Author

Emily

Browsing

Unlock the Flavor: Why Sun Dried Tomato Stuffed Chicken is a Must-Try

If you’re on the hunt for a delicious, crowd-pleasing dinner option, look no further than this Sun Dried Tomato Stuffed Chicken. This recipe combines juicy chicken breasts with gooey cheese, vibrant spinach, and flavorful sun dried tomatoes, making it a meal your family will love. Not only is it perfect for busy weeknights, but it also impresses at dinner parties or family gatherings. Let’s dive into why this dish deserves a spot in your weekly rotation!

  • Quick and Easy Preparation: With straightforward steps and minimal prep time, you can have this dish ready in about 30 minutes, making it ideal for busy evenings.
  • Flavor Explosion: The combination of sun dried tomatoes, spinach, and cheese creates a rich and savory filling that elevates the humble chicken breast to gourmet status.
  • Healthy Option: Packed with protein and essential nutrients, this dish is a wholesome choice that satisfies without sacrificing flavor.
  • Versatile Ingredients: This recipe allows for substitutions and variations, so you can customize it to suit your taste or dietary needs.
  • Impressive Presentation: Stuffed chicken looks elegant on the plate, making it a fantastic option for entertaining guests.

Ingredient Breakdown: The Key to Delicious Stuffed Chicken

Let’s take a closer look at the ingredients that make up this mouthwatering dish. Each component plays a vital role in creating the perfect balance of flavors and textures.

  • Boneless Skinless Chicken Breasts: The primary ingredient, offering a lean protein source that works beautifully when stuffed.
  • Salt: Essential for enhancing the flavors of the chicken and stuffing. Adjust according to taste!
  • Black Pepper: Freshly ground black pepper adds a hint of spice and depth to the dish.
  • Ginger Powder: This spice adds a warm, aromatic quality. You can substitute with fresh ginger for a brighter flavor.
  • Garlic Powder: A must-have for seasoning; fresh minced garlic can be used for a more robust flavor.
  • Gouda Cheese: Melts beautifully and complements the sun dried tomatoes. Swap for mozzarella or provolone if desired.
  • Sun Dried Tomatoes: These tomatoes provide a concentrated flavor. Opt for oil-packed for added richness.
  • Baby Spinach: Adds freshness and color to the stuffing. Kale or Swiss chard can be substituted.
  • Dried Basil: This herb enhances the overall flavor profile. Fresh basil can be used for a more intense taste.
  • Olive Oil: Used for basting the chicken, it adds moisture and flavor. Avocado oil is a great alternative.
  • Garlic Cloves: Sliced for basting, adding delicious garlic aroma and flavor to the chicken.

How to Create Your Sun Dried Tomato Stuffed Chicken

Now that we’ve covered the ingredients, let’s get into the nitty-gritty of how to bring this dish to life! Follow these easy steps for a delicious meal that’s sure to impress.


Air Fryer XL

★ Recommended Kitchen Tool

Air Fryer XL

Make this recipe even easier with a quality Air Fryer XL — a must-have kitchen staple!


🛒 Shop This Tool →

As an Amazon Associate, we earn from qualifying purchases.
  1. Preheat your oven to 375°F (190°C) to ensure it’s ready for the chicken.
  2. Butterfly the chicken breasts by slicing them horizontally but not all the way through, creating a pocket for the stuffing.
  3. In a mixing bowl, combine the gouda cheese, sun dried tomatoes, spinach, and dried basil. Mix well to create the stuffing.
  4. Stuff each chicken breast with the mixture, ensuring to pack it tightly.
  5. Season the outside of the chicken with salt, pepper, ginger powder, and garlic powder.
  6. In a skillet, heat olive oil over medium heat and sear the stuffed chicken breasts for 3-4 minutes on each side until golden brown.
  7. Transfer the chicken to a baking dish and top with sliced garlic cloves.
  8. Bake in the preheated oven for 20-25 minutes, or until the chicken is cooked through and reaches an internal temperature of 165°F (74°C).
  9. Let the chicken rest for a few minutes before slicing. Serve warm and enjoy!

Expert Tips for Perfecting Your Stuffed Chicken
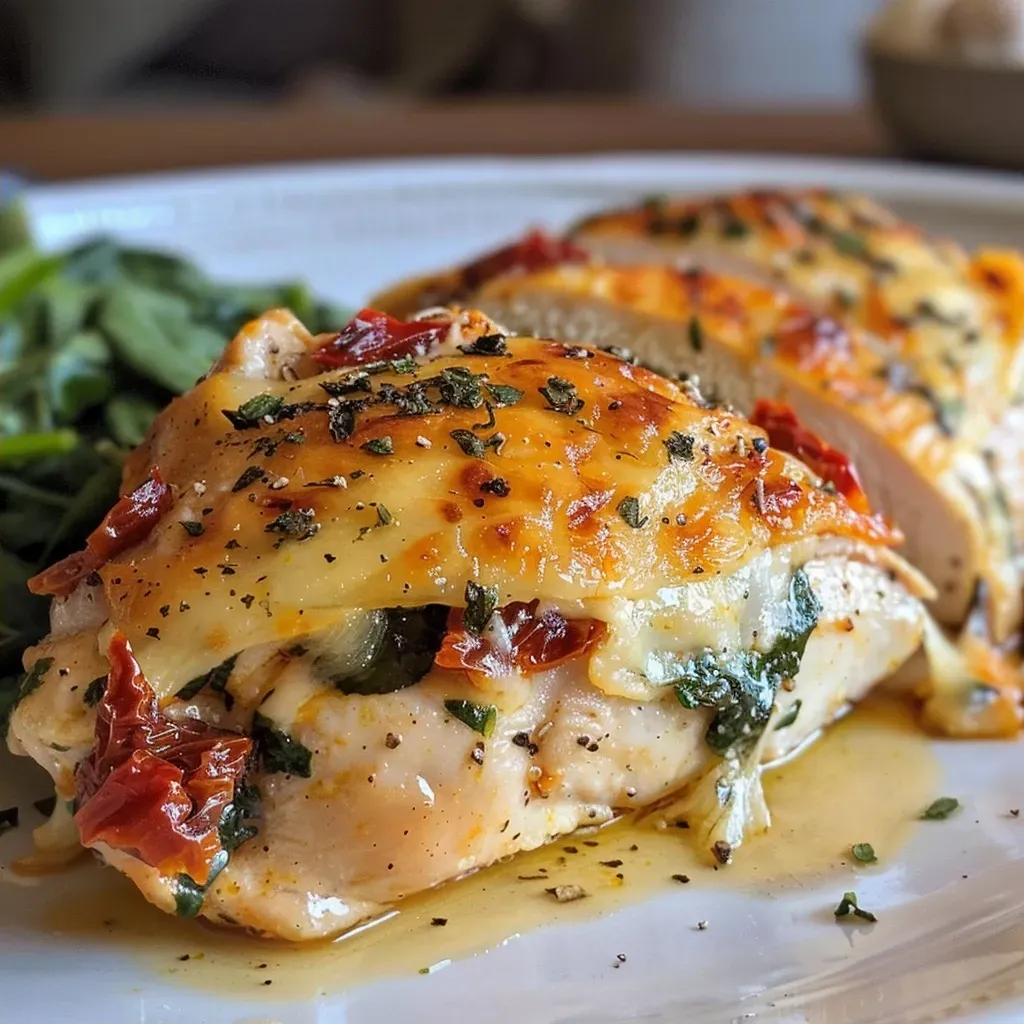
Side angle shot of stuffed chicken breast showcasing sun dried tomatoes and gouda.

To make sure your Sun Dried Tomato Stuffed Chicken turns out perfectly every time, keep these expert tips in mind:

  • Don’t Overstuff: Ensure the pockets aren’t overfilled to avoid spilling during cooking.
  • Use a Meat Thermometer: This ensures your chicken is cooked perfectly without drying out.
  • Rest the Chicken: Allowing the chicken to rest after baking helps retain moisture.
  • Experiment with Fillings: Don’t hesitate to try different cheeses or greens to customize the flavor.
  • Marinate Chicken: For extra flavor, marinate the chicken in Italian dressing for a few hours before cooking.
  • Pair with Sides: Serve with a fresh salad or roasted vegetables for a complete meal.
  • Make It Ahead: Prepare the stuffing in advance for a quicker dinner option.
  • Use Leftovers Creatively: Shred any leftover stuffed chicken for salads or sandwiches the next day!

Common Mistakes to Avoid When Making Stuffed Chicken

Even the best cooks can make mistakes. Here are some common pitfalls to watch out for:

  • Skipping the Searing: Don’t skip the pan-searing step; it locks in flavor and moisture.
  • Not Seasoning Properly: Ensure both the outside and inside of the chicken are well-seasoned for the best flavor.
  • Using Cold Ingredients: Make sure your stuffing ingredients are at room temperature for even cooking.
  • Rushing the Cooking Time: Always allow the chicken to cook through completely; undercooked chicken is unsafe to eat.
  • Not Letting It Rest: Resting is crucial for juicy chicken; don’t skip this step!

Delicious Variations to Try

Don’t be afraid to mix things up! Here are some tasty variations of the Sun Dried Tomato Stuffed Chicken you can try:

  • Pesto Stuffed Chicken: Substitute sun dried tomatoes with basil pesto for a fresh twist.
  • Caprese Style: Use fresh mozzarella, tomatoes, and basil for an Italian classic.
  • Spicy Jalapeño: Add diced jalapeños to the stuffing for a spicy kick.
  • Mediterranean Mix: Incorporate feta cheese, olives, and artichokes for a Mediterranean flair.

How to Store and Freeze Your Stuffed Chicken

Proper storage ensures your leftovers remain delicious:

  • Refrigeration: Store any uneaten stuffed chicken in an airtight container in the refrigerator for up to 3 days.
  • Freezing: For long-term storage, freeze the cooked stuffed chicken in a freezer-safe container for up to 3 months.
  • Reheating: To reheat, bake in the oven at 350°F (175°C) until warmed through, ensuring it stays moist.

Frequently Asked Questions

Got questions? Here are some common queries regarding the Sun Dried Tomato Stuffed Chicken:

  • Can I use frozen chicken? Yes, but thaw it completely before preparing.
  • What can I serve with stuffed chicken? It pairs wonderfully with a fresh salad, roasted vegetables, or garlic bread.
  • How do I know when the chicken is done? Use a meat thermometer; the internal temperature should reach 165°F (74°C).
  • Can I make this dish ahead of time? Absolutely! Prepare and stuff the chicken, then refrigerate until ready to cook.
  • What if I don’t have sun dried tomatoes? You can use fresh tomatoes or omit them, though the flavor will differ.
  • Is this recipe gluten-free? Yes, as long as you ensure no gluten-containing ingredients are used.
  • Can I use other types of cheese? Yes, feel free to substitute with your favorite melting cheese.
  • What should I do with leftovers? Shred leftover chicken for salads, wraps, or pasta dishes.

Nutritional Information and Dietary Adaptations

This Sun Dried Tomato Stuffed Chicken is not only delicious but also nutritious. Here’s a breakdown of its benefits:

  • High in Protein: Each serving provides a significant protein boost, perfect for muscle repair and growth.
  • Low in Carbohydrates: Ideal for low-carb diets, especially when paired with vegetables.
  • Rich in Vitamins: The spinach and tomatoes add essential vitamins and minerals to your meal.
  • Customizable for Diets: Easily adaptable for keto, paleo, and vegetarian diets with simple ingredient swaps.

Essential Equipment for Cooking Stuffed Chicken

To make your cooking experience smooth, here’s a list of essential equipment:

  • Sharp Knife: For butterflying the chicken breasts with ease.
  • Mixing Bowl: To combine stuffing ingredients thoroughly.
  • Skillet: A heavy-bottomed skillet is ideal for searing the chicken.
  • Baking Dish: Use a baking dish that can go from stovetop to oven.
  • Meat Thermometer: An essential tool for checking doneness and ensuring food safety.

Serving Suggestions: Pairing Your Stuffed Chicken

To round out your meal, consider these delightful pairings:

  • Creamy Mashed Potatoes: A classic side that absorbs the chicken’s flavorful juices.
  • Fresh Green Salad: A crisp salad with mixed greens and vinaigrette adds balance to the richness of the dish.
  • Garlic Roasted Vegetables: Colorful roasted veggies complement the stuffed chicken beautifully.
  • Quinoa or Rice: A healthy grain option to soak up any leftover sauce.

Conclusion: Your New Favorite Dinner Recipe Awaits!

With its delicious combination of flavors, ease of preparation, and impressive presentation, Sun Dried Tomato Stuffed Chicken is the answer to your dinner-time dilemmas. Whether you’re cooking for your family or entertaining guests, this recipe is sure to be a hit. So grab your ingredients, follow the steps, and enjoy a satisfying, flavorful meal that will keep everyone coming back for more. Happy cooking!

Sun Dried Tomato Stuffed Chicken That Impresses Every Time

Prep Time 15 minutes
Cook Time 25 minutes
Total Time 40 minutes
Servings 4 pieces
Calories 350
Juicy chicken breasts stuffed with flavorful sun-dried tomatoes and melted cheese, perfect for an impressive and delicious meal.

Ingredients

Protein

  • 4 pieces Boneless Skinless Chicken Breasts

Seasonings

  • 1 teaspoon Salt
  • 1 teaspoon Black Pepper (Freshly ground)
  • 1 teaspoon Ginger Powder (Can substitute with fresh ginger)
  • 1 teaspoon Garlic Powder (Fresh minced garlic works too)

Cheese

  • 1 cup Gouda Cheese (Substitute with mozzarella or provolone if desired)

Sun-Dried Tomatoes

  • 1/2 cup Sundried Tomatoes (Opt for oil-packed for convenience)

Vegetables

  • 2 cups Baby Spinach (Kale or Swiss chard are great substitutes)

Herbs

  • 1 teaspoon Dried Basil (Fresh basil can replace it for intensity)

Oil

  • 1 tablespoon Olive Oil (Avocado oil is a good substitute)

Garlic

  • 2 cloves Garlic (Sliced for basting)

Instructions 

  • Preheat oven to 375°F (190°C). Slice a pocket into each chicken breast.
  • Mix chopped sun-dried tomatoes, spinach, basil, and shredded cheese. Stuff the mixture into each chicken pocket.
  • Secure with toothpicks if needed. Season the outside with salt, pepper, ginger, and garlic powder.
  • Heat olive oil in a skillet over medium heat. Sear chicken for 2-3 minutes per side until golden.
  • Transfer to oven and bake for 20-25 minutes. Baste with sliced garlic during baking.

Notes

Ensure chicken is cooked through for safety. Feel free to customize with your favorite herbs and cheeses.
Calories: 350kcal
Cost: $15
Course: Main Course
Cuisine: American
Keyword: chicken, stuffed, sun-dried tomatoes

Welcome to your new favorite weeknight dinner! This Crockpot Chicken and Gravy recipe is the ultimate solution for busy families who crave delicious, home-cooked meals without the hassle. Made with everyday ingredients, this dish transforms simple chicken into a comforting masterpiece, allowing you to enjoy a stress-free dinner any night of the week.

Imagine coming home after a long day to the aroma of tender chicken simmering in a rich, creamy gravy. With just a few minutes of prep in the morning, you can set your slow cooker and forget about it until dinner time. This recipe is not only easy to make but also incredibly versatile, making it a must-have in your weekly cooking rotation.

Why You’ll Love This Recipe

This Crockpot Chicken and Gravy is more than just a meal; it’s a comforting experience that brings family and friends together. Here’s why you’ll absolutely love it:


Digital Meat Thermometer

★ Recommended Kitchen Tool

Digital Meat Thermometer

Make this recipe even easier with a quality Digital Meat Thermometer — a must-have kitchen staple!


🛒 See Deals on Amazon →

As an Amazon Associate, we earn from qualifying purchases.
  • Hands-Free Cooking: Simply set it and forget it! This recipe allows you to get on with your day while the crockpot works its magic.
  • Budget-Friendly: Made with affordable ingredients, this recipe won’t break the bank—perfect for families on a budget.
  • Kid-Approved: Even picky eaters will love the creamy gravy and tender chicken, making dinner time a breeze.
  • Versatile Serving Options: Serve over rice, mashed potatoes, or egg noodles for a complete meal your family will adore.
  • Make Ahead Friendly: Easily make this dish in advance for busy nights or meal prep for the week ahead.

Ingredients You’ll Need

Gathering your ingredients is the first step to a successful Crockpot Chicken and Gravy. Here’s what you’ll need:

  • 1.5 lbs boneless, skinless chicken breasts (or thighs): Choose chicken breasts for a leaner option or thighs for more flavor.
  • 2 packets (0.87 oz) low-sodium chicken gravy mix: Essential for creating that delicious homemade gravy flavor.
  • ¼ cup dry whole milk powder: This ingredient adds creaminess without the need for fresh milk.
  • 2 tablespoons cornstarch: Helps thicken the gravy to the perfect consistency.
  • 1 ½ tablespoons instant chicken bouillon granules: For a richer flavor, opt for Better Than Bouillon.
  • ¾ teaspoon garlic powder: Adds depth and flavor.
  • ½ teaspoon onion powder: Complements the garlic and enhances the overall taste.
  • ¼ teaspoon freshly cracked black pepper: Adjust to taste for the perfect seasoning.
  • ¼ teaspoon dried basil: A subtle herb flavor that elevates the dish.
  • ¼ teaspoon dried thyme: Adds a lovely herbal note.
  • 2 cups water: The base for your gravy.

Step-by-Step Instructions

Now that you have your ingredients ready, let’s dive into the steps to create this delicious Crockpot Chicken and Gravy.

  1. Lightly coat the inside of a 6+ quart crockpot insert with non-stick spray. Place the chicken breasts in the crockpot.
  2. In a medium-sized bowl, whisk together the dry ingredients: chicken gravy packets, dry whole milk powder, cornstarch, chicken bouillon, garlic powder, onion powder, pepper, basil, and thyme.
  3. Slowly add water to the dry mixture, stirring continuously to prevent lumps, until a paste forms. Gradually add the remaining water while whisking until the gravy is smooth.
  4. Pour the prepared gravy mixture over the chicken in the crockpot.
  5. Cover and cook on low for 5-6 hours or on high for 3-4 hours, until the chicken is fully cooked and easy to shred.
  6. Once cooked, shred the chicken using two forks. Adjust the size of the chicken pieces to your preference.
  7. Serve the chicken and gravy over rice, mashed potatoes, or egg noodles.

Pro Tips for the Best Results

Side view of tender chicken smothered in rich gravy from a crockpot.

To ensure your Crockpot Chicken and Gravy turns out perfectly every time, keep these expert tips in mind:

  • Choose the Right Cut: Boneless, skinless chicken thighs offer more flavor, while breasts are leaner. Both work well!
  • Don’t Skip the Bouillon: Using chicken bouillon granules adds depth to the gravy, making it taste homemade.
  • Adjust the Thickness: If you prefer a thicker gravy, add an extra tablespoon of cornstarch mixed with water during the last hour of cooking.
  • Make It Creamy: For additional creaminess, stir in a splash of heavy cream or sour cream before serving.
  • Spice It Up: Add a pinch of cayenne pepper or red pepper flakes for a kick!
  • Leftovers are Gold: This dish reheats beautifully, making it perfect for meal prep or leftovers.
  • Freezer Friendly: Freeze any leftovers in an airtight container for up to three months!
  • Experiment with Herbs: Fresh herbs like rosemary or parsley can elevate the flavor profile.

Common Mistakes and Troubleshooting

Even the best cooks can run into hiccups. Here are some common mistakes to avoid when making Crockpot Chicken and Gravy:

  • Overcooking the Chicken: Cooking for too long can dry out the chicken. Stick to the recommended cooking times.
  • Not Enough Liquid: Make sure to use enough water to avoid burning. The gravy should be plentiful!
  • Lumpy Gravy: Whisk the dry ingredients thoroughly before adding water to prevent lumps.
  • Skipping Seasoning: Don’t forget to taste and adjust seasoning before serving. A little salt and pepper can make a big difference!

Delicious Variations to Try

Feeling adventurous? Here are some tasty variations to customize your Crockpot Chicken and Gravy:

  • Vegetable Medley: Add chopped carrots, potatoes, or peas to the crockpot for added nutrition and flavor.
  • Herb Infusion: Experiment with different herbs like dill or oregano for a unique twist.
  • Savory Mushroom Gravy: Stir in sautéed mushrooms for a heartier gravy.
  • BBQ Chicken Style: Mix in your favorite BBQ sauce alongside the gravy for a tangy kick.

Storage and Make-Ahead Instructions

This Crockpot Chicken and Gravy is perfect for meal prep! Here’s how to store and reheat:

  • Refrigerate: Store leftovers in an airtight container in the refrigerator for up to 3 days.
  • Freeze: Freeze in individual portions for up to 3 months. Thaw overnight in the fridge before reheating.
  • Reheat: Reheat in the microwave or on the stovetop until heated through. Add a splash of water to loosen the gravy if needed.
  • Make Ahead: Prepare the ingredients the night before and store them in the fridge. In the morning, simply add to the crockpot and cook!

Comprehensive FAQ

Have questions? Here are some commonly asked questions about Crockpot Chicken and Gravy:

  • Can I use frozen chicken? Yes, you can use frozen chicken, but increase the cooking time by about an hour.
  • Can I double the recipe? Absolutely! Just make sure your crockpot is large enough to accommodate the extra ingredients.
  • What can I serve with this dish? It pairs wonderfully with rice, mashed potatoes, egg noodles, or even crusty bread.
  • Is this recipe gluten-free? Use gluten-free gravy mix and cornstarch to make it gluten-free.
  • Can I add vegetables? Yes! Carrots, potatoes, or peas are great additions.
  • How do I prevent the gravy from being too salty? Use low-sodium chicken bouillon and gravy mix to control the saltiness.
  • Can I make this recipe in advance? Yes, you can prepare it a day ahead and cook it when you’re ready.
  • How long does this dish last in the fridge? Leftovers can be stored in the refrigerator for 3-4 days.

Nutrition Tips and Dietary Adaptations

This Crockpot Chicken and Gravy can be adapted to fit various dietary needs:

  • Low-Carb Option: Serve with cauliflower rice instead of traditional starches.
  • Gluten-Free: Use gluten-free gravy mix and cornstarch.
  • Dairy-Free: Substitute the dry milk powder with coconut milk powder for a dairy-free version.
  • High-Protein: Add beans or lentils for an extra protein boost.

Equipment Recommendations

To make the best Crockpot Chicken and Gravy, here’s what you’ll need:

  • 6+ Quart Slow Cooker: A good quality slow cooker is essential for even cooking.
  • Whisk: For mixing the dry ingredients and gravy smoothly.
  • Measuring Cups and Spoons: Accurate measurements are key to consistent results.
  • Forks: For shredding the chicken once it’s cooked.

Serving Suggestions

To round out your meal, consider these delicious serving ideas:

  • Over Mashed Potatoes: A classic choice that complements the gravy perfectly.
  • On Egg Noodles: For a comforting twist, serve the chicken and gravy over egg noodles.
  • With Crusty Bread: Perfect for soaking up every last drop of gravy.
  • Alongside Steamed Vegetables: Balance the richness of the dish with some fresh veggies.

In conclusion, this Crockpot Chicken and Gravy recipe is your go-to solution for busy weeknights, combining convenience, flavor, and family-friendliness. With its rich, creamy gravy and tender chicken, you’ll never feel like you’re in a dinner rut again. So grab your slow cooker and let this simple yet satisfying dish transform your mealtime experience!

Crockpot Chicken and Gravy

Prep Time 10 minutes
Cook Time 4 hours
Total Time 4 hours 10 minutes
Servings 4 servings
Calories 350
A comforting and easy-to-make crockpot dish featuring tender chicken in a rich, homemade gravy.

Ingredients

Protein

  • 1.5 lbs boneless (skinless chicken breasts or thighs)
  • 2 packets low-sodium chicken gravy mix (0.87 oz each)
  • 0.25 cup dry whole milk powder (to create a creamy texture)
  • 2 tablespoons cornstarch (to thicken the gravy)
  • 1.5 tablespoons instant chicken bouillon granules (or Better Than Bouillon for richer flavor)
  • 0.75 teaspoon garlic powder (for flavor)
  • 0.5 teaspoon onion powder (for flavor)
  • 0.25 teaspoon black pepper (adjust to taste)
  • 0.25 teaspoon dried basil (subtle herb flavor)
  • 0.25 teaspoon dried thyme (herbal note)
  • 2 cups water (to create the gravy)

Instructions 

  • Spray the crockpot insert and place the chicken inside.
  • Mix dry ingredients in a bowl, then gradually whisk in water to form a smooth gravy.
  • Pour gravy over chicken, cover, and cook on low for 5-6 hours or high for 3-4 hours.
  • Shred the cooked chicken and serve with the gravy over rice or potatoes.

Notes

Adjust seasoning and cooking time as needed for preferred tenderness.
Calories: 350kcal
Cost: $15
Course: Main Course
Cuisine: American
Keyword: chicken

Elevate Your Weeknight Dinners with Zesty Chicken Soup and Orzo

Welcome to the ultimate solution for busy weeknights—this chicken soup with lemon and orzo is not just a meal; it’s a comforting hug in a bowl! Made with simple, wholesome ingredients, this recipe is perfect for families craving something hearty yet healthy. With its bright flavors and nutritious ingredients, it’s no wonder this dish is destined to become a new family favorite!

In just under 30 minutes, you can whip up a pot of this delicious soup, making it an ideal choice for those hectic evenings when time is short, but a nutritious dinner is a must. Let’s dive into the details of why this recipe is a keeper and how to make it shine on your dinner table.

Why You’ll Love This Recipe

  • Quick & Easy: Ready in just 30 minutes, perfect for busy nights.
  • Nutritious Comfort: Packed with vegetables, lean protein, and wholesome orzo, this soup is as nourishing as it is delicious.
  • Customizable: Easily adapt the recipe with your favorite veggies or spices to suit your family’s tastes.
  • One-Pot Wonder: Minimal cleanup required as everything is cooked in one pot!
  • Freezer-Friendly: Make a big batch and freeze leftovers for quick meals later.

Ingredient Breakdown

Here’s what you will need for this lemon chicken orzo soup, along with some helpful substitutions:


Nonstick Grill Pan

★ Recommended Kitchen Tool

Nonstick Grill Pan

Make this recipe even easier with a quality Nonstick Grill Pan — a must-have kitchen staple!


🛒 Shop This Tool →

As an Amazon Associate, we earn from qualifying purchases.
  • Olive Oil: For sautéing; you can also use avocado oil or butter.
  • Onion: A classic base; yellow or white onions work well. You could substitute with shallots for a milder flavor.
  • Carrots & Celery: Essential for flavor and nutrition; feel free to add in bell peppers or zucchini.
  • Garlic: Fresh minced garlic adds depth; if you’re short on time, garlic powder can be used.
  • Dried Oregano & Thyme: These herbs enhance flavor; try using Italian seasoning if you’re out.
  • Bay Leaf: Adds aromatic flavor; just remember to remove it before serving.
  • Chicken Stock: Use high-quality stock for the best flavor; vegetable stock can be a great substitute for a vegetarian option.
  • Chicken Thighs: Boneless and skinless thighs keep the soup tender; you could also use chicken breasts.
  • Orzo: This small pasta cooks quickly and adds heartiness; feel free to swap it with rice or quinoa.
  • Lemon: Zest and juice brighten the dish; more can be added to taste!
  • Fresh Dill or Parsley: For garnish, adding a fresh note; you can substitute with chives if you prefer.

Pro Tips for Perfect Soup

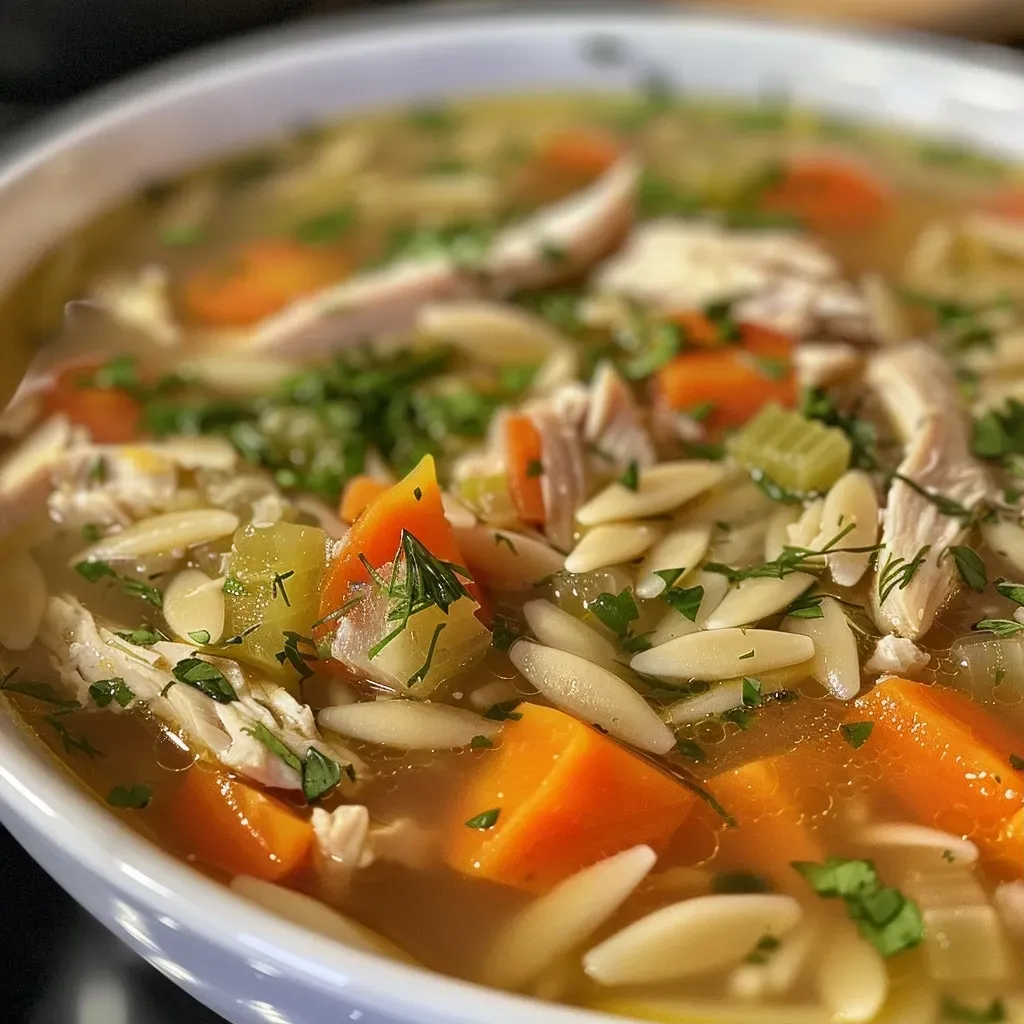
Side view of a steaming bowl filled with Chicken Soup featuring orzo, chicken, and lemon slices.

To ensure your chicken soup turns out perfectly every time, consider these expert insights:

  • Use Quality Ingredients: Fresh, high-quality ingredients will elevate the flavor of the soup.
  • Don’t Skip the Sauté: Sautéing the vegetables first builds a flavorful base for the soup.
  • Shred Chicken Wisely: Allow the chicken to cool slightly before shredding for easier handling.
  • Adjust Consistency: If the soup becomes too thick, add more stock to reach your desired consistency.
  • Season Gradually: Taste and adjust seasoning as you go to achieve a perfectly balanced flavor.
  • Garnish Generously: Fresh herbs and a squeeze of lemon at the end brightens the soup’s flavor.
  • Store Properly: Cool the soup completely before storing to prevent bacterial growth.
  • Make Ahead: Prepare the soup a day ahead and reheat for even better flavor.
  • Experiment with Spices: Feel free to add a pinch of red pepper flakes for a subtle kick!

Common Mistakes and Troubleshooting

Even the best recipes can have hiccups. Here are some common mistakes and how to avoid them:

  • Overcooking the Chicken: Ensure you don’t simmer the chicken too long; it should be tender but not mushy.
  • Too Much Liquid: If your soup is too watery, let it simmer uncovered for a few minutes to reduce.
  • Insufficient Seasoning: Always taste and adjust seasoning toward the end for the best flavor.
  • Not Enough Lemon: If the flavor feels flat, add more lemon juice or zest to brighten it.

Variations of Zesty Chicken Soup

Put a twist on your soup with these delightful variations:

  • Spicy Chicken Soup: Add a teaspoon of cayenne pepper or a diced jalapeño for a spicy kick.
  • Vegetable-Loaded: Toss in additional veggies like spinach, kale, or peas for an extra nutrient boost.
  • Creamy Lemon Chicken Soup: Stir in a splash of cream or coconut milk at the end for a richer flavor.
  • Herbed Chicken Soup: Swap dill for thyme or rosemary for a different flavor profile.

Storage and Make-Ahead Instructions

To enjoy your chicken orzo soup later:

  • Refrigerate: Store in an airtight container for up to 4 days.
  • Freeze: Cool completely, then freeze in portions for up to 3 months. Reheat on the stove.
  • Make Ahead: Prepare the soup in advance, but add the orzo during reheating to prevent it from getting mushy.

Frequently Asked Questions

Here are answers to some common questions about making this soup:

  • Can I use frozen chicken? Yes! Just adjust the cooking time to ensure it reaches a safe temperature.
  • How do I make it vegetarian? Substitute chicken with chickpeas or beans and use vegetable stock.
  • Can I add more herbs? Absolutely! Fresh herbs like basil or cilantro can add wonderful flavor.
  • What if I don’t have orzo? You can use small pasta or even rice as a substitute.
  • How do I reheat the soup? Reheat on the stove over low heat, adding a splash of water or stock if needed.
  • Can I make this soup in a slow cooker? Yes! Sauté veggies, then add everything to the slow cooker and cook on low for 4-6 hours.
  • How do I know when the chicken is done? The chicken should reach an internal temperature of 165°F.
  • Can I add potatoes? Yes! Diced potatoes can be added for extra heartiness.

Nutritional Tips and Dietary Adaptations

This healthy soup recipe can easily fit into various dietary needs:

  • Low-Carb: Skip the orzo and add more vegetables like zucchini or cauliflower.
  • Gluten-Free: Use gluten-free pasta or rice instead of orzo.
  • Dairy-Free: This recipe is naturally dairy-free; just avoid creamy variations.
  • Protein-Packed: Add beans or lentils for extra protein if desired.

Equipment Recommendations

To make this soup, you’ll need:

  • Large Pot or Dutch Oven: Perfect for cooking the soup evenly.
  • Sharp Knife: For chopping vegetables with ease.
  • Cutting Board: A sturdy surface for food prep.
  • Measuring Cups and Spoons: For accurate ingredient measurements.

Serving Suggestions

This lemon chicken orzo soup pairs beautifully with:

  • Crusty Bread: A loaf of sourdough or a baguette for dipping.
  • Side Salad: A fresh green salad brings a nice balance to the meal.
  • Cheese: Grated parmesan or a dollop of sour cream can add richness.

Whether it’s a chilly evening or a bustling weeknight, this chicken soup recipe will warm hearts and bellies alike. Enjoy the process of creating something delicious, and make it your own with the variations and tips provided. Happy cooking!

Chicken Soup with Lemon and Orzo Recipe

Prep Time 10 minutes
Cook Time 25 minutes
Total Time 35 minutes
Servings 4 servings
Calories 350
A comforting and flavorful chicken soup infused with lemon and tender orzo, perfect for a cozy meal.

Ingredients

Oil

  • 1 tbsp Olive Oil

Vegetables

  • 1 piece Onion (finely chopped)
  • 2 pieces Carrots (diced)
  • 2 ribs Celery (diced)

Aromatics

  • 3 cloves Garlic (minced)
  • 1 tsp Dried Oregano
  • ½ tsp Dried Thyme
  • 1 bay leaf Bay Leaf

Liquids

  • 6 cups Chicken Stock (best quality possible)

Protein

  • 1 lb Chicken Thighs (boneless & skinless or breasts)

Grains

  • ¾ cup Orzo

Citrus

  • 1 piece Lemon (zest & juice, more to taste/garnish)

Seasonings

  • to taste Sea Salt and Black Pepper

Garnish

  • to taste Fresh Dill (or parsley to garnish)

Instructions 

  • Heat olive oil in a large pot over medium heat.
  • Add chopped onion, carrots, and celery; cook 5–7 minutes until softened.
  • Add garlic, oregano, thyme, and bay leaf; cook 30 seconds until fragrant.
  • Pour in chicken stock and bring to a simmer. Season chicken with salt and pepper, add to pot, and cook 10 minutes.
  • Add orzo and cook 8–10 minutes until tender. Shred chicken, return to pot, add lemon zest and juice, season, and remove bay leaf.

Notes

For extra flavor, garnish with fresh herbs and lemon slices before serving.
Calories: 350kcal
Cost: $15
Course: Soup
Cuisine: American
Keyword: chicken, lemon, orzo

Warm Up Your Evenings with Creamy Chicken Pumpkin Soup

As the days grow shorter and the air becomes crisp, there’s nothing quite like a bowl of **Creamy Chicken Pumpkin Soup** to warm your soul. This delightful dish not only brings the comforting flavors of fall to your table, but it also transforms humble ingredients into a meal that feels special. Packed with nutrients and flavor, this soup is perfect for busy weeknights or a cozy gathering with friends.

Why You’ll Love This Recipe

Here are five compelling reasons to make this creamy pumpkin chicken soup a staple in your kitchen:

  • Quick and Easy: With simple steps and minimal prep time, you can have this soup ready in under 30 minutes, making it ideal for those hectic evenings.
  • Nutritious Comfort: This soup is packed with protein from chicken and a wealth of vitamins from pumpkin, ensuring a healthy meal without sacrificing flavor.
  • Versatile Ingredients: Use leftover chicken, canned pumpkin, or even fresh pumpkin—this recipe adapts to what you have on hand.
  • Rich and Creamy: The addition of heavy cream or coconut milk enhances the soup’s texture, making each spoonful a luxurious experience.
  • Perfect for Meal Prep: This soup stores beautifully, so you can make a big batch and enjoy it throughout the week, making meals effortless.

Ingredients You’ll Need

To create your perfect creamy chicken pumpkin soup, gather the following ingredients:


Digital Meat Thermometer

★ Recommended Kitchen Tool

Digital Meat Thermometer

Make this recipe even easier with a quality Digital Meat Thermometer — a must-have kitchen staple!


🛒 Shop This Tool →

As an Amazon Associate, we earn from qualifying purchases.
  • 1 tbsp Olive Oil: Extra virgin, for sautéing the aromatics, providing a fruity base.
  • 1 large Yellow Onion (approx. 1.5 cups chopped): Finely chopped, forms the savory foundation of the soup.
  • 2 cloves Garlic: Minced, adds a pungent, aromatic depth.
  • 1 tsp Dried Sage: Rubbed or ground, offers an earthy, slightly peppery flavor synonymous with fall.
  • ½ tsp Dried Thyme: Provides a subtle, earthy, and slightly minty note.
  • ¼ tsp Ground Nutmeg: Freshly grated if possible, for a warm, nutty spice.
  • Pinch of Cayenne Pepper (optional): Adds a very subtle kick to balance the sweetness.
  • 2 (15-ounce) cans Pumpkin Purée: The star of the soup, ensuring a smooth, rich pumpkin flavor.
  • 4 cups Chicken Broth: Low-sodium is preferred, to control the overall saltiness.
  • 1.5 cups Cooked Chicken: Shredded or diced; rotisserie chicken works wonderfully for convenience.
  • ¾ cup Heavy Cream (or full-fat coconut milk for dairy-free): Adds luxurious creaminess and richness.
  • 1 tsp Salt (or to taste): Enhances all the flavors.
  • ½ tsp Black Pepper (or to taste): Freshly ground for the best flavor.
  • Fresh Parsley or Chives (for garnish, optional): Adds a touch of freshness and color.
  • Toasted Pumpkin Seeds (for garnish, optional): Provides a delightful crunch and nutty flavor.

How to Make Creamy Chicken Pumpkin Soup

Side view of a vibrant bowl of creamy chicken pumpkin soup, showcasing its texture.

Follow these straightforward steps to create your cozy bowl of flavorful soup:

  • Sauté Aromatics: Heat the olive oil in a large Dutch oven or heavy-bottomed pot over medium heat. Add the chopped onion and cook, stirring occasionally, until softened and translucent, about 5-7 minutes.
  • Add Garlic and Spices: Stir in the minced garlic, dried sage, dried thyme, ground nutmeg, and cayenne pepper (if using). Cook for another 1-2 minutes, stirring constantly, until fragrant. This step is crucial for blooming the spices and maximizing their flavor.
  • Incorporate Pumpkin and Broth: Add the pumpkin purée to the pot, stirring to combine it with the aromatics. Gradually pour in the chicken broth, stirring continuously to ensure the pumpkin incorporates smoothly without lumps.
  • Simmer the Soup: Bring the mixture to a gentle simmer. Reduce the heat to low, cover the pot, and let it cook for 15-20 minutes. This allows the flavors to meld together beautifully. Stir occasionally to prevent sticking.
  • Blend for Smoothness (Optional but Recommended): Carefully transfer the soup in batches to a high-speed blender and blend until completely smooth and velvety. Alternatively, use an immersion blender directly in the pot, blending until you achieve your desired consistency. Be cautious when blending hot liquids; ensure the blender lid is secure and consider removing the center cap and covering it with a folded kitchen towel to allow steam to escape.
  • Return to Pot (if using a countertop blender): If you used a countertop blender, pour the smooth soup back into the pot.
  • Add Chicken and Cream: Stir in the shredded or diced cooked chicken and the heavy cream (or coconut milk). Continue to cook over low heat for another 5-10 minutes, or until the chicken is heated through and the soup is warmed to your liking. Do not let the soup boil after adding the cream, as it can curdle (especially dairy cream).
  • Season and Serve: Taste the soup and adjust seasoning with salt and black pepper as needed. Ladle the hot, creamy chicken pumpkin soup into bowls. Garnish with fresh parsley or chives and toasted pumpkin seeds, if desired.

Pro Tips for the Best Creamy Chicken Pumpkin Soup

Enhance your cooking experience with these expert insights:

  • Use Fresh Pumpkin: If you have the time, roasting fresh pumpkin will elevate the flavor of the soup. Simply cut the pumpkin, remove the seeds, and roast until tender before puréeing.
  • Experiment with Spices: Feel free to adjust the spices according to your taste preferences. A dash of cinnamon or allspice can add a warm, cozy flavor.
  • Make It Dairy-Free: Swap out the heavy cream for coconut milk to keep the soup creamy without dairy.
  • Double the Recipe: This soup freezes well, so consider making a double batch to enjoy later. Just be sure to leave out the cream until you reheat it.
  • Add Greens: Stir in some spinach or kale during the last few minutes of cooking for added nutrition and color.
  • Adjust Consistency: If you prefer a thicker soup, add more pumpkin purée or reduce the broth; for a thinner soup, simply add more broth.
  • Garnishing Matters: A sprinkle of toasted pumpkin seeds or croutons adds a delightful texture contrast to the creamy soup.
  • Taste Before Serving: Always taste and adjust your seasoning before ladling the soup into bowls for the best flavor.

Common Mistakes and Troubleshooting

Avoid these common pitfalls to ensure your soup turns out perfect:

  • Under-seasoning: Don’t skip the salt and pepper! Seasoning enhances the flavors of the soup.
  • Overcooking the Chicken: Make sure your chicken is cooked just right; overcooked chicken can become tough and dry.
  • Skipping the Blend: For a truly creamy texture, don’t skip blending the soup, even if you enjoy some chunkiness.
  • Using Pumpkin Pie Filling: Ensure you use pure pumpkin purée and not pumpkin pie filling, which contains added sugars and spices.

Variations to Try

Get creative with these variations to suit your tastes:

  • Spicy Pumpkin Chicken Soup: Add diced jalapeños or a splash of hot sauce for a kick.
  • Vegan Pumpkin Soup: Omit the chicken and use vegetable broth with chickpeas or lentils for protein.
  • Curried Pumpkin Chicken Soup: Add curry powder to the spices for an aromatic twist.
  • Cheesy Pumpkin Chicken Soup: Stir in some grated cheese just before serving for an indulgent touch.

Storage and Make-Ahead Instructions

This soup is perfect for meal prep! Here’s how to store and reheat it:

  • Refrigerator: Store in an airtight container in the refrigerator for up to 4 days. Reheat on the stove over medium heat until warmed through.
  • Freezer: Freeze in portions for up to 3 months. Thaw overnight in the refrigerator before reheating.
  • Make-Ahead: You can make the soup a day in advance. Just add the cream right before serving to keep it fresh.

FAQ: Your Questions Answered

Here are some frequently asked questions about creamy chicken pumpkin soup:

  • Can I use fresh pumpkin instead of canned? Yes! Just roast and purée it before adding it to the soup.
  • Is this soup gluten-free? Absolutely, as long as you use gluten-free broth.
  • Can I use other types of chicken? Yes! Thighs or breasts work well; just adjust cooking time as needed.
  • What can I serve with this soup? This soup pairs wonderfully with crusty bread, a green salad, or grilled cheese sandwiches.
  • How do I thicken the soup? If you prefer a thicker consistency, add more pumpkin purée or reduce the broth.
  • Can I make this soup spicy? Definitely! Add spices like cayenne or diced jalapeños for heat.
  • What if I don’t have chicken broth? You can substitute with vegetable broth for a lighter flavor.
  • How long does this soup last? It can last up to 4 days in the refrigerator or up to 3 months in the freezer.

Nutritional Tips and Dietary Adaptations

This soup can easily be adapted to suit various dietary needs:

  • Low-Carb: Use less pumpkin and more chicken for a protein-rich, low-carb meal.
  • Dairy-Free: Substitute heavy cream with coconut milk or a plant-based cream.
  • High-Protein: Add beans or lentils for an extra protein boost, making it heartier.

Equipment Recommendations

To make this creamy chicken pumpkin soup, you will need:

  • Large Dutch Oven: Ideal for even cooking and simmering.
  • Immersion Blender: Makes blending the soup hassle-free.
  • Cutting Board and Sharp Knife: For efficient chopping of vegetables.
  • Measuring Cups and Spoons: Ensure precise ingredient measurements.

Serving Suggestions

Enhance your soup experience with these serving ideas:

  • Garnish: Top with fresh herbs, a drizzle of cream, or toasted seeds for added texture.
  • Pairing: Serve alongside a warm baguette or buttery crackers for a delightful crunch.
  • Add a Salad: A simple green salad with vinaigrette can provide a refreshing contrast to the creamy soup.

Conclusion

In under 30 minutes, you can create a delicious and nourishing bowl of **Creamy Chicken Pumpkin Soup** that embodies the flavors of fall. Whether you’re cooking for your family or entertaining guests, this recipe is sure to impress. Embrace the warmth, comfort, and satisfaction that comes with each spoonful, and don’t forget to make extra for those busy nights! Happy cooking!

Creamy Chicken Pumpkin Soup

Prep Time 10 minutes
Cook Time 30 minutes
Total Time 40 minutes
Servings 4 servings
Calories 350
A warm, comforting soup combining the sweetness of pumpkin with savory chicken and aromatic spices, perfect for fall.

Ingredients

Oil

  • 1 tbsp Olive Oil (Extra virgin, for sautéing the aromatics, providing a fruity base.)

Vegetables

  • 1 large Yellow Onion (Approx. 1.5 cups chopped, forms the savory foundation of the soup.)
  • 2 cloves Garlic (Minced, adds a pungent, aromatic depth.)

Spices

  • 1 tsp Dried Sage (Offers an earthy, slightly peppery flavor.)
  • ½ tsp Dried Thyme (Subtle, earthy, slightly minty note.)
  • ¼ tsp Ground Nutmeg (Freshly grated if possible, warm, nutty spice.)
  • Pinch optional Cayenne Pepper (Adds a subtle kick, optional.)

Canned Goods

  • 2 15-ounce cans Pumpkin Purée (The star of the soup, smooth and rich.)
  • 4 cups Chicken Broth (Low-sodium preferred.)

Protein

  • 1.5 cups Cooked Chicken (Shredded or diced; rotisserie chicken works well.)

Dairy & Alternatives

  • ¾ cup Heavy Cream (Or full-fat coconut milk for dairy-free.)
  • 1 tsp Salt (To taste.)
  • ½ tsp Black Pepper (Freshly ground, to taste.)

Garnishes (optional)

  • to taste Fresh Parsley or Chives (Adds freshness and color.)
  • to taste Toasted Pumpkin Seeds (Provides crunch and nutty flavor.)

Instructions 

  • Heat oil in a large pot, sauté chopped onion until translucent (~5-7 min).
  • Add garlic and spices; cook 1-2 min until fragrant.
  • Stir in pumpkin purée, then gradually add chicken broth, stirring to combine.
  • Simmer for 15-20 min, then blend until smooth using an immersion blender or in batches.
  • Stir in cooked chicken and heavy cream; heat through without boiling. Season with salt and pepper, then serve garnished with herbs and pumpkin seeds if desired.

Notes

For a dairy-free version, substitute coconut milk for heavy cream.
Calories: 350kcal
Cost: $15
Course: Soup
Cuisine: American
Keyword: chicken, fall, Pumpkin

Discover the Joy of Cooking Crispy Baked Chicken with Walnuts

Welcome to your new favorite recipe for crispy baked chicken with walnuts! This dish brings together the heart-healthy benefits of walnuts with the satisfying crunch you crave, making it a perfect choice for busy weeknights. Not only is it delicious, but it’s also incredibly easy to prepare, ensuring that you can put a nutritious meal on the table without feeling overwhelmed. Let’s dive into the reasons why this recipe will become a staple in your kitchen.

Why You’ll Love This Recipe

  • Quick and Easy: This healthy baked chicken recipe takes only about 30 minutes from start to finish, perfect for those hectic evenings.
  • Heart Healthy: Walnuts are an excellent source of Omega-3 fatty acids, promoting heart health while adding a deliciously nutty flavor.
  • High Protein: Each serving of chicken packs a punch of protein, keeping you and your family satisfied and energized.
  • Versatile: Customize this recipe with your favorite herbs or spices to create a new flavor profile every time you make it.
  • Kid-Friendly: The crispy walnut crust is a hit with picky eaters, making it easier to serve a healthy meal without complaints.

Ingredient Breakdown

To make your crispy baked chicken with walnuts, you’ll need the following ingredients:

  • 8 boneless skinless chicken breasts (3 oz each): These are lean and cook quickly. If you prefer, you can substitute with skinless chicken thighs for a juicier texture.
  • 1/2 cup flour, seasoned with pepper: This helps create a base for the walnut crust. Whole wheat flour can be used for added fiber.
  • 1/2 cup buttermilk: This tenderizes the chicken and helps the walnuts stick. You can use dairy-free alternatives if needed.
  • 1 1/2 cups finely ground walnuts: The star of the dish! You can substitute with pecans or almonds if desired.

Step-by-Step Instructions

Close-up view of crispy baked chicken with a golden brown walnut topping.

Follow these simple steps to make your healthy baked chicken:


Digital Meat Thermometer

★ Recommended Kitchen Tool

Digital Meat Thermometer

Make this recipe even easier with a quality Digital Meat Thermometer — a must-have kitchen staple!


🛒 Shop This Tool →

As an Amazon Associate, we earn from qualifying purchases.
  1. Preheat oven to 350°F (175°C). Coat chicken with flour and then dip each breast in buttermilk. Coat each chicken breast with walnuts.
  2. Heat a non-stick pan on medium and spray it with vegetable oil. Place chicken in the pan, cooking each side for 2 to 3 minutes while regulating the heat to avoid burning the walnut crust.
  3. Transfer chicken to the oven to bake thoroughly for approximately 20 minutes, or until a meat thermometer inserted in the thickest part of the breast registers 165°F (75°C). Remove from the pan when cooked.
  4. Slice each chicken breast diagonally into 4 pieces. Serve hot and enjoy!

Pro Tips for Perfect Chicken

  • Marinate for Flavor: If you have the time, marinating the chicken in buttermilk for a few hours enhances the flavor and tenderness.
  • Use Fresh Walnuts: Freshly ground walnuts yield the best flavor and texture. Toast them lightly for an even richer taste.
  • Don’t Skip the Flour: The flour helps the buttermilk adhere better to the chicken, ensuring a thicker, crunchier crust.
  • Check Doneness: Always use a meat thermometer to check for doneness. This avoids overcooking and ensures juicy chicken.
  • Customize Your Seasoning: Feel free to add your favorite herbs or spices to the flour for added flavor.
  • Keep the Heat Moderate: Moderate heat while pan-searing ensures the walnuts don’t burn before the chicken is cooked through.
  • Let It Rest: Allow the chicken to rest for a few minutes after baking. This helps the juices redistribute, making for a juicier bite.
  • Use a Baking Sheet: For easy cleanup, line your baking sheet with parchment paper before placing the chicken on it.

Common Mistakes and Troubleshooting

Here are some common pitfalls to avoid when making your crispy baked chicken:

  • Burnt Walnuts: If your walnuts are burning, reduce the heat on your stovetop when searing the chicken.
  • Dry Chicken: Overcooking is a common issue. Always use a thermometer to ensure perfect doneness.
  • Crust Falling Off: Ensure the chicken is well-coated with buttermilk and press the walnuts firmly onto the chicken for better adhesion.

Variations to Try

Want to mix things up? Here are some delicious variations of this recipe:

  • Spicy Walnut Chicken: Add cayenne pepper or paprika to the flour for a spicy kick.
  • Herbed Chicken: Mix dried herbs like thyme or rosemary into the walnut crust for an aromatic touch.
  • Cheesy Walnut Chicken: Incorporate grated Parmesan cheese into the walnut mixture for added flavor.
  • Maple Glazed Chicken: Drizzle a touch of maple syrup over the chicken before baking for a sweet contrast.

Storage and Make-Ahead Instructions

This recipe is great for meal prep:

  • To Store: Place cooked chicken in an airtight container and refrigerate for up to 3 days.
  • To Freeze: Freeze cooked chicken in a single layer, then transfer to a freezer bag for up to 3 months.
  • Reheating: Reheat in the oven to retain crispiness. Avoid the microwave to prevent sogginess.
  • Make Ahead: Prepare the chicken up to the baking step, then cover and refrigerate for up to 24 hours before baking.

Frequently Asked Questions

Here are some common questions about crispy baked chicken with walnuts:

  • Is this recipe heart-healthy? Yes! Walnuts are rich in healthy fats that support heart health.
  • Can I use other nuts? Absolutely! Pecans or almonds can be used as substitutes for walnuts.
  • What should I serve with this chicken? It pairs well with roasted vegetables or a fresh salad for a balanced meal.
  • How can I make this dairy-free? Substitute buttermilk with a non-dairy milk mixed with a bit of lemon juice.
  • Can I grill this chicken instead? Yes, grilling adds a smoky flavor. Just be sure to monitor the temperature closely.
  • What’s the best way to reheat leftovers? Reheat in the oven at a low temperature to keep the crust crispy.
  • Can this be made gluten-free? Yes! Use gluten-free flour for the coating.
  • How long does it take to cook? The total cooking time is about 30 minutes, including prep and baking.

Nutrition Tips and Dietary Adaptations

This recipe is naturally low in saturated fat and high in protein, making it a great choice for various dietary needs. Here are some tips:

  • Low-Carb Option: Reduce the amount of flour and serve with a side of non-starchy vegetables.
  • High-Fiber Addition: Serve with a side of quinoa or brown rice to boost fiber content.
  • Protein Boost: Pair with legumes or beans to increase the protein content of your meal.

Equipment Recommendations

To make this recipe, consider having the following equipment on hand:

  • Non-Stick Skillet: Ideal for searing and helps prevent sticking.
  • Baking Sheet: A sturdy sheet for transferring the chicken to the oven.
  • Meat Thermometer: Ensures your chicken is cooked to perfection.
  • Mixing Bowls: For preparing your flour, buttermilk, and walnut mixture.

Serving Suggestions

To elevate your meal, consider serving your crispy baked chicken with:

  • Seasoned Quinoa: A great source of protein and fiber.
  • Steamed Broccoli: A nutritious side that adds color and crunch.
  • Garden Salad: Fresh greens with a light vinaigrette to balance the richness of the chicken.
  • Sweet Potato Mash: A comforting addition that complements the flavors beautifully.

Conclusion

This crispy baked chicken with walnuts is more than just a meal; it’s an opportunity to enjoy a heart-healthy dish that’s bursting with flavor. Perfect for busy weeknights or special occasions, this recipe will surely impress your family and friends. Remember, cooking is all about experimenting and having fun, so don’t hesitate to make this dish your own. Happy cooking!

Heart Healthy Crispy Baked Chicken with Walnuts

Prep Time 10 minutes
Cook Time 20 minutes
Total Time 30 minutes
Servings 4 pieces
Calories 350
A delicious and nutritious dish featuring crispy baked chicken coated with ground walnuts, perfect for a heart-healthy meal.

Ingredients

Chicken

  • 8 pieces boneless skinless chicken breasts (3 oz each)
  • 1/2 cup flour, seasoned with pepper
  • 1/2 cup buttermilk
  • 1 1/2 cups finely ground walnuts

Instructions 

  • Preheat oven to 350°F (175°C). Coat chicken with flour, dip in buttermilk, then coat with walnuts.
  • Heat a non-stick pan on medium, spray with vegetable oil, and cook chicken for 2-3 minutes per side.
  • Transfer chicken to oven and bake for 20 minutes until cooked through.
  • Remove from oven, slice diagonally into 4 pieces, and serve hot.

Notes

Using ground walnuts adds healthy fats and flavor. Ensure chicken is fully cooked before serving.
Calories: 350kcal
Cost: $15
Course: Main Course
Cuisine: American
Keyword: chicken, healthy, walnuts

When it comes to weeknight dinners, few dishes can compete with the warmth and satisfaction of a Jiffy Chicken Cornbread Casserole. Combining creamy chicken, sweet corn, and the beloved cornbread topping, this dish is designed to delight even the pickiest of eaters. Whether you’re a busy mom like me or just someone looking for an easy, delicious meal, this casserole is sure to become a staple in your kitchen. Let’s dive into why this recipe is a must-try and how you can make it your own!

Why You’ll Love This Recipe

  • Quick and Easy: With just a few simple ingredients and less than an hour from start to finish, you can have a satisfying dinner ready without the stress.
  • Family-Friendly: The flavors are familiar and comforting, making it a hit with kids and adults alike.
  • Versatile Ingredients: You can easily swap out ingredients based on what you have on hand, making it adaptable to your pantry.
  • One-Dish Wonder: Minimal cleanup is needed since everything cooks in one baking dish, allowing you to spend more time with your family.
  • Freezer-Friendly: Make extra and freeze it for busy nights when cooking feels overwhelming.

Ingredient Breakdown

To whip up this delightful casserole, you’ll need the following ingredients:

  • 1 (10.5 ounce) can condensed cream of chicken soup: This is the base that adds creaminess and flavor. You can substitute with cream of mushroom if you prefer.
  • 1 (10.5 ounce) can condensed cream of mushroom soup: Adds depth; however, you can use two cans of the same flavor if desired.
  • ¾ cup milk: For a creamier consistency, opt for whole milk or even a dairy-free alternative.
  • 4 cups cooked, diced chicken: Utilize leftover rotisserie chicken or boiled chicken for convenience.
  • 1 cup grated sharp cheddar cheese: This adds a lovely cheesy layer. Feel free to substitute with Monterey Jack for a milder taste.
  • 1 (8.5 ounce) box corn muffin mix (such as Jiffy brand): The star of the dish, providing that sweet cornbread topping.
  • 1 (14.75 ounce) can cream style sweet corn: Enhances the texture and flavor of the casserole.
  • ⅓ cup sour cream: For added richness; Greek yogurt works as a healthy alternative.
  • 1 large egg: Binds the cornbread together.
  • 2 tablespoons melted butter: Adds moisture and flavor to the cornbread topping.

How to Make Jiffy Chicken Cornbread Casserole

Ready to create this comforting dish? Follow these simple steps:


Nonstick Grill Pan

★ Recommended Kitchen Tool

Nonstick Grill Pan

Make this recipe even easier with a quality Nonstick Grill Pan — a must-have kitchen staple!


🛒 See Deals on Amazon →

As an Amazon Associate, we earn from qualifying purchases.
  • Preheat the oven: Set your oven to 400°F (200°C). This ensures the casserole bakes evenly.
  • Prepare the baking dish: Spray a 3-quart baking dish with cooking spray. If using a smaller 2-quart dish, your cornbread topping may be thicker and require a few extra minutes of baking.
  • Make the creamy chicken base: In a large bowl, whisk together the condensed soups and milk until smooth. Stir in the diced chicken and cheese, combining well.
  • Transfer to the baking dish: Pour the chicken mixture into the prepared baking dish, spreading it evenly.
  • Prepare the cornbread topping: In a separate bowl, combine the corn muffin mix, cream style corn, sour cream, egg, and melted butter. Mix until just combined.
  • Spread the batter: Gently spread the cornbread mixture over the chicken layer, ensuring it covers the top evenly.
  • Bake to perfection: Bake uncovered for about 40-50 minutes, or until a toothpick inserted into the center of the cornbread topping comes out clean. If the top starts to brown too quickly, tent it with foil.
  • Let it rest: Allow the casserole to stand for 5-10 minutes before serving; this helps it set up nicely.

Pro Tips for Perfecting Your Casserole

Juicy Jiffy Chicken Cornbread Casserole displayed in a dish, showcasing a creamy texture.
  • Ingredient Quality: Use high-quality ingredients for the best flavor—fresh chicken and real cheese make a noticeable difference.
  • Don’t Overmix: When preparing the cornbread topping, mix just until combined to avoid a dense texture.
  • Customize Spice Levels: Add diced jalapeños or crushed red pepper for a kick if your family enjoys some heat.
  • Cheese Variations: Experiment with different cheeses like pepper jack or gouda for a unique twist.
  • Fresh Herbs: Toss in some chopped parsley or chives for a fresh flavor boost.
  • Cooked Vegetables: Add sautéed bell peppers, onions, or spinach to the chicken mix for extra nutrition.
  • Don’t Skip the Resting Time: Letting it sit after baking allows the flavors to meld and the casserole to firm up.
  • Freezing Tips: If you want to freeze leftovers, let it cool completely before storing in an airtight container.

Common Mistakes & Troubleshooting

Even the best chefs encounter hiccups. Here are some common mistakes and how to avoid them:

  • Overbaking: Keep an eye on the casserole; the cornbread topping can brown quickly.
  • Dry Chicken: Ensure your chicken is cooked but not overdone prior to mixing it with the other ingredients.
  • Too Thick Cornbread: Use a larger baking dish if the mixture seems overly thick to ensure even cooking.
  • Not Enough Moisture: If the casserole seems dry, you can add a splash of broth or additional milk.

Delicious Variations to Try

Make this dish your own with these fun variations:

  • Tex-Mex Casserole: Add black beans, corn, and taco seasoning to the chicken mixture for a southwestern flair.
  • Vegetarian Delight: Substitute chicken with sautéed mushrooms and zucchini for a hearty vegetarian version.
  • BBQ Chicken Casserole: Mix in your favorite BBQ sauce with the chicken for a smoky flavor.
  • Buffalo Chicken Casserole: Add buffalo sauce to the chicken mixture for a spicy twist that pairs well with ranch dressing.

Storage & Make-Ahead Instructions

This casserole is a lifesaver for meal prep and leftovers:

  • Refrigerate: Store leftovers in an airtight container in the fridge for up to 3 days.
  • Freezer Friendly: Freeze baked or unbaked casserole tightly covered for up to 2 months. Thaw overnight before baking or reheating.
  • Make Ahead: Prepare the chicken mixture and cornbread topping separately, then assemble and bake when ready.

Frequently Asked Questions

  • Can I use frozen chicken? Yes, just ensure it’s fully cooked before adding it to the mixture.
  • What can I substitute for Jiffy mix? You can use homemade cornbread mix or any brand of cornbread mix you prefer.
  • How do I make it gluten-free? Use gluten-free cornbread mix and ensure all other ingredients are gluten-free.
  • Can I add more vegetables? Absolutely! Diced carrots, peas, or bell peppers can enhance nutrition and flavor.
  • Is this casserole good for freezing? Yes, it freezes well for up to 2 months.
  • How do I reheat leftovers? Reheat in the oven at 350°F until warmed through or in the microwave in short intervals.
  • Can I use different cheeses? Yes, feel free to experiment with different cheese varieties for a new flavor.
  • What’s the best way to serve it? Pair with a fresh salad or steamed vegetables for a complete meal.

Nutritional Tips & Dietary Adaptations

Looking to adapt this recipe for special diets? Here are some tips:

  • Low-Fat Option: Use low-fat versions of cream soups and reduced-fat cheese.
  • Dairy-Free: Substitute dairy ingredients with plant-based alternatives like almond milk and vegan sour cream.
  • Protein Boost: Add beans or lentils to increase the protein content while keeping it vegetarian.

Equipment Recommendations

To make your cooking experience smoother, here’s what you’ll need:

  • Baking Dish: A 3-quart dish is ideal for this recipe.
  • Mixing Bowls: Have a couple of different sizes for mixing ingredients.
  • Whisk: Perfect for blending the creamy base and cornbread mix.
  • Measuring Cups & Spoons: Essential for accuracy in your recipe.

Serving Suggestions

This casserole is delightful on its own, but you can elevate your meal with these serving ideas:

  • Fresh Salad: A simple green salad with vinaigrette pairs wonderfully with the rich casserole.
  • Fruit Compote: Serve a side of fruit compote for a sweet contrast to the savory dish.
  • Hot Sauce: For those who like heat, offer hot sauce on the side for an extra kick.
  • Crusty Bread: A slice of crusty bread or cornbread makes for a comforting addition to the meal.

In conclusion, the Jiffy Chicken Cornbread Casserole is not just a meal; it’s a warm hug on a plate, a perfect blend of flavors and textures that everyone will enjoy. With its ease of preparation and endless possibilities for customization, it’s no wonder this dish has earned a permanent spot in dinner rotations across families. So gather your ingredients, preheat your oven, and let’s make dinner a comforting affair!

Jiffy Chicken Cornbread Casserole

Prep Time 10 minutes
Cook Time 45 minutes
Total Time 55 minutes
Servings 6 servings
Calories 650
A comforting and cheesy casserole combining chicken, cornbread, and creamy soups for a hearty meal.

Ingredients

Canned Soups

  • 1 can condensed cream of chicken soup
  • 1 can condensed cream of mushroom soup
  • 0.75 cup milk

Chicken

  • 4 cups cooked, diced chicken

Cheese

  • 1 cup grated sharp cheddar cheese

Cornbread Mix

  • 1 box corn muffin mix (such as Jiffy)

Canned Corn

  • 1 can cream style sweet corn
  • ⅓ cup sour cream
  • 1 large egg
  • 2 tablespoons melted butter

Instructions 

  • Preheat oven to 400°F (200°C). Spray a 3-quart baking dish.
  • Whisk together soups and milk in a large bowl. Stir in chicken and cheese.
  • Pour mixture into dish. Mix cornbread ingredients and spread over top.
  • Bake uncovered for 40-50 minutes until golden and cooked through. Let stand 5-10 minutes before serving.

Notes

Cover loosely with foil if top darkens too quickly.
Calories: 650kcal
Cost: $15
Course: Main Course
Cuisine: American
Keyword: casserole, chicken, cornbread

Welcome to Your New Favorite Chicken Salad Sandwich!

If you’re a busy mom or just someone looking for quick and delicious meal solutions, you’re about to discover how the humble chicken can transform into a delightful dish with this Cranberry Pecan Chicken Salad Sandwich. This recipe is not just about flavor; it’s packed with nutrition and is incredibly versatile, making it perfect for lunches, picnics, or even a light dinner. Trust me, once you try it, you’ll want to keep it in your meal rotation!

Why You’ll Love This Recipe

This Cranberry Pecan Chicken Salad Sandwich offers so much more than just great taste. Here are five specific benefits that make this dish a winner:

  • Quick to Prepare: With just a few simple steps, you can have a delicious chicken salad ready in no time, making it perfect for those busy days.
  • Flavorful Combination: The sweet cranberries paired with crunchy pecans add a delightful texture and taste that everyone will love.
  • Customizable: This recipe is easily adaptable, so you can incorporate your favorite ingredients or make substitutions based on what you have at home.
  • Healthy and Nutritious: Packed with protein from the chicken and healthy fats from the pecans, this salad is a wholesome choice for lunch.
  • Perfect for Meal Prep: Make a large batch and store it in the fridge for quick lunches throughout the week.

What Ingredients Are in Cranberry Pecan Chicken Salad?

To create this satisfying sandwich, you’ll need the following ingredients:


Salad Dressing Shaker

★ Recommended Kitchen Tool

Salad Dressing Shaker

Make this recipe even easier with a quality Salad Dressing Shaker — a must-have kitchen staple!


🛒 Check Price on Amazon →

As an Amazon Associate, we earn from qualifying purchases.
  • 4 cups diced cooked chicken (about 2 1/2 lbs): Use rotisserie chicken for convenience or leftover homemade chicken for better flavor.
  • 1 cup finely diced celery: Adds a nice crunch and freshness.
  • 1/2 cup relish (sweet or dill): Choose based on your taste preference.
  • 1 cup mayonnaise: This binds everything together; Greek yogurt can be a healthier alternative.
  • 3/4 cup dried cranberries: For a sweet and chewy texture.
  • 1/2 Vidalia onion (finely diced, about 1/2 cup): Provides a subtle sweetness and depth of flavor.
  • 1 teaspoon salt: Enhances all the flavors.
  • 1 teaspoon fresh ground black pepper: Adds a hint of spice.
  • 1 cup pecan pieces: For crunch and nutty flavor.
  • 8 slices white or whole-grain bread: Your choice of bread makes a big difference in taste and nutrition.

How to Make This Cranberry Pecan Chicken Salad Sandwich

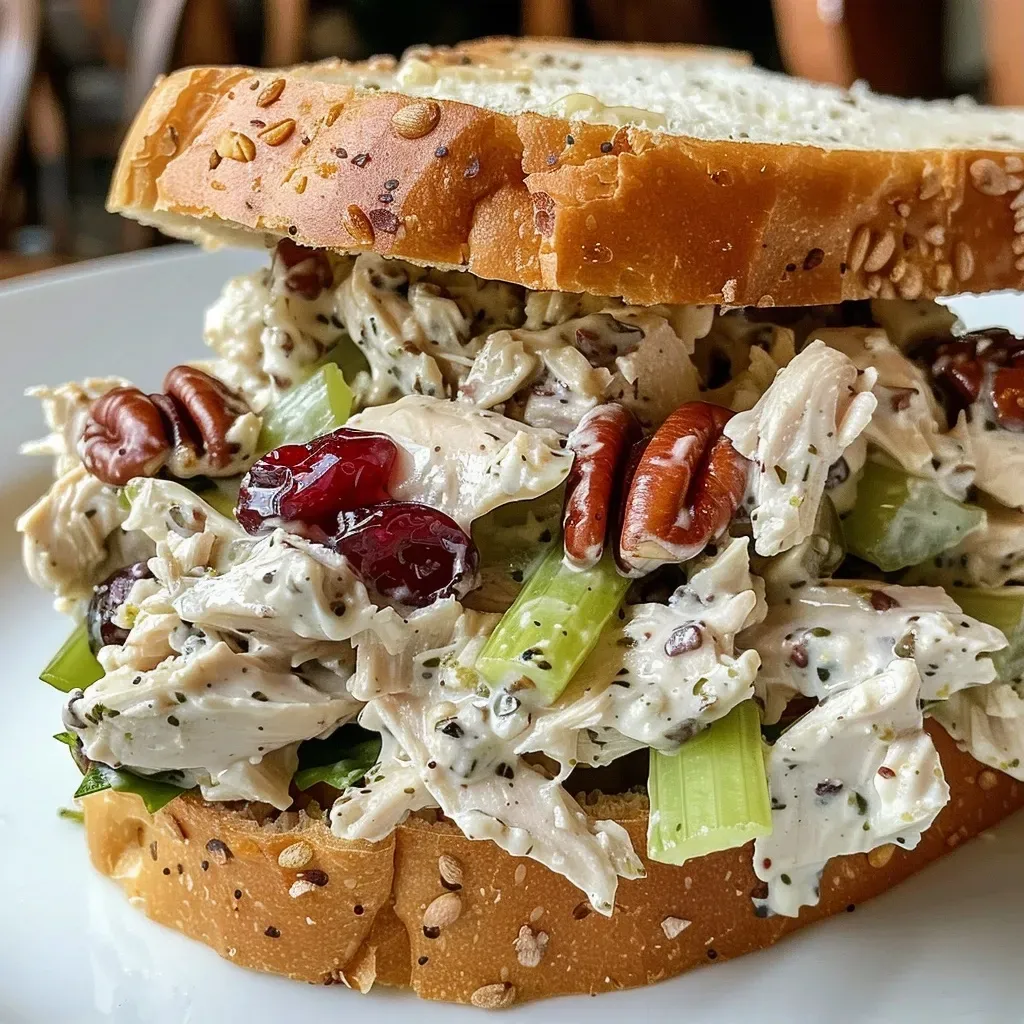
Close-up of a colorful chicken salad sandwich featuring cranberries and pecans.

Follow these simple steps to whip up your Cranberry Pecan Chicken Salad Sandwich:

  • In a large bowl, combine the diced chicken, celery, relish, mayonnaise, dried cranberries, diced onion, salt, pepper, and pecan pieces.
  • Mix all ingredients thoroughly until everything is well combined.
  • Cover the bowl and refrigerate for at least 2 hours. This chilling time allows the flavors to meld beautifully.
  • When ready to serve, scoop 3/4 to 1 cup of chicken salad onto a slice of bread.
  • Top with a second slice of bread and serve immediately, or wrap it up for a lunch on-the-go!

Tips for the Best Chicken Salad

Want to elevate your chicken salad to the next level? Here are some expert tips:

  • Use Fresh Ingredients: Fresh celery and high-quality mayonnaise can make a significant difference in taste.
  • Chill Before Serving: Letting the salad chill not only enhances the flavors but also improves the texture.
  • Experiment with Flavors: Add ingredients like diced apple, grapes, or even a dash of mustard for an extra kick.
  • Consider Your Bread: Try different types of bread, like croissants or pita, for unique servings.
  • Adjust Seasoning: Taste and adjust salt and pepper before serving; everyone’s palate is different!
  • Use Leftovers: Leftover turkey or rotisserie chicken works wonderfully for this salad.
  • Make it a Wrap: For a low-carb option, serve the salad in a lettuce wrap instead of bread.
  • Pack for Lunch: Store in an airtight container to keep it fresh for your lunch box.

Cranberry Pecan Chicken Salad Variations

Feeling adventurous? Here are some fun variations to try:

  • Spicy Cranberry Chicken Salad: Add diced jalapeños for a spicy twist.
  • Apple Pecan Chicken Salad: Incorporate diced apples for added sweetness and crunch.
  • Greek Yogurt Chicken Salad: Substitute Greek yogurt for mayonnaise for a lighter version.
  • Herbed Chicken Salad: Mix in fresh herbs like dill or parsley for a fresh flavor boost.

Common Mistakes and Troubleshooting

Here are some common pitfalls to avoid when making your chicken salad:

  • Overmixing: Mixing too vigorously can break down the chicken and create a mushy texture.
  • Not Enough Chill Time: Skipping the chill time can result in a less flavorful salad.
  • Too Much Mayonnaise: Adding too much can overpower the other flavors; start with less and add more as needed.
  • Ignoring Seasoning: Always taste and adjust seasoning before serving.

Storage and Make-Ahead Instructions

This chicken salad is perfect for meal prep. Here’s how to store it:

  • Refrigerate: Store in an airtight container for up to 3 days in the fridge.
  • Freeze: While not recommended due to texture changes, you can freeze the chicken salad for up to a month. Thaw in the refrigerator before serving.
  • Make Ahead: Prepare the salad a day in advance to save time on busy mornings.

Frequently Asked Questions

Have questions about this recipe? Here are some common inquiries:

  • Can I use canned chicken? Yes, canned chicken works in a pinch, but fresh is always recommended for flavor.
  • What bread is best for this sandwich? Whole grain or sourdough adds a nice texture and flavor.
  • Can I add more vegetables? Absolutely! Shredded carrots or diced bell peppers can add great flavor and nutrition.
  • How can I make it gluten-free? Serve on gluten-free bread or in a lettuce wrap.
  • What can I serve with it? Pair with a side salad, veggie sticks, or chips for a complete meal.
  • Can I use other nuts? Yes, walnuts or almonds can be substituted for pecans.
  • How long can I keep it in the fridge? Up to 3 days; just ensure it’s in a sealed container.
  • Is it safe to eat after a few days? Always check for off smells or changes in texture before consuming leftovers.

Nutrition Tips and Dietary Adaptations

This chicken salad can easily fit into various dietary plans:

  • Low-Carb Option: Serve in lettuce cups instead of bread.
  • Heart-Healthy: Use olive oil mayonnaise for a healthier fat option.
  • Increased Fiber: Add chopped veggies to boost fiber content.
  • Protein Boost: Pair with a side of Greek yogurt for added protein.

Equipment Recommendations

Here’s a quick list of equipment that will make your cooking experience smoother:

  • Large Mixing Bowl: For combining all your delicious ingredients.
  • Cutting Board: Essential for chopping your veggies and chicken.
  • Sharp Knife: A sharp knife makes prep work much easier.
  • Measuring Cups and Spoons: For precise ingredient measurements.
  • Sealable Containers: Perfect for storing leftovers or meal-prepped portions.

Serving Suggestions

To make your meal even more delightful, consider these serving ideas:

  • On a Bed of Greens: Serve the chicken salad over a bed of mixed greens for a light option.
  • In a Wrap: Use a tortilla to create a convenient wrap for lunch.
  • With Chips: Pair with your favorite chips for a satisfying crunch.
  • As a Snack: Scoop onto crackers for a quick and tasty snack.

Final Thoughts

This Cranberry Pecan Chicken Salad Sandwich is not just a recipe; it’s a solution for busy weeknights and satisfying lunches. With its blend of flavors and textures, it’s sure to become a family favorite. Whether you’re making it for yourself or a group, it’s a dish that brings joy to the table. So gather your ingredients, follow this guide, and enjoy a delicious meal that’s as easy to make as it is delightful to eat!

Cranberry Pecan Chicken Salad Sandwich

Prep Time 15 minutes
Cook Time 15 minutes
Total Time 30 minutes
Servings 4 servings
Calories 450
A delicious and easy chicken salad with cranberries and pecans, perfect for a quick lunch or picnic.

Ingredients

Main ingredients

  • 4 cups diced cooked chicken ((2 1/2 lb.))
  • 1 cup finely diced celery
  • 1/2 cup relish (sweet or dill)
  • 1 cup mayonnaise
  • 3/4 cup dried cranberries
  • 1/2 vidalia onion finely diced onion ((about 1/2 cup))
  • 1 teaspoon salt
  • 1 teaspoon fresh ground black pepper
  • 1 cup pecan pieces
  • 8 slices white or whole-grain bread

Instructions 

  • Combine chicken, celery, relish, mayonnaise, cranberries, onion, salt, pepper, and pecans in a bowl.
  • Mix thoroughly until well combined.
  • Refrigerate for at least 2 hours to meld flavors.
  • Scoop 3/4 to 1 cup of salad onto a bread slice.
  • Top with another bread slice and serve immediately.

Notes

For added flavor, toast the bread lightly before assembling.
Calories: 450kcal
Cost: $15
Course: Lunch
Cuisine: American
Keyword: chicken, Sandwich

Unlock the Flavor: Quick and Flavor-Packed Teriyaki Chicken Bowls

Welcome to your new go-to weeknight meal! If you’re looking to whip up something delicious and satisfying in no time, these Easy Teriyaki Chicken Bowls are perfect for you. Combining juicy chicken, savory teriyaki sauce, and your choice of rice and steamed veggies, this recipe ensures that even the busiest evenings can end with a delightful dinner. Let’s dive into how to make this meal a staple in your home!

Why You’ll Love This Recipe

  • Quick and Easy: This meal comes together in around 30 minutes, so you can have a healthy dinner on the table without the hassle.
  • Customizable: Use whatever vegetables you have on hand or swap out rice for quinoa, cauliflower rice, or even noodles for a fun twist!
  • Family-Friendly: With its sweet and savory flavors, this dish appeals to both picky eaters and culinary adventurers alike.
  • Meal Prep Friendly: Make a double batch to enjoy leftovers for lunch or freeze portions for easy dinners later.
  • Homemade Sauce: A simple homemade teriyaki sauce means you control the ingredients, making it healthier than store-bought options.

Ingredients You’ll Need

Here’s a detailed look at what you’ll need to create these delicious teriyaki chicken bowls:

  • 4 boneless skinless chicken breasts, cubed: Chicken breast is lean and cooks quickly, making it ideal for a fast meal.
  • 1 Tbsp. olive oil: For sautéing the chicken, enhancing flavor while keeping it moist.
  • 1/2 cup low sodium soy sauce: This is the base of your teriyaki sauce, providing that essential umami taste.
  • 1/2 cup water: To balance the sauce and keep it from being too salty.
  • 3 Tbsp. packed light brown sugar: Adds a touch of sweetness to balance the salty soy sauce.
  • 2 Tbsp. rice vinegar: Provides acidity, enhancing the overall flavor profile.
  • 1/2 tsp. sesame oil (optional): Adds a nutty flavor that is classic in teriyaki dishes.
  • 1 tsp. ground ginger: Fresh ginger would be even better, but ground ginger works in a pinch.
  • 2 tsp. minced garlic: Fresh garlic adds depth and aroma to the dish.
  • 2 Tbsp. honey: Natural sweetness that complements the brown sugar.
  • 3 tsp. cornstarch: To thicken the sauce, giving it that perfect glaze.
  • Sesame seeds for garnish: A final touch for presentation and flavor.
  • Chopped green onions for garnish: Freshness and crunch to elevate your dish.
  • Rice (white or brown) for serving: Your choice of rice will serve as the base for this meal.
  • Steamed vegetables of your choice for serving: Broccoli, bell peppers, or snap peas work beautifully!

How to Make Easy Teriyaki Chicken Bowl Recipe

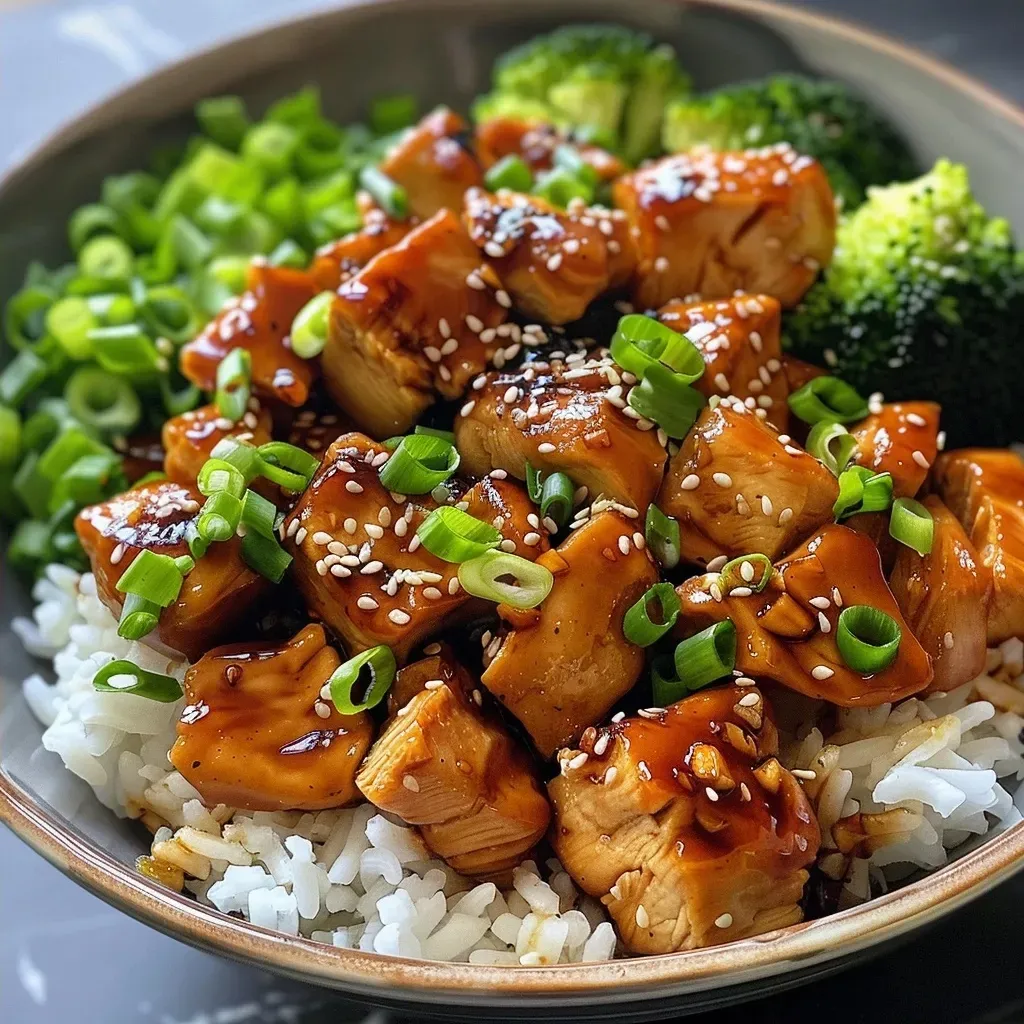
Side view of a colorful teriyaki chicken bowl featuring vegetables and sesame seeds.

Step 1: Prepare the Chicken

Heat 1 tablespoon olive oil in a large skillet over medium-high heat. Once hot, add the cubed chicken breasts and brown them thoroughly, cooking until they are no longer pink inside (about 6-8 minutes).


Air Fryer XL

★ Recommended Kitchen Tool

Air Fryer XL

Make this recipe even easier with a quality Air Fryer XL — a must-have kitchen staple!


🛒 Shop This Tool →

As an Amazon Associate, we earn from qualifying purchases.

Step 2: Whisk Together the Teriyaki Sauce

While the chicken is cooking, whisk together the following in a medium-sized bowl until smooth:

  • 1/2 cup low sodium soy sauce
  • 1/2 cup water
  • 2 tablespoons honey
  • 3 tablespoons brown sugar
  • 2 tablespoons rice vinegar
  • 1/2 teaspoon sesame oil (optional)
  • 1 teaspoon ground ginger
  • 2 teaspoons minced garlic
  • 3 teaspoons cornstarch

Step 3: Cook the Chicken with the Sauce

Once the chicken is browned, pour the prepared teriyaki sauce into the skillet. Stir frequently and cook until the sauce thickens and coats the chicken evenly, about 2-3 minutes.

Step 4: Serve and Garnish

Serve the teriyaki chicken immediately over your choice of rice, accompanied by steamed vegetables. Sprinkle generously with sesame seeds and chopped green onions for added flavor and texture.

Pro Tips for Making Easy Teriyaki Chicken Bowls

  • Prep Ahead: Cube your chicken and whisk the sauce ahead of time to streamline the cooking process on busy nights.
  • Thickening the Sauce: For a thicker sauce, combine cornstarch with a bit of cold water before adding it to the skillet.
  • Flavor Boost: Marinade the chicken in a bit of the teriyaki sauce for an hour before cooking for extra flavor.
  • Cooking Rice: Use instant rice or pre-cooked rice packets to save time!
  • Veggie Variety: Add frozen mixed vegetables to the skillet during the last few minutes of cooking for ease and nutrition.
  • Garnish Generously: Don’t skip the sesame seeds and green onions—they add crucial texture and flavor!
  • Experiment with Proteins: Try this recipe with shrimp, tofu, or beef for a different twist.
  • Serve with Fresh Herbs: A sprinkle of cilantro or parsley can brighten up the dish!

Common Mistakes and Troubleshooting

  • Overcooking Chicken: Ensure you don’t overcook the chicken to retain its juiciness. Check for doneness early!
  • Sauce Too Thick: If your sauce thickens too much, add a bit more water to reach your desired consistency.
  • Too Salty: If you find the dish too salty, add a bit more sugar or honey to balance the flavor.
  • Not Enough Sauce: Always make sure you have enough sauce to coat the chicken and rice generously.

Variations to Try

  • Vegetable Teriyaki Bowl: Omit the chicken and substitute with grilled or sautéed veggies.
  • Spicy Teriyaki Bowl: Add sriracha or red pepper flakes to the sauce for a kick!
  • Quinoa Bowl: Substitute rice with quinoa for a protein-packed option.
  • Teriyaki Tacos: Use the teriyaki chicken as a filling for tacos, topped with crunchy slaw and avocado.

Storage and Make-Ahead Instructions

This recipe is perfect for meal prep! Store leftovers in an airtight container in the fridge for up to 4 days. For longer storage, freeze in portions for up to 3 months. Reheat in the microwave or on the stove with a splash of water to keep it moist.

Frequently Asked Questions

  • Can I use chicken thighs instead of breasts? Yes! Chicken thighs are juicier and can add more flavor.
  • Is teriyaki sauce gluten-free? Use gluten-free soy sauce or tamari to make this dish gluten-free.
  • Can I make this recipe vegan? Yes! Substitute chicken with tofu and use maple syrup instead of honey.
  • How do I know when the chicken is cooked through? The chicken should reach an internal temperature of 165°F (75°C).
  • What veggies should I use? Broccoli, bell peppers, and snap peas are great choices, but feel free to use what you have!
  • Can I double this recipe? Absolutely! Just ensure your skillet is large enough or cook in batches.
  • What can I serve with teriyaki chicken? Edamame, miso soup, or a simple salad are excellent side dishes.
  • How long can I store leftovers? In the fridge, leftovers can last up to 4 days, while frozen portions can last up to 3 months.

Nutrition Tips and Dietary Adaptations

This recipe is a great source of lean protein and can be adapted for various dietary needs:

  • Low Carb: Serve over cauliflower rice or omit the rice altogether.
  • Low Sugar: Reduce the amount of brown sugar and use a sugar substitute.
  • Paleo: Use coconut aminos instead of soy sauce and honey instead of brown sugar.

Recommended Equipment

  • Large Skillet: A non-stick skillet works best for even cooking and easy cleanup.
  • Whisk: Essential for combining the teriyaki sauce ingredients smoothly.
  • Sharp Knife: For safely cubing chicken and chopping vegetables.

Serving Suggestions

Serve your teriyaki chicken bowls with a side of steamed edamame or a crisp cucumber salad for a refreshing contrast. You can also add a drizzle of extra teriyaki sauce over the top or a sprinkle of chili flakes for those who enjoy a little heat!

Conclusion

Now that you have everything you need to create these Quick and Flavor-Packed Teriyaki Chicken Bowls, it’s time to get cooking! Remember, the beauty of this dish lies in its versatility—feel free to make it your own with different proteins, veggies, and garnishes. Enjoy the process and savor every bite with your loved ones!

Easy Teriyaki Chicken Bowl Recipe

Prep Time 10 minutes
Cook Time 10 minutes
Total Time 20 minutes
Servings 4 servings
Calories 350
A quick and flavorful dish featuring tender chicken in a homemade teriyaki sauce, served over rice and vegetables.

Ingredients

Protein

  • 4 pieces boneless skinless chicken breasts, cubed
  • 1 Tbsp olive oil
  • 1/2 cup low sodium soy sauce
  • 1/2 cup water
  • 3 Tbsp packed light brown sugar
  • 2 Tbsp rice vinegar
  • 1/2 tsp sesame oil (optional)
  • 1 tsp ground ginger
  • 2 tsp minced garlic
  • 2 Tbsp honey
  • 3 tsp cornstarch

Garnishes

  • Sesame seeds for garnish
  • Chopped green onions for garnish
  • Rice (white or brown) for serving
  • Steamed vegetables of your choice for serving

Instructions 

  • Heat 1 tablespoon olive oil in a skillet over medium-high heat and cook the chicken until browned and cooked through, about 6-8 minutes.
  • Whisk together soy sauce, water, honey, brown sugar, rice vinegar, sesame oil (if using), ginger, garlic, and cornstarch until smooth.
  • Pour the sauce into the skillet with chicken and cook until thickened, about 2-3 minutes.
  • Serve over rice with steamed vegetables, garnished with sesame seeds and green onions.

Notes

Adjust the amount of sesame oil and garnishes to taste for added flavor.
Calories: 350kcal
Cost: $15
Course: Main Course
Cuisine: Japanese
Keyword: chicken, Teriyaki

Unlock the Secrets of the Perfect Chicken Salad

If you’re searching for a quick and satisfying meal that pleases the whole family, look no further than this Quick and Creamy Cranberry Pecan Chicken Salad. This delightful dish combines tender chicken, crunchy pecans, and sweet cranberries, making it a fantastic option for lunches, picnics, or quick dinners. In this comprehensive guide, we’ll break down everything you need to know about making the best chicken salad, ensuring that it’s never a boring option on your dinner table.

Why You’ll Love This Recipe

There are countless reasons to fall in love with this creamy cranberry pecan chicken salad. Here are just a few:

  • Quick and Easy Preparation: With just a few simple steps, you can whip up this salad in under 30 minutes, making it perfect for busy weeknights.
  • Versatile Serving Options: Enjoy it on its own, in lettuce wraps, or as a filling for sandwiches and croissants. The possibilities are endless!
  • Meal Prep Friendly: This salad stores well in the fridge, making it an ideal choice for meal prep or quick lunches during the week.
  • Flavor Explosion: The combination of sweet cranberries, crunchy pecans, and zesty dressing creates a delightful balance of flavors and textures.
  • Healthier Alternative: By using Greek yogurt in the dressing, you can create a lighter version without sacrificing taste.

Ingredient Breakdown

Let’s take a closer look at the ingredients that make this chicken salad shine, along with some handy substitutions.


Salad Spinner

★ Recommended Kitchen Tool

Salad Spinner

Make this recipe even easier with a quality Salad Spinner — a must-have kitchen staple!


🛒 See Deals on Amazon →

As an Amazon Associate, we earn from qualifying purchases.
  • Cooked Chicken Breast: You can use shredded rotisserie chicken for convenience or poach your own for a fresh taste.
  • Dried Cranberries: These add a touch of sweetness. Consider using raisins or chopped apples for a different flavor.
  • Chopped Celery: Provides crunch; you might substitute with diced bell peppers for a peppery twist.
  • Mayonnaise: A base for the dressing; you can swap it for avocado or a vegan mayo if desired.
  • Plain Greek Yogurt: This ingredient lightens the dressing while adding protein; opt for low-fat yogurt for fewer calories.
  • Honey: Adds sweetness; agave syrup or maple syrup can work as alternatives.
  • Apple Cider Vinegar: Offers tang; lemon juice can also be a great substitute.
  • Pecan Halves: Toasting them enhances their flavor; walnuts work well if you’re out of pecans.
  • Poppy Seeds: These add a unique flavor; sesame seeds can be used if you prefer.

How to Make Your Chicken Salad – Step-by-Step

Side view of a bowl filled with creamy chicken salad featuring cranberries and pecans.

Ready to create your delicious salad? Follow these simple steps:

  1. Prep Your Ingredients: Shred the cooked chicken into bite-sized pieces. Chop the celery and pecans to your desired size.
  2. Make the Dressing: In a small bowl, whisk together mayonnaise, Greek yogurt, honey, apple cider vinegar, poppy seeds, salt, and pepper until smooth.
  3. Combine Ingredients: In a large mixing bowl, combine chicken, cranberries, celery, and pecans.
  4. Toss with Dressing: Pour the dressing over the chicken mixture and toss gently until everything is well-coated.
  5. Chill: Refrigerate the chicken salad for at least 30 minutes to allow the flavors to meld.
  6. Serve: Enjoy chilled on lettuce leaves, croissants, or your favorite sandwich bread.

Pro Tips for the Best Chicken Salad

Here are some expert tips to elevate your chicken salad game:

  • Use Rotisserie Chicken: For a super fast meal, shredded rotisserie chicken is a time-saver.
  • Toast Your Pecans: Lightly toasting the pecans enhances their flavor and adds a wonderful crunch.
  • Let It Chill: Allowing the salad to chill for at least 30 minutes helps the flavors meld beautifully.
  • Experiment with Herbs: Fresh herbs like dill or parsley can add an extra layer of flavor.
  • Adjust the Dressing: Feel free to tweak the dressing ingredients to suit your taste—add more honey for sweetness or vinegar for tang.
  • Make It a Meal: Serve the salad over mixed greens for a complete meal that’s both filling and nutritious.
  • Pack It Right: If you’re meal prepping, store the salad in airtight containers to keep it fresh.
  • Mind the Mix-Ins: Add-ins like diced apples, grapes, or even cooked bacon can create delicious variations.

Common Mistakes and Troubleshooting

Avoid these pitfalls to ensure your chicken salad turns out perfectly:

  • Overmixing: Be gentle when combining the salad with the dressing to keep the chicken intact.
  • Skipping the Chill: Don’t skip chilling the salad; it’s key for flavor development.
  • Using Too Much Dressing: Start with a little dressing and add more as needed to avoid a soggy salad.
  • Forgetting to Season: Always taste and adjust seasoning before serving; salt can dramatically enhance flavor.

Delicious Variations to Try

Mix things up with these variations:

  • Apple Pecan Chicken Salad: Add diced apples for a sweet crunch.
  • Curried Chicken Salad: Mix in curry powder for an exotic twist on the classic.
  • Greek Chicken Salad: Substitute Greek yogurt for a tangy flavor and add feta cheese and olives.
  • Spicy Chicken Salad: Toss in some diced jalapeños or hot sauce for a spicy kick.

Storage and Make-Ahead Instructions

This chicken salad is perfect for making ahead of time. Here’s how to store it:

  • In the Fridge: Store in an airtight container for up to 3-4 days. The flavors improve over time!
  • Make Ahead: Prepare the salad a day in advance for events or busy weeknights.

Frequently Asked Questions

Here are some common questions about making chicken salad:

  • Can I use other proteins? Yes! This salad works well with turkey, tuna, or chickpeas.
  • Is this chicken salad gluten-free? Absolutely! Just be sure to use gluten-free bread or wraps.
  • How can I make it dairy-free? Substitute Greek yogurt with a dairy-free alternative like coconut yogurt.
  • What can I serve with chicken salad? Serve with fresh veggies, crackers, or on a bed of greens.
  • Can I freeze chicken salad? It’s not recommended to freeze chicken salad, as the texture may change.
  • How do I know when the chicken is cooked? Chicken should reach an internal temperature of 165°F.
  • Can I add nuts? Yes! Nuts like walnuts or almonds can be great additions.
  • How can I make the salad more filling? Add quinoa or cooked pasta to make it heartier.

Nutritional Information and Dietary Adaptations

This creamy cranberry pecan chicken salad is not only delicious but also nutritious. Here’s a quick breakdown:

  • High in Protein: Perfect for keeping you full and satisfied.
  • Low in Carbohydrates: A great option for low-carb diets, especially when served in lettuce wraps.
  • Healthy Fats: The nuts provide heart-healthy fats.
  • Customizable for Dietary Needs: Easily adapt to fit gluten-free, dairy-free, or low-sugar diets.

Equipment Recommendations

To make this salad, you’ll need:

  • Mixing Bowls: A large bowl for combining ingredients and a smaller one for the dressing.
  • Whisk: Essential for blending the dressing smoothly.
  • Measuring Cups and Spoons: For accuracy in your ingredients.
  • Knife and Cutting Board: To chop your ingredients efficiently.

Serving Suggestions

Enjoy your chicken salad in a variety of ways:

  • Lettuce Wraps: For a refreshing, low-carb option, serve it inside large lettuce leaves.
  • On Bread: Create delicious sandwiches or croissants filled with the salad.
  • As a Salad: Serve over a bed of mixed greens for a light meal.
  • With Crackers: Pair with whole-grain crackers for a satisfying snack.

Conclusion

In conclusion, this Quick and Creamy Cranberry Pecan Chicken Salad is a versatile and delicious meal that can be customized to fit your family’s tastes and dietary needs. With its quick prep time and delightful flavors, it’s sure to become a go-to recipe in your home. So go ahead, gather your ingredients, and enjoy a refreshing salad that makes dinner stress-free and enjoyable!

Creamy Cranberry Pecan Chicken Salad

Prep Time 15 minutes
Total Time 15 minutes
Servings 4 servings
Calories 350
A delicious and creamy chicken salad with cranberries and pecans, perfect for a quick lunch or light dinner.

Ingredients

Main

  • 2 cups cooked chicken breast, shredded
  • 1/3 cup dried cranberries
  • 1/3 cup chopped celery
  • 1/2 cup mayonnaise
  • 1 tablespoon plain Greek yogurt
  • 1 tablespoon honey
  • 1 tablespoon apple cider vinegar
  • 1/3 cup pecan halves
  • 1 teaspoon poppy seeds
  • to taste Salt and pepper
  • Green leaf lettuce, for serving
  • Bread or croissants, optional

Instructions 

  • Shred the chicken and chop the celery and pecans.
  • Mix mayonnaise, Greek yogurt, honey, vinegar, poppy seeds, salt, and pepper to make the dressing.
  • Combine chicken, cranberries, celery, and pecans in a bowl, then toss with the dressing.
  • Refrigerate for at least 30 minutes before serving.
  • Serve on lettuce leaves or in bread or croissants.

Notes

For extra flavor, toast the pecans before adding.
Calories: 350kcal
Cost: $15
Course: Salad
Cuisine: American
Keyword: chicken, cranberry, Pecan

Transform Your Weeknight Dinners with This Easy Chicken & Rice Bake

As a busy mom, you know how challenging it can be to whip up a satisfying dinner after a long day. That’s why I’m excited to share my One Dish Chicken & Rice Bake recipe. Not only is it delicious, but it also simplifies dinner prep, allowing you to focus on what really matters—spending quality time with your family. This dish features tender chicken, creamy mushroom soup, and fluffy rice, all baked together in one pan, making cleanup a breeze!

With minimal effort and everyday ingredients, this comforting meal is perfect for those hectic weeknights. Let’s dive into why you’ll love this recipe and how to make it shine in your kitchen.

Why You’ll Love This Recipe

  • Quick Preparation: With just a few simple steps, you can have dinner in the oven in under 15 minutes.
  • One-Pan Wonder: No need for multiple dishes; everything cooks together, saving you time and energy on cleanup.
  • Kid-Friendly Flavor: Creamy mushroom soup and tender chicken are flavors that even picky eaters can’t resist.
  • Customizable Ingredients: Easily swap out chicken for turkey or add your favorite vegetables to the mix.
  • Make-Ahead Option: Prepare it in advance and pop it in the oven when you’re ready for a hassle-free meal.

Ingredient Breakdown

Here’s what you’ll need for this recipe:


Digital Meat Thermometer

★ Recommended Kitchen Tool

Digital Meat Thermometer

Make this recipe even easier with a quality Digital Meat Thermometer — a must-have kitchen staple!


🛒 See Deals on Amazon →

As an Amazon Associate, we earn from qualifying purchases.
  • Campbell’s® Condensed Cream of Mushroom Soup: This provides the creamy base and rich flavor. If you prefer a different flavor, try the cream of chicken or celery soup.
  • Water: Used to cook the rice; feel free to use chicken broth for extra flavor.
  • Long Grain White Rice: A staple that cooks beautifully in the oven. Substitute with brown rice, but adjust the cooking time accordingly.
  • Boneless, Skinless Chicken Breast: Lean protein that cooks quickly. You can use thighs for more flavor or even shredded rotisserie chicken for a shortcut.
  • Paprika: This adds a lovely warmth and color to the chicken. Experiment with smoked paprika for a different twist.

Pro Tips for Perfecting Your Bake

Side view of a steaming casserole dish filled with chicken and rice, garnished with paprika.
  • Evenly Layer Ingredients: Ensure all ingredients are evenly spread in the baking dish for uniform cooking.
  • Season Generously: Don’t skimp on seasoning the chicken; a little salt and pepper make a big difference.
  • Check Chicken Temperature: Use a meat thermometer to ensure the chicken reaches 165°F for safe consumption.
  • Let It Rest: Allow the baked dish to sit for about 10 minutes before serving to let flavors meld.
  • Add Fresh Herbs: Garnish with parsley or thyme for a fresh finish that brightens the dish.
  • Experiment with Add-Ins: Consider adding peas, carrots, or broccoli for extra nutrition and color.
  • Use Foil to Prevent Over-Browning: If the chicken starts to brown too quickly, cover the dish with foil halfway through baking.
  • Double the Batch: Make two and freeze one for a busy night later; it reheats beautifully!

Avoiding Common Mistakes

Even the best cooks can make mistakes! Here are some common pitfalls and how to avoid them:

  • Rice Not Cooking Properly: Ensure you’re using the right rice for this recipe; long-grain white rice is best for even cooking.
  • Overcooking the Chicken: Keep an eye on the baking time; overcooked chicken can become dry and tough.
  • Not Using Enough Liquid: Make sure you have enough liquid so the rice can absorb it fully; adjust if necessary.
  • Skipping the Resting Time: Skipping this step can lead to a soupy dish rather than a cohesive bake.

Delicious Variations to Try

Feeling adventurous? Here are some variations to keep things exciting:

  • Vegetable Lovers’ Bake: Add chopped bell peppers, zucchini, or spinach for a veggie-packed version.
  • Cheesy Chicken & Rice: Stir in a cup of shredded cheese before baking for a melty twist.
  • Southwestern Style: Add black beans and corn, and season with taco seasoning for a fun flavor change.
  • Asian-Inspired: Use soy sauce instead of salt, add sesame oil, and top with green onions for an Asian flair.

Storage and Make-Ahead Instructions

This dish is fantastic for meal prep! Here’s how to store and prepare it in advance:

  • Refrigeration: Store leftovers in an airtight container in the fridge for up to 3 days.
  • Freezing: Freeze portions in freezer-safe containers for up to 3 months. Thaw in the fridge before reheating.
  • Make-Ahead: Prepare the dish up to the baking step, cover, and refrigerate overnight. Bake the next day, adding an extra 5-10 minutes to the cooking time.

Frequently Asked Questions

Here are answers to some common questions about this dish:

  • Can I use brown rice instead of white rice? Yes, but you’ll need to adjust the cooking time and possibly add more liquid.
  • What can I substitute for the mushroom soup? You can use cream of chicken, celery, or any other creamy soup you prefer.
  • Can I make this dish in a slow cooker? Absolutely! Combine all ingredients in your slow cooker and cook on low for 4-6 hours.
  • Is it possible to make this dish dairy-free? Yes, use dairy-free soup options and omit any cheese.
  • What other proteins can I use? Feel free to use turkey, pork, or even tofu for a vegetarian option.
  • How can I add more flavor to the dish? Consider marinating the chicken beforehand or adding spices like garlic powder or onion powder.
  • Can I use frozen chicken? Yes, just ensure it’s fully cooked before serving. Increase baking time accordingly.
  • What sides go well with this dish? A simple green salad or steamed vegetables make great accompaniments.

Nutrition Tips and Dietary Adaptations

This dish can easily align with various dietary needs:

  • Low-Carb Option: Substitute rice with cauliflower rice for a low-carb version.
  • Gluten-Free: Ensure the soup and any seasonings are gluten-free.
  • Heart-Healthy: Use skinless chicken and low-fat soup options to reduce saturated fats.

Essential Equipment Recommendations

To make this recipe, you’ll need:

  • Baking Dish: An 11x8x2-inch dish is ideal for this recipe.
  • Meat Thermometer: To ensure your chicken is cooked to perfection.
  • Mixing Bowl: For combining the soup and rice.

Serving Suggestions

This dish is perfect on its own, but here are a few ideas to elevate your meal:

  • Garnish with Fresh Herbs: A sprinkle of parsley or chives adds freshness.
  • Pair with a Side Salad: A crunchy green salad balances the richness of the bake.
  • Serve with Crusty Bread: A slice of warm bread is great for scooping up the rice.

As you can see, this One Dish Chicken & Rice Bake is more than just a meal; it’s a solution for busy families looking for quick, satisfying dinners. With the flexibility to customize and adapt, it’s a recipe you’ll turn to again and again. So, gather your ingredients and get ready to enjoy a comforting dinner that will quickly become a family favorite!

One Dish Chicken & Rice Bake

Prep Time 10 minutes
Cook Time 45 minutes
Total Time 55 minutes
Servings 4 servings
Calories 450
A simple and hearty baked chicken and rice dish that comes together easily for a satisfying meal.

Ingredients

Canned Goods

  • 1 can Campbell’s® Condensed Cream of Mushroom Soup
  • 1 cup water

Grains

  • 1 cup long grain white rice

Meat

  • 2 pieces boneless, skinless chicken breast
  • 1 teaspoon paprika

Instructions 

  • Preheat oven to 375°F (190°C).
  • Mix soup, water, and rice in an 11x8-inch baking dish.
  • Season chicken with salt, pepper, and paprika; place on rice mixture.
  • Cover and bake for 45 minutes.
  • Let stand 10 minutes, then stir rice and serve.

Notes

Ensure chicken is cooked through before serving.
Calories: 450kcal
Cost: $15
Course: Main Course
Cuisine: American
Keyword: bake, chicken, rice