Author

Emily

Browsing

Effortless Chicken and Dumplings: A Cozy Favorite for Busy Nights

Welcome to a warm and comforting recipe that will quickly become a staple in your home! This quick and simple chicken and dumplings recipe is perfect for those busy weeknights when you want something hearty without spending hours in the kitchen. With just a handful of ingredients, you can whip up a satisfying meal that will please even the pickiest of eaters.

Let’s dive into why this recipe is not only easy but also incredibly delicious!

Why You’ll Love This Recipe

  • Speedy Preparation: Ready in under 30 minutes, perfect for a weeknight dinner.
  • Minimal Ingredients: Uses just four main ingredients that you likely already have in your pantry.
  • Kid-Friendly: A comforting dish that appeals to both kids and adults alike.
  • Versatile: Easily customize with your favorite vegetables or proteins, like rotisserie chicken.
  • Freezer-Friendly: Make a large batch and store leftovers for an easy meal later.

Ingredients Breakdown

Here’s what you’ll need to create this delightful dish:


Digital Meat Thermometer

★ Recommended Kitchen Tool

Digital Meat Thermometer

Make this recipe even easier with a quality Digital Meat Thermometer — a must-have kitchen staple!


🛒 See Deals on Amazon →

As an Amazon Associate, we earn from qualifying purchases.
  • 2.25 cups biscuit baking mix: This serves as the base for your dumplings. You can also use store-bought dumpling mix for convenience.
  • 0.67 cup milk: Whole milk is preferred for creaminess, but you can substitute with almond milk or any non-dairy alternative.
  • 2 (14-ounce) cans chicken broth: A rich stock adds depth to the dish. Feel free to use homemade chicken stock for extra flavor.
  • 2 (10-ounce) cans chunk chicken, drained: For speed, use canned chicken or shredded rotisserie chicken. This saves you time and effort!

Step-by-Step Instructions
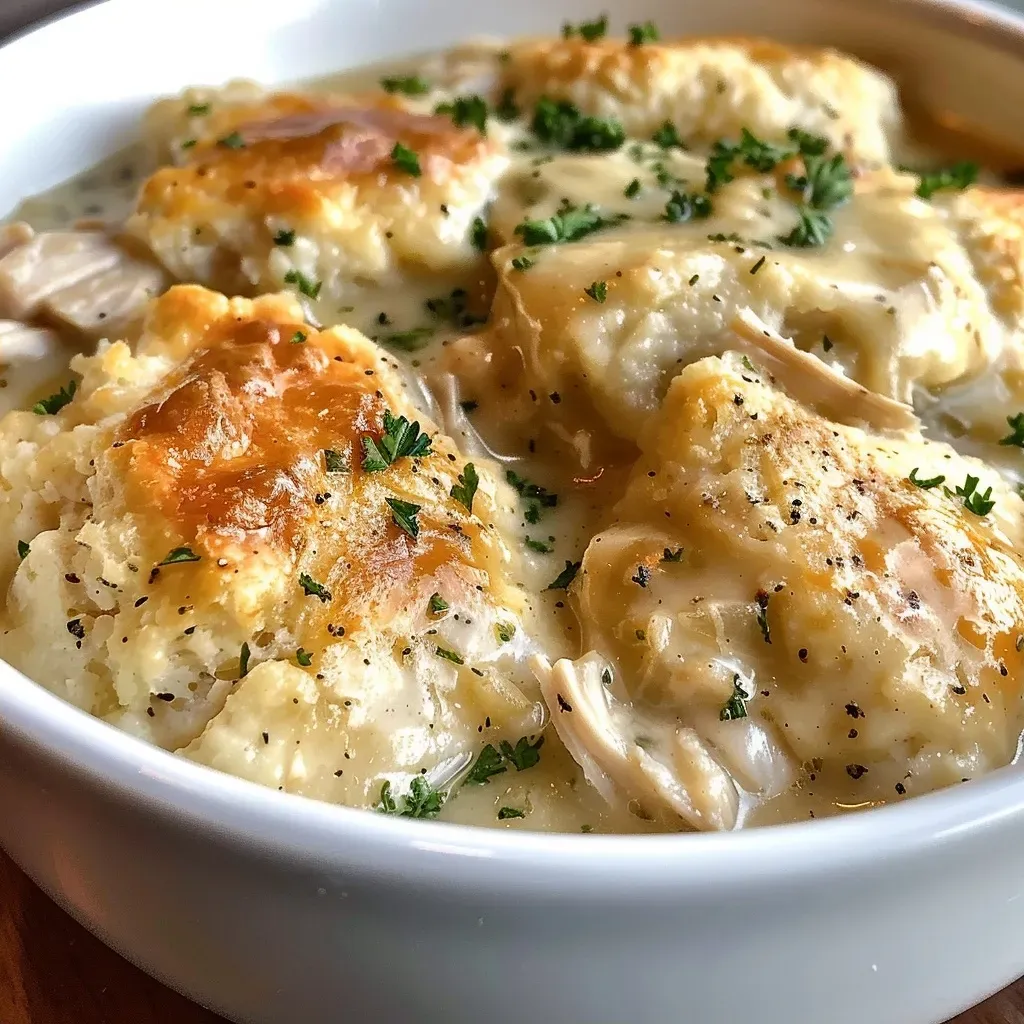
Close-up of a steaming bowl of chicken and dumplings with a rich broth.

Follow these simple steps to create your chicken and dumplings:

  • Combine Ingredients: Stir together the biscuit mix and milk in a medium bowl until a dough forms. Set it aside.
  • Prepare Broth: Pour the chicken broth into a saucepan along with the drained chicken. Bring it to a boil over medium heat.
  • Make Dumplings: Take a handful of biscuit dough, flatten it slightly, and tear off 1- to 2-inch pieces. Carefully drop them into the boiling broth, ensuring they are fully immersed.
  • Cook: Cover and simmer, stirring occasionally, for about 10 minutes until the dumplings are cooked through and fluffy.

Pro Tips for Perfect Chicken and Dumplings

  • Use Fresh Ingredients: For the best flavor, use fresh herbs like thyme or parsley to elevate your dish.
  • Don’t Overcrowd the Broth: Make sure the dumplings have enough space to expand while cooking.
  • Adjust Consistency: If the broth is too thick, add a bit more chicken stock or water to reach your desired consistency.
  • Try Adding Vegetables: For extra nutrition, stir in some frozen peas, carrots, or butternut squash when adding the dumplings.
  • Season to Taste: Don’t forget to taste and adjust with salt and pepper as needed!
  • Make Ahead: Prepare the dumpling dough in advance and refrigerate it until ready to use for quick assembly.
  • Garnish: A sprinkle of fresh herbs or a drizzle of heavy cream can add a beautiful finishing touch to your dish.
  • Leftover Magic: This dish can be easily reheated and tastes even better the next day!

Common Mistakes and Troubleshooting

Even the best cooks encounter hiccups! Here are some common issues and how to prevent them:

  • Dense Dumplings: If your dumplings turn out tough, it may be due to overmixing the dough. Mix until just combined for fluffy results.
  • Burnt Broth: Keep an eye on the broth while it’s cooking. Stir occasionally to prevent sticking and burning.
  • Too Much Broth: If your soup seems too watery, allow it to simmer uncovered for a few minutes to reduce the liquid.
  • Flavorless Dish: Always taste before serving. Adjust seasoning with salt, pepper, and herbs as desired.

Delicious Variations

Feel free to customize this recipe to suit your preferences:

  • Vegetable Delight: Add chopped carrots, celery, and peas for a hearty vegetable chicken and dumplings.
  • Spicy Kick: Stir in some diced jalapeños or a dash of cayenne pepper for a spicy twist.
  • Herbed Chicken: Incorporate fresh herbs like rosemary or tarragon for a fragrant flavor boost.
  • Creamy Version: Add a splash of heavy cream to the broth for a richer, creamier soup.

Storage and Make-Ahead Instructions

This dish is perfect for meal prep! Here’s how to store and reheat:

  • Refrigerate: Store leftovers in an airtight container in the fridge for up to 3 days.
  • Freeze: For longer storage, freeze in individual portions for up to 3 months. Reheat directly from the freezer.
  • Reheat: Warm gently on the stovetop, adding a little extra chicken stock if the dumplings have absorbed too much liquid.

FAQs About Chicken and Dumplings

  • Can I use homemade chicken stock? Yes! Homemade stock adds great flavor to the dish.
  • Can I make this recipe gluten-free? Absolutely! Substitute the biscuit mix with a gluten-free blend.
  • How do I make dumplings from scratch? You can make your own dumpling dough using flour, baking powder, and milk.
  • What can I add to enhance flavor? Fresh herbs, spices, and even a splash of lemon juice can brighten the dish.
  • Is this recipe suitable for freezing? Yes, it’s great for freezing, but the dumplings may change texture slightly.
  • How can I make it healthier? Use low-sodium chicken broth and add more vegetables for extra nutrition.
  • Can I use leftovers to make this dish? Absolutely! Shredded rotisserie chicken works great in this recipe.
  • What’s the best way to serve chicken and dumplings? Serve hot with a sprinkle of fresh parsley on top for a pop of color!

Nutrition Tips and Dietary Adaptations

This dish can be adjusted to meet various dietary needs:

  • Low-Fat Option: Use low-fat milk and reduce the amount of broth to create a lighter version.
  • Dairy-Free: Substitute with almond or oat milk and use dairy-free biscuit mix.
  • High-Protein: Incorporate additional protein like beans or lentils for a heartier meal.

Essential Equipment Recommendations

To make this recipe, you’ll need:

  • Medium Mixing Bowl: For combining the biscuit mix and milk.
  • Large Saucepan: Essential for cooking the broth and dumplings.
  • Wooden Spoon: Great for stirring without damaging your cookware.

Serving Suggestions

Chicken and dumplings is a meal on its own, but you can enhance the dining experience:

  • Pair with Salad: A fresh green salad adds a light contrast to the hearty meal.
  • Crusty Bread: Serve with crusty bread to soak up the delicious broth.
  • Wine Pairing: A light white wine like Sauvignon Blanc complements the flavors beautifully.

Conclusion

And there you have it! A simple, satisfying recipe for chicken and dumplings that’s perfect for any night of the week. With its ease of preparation and comforting flavors, it’s sure to become a family favorite. So gather your ingredients, get cooking, and enjoy a cozy meal that will warm your heart and fill your belly. Happy cooking!
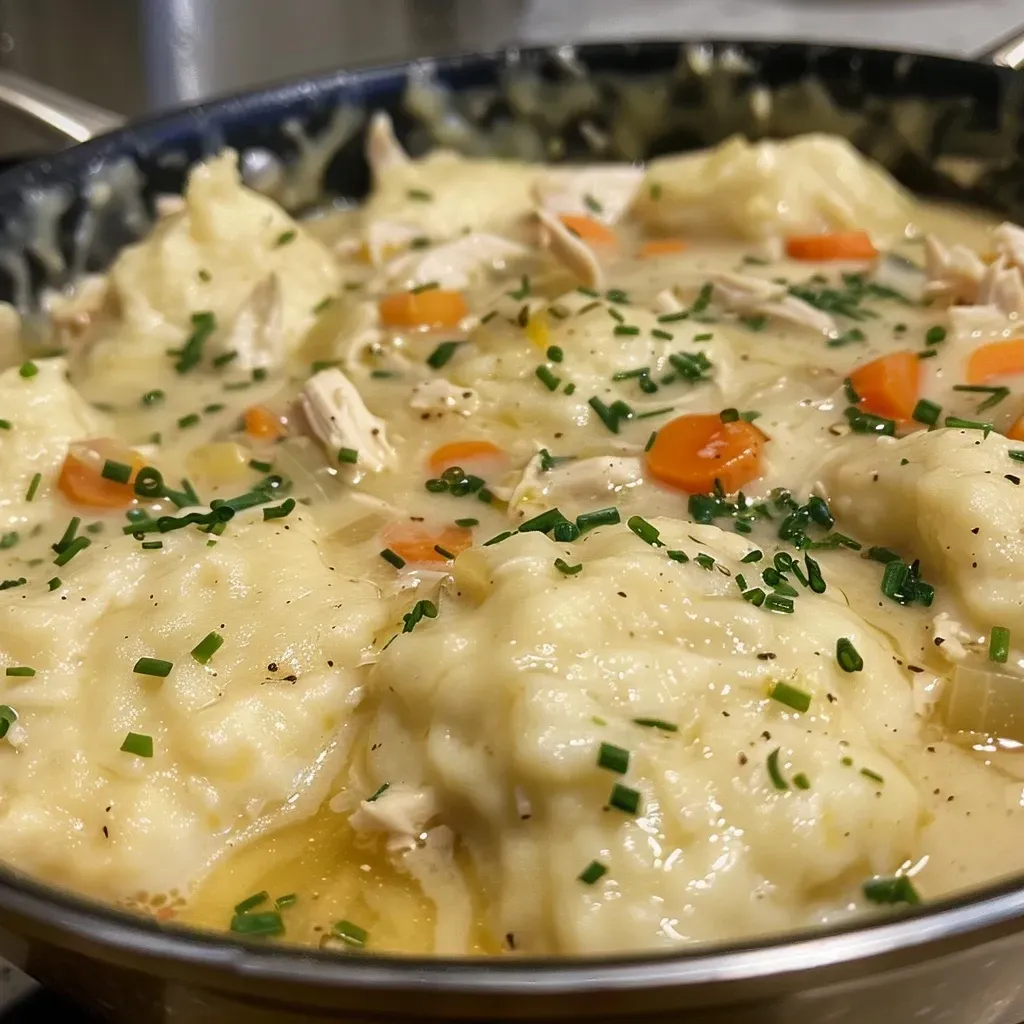
Quick and Super Easy Chicken and Dumplings

Prep Time 10 minutes
Cook Time 15 minutes
Total Time 25 minutes
Servings 4 servings
Calories 350
A quick and comforting dish combining tender chicken, flavorful broth, and fluffy dumplings in just a few simple steps.

Ingredients

Dough and Liquids

  • 2.25 cups biscuit baking mix
  • 0.66666668653488 cup milk

Broth and Chicken

  • 2 14 ounce cans chicken broth
  • 2 10 ounce cans chunk chicken, drained

Instructions 

  • Mix biscuit baking mix and milk until dough forms; set aside.
  • Bring chicken broth and chicken to a boil in a saucepan.
  • Tear off small pieces of dough and drop into boiling broth; stir to cover dumplings.
  • Cover and simmer for 10 minutes until dumplings are cooked through.

Notes

Ensure dumplings are fully immersed for even cooking.
Calories: 350kcal
Cost: $12
Course: Main Course
Cuisine: American
Keyword: chicken, dumplings, quick

Elevate Your Dinner Routine with Tuscan Chicken

Are you tired of the same old chicken recipes? If you’re looking for a quick, flavorful, and satisfying meal that everyone in the family will love, you’ve come to the right place! This Tuscan Chicken Sheet Pan Supper is not just another recipe; it’s a vibrant, one-pan wonder that transforms humble chicken breasts into a culinary delight. Packed with juicy chicken, fresh Roma tomatoes, and crisp green beans, all drizzled with a zesty balsamic dressing, this dish is perfect for busy weeknights.

In this article, we’ll explore everything you need to know about making this easy dinner, from the ingredients and preparation steps to expert tips, variations, and more. So, let’s dive into the flavors of Tuscany and turn your kitchen into a gourmet paradise!

Why You’ll Love This Recipe

  • Quick Preparation: This Tuscan chicken recipe is super easy to prepare, taking less than 15 minutes of hands-on time.
  • One-Pan Wonder: Minimal cleanup is required, as everything cooks together on a single sheet pan.
  • Flavorful Marinade: The combination of olive oil, balsamic vinegar, garlic, and herbs infuses the chicken and veggies with incredible flavor.
  • Healthy and Nutritious: Packed with protein and vegetables, this meal is both satisfying and nutritious.
  • Versatile Ingredients: You can easily substitute ingredients based on what you have on hand or what’s in season.

Ingredient Breakdown

Let’s take a closer look at the ingredients that make this recipe shine:


Digital Meat Thermometer

★ Recommended Kitchen Tool

Digital Meat Thermometer

Make this recipe even easier with a quality Digital Meat Thermometer — a must-have kitchen staple!


🛒 Shop This Tool →

As an Amazon Associate, we earn from qualifying purchases.
  • Chicken Breasts: Use 24 ounces of boneless, skinless chicken breasts. You can substitute with thighs for a juicier option.
  • Roma Tomatoes: Six large Roma tomatoes provide sweetness and acidity. Feel free to use cherry tomatoes if you prefer.
  • Green Beans: Fresh green beans add a nice crunch, but asparagus or zucchini work well too.
  • Balsamic Vinegar: This adds depth of flavor. You can replace it with red wine vinegar if necessary.
  • Garlic: Fresh minced garlic offers robust flavor. If you’re in a pinch, garlic powder can be used.
  • Herbs: Dried parsley and basil enhance the Tuscan flavor profile. Fresh herbs can be substituted for a more vibrant taste.
  • Parmesan Cheese: A sprinkle of grated Parmesan adds a delicious, savory finish. Nutritional yeast can be a great dairy-free alternative.

Pro Tips for Perfect Tuscan Chicken

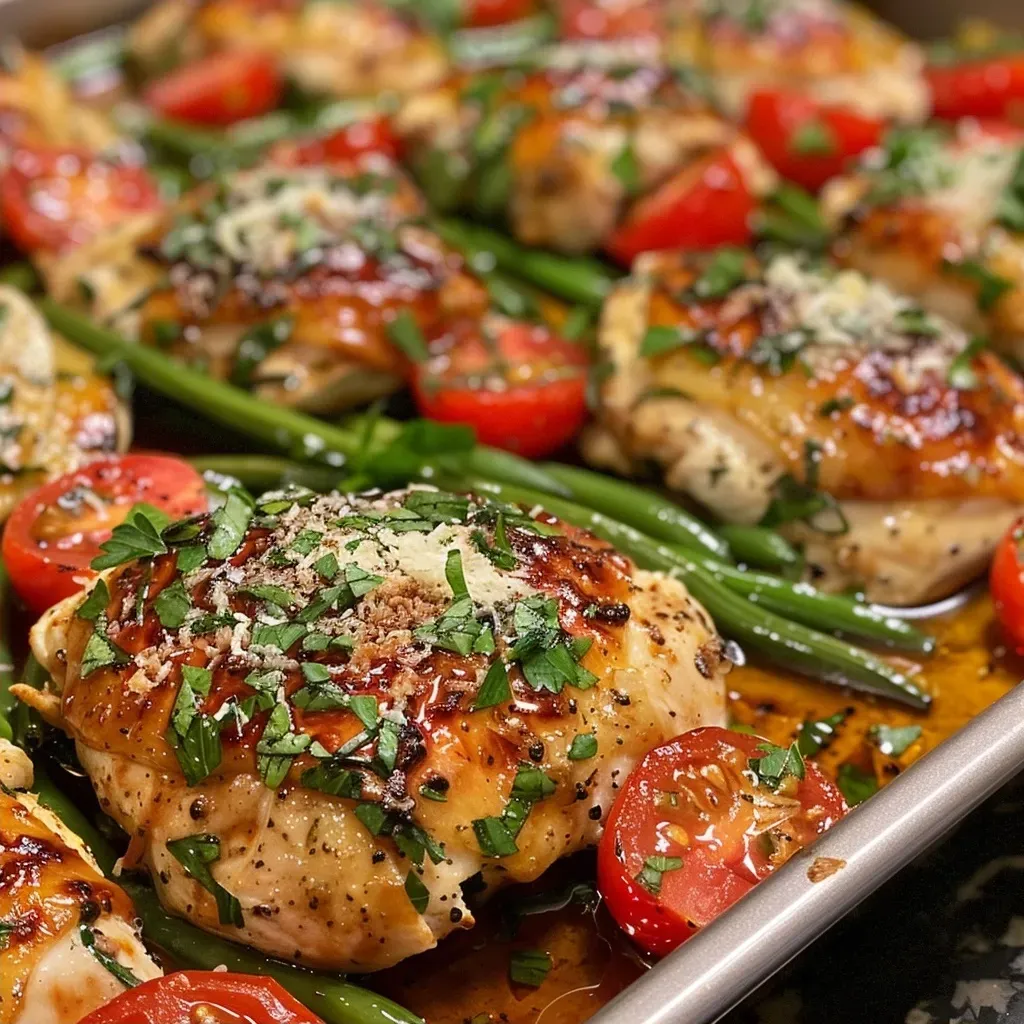
A mouthwatering Tuscan Chicken Sheet Pan Supper featuring juicy chicken, vibrant tomatoes, and green beans.

To ensure your sheet pan supper turns out perfectly every time, consider these expert insights:

  • Marinate for Maximum Flavor: Allow the chicken and veggies to marinate for at least 30 minutes, or up to 2 hours, for deeper flavor.
  • Use Parchment Paper: Lining your sheet pan with parchment paper makes for easier cleanup and prevents sticking.
  • Check Chicken Temperature: Ensure the chicken reaches an internal temperature of 165°F for safe consumption.
  • Don’t Overcrowd the Pan: Spread the chicken and vegetables out to allow even roasting and caramelization.
  • Shake the Pan: Gently shake the pan halfway through cooking to ensure even cooking and browning.
  • Let it Rest: Allow the chicken to rest for a few minutes after removing from the oven for juicier results.
  • Customize Your Vegetables: Feel free to swap in seasonal vegetables for variety throughout the year.
  • Garnish for Presentation: A sprinkle of fresh parsley right before serving brightens up the dish.

Avoid Common Mistakes

Here are some common pitfalls to avoid when making this Tuscan chicken:

  • Skipping the Marinade: Don’t rush this step! Marinating is crucial for flavor.
  • Overcooking the Chicken: Keep an eye on your chicken to prevent dryness; use a meat thermometer for accuracy.
  • Not Preheating the Oven: Always preheat your oven to ensure even cooking from the start.
  • Using Old Ingredients: Fresh ingredients yield the best flavors. Check your pantry and fridge!

Variations of Tuscan Chicken

If you’re feeling adventurous, you can switch up this recipe in a few different ways:

  • Italian Herb Chicken: Add Italian seasoning for an extra flavor boost.
  • Spicy Tuscan Chicken: Incorporate red pepper flakes into the marinade for some heat.
  • Vegetarian Option: Replace chicken with firm tofu or tempeh, marinating and roasting the same way.
  • Cheesy Goodness: Mix in a variety of cheeses, like mozzarella or feta, for a creamy touch.

Storage and Make-Ahead Instructions

This Tuscan chicken is perfect for meal prep! Here’s how to store and reheat it:

  • Storage: Store leftovers in an airtight container in the refrigerator for up to 3 days.
  • Freezing: Freeze marinated chicken and veggies in a zip-top bag for up to 3 months. Thaw before cooking.
  • Reheating: Reheat in the oven at 350°F until warmed through, or use a microwave for convenience.

Frequently Asked Questions

  • Can I use chicken thighs instead of breasts? Yes, chicken thighs will provide a juicier texture.
  • What can I substitute for green beans? Asparagus, zucchini, or bell peppers work beautifully.
  • How can I make this dish gluten-free? Ensure your balsamic vinegar is gluten-free; the rest of the ingredients are naturally gluten-free.
  • Can I add other spices? Absolutely! Feel free to add your favorite spices to the marinade.
  • How long does it take to cook? The chicken and veggies will roast for about 25 minutes at 425°F.
  • Can I make this ahead of time? Yes! You can marinate the chicken and vegetables several hours in advance.
  • What’s the best way to serve this? This dish pairs wonderfully with a side salad or over a bed of quinoa or rice.
  • Is this a good dish for meal prep? It’s perfect for meal prep! Just store in individual portions.

Nutritional Tips and Dietary Adaptations

To make this recipe fit various dietary needs:

  • Low-Carb: Pair it with a salad instead of grains.
  • High Protein: Increase chicken servings for a protein boost.
  • Dairy-Free: Omit the Parmesan or use a dairy-free alternative.
  • Whole30 Compliant: Ensure all marinades and ingredients are compliant with Whole30 standards.

Essential Equipment for Your Tuscan Chicken

  • Sheet Pan: A large, sturdy sheet pan is essential for even cooking.
  • Mixing Bowl: Use a bowl for mixing your marinade.
  • Meat Thermometer: This tool ensures your chicken is cooked perfectly.
  • Parchment Paper: For easy cleanup and non-stick cooking.

Serving Suggestions

To complete your Tuscan chicken meal, consider these serving ideas:

  • Fresh Salad: A simple arugula or mixed greens salad with a lemon vinaigrette complements the dish beautifully.
  • Crusty Bread: Serve with a loaf of fresh Italian bread for soaking up the delicious juices.
  • Wine Pairing: A light Pinot Grigio pairs wonderfully with the flavors of the chicken and vegetables.
  • Quinoa or Rice: Serve over a bed of quinoa or brown rice to make it a heartier meal.

Wrap-Up: Your New Favorite Dinner Awaits!

The Tuscan Chicken Sheet Pan Supper is not only a feast for the taste buds but also a lifesaver for busy weeknights. With its rich flavors, ease of preparation, and minimal cleanup, it’s destined to become a staple in your dinner rotation. So, gather your ingredients and get ready to impress your family with this delightful dish. Happy cooking!

Tuscan Chicken Sheet Pan Supper

Prep Time 10 minutes
Cook Time 25 minutes
Total Time 35 minutes
Servings 4 servings
Calories 550
A flavorful and easy sheet pan dinner featuring chicken, tomatoes, green beans, and Parmesan cheese, perfect for a quick weeknight meal.

Ingredients

Marinade

  • 1 cup olive oil
  • ⅓ cup balsamic vinegar
  • 5 cloves garlic, minced
  • 1 teaspoon dried parsley
  • 1 teaspoon dried basil
  • 1 teaspoon Kosher salt
  • 1 teaspoon black pepper
  • 24 ounces boneless, skinless chicken breasts
  • 6 large Roma tomatoes, halved
  • 16 ounces green beans, ends trimmed
  • ½ cup grated Parmesan cheese
  • 2 tablespoons minced fresh parsley

Instructions 

  • Combine olive oil, balsamic, garlic, parsley, basil, salt, and pepper. Whisk to emulsify.
  • Place chicken in a zip bag with half the marinade; seal and set aside.
  • Put tomatoes and green beans in another zip bag with remaining marinade; seal and refrigerate for up to 2 hours.
  • Preheat oven to 425°F. Arrange chicken and veggies on a sheet pan, discard excess marinade, and line with parchment if desired.
  • Roast for 25 minutes, then sprinkle with Parmesan and parsley before serving.

Notes

Marinate the chicken and vegetables for better flavor, and line the sheet pan for easy cleanup.
Calories: 550kcal
Cost: $15
Course: dinner
Cuisine: Italian
Keyword: chicken

Transform Your Dinner with This Easy Lemon Chicken Casserole

If you’re looking for a delicious, comforting meal that’s perfect for busy weeknights, look no further than this Easy Lemon Chicken Casserole. It’s the ultimate one-pan dish that turns simple ingredients into a flavorful feast. With its bright flavors and easy preparation, you’ll find that this recipe is not just a meal—it’s a delightful experience. In this article, we’ll explore everything you need to know to create this delectable casserole, giving you tips, variations, and insights to make it your own.

Why You’ll Love This Recipe

This Easy Lemon Chicken Casserole isn’t just a meal; it’s a solution for your weeknight dinners. Here are five reasons why this dish will become a staple in your home:

  • Effortless Preparation: With everything cooked in one baking dish, cleanup is a breeze. Just mix and bake!
  • Bright & Fresh Flavors: The combination of lemon, garlic, and herbs adds a refreshing twist that elevates simple ingredients.
  • Family-Friendly: This casserole is perfect for all ages, appealing even to picky eaters with its balanced flavors.
  • Versatile Ingredients: You can easily substitute ingredients based on what you have, making it adaptable to your pantry.
  • Quick Cooking Time: Ready in just about 35 minutes, this dish is ideal for those hectic evenings when time is short.

Ingredients You’ll Need

To create this mouthwatering Easy Lemon Chicken Casserole, gather the following ingredients:


Digital Meat Thermometer

★ Recommended Kitchen Tool

Digital Meat Thermometer

Make this recipe even easier with a quality Digital Meat Thermometer — a must-have kitchen staple!


🛒 View on Amazon →

As an Amazon Associate, we earn from qualifying purchases.
  • 1 pound cubed boneless skinless chicken breast
  • 2 1/2 cups chicken broth
  • 1 cup white rice (you can substitute with brown rice, but adjust cooking time)
  • 3 tablespoons lemon juice
  • 3 tablespoons melted butter
  • 1 tablespoon lemon zest
  • 1 tablespoon minced garlic
  • 1 teaspoon onion powder
  • 1 teaspoon dried basil
  • 1/2 teaspoon pepper
  • 1/2 teaspoon thyme
  • Thin slices from 1 lemon, for topping
  • 1 teaspoon salt
  • 2 teaspoons lemon pepper

Feel free to switch out the chicken for turkey or even tofu for a vegetarian option. You can also use low-sodium broth to control the salt content.

How to Make Easy Lemon Chicken Casserole

Close-up view of a lemon chicken casserole, showcasing its golden, bubbling top with lemon slices.

Follow these steps to create your casserole:

  1. Preheat your oven to 375°F. Spray a 9×13-inch baking dish with non-stick cooking spray for easy cleanup.
  2. Combine the base: In the prepared baking dish, mix the chicken broth, white rice, lemon juice, melted butter, lemon zest, minced garlic, onion powder, part of the salt, dried basil, pepper, and thyme until evenly combined.
  3. Prepare the chicken: Season the cubed chicken breast with the remaining salt and lemon pepper. Distribute the seasoned chicken evenly over the mixture in the baking dish.
  4. Bake the casserole: Place the baking dish in the preheated oven and bake for 30 minutes, allowing the rice to absorb the flavors and the chicken to cook through.
  5. Add lemon slices: After 30 minutes, carefully place the lemon slices over the top of the casserole. Return the dish to the oven for an additional 5 minutes, or until the rice is tender and the chicken is fully cooked.
  6. Rest before serving: Remove the casserole from the oven and let it rest for about 5 minutes to allow the flavors to meld, making it easier to serve. Enjoy warm!

Pro Tips for the Perfect Casserole

Here are some expert insights to ensure your Easy Lemon Chicken Casserole turns out perfectly every time:

  • Use leftover chicken: To save time, use pre-cooked or rotisserie chicken. Just adjust baking time to ensure the casserole is heated through.
  • Don’t skip the resting time: Allowing the casserole to sit for a few minutes after baking helps the flavors meld beautifully.
  • Check the rice: Make sure the rice is fully cooked before serving. If it seems undercooked, return it to the oven with a splash of additional broth.
  • Experiment with flavors: Add different herbs like rosemary or parsley for a unique twist or use different citrus like lime for a zesty variation.
  • Make it creamy: Stir in a cup of sour cream or cream cheese before baking for a richer texture.
  • Perfect for meal prep: This casserole keeps well in the fridge, making it a great option for meal prep.
  • Serve with a salad: Pair it with a fresh green salad or steamed vegetables for a complete meal.
  • Consider cooking in stages: If time allows, cook the rice separately for a fluffier texture before combining with the chicken mixture.

Common Mistakes and Troubleshooting

Even seasoned cooks can run into challenges. Here’s how to avoid common pitfalls:

  • Overcooking the chicken: Ensure your oven temperature is accurate to prevent dry chicken. A meat thermometer should read 165°F.
  • Undercooked rice: If you find the rice is still crunchy, add a bit more broth and return to the oven.
  • Flavors not melding: Letting the casserole rest is key to allowing flavors to blend beautifully.
  • Soggy casserole: Ensure you’re measuring the chicken broth accurately. Too much liquid can lead to a mushy dish.

Delicious Variations to Try

Want to mix things up? Here are four tasty variations to elevate your casserole:

  • Mediterranean Twist: Add olives, sun-dried tomatoes, and feta cheese for a Mediterranean flair.
  • Veggie-Packed Version: Incorporate diced bell peppers, zucchini, and spinach for a nutritious boost.
  • Cheesy Chicken Casserole: Stir in a cup of shredded cheese (like mozzarella or cheddar) before baking for a creamy, cheesy delight.
  • Herb-Infused Delight: Use fresh herbs like dill or thyme to enhance the flavor profile.

Storage and Make-Ahead Instructions

This casserole is perfect for make-ahead meals! Here’s how to store and reheat it:

  • Refrigerate: Store leftovers in an airtight container in the fridge for up to 3-4 days.
  • Freeze: You can freeze the unbaked casserole for up to 3 months. Just add an extra 10-15 minutes of baking time if cooking from frozen.
  • Reheat: To reheat, place in the oven at 350°F until warmed through, about 20-25 minutes.

Comprehensive FAQ

Here are some frequently asked questions related to this Easy Lemon Chicken Casserole:

  • Can I use brown rice instead of white rice? Yes, but you’ll need to adjust the cooking time to ensure the brown rice cooks fully.
  • What can I substitute for chicken broth? Vegetable broth or water can be used in a pinch, but chicken broth adds more flavor.
  • Is this dish gluten-free? Yes, as long as you use gluten-free chicken broth and rice.
  • Can I make this casserole without chicken? Absolutely! Substitute with beans or lentils for a vegetarian option.
  • How can I make this casserole spicier? Add red pepper flakes or diced jalapeños to the mixture for a kick!
  • What’s the best way to serve this dish? It pairs well with a fresh salad or roasted vegetables for a balanced meal.
  • Can I use frozen chicken? Yes, but ensure it’s thawed before preparing the casserole for even cooking.
  • How do I know when the casserole is done? The chicken should be cooked to an internal temperature of 165°F, and the rice should be tender.

Nutrition Tips and Dietary Adaptations

To make this casserole even healthier, consider these tips:

  • Increase vegetables: Incorporate more veggies for added fiber and nutrients.
  • Choose whole grain: Opt for brown rice or quinoa for a whole grain option.
  • Reduce fat: Use less butter or substitute with olive oil for a heart-healthy fat.
  • Lower sodium: Use low-sodium broth and season to taste.

Essential Equipment for Success

Make sure you have the following tools ready for a smooth cooking experience:

  • 9×13-inch baking dish: Ideal for even cooking and easy serving.
  • Mixing bowl: For combining ingredients before baking.
  • Measuring cups and spoons: To ensure accurate ingredient proportions.
  • Meat thermometer: To check the chicken’s doneness.

Serving Suggestions

To complete your meal, consider pairing your Easy Lemon Chicken Casserole with:

  • Fresh green salad: A simple green salad with vinaigrette complements the richness of the casserole.
  • Garlic bread: Crunchy garlic bread is a delightful side that everyone loves.
  • Steamed vegetables: Broccoli or asparagus add color and nutrition to your plate.
  • Fruit salad: A light fruit salad can provide a refreshing contrast to the savory casserole.

With this comprehensive guide, you’re now equipped to create an Easy Lemon Chicken Casserole that not only satisfies the whole family but also brings joy to your dinner table. Happy cooking!

Easy Lemon Chicken Casserole Recipe

Prep Time 10 minutes
Cook Time 35 minutes
Total Time 45 minutes
Servings 4 servings
Calories 450
A flavorful and easy-to-make casserole combining tender chicken, rice, and zesty lemon for a comforting meal.

Ingredients

Chicken

  • 1 pound cubed boneless skinless chicken breast
  • 2.5 cups chicken broth
  • 1 cup white rice
  • 3 tablespoons lemon juice
  • 3 tablespoons melted butter
  • 1 tablespoon lemon zest
  • 1 tablespoon minced garlic
  • 1 teaspoon onion powder
  • 1 teaspoon dried basil
  • 0.5 teaspoon pepper
  • 0.5 teaspoon thyme
  • 1 lemon thin slices from 1 lemon, for topping
  • 1 teaspoon salt
  • 2 teaspoons lemon pepper

Instructions 

  • Preheat oven to 375°F. Spray baking dish with non-stick spray.
  • Mix chicken broth, rice, lemon juice, butter, lemon zest, garlic, onion powder, salt, basil, pepper, and thyme in the dish.
  • Season chicken with salt and lemon pepper, then layer over the mixture.
  • Bake for 30 minutes, then add lemon slices on top and bake 5 more minutes.
  • Rest for 5 minutes before serving. Enjoy!

Notes

Use fresh lemon slices for best flavor.
Calories: 450kcal
Cost: $15
Course: Main Course
Cuisine: American
Keyword: casserole, chicken, lemon

Whip Up Comfort: Your Ultimate Guide to Easy Chicken and Dumplings

When the weather turns chilly and the family is craving something warm and filling, there’s nothing quite like a bowl of easy chicken and dumplings. This classic dish is not only a comfort food staple; it’s also incredibly easy to make with just a handful of ingredients. In this comprehensive guide, we’ll break down everything you need to know to create a delicious and satisfying bowl of chicken and dumplings that will leave your family asking for seconds!

Why You’ll Love This Recipe

This recipe for chicken and dumplings is designed with busy weeknights in mind. Here are five reasons why it’s a must-try:

  • Quick and Easy: With straightforward steps, you can have dinner on the table in under an hour, perfect for those hectic evenings.
  • Family-Friendly: This dish is a hit with both picky eaters and food lovers, making it a great choice for family dinners.
  • Comforting Flavors: The combination of tender chicken, hearty vegetables, and fluffy dumplings creates a warm, satisfying meal.
  • Flexible Ingredients: Use what you have on hand! This recipe is adaptable to include different vegetables or proteins.
  • Meal Prep Friendly: Make it ahead of time or store leftovers for easy lunches throughout the week.

Ingredients Breakdown

Here’s what you need to gather for this delicious chicken and dumplings recipe:


Nonstick Grill Pan

★ Recommended Kitchen Tool

Nonstick Grill Pan

Make this recipe even easier with a quality Nonstick Grill Pan — a must-have kitchen staple!


🛒 Check Price on Amazon →

As an Amazon Associate, we earn from qualifying purchases.
  • 2 tbsp. olive oil: For sautéing the chicken and vegetables.
  • 1 1/2 lb. boneless, skinless chicken thighs: Juicy and flavorful, perfect for this dish.
  • Kosher salt and freshly ground black pepper: Essential for seasoning.
  • 1 medium yellow onion, chopped: Adds sweetness and depth to the soup.
  • 2 carrots, chopped: For a touch of sweetness and color.
  • 2 celery stalks, chopped: Provides a nice crunch and flavor.
  • 2 bay leaves: Adds a subtle aromatic flavor.
  • 1 sprig thyme: Fresh herbs elevate the dish.
  • 1 (8-ounce) package sliced mushrooms: For an earthy flavor.
  • 3 tbsp. all-purpose flour: To thicken the broth.
  • 2 (32-ounce) containers chicken stock: The base for your soup.
  • 1 1/2 c. all-purpose flour, spooned and leveled: For the dumplings.
  • 1 1/2 tsp. baking powder: Helps the dumplings rise.
  • 1 tbsp. fresh thyme: Enhances freshness in the dumplings.
  • 1 tsp. kosher salt: For seasoning the dumpling batter.
  • 3/4 c. buttermilk: Makes the dumplings fluffy.
  • 1 large egg: Adds richness to the dumpling dough.

Pro Tips for Perfection

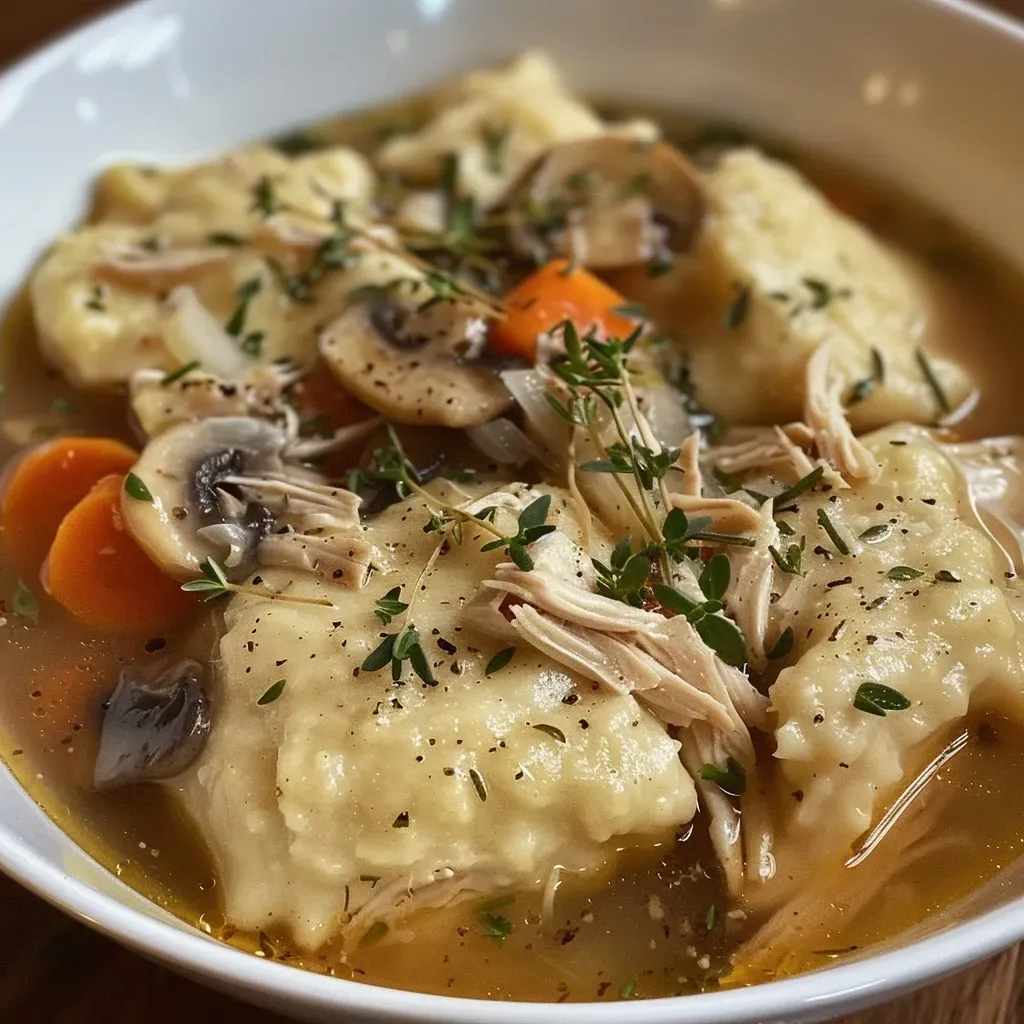
Close-up view of hearty chicken and dumplings in a bowl, showcasing tender chicken and fluffy dumplings.

Want to take your chicken and dumplings to the next level? Here are some expert tips:

  • Don’t Overcook the Chicken: Keep an eye on your chicken while cooking to ensure it stays juicy and tender.
  • Use Fresh Herbs: Fresh thyme and bay leaves impart a deeper flavor than dried versions.
  • Make Your Own Stock: If time allows, homemade chicken stock will elevate the taste significantly.
  • Adjust Dumpling Thickness: For a lighter dumpling, add more buttermilk; for a denser one, add a bit more flour.
  • Simmer, Don’t Boil: Keep the soup at a gentle simmer to allow the dumplings to cook evenly.
  • Let It Rest: Allow the dish to sit for a few minutes after cooking. It helps the flavors meld beautifully.
  • Experiment with Veggies: Feel free to add peas, corn, or green beans for extra nutrition and color.
  • Save Leftover Chicken: If you have leftover rotisserie chicken, use it to save time!

Common Mistakes and Troubleshooting

Even the best cooks can face challenges. Here are solutions for common mistakes:

  • Dumplings Are Too Dense: This usually means too much flour was added. Be sure to measure accurately.
  • Broth Is Too Thin: If your soup is too watery, let it simmer longer to reduce and thicken.
  • Flavor Is Lacking: Always taste and adjust seasoning as needed—don’t be afraid to add more salt or herbs!
  • Burning Ingredients: If cooking on high heat, watch carefully to avoid burning the bottom of the pot.

Variations to Try

Want to mix things up? Here are some delicious variations to consider:

  • Herbed Dumplings: Add a tablespoon of dill or parsley to the dumpling mix for an extra layer of flavor.
  • Spicy Chicken and Dumplings: Incorporate diced jalapeños or a dash of hot sauce for a kick.
  • Creamy Chicken and Dumplings: Stir in a cup of heavy cream just before serving for a richer broth.
  • Vegetarian Option: Substitute the chicken with hearty vegetables like zucchini and chickpeas for a plant-based twist.

Storage and Make-Ahead Instructions

This recipe is perfect for meal prep! Here’s how to store and reheat:

  • Storing Leftovers: Keep leftovers in an airtight container in the fridge for up to 3 days.
  • Freezing: The soup can be frozen without the dumplings for up to 3 months. Add dumplings fresh when reheating.
  • Reheating: Warm in a pot over medium heat, adding a splash of broth or water if it thickens too much.
  • Make-Ahead Tips: Prepare the soup base a day ahead, then add dumplings just before serving for the best texture.

Frequently Asked Questions

Here are some common questions about chicken and dumplings:

  • Can I use frozen vegetables? Absolutely! Just add them during the last few minutes of cooking.
  • What’s the best chicken to use? Boneless, skinless chicken thighs are ideal due to their flavor and moisture, but breasts work too.
  • Can I make this gluten-free? Yes! Substitute all-purpose flour with a gluten-free blend and use gluten-free baking powder.
  • How do I know when dumplings are done? They should be fluffy and cooked through, usually after about 15-20 minutes of simmering.
  • Can I add cheese? For a cheesy twist, stir in shredded cheese just before serving!
  • Is this dish spicy? It’s not spicy, but you can add spices or hot sauce to customize the heat level.
  • How can I thicken the broth? If your broth is too thin, allow it to simmer uncovered until it reduces to your desired thickness.
  • What sides pair well with chicken and dumplings? A simple green salad or steamed vegetables complement this dish beautifully.

Nutritional Tips and Dietary Adaptations

This chicken and dumplings recipe can be adapted for various dietary needs:

  • Low-Carb: Use cauliflower rice instead of dumplings, and add more vegetables to the soup.
  • Dairy-Free: Substitute buttermilk with almond milk and use dairy-free butter.
  • High-Protein: Add beans or lentils to boost protein while keeping the dish hearty.

Essential Equipment Recommendations

Having the right tools makes cooking easier! Here’s what you’ll need:

  • Large Dutch Oven: Perfect for making the soup and allowing for even cooking.
  • Wooden Spoon: Great for stirring ingredients without scratching your pot.
  • Measuring Cups and Spoons: Accurate measurements are key for perfect dumplings.

Serving Suggestions

Want to elevate your chicken and dumplings presentation? Here are some ideas:

  • Garnish with Fresh Herbs: A sprinkle of fresh thyme or parsley adds color and freshness.
  • Serve with Crusty Bread: A side of warm, crusty bread is perfect for soaking up the delicious broth.
  • Pair with a Salad: A light salad balances the richness of the dish.

Conclusion

With this easy chicken and dumplings recipe, you’ll not only bring comfort to your dinner table but also have a delightful meal that your family will love. Remember, cooking is all about enjoying the process and sharing good food with those you love. So gather your ingredients, roll up your sleeves, and let’s make a delicious pot of chicken and dumplings that will warm your hearts and bellies!

Easy Weeknight Chicken and Dumplings

Prep Time 15 minutes
Cook Time 40 minutes
Total Time 55 minutes
Servings 4 servings
Calories 450
A comforting and hearty chicken and dumplings recipe perfect for weeknights, combining tender chicken, flavorful broth, and fluffy dumplings.

Ingredients

Main ingredients

  • 2 tbsp olive oil
  • 1.5 lb boneless, skinless chicken thighs
  • Kosher salt and freshly ground black pepper seasoning
  • 1 medium yellow onion, chopped
  • 2 carrots chopped carrots
  • 2 stalks celery stalks, chopped
  • 2 bay leaves bay leaves
  • 1 sprig thyme
  • 8 oz sliced mushrooms
  • 3 tbsp all-purpose flour
  • 2 containers chicken stock
  • 1.5 cups all-purpose flour, spooned and leveled
  • 1.5 tsp baking powder
  • 1 tbsp fresh thyme
  • 1 tsp kosher salt
  • 3/4 cup buttermilk
  • 1 large egg

Instructions 

  • Cook chicken: Heat oil, season chicken, cook until browned, then shred.
  • Make broth: Sauté vegetables, add mushrooms, flour, then stock and chicken; simmer until thickened.
  • Prepare dumplings: Mix flour, baking powder, thyme, salt; add buttermilk and egg.
  • Drop dumplings onto soup, cover, and simmer until cooked, about 15-20 minutes.

Notes

Use fresh herbs for best flavor and adjust seasoning to taste.
Calories: 450kcal
Cost: $15
Course: Main Course
Cuisine: American
Keyword: chicken, dumplings

Transform Your Dinner Routine with High Protein Chicken Gyros

Are you tired of the same old chicken recipes? Do you find yourself scrambling for quick, healthy meals that your family will actually enjoy? Look no further! These High Protein Chicken Gyros are not only delicious but also incredibly easy to make. Packed with flavor and healthy ingredients, this recipe is perfect for busy families looking for tasty dinner solutions. Let’s dive into why you’ll love these gyros and how you can elevate your weeknight dinners with this simple recipe.

Why You’ll Love This Recipe

  • High Protein Content: Each serving is loaded with protein, making it a great choice for fitness enthusiasts or anyone looking to maintain a healthy diet.
  • Quick Preparation: The entire meal can be prepped and cooked within 90 minutes, perfect for busy weeknights.
  • Versatile Serving Options: Enjoy these gyros in pitas, salads, or even on their own with a side of veggies—your choice!
  • Family-Friendly: With flavors kids love and nutritious ingredients, it’s a surefire hit for family dinners.
  • Budget-Friendly: Utilizing chicken thighs and cottage cheese keeps costs low without sacrificing flavor or nutrition.

Ingredients You’ll Need

Gather these simple ingredients to make your High Protein Chicken Gyros:

  • 8 boneless skinless chicken thighs: For juicy and tender meat. (Sometimes I add 10-12 thighs for extra servings!)
  • 1/3 cup cottage cheese: Blended for a creamy texture that adds protein.
  • 1 tablespoon Poultry Seasoning: Seasoning to taste, feel free to use your favorite mix.
  • 1 cup water or broth: For moisture during cooking.
  • 1/2 onion: Adds flavor; you can also use foil if you prefer.

How to Prepare Your High Protein Chicken Gyros

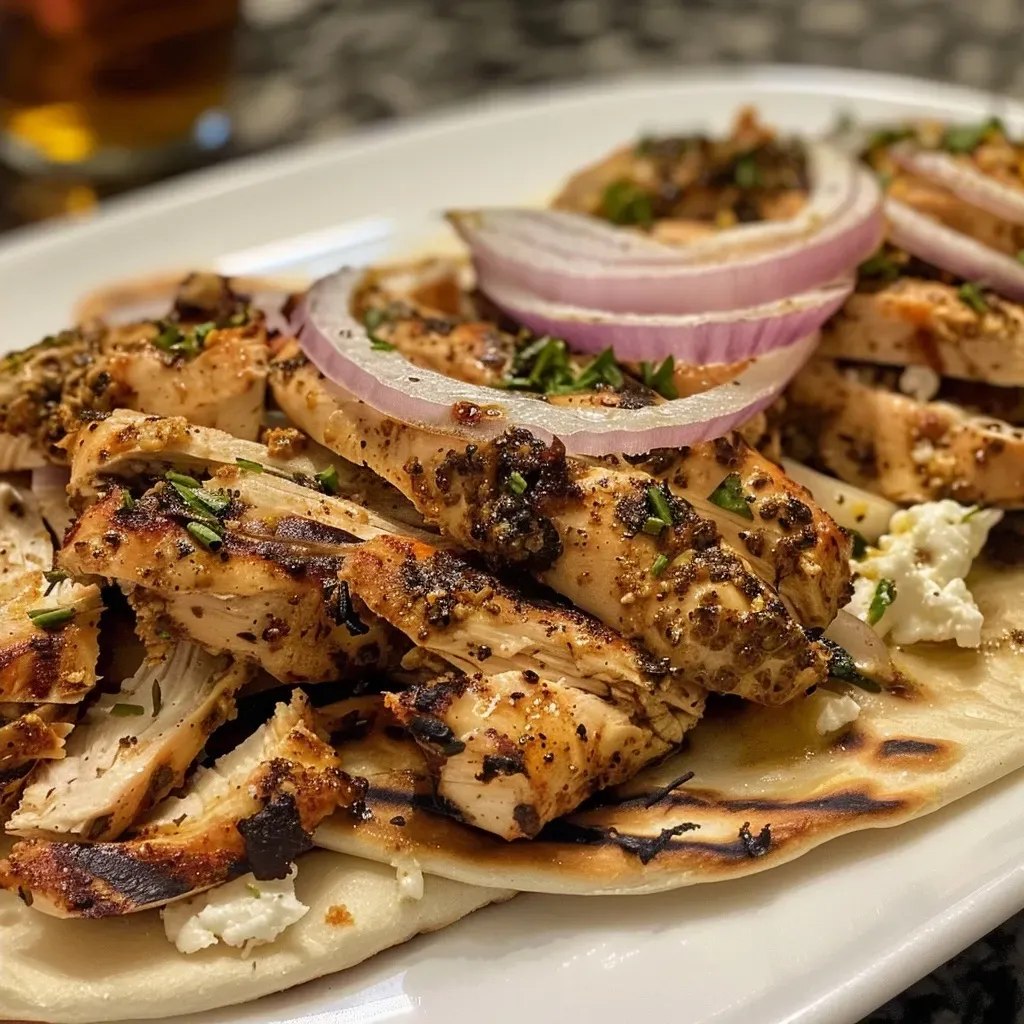
Close-up side view of juicy chicken gyros served with fresh toppings.

Follow these easy steps to create your delicious gyros:


Nonstick Grill Pan

★ Recommended Kitchen Tool

Nonstick Grill Pan

Make this recipe even easier with a quality Nonstick Grill Pan — a must-have kitchen staple!


🛒 Check Price on Amazon →

As an Amazon Associate, we earn from qualifying purchases.
  • Preheat the oven to 425°F (220°C).
  • Blend the cottage cheese in a food processor until smooth. Alternatively, use an immersion blender in its container for convenience.
  • Marinate the chicken thighs in a bowl with your chosen poultry seasoning. I recommend Watkins poultry seasoning, but feel free to create your own blend too.
  • Add the blended cottage cheese to the chicken and mix well to ensure even coating.
  • Prepare your cooking method: If you have a vertical gyro oven, oil it lightly. If not, create a makeshift spit by cutting an onion in half and inserting bamboo skewers vertically.
  • Thread the chicken onto the spit or place in a baking dish.
  • Add one cup of water or broth to the bottom and place half of the onion on top of the meat.
  • Bake for 75-90 minutes or until golden. Use a meat thermometer for safety (165°F for chicken).
  • Let it rest for a few minutes before slicing and serving.

Pro Tips for Perfect Gyros

  • Marinate Longer: For deeper flavor, consider marinating the chicken overnight.
  • Adjust Seasoning: Check the sodium levels in your seasoning if you’re watching salt intake.
  • Rest the Chicken: Allowing the chicken to rest after cooking ensures juiciness.
  • Experiment with Spice: Don’t hesitate to try different seasonings or marinades for unique flavor profiles.
  • Cut Evenly: Slice the chicken into even pieces for uniform cooking.
  • Serve Fresh: Serve immediately for the best texture and flavor.
  • Side Dishes: Pair with tzatziki sauce and Greek salad for a complete meal.
  • Use Leftovers: Leftover chicken can be used in salads, wraps, or sandwiches for quick lunches!

Common Mistakes and Troubleshooting

Even the best cooks can run into issues. Here are some common mistakes and how to avoid them:

  • Overcooking the Chicken: Ensure you monitor cooking times closely to prevent dry chicken. A meat thermometer is your friend!
  • Not Blending the Cottage Cheese Smoothly: Make sure the cottage cheese is blended thoroughly for a creamy texture—no lumps!
  • Skipping the Resting Period: Allowing the chicken to rest prevents juices from running out.

Variations to Try

Want to switch things up? Here are four delicious variations:

  • Greek Chicken Gyros: Add feta cheese and olives to the filling for a Mediterranean twist.
  • Spicy Chicken Gyros: Incorporate hot sauce or cayenne pepper into the marinade for heat.
  • Veggie Gyros: Replace chicken with grilled vegetables like zucchini, bell peppers, and mushrooms for a vegetarian option.
  • Curried Chicken Gyros: Use curry powder in your seasoning mix for an exciting flavor change.

Storage and Make-Ahead Instructions

Planning ahead? Here’s how to store and prepare your gyros for later:

  • Refrigerate: Store cooked chicken in an airtight container for up to 3-4 days.
  • Freeze: Keep cooked chicken in the freezer for up to 3 months. Thaw in the refrigerator before reheating.
  • Make-Ahead: Prepare the chicken and marinate it a day in advance for enhanced flavors.

Nutrition Tips and Dietary Adaptations

Want to make your gyros even healthier? Here are some tips:

  • Low-Fat Version: Use low-fat cottage cheese and skinless chicken breasts for a lighter option.
  • Gluten-Free: Serve your gyros in gluten-free pitas or lettuce wraps.
  • Dairy-Free: Substitute cottage cheese with a dairy-free alternative like tahini or blended silken tofu.

Equipment Recommendations

Here’s what you’ll need to make your gyros:

  • Food Processor: For blending the cottage cheese smoothly.
  • Vertical Gyro Oven: Optional, but gives great results. A roasting pan works too!
  • Meat Thermometer: Ensures perfectly cooked chicken every time.
  • Bamboo Skewers: Handy for creating a makeshift spit if you don’t have a vertical oven.

Serving Suggestions

How to serve your gyros? Here are some ideas:

  • Classic Pita Wrap: Serve sliced chicken in warm pitas topped with tzatziki sauce, lettuce, and tomatoes.
  • Greek Salad Bowl: Create a vibrant salad using chopped cucumbers, tomatoes, and red onion topped with gyro slices.
  • On a Platter: Serve with sides like Greek lemon potatoes and grilled veggies for a feast.

Frequently Asked Questions

Got questions? Here are some common queries:

  • Can I use chicken breasts instead of thighs? Yes, but thighs offer more moisture and flavor.
  • How long should I marinate the chicken? At least 30 minutes, but overnight is best for flavor.
  • What can I substitute for cottage cheese? Greek yogurt or blended tofu work as great replacements.
  • Can I make these gyros in an air fryer? Yes, adjust cooking times and temperatures accordingly.
  • What else can I serve with my gyros? French fries, Greek salad, or even grilled vegetables are excellent choices.
  • How do I know when the chicken is done? Use a meat thermometer to check for an internal temperature of 165°F.
  • Can I freeze leftovers? Absolutely! Store in an airtight container for up to three months.
  • What beverages pair well with gyros? A refreshing tzatziki and lemon drink or a light red wine complement the flavors beautifully.

Conclusion

Now that you have all the essential details on making High Protein Chicken Gyros, it’s time to bring this recipe into your kitchen! With its myriad of flavors, easy preparation, and versatility, you’ll be able to enjoy satisfying meals that don’t feel repetitive. So, gather your ingredients, try it out, and watch your family fall in love with dinner again. Happy cooking!

High Protein Chicken Gyros

Prep Time 15 minutes
Cook Time 1 hour 30 minutes
Total Time 1 hour 45 minutes
Servings 4 servings
Calories 350
A flavorful and protein-packed chicken gyros recipe perfect for a quick and satisfying meal.

Ingredients

Meat

  • 8 pieces boneless skinless chicken thighs (can add 10-12 thighs)
  • 1/3 cup cottage cheese (blended)
  • 1 tablespoon Poultry Seasoning (to taste)
  • 1 cup water (or broth)
  • 1/2 onion onion (or foil)

Instructions 

  • Preheat oven to 425°F (220°C). Blend cottage cheese until smooth.
  • Season chicken thighs with poultry seasoning and mix with blended cottage cheese.
  • Thread chicken onto skewers or a homemade spit, place in a oiled oven plate, add water or broth underneath.
  • Bake for 75-90 minutes until golden, then rest and slice.
  • Serve on pita with tzatziki, or on a salad with your favorite sides.

Notes

Feel free to customize seasonings and sides for variety.
Calories: 350kcal
Cost: $15
Course: Main Course
Cuisine: Greek
Keyword: chicken

Why Chicken Noodle Soup is the Ultimate Comfort Food

When it comes to quick and easy weeknight meals, few dishes can rival the comfort and warmth of a classic chicken noodle soup. This quick chicken noodle soup recipe not only delivers on flavor but also on convenience, making it perfect for busy families. With tender chicken, hearty vegetables, and perfectly cooked noodles all simmered together in a flavorful broth, this soup is like a warm hug in a bowl. In this article, I’ll guide you through everything you need to know to whip up this delightful dish in just 30 minutes.

Why You’ll Love This Recipe

This chicken noodle soup recipe stands out for several reasons:

  • Quick Preparation: Ready in just 30 minutes, perfect for busy nights!
  • Simple Ingredients: Made with everyday pantry staples that you probably already have.
  • Customizable: Easily adjust ingredients to suit your family’s tastes or dietary needs.
  • Comforting and Satisfying: Hearty enough to fill you up while providing a nourishing meal.
  • Kid-Friendly: A favorite among picky eaters, making dinner time less of a battle.

Ingredient Breakdown

Understanding each ingredient in this soup is crucial for achieving the best flavor and texture. Here’s what you’ll need:


Air Fryer XL

★ Recommended Kitchen Tool

Air Fryer XL

Make this recipe even easier with a quality Air Fryer XL — a must-have kitchen staple!


🛒 Shop This Tool →

As an Amazon Associate, we earn from qualifying purchases.
  • 1 tablespoon butter: For sautéing vegetables and adding richness.
  • 0.5 cup chopped onion: Adds depth of flavor.
  • 0.5 cup chopped celery: Provides crunch and freshness.
  • 4 (14.5 ounce) cans chicken broth: The base of the soup; you can substitute with homemade broth for added flavor.
  • 1 (14.5 ounce) can vegetable broth: Enhances the overall taste and is ideal for extra richness.
  • 1.5 cups egg noodles: The heart of the soup; they soak up the flavors beautifully.
  • 0.5 pound chopped cooked chicken breast: You can also use rotisserie chicken for convenience.
  • 1 cup sliced carrots: Adds natural sweetness and color.
  • 0.5 teaspoon dried basil: For a hint of herbal flavor.
  • 0.5 teaspoon dried oregano: Complements the chicken and broth.
  • Salt and ground black pepper to taste: Essential for seasoning.

How to Make Quick and Easy Chicken Noodle Soup

Close-up side view of a bowl of chicken noodle soup with vegetables and noodles.

Prepare to be amazed at how simple it is to make this delicious soup:

  1. Melt butter in a large pot over medium heat.
  2. Add onion and celery; cook until just tender, about 5 minutes.
  3. Stir in chicken broth, vegetable broth, egg noodles, chicken, carrots, basil, oregano, salt, and black pepper to combine; bring to a boil.
  4. Reduce heat; simmer for 20 minutes.
  5. Serve hot and enjoy!

Pro Tips for the Best Chicken Noodle Soup

To elevate your chicken noodle soup game, consider these expert tips:

  • Use Quality Broth: Opt for low-sodium chicken broth for better control over the saltiness.
  • Cook Noodles Separately: If you plan to store leftovers, cook noodles separately to prevent them from getting mushy.
  • Flavor Boost: Add a splash of lemon juice or a sprinkle of fresh herbs just before serving for brightness.
  • Make it Creamy: For a creamy version, stir in a splash of cream or half-and-half at the end.
  • Vegetable Variations: Feel free to add your favorite vegetables, such as peas or green beans, for added nutrition.
  • Season Gradually: Taste as you go and adjust seasonings to your preference.
  • Storage Smartly: Store broth and noodles separately if you plan to keep leftovers for more than a day.
  • Make Ahead: This soup can be made ahead of time and freezes beautifully!

Common Mistakes and Troubleshooting

Even though this recipe is simple, here are some common pitfalls and how to avoid them:

  • Overcooking Noodles: Be careful not to overcook the noodles, as they will continue to soften in the hot broth.
  • Too Little Flavor: If the soup tastes bland, try adding more herbs or a bit of soy sauce for depth.
  • Greasy Soup: Skim off excess fat from the broth if it appears too oily.

Delicious Variations

This recipe is a fantastic base that you can customize to your liking:

  • Italian Chicken Noodle Soup: Add Italian seasoning and diced tomatoes for a Mediterranean twist.
  • Mexican Chicken Noodle Soup: Incorporate diced green chilies, cumin, and cilantro for a zesty flavor.
  • Vegetarian Noodle Soup: Substitute chicken with chickpeas and use vegetable broth for a plant-based option.
  • Spicy Chicken Noodle Soup: Add red pepper flakes or a dash of hot sauce to kick up the heat!

Storage and Make-Ahead Instructions

This soup is perfect for meal prep or making ahead:

  • Refrigeration: Store leftover soup in an airtight container in the fridge for up to 3 days.
  • Freezing: Freeze in individual portions for up to 3 months. Just remember to cook the noodles separately!
  • Reheating: Reheat on the stovetop or in the microwave, adding a splash of water or broth if needed.

Frequently Asked Questions

Here are some common questions about chicken noodle soup:

  • Can I use frozen chicken? Yes! Just ensure it’s fully cooked before adding to the soup.
  • What type of noodles work best? Egg noodles are traditional, but you can also use whole wheat or gluten-free options.
  • How can I thicken the soup? For a thicker consistency, you can add a cornstarch slurry or pureed vegetables.
  • Is this recipe gluten-free? Use gluten-free noodles and broth to make it suitable for a gluten-free diet.
  • Can I add more vegetables? Absolutely! Add any veggies you enjoy, like spinach, peas, or zucchini.
  • What should I serve with chicken noodle soup? Pair it with crusty bread or a fresh salad for a complete meal.
  • How long does it take to make? This recipe takes about 30 minutes from start to finish!
  • Can I make this in a slow cooker? Yes, you can make it in a slow cooker by adding all ingredients and cooking on low for 4-6 hours.

Nutrition Tips and Dietary Adaptations

This chicken noodle soup can easily accommodate various dietary needs:

  • Low-Calorie Option: Use skinless chicken and low-sodium broth.
  • High-Protein: Add extra cooked chicken or chickpeas for a protein boost.
  • Vegan Adaptation: Replace chicken with tofu or chickpeas, and use vegetable broth.

Equipment Recommendations

Having the right tools can make your cooking experience smoother:

  • Large Pot: A heavy-bottomed pot is ideal for even cooking.
  • Wooden Spoon: Great for stirring without scratching your pot.
  • Measuring Cups and Spoons: Ensure accuracy in your ingredients.

Serving Suggestions

Make your meal complete by serving chicken noodle soup with:

  • Crusty Bread: Perfect for dipping and soaking up the soup.
  • Garden Salad: A light side salad balances the hearty soup.
  • Cheese Toast: A slice of cheese-covered bread adds a comforting touch.

Conclusion

This quick chicken noodle soup recipe is sure to become a cherished staple in your home. With its rich flavors, easy preparation, and endless customization options, you can make this soup your own while providing a nourishing meal for your loved ones. So grab your ingredients and get ready to enjoy a delicious bowl of comfort that’s just minutes away!

Quick and Easy Chicken Noodle Soup

Prep Time 10 minutes
Cook Time 20 minutes
Total Time 30 minutes
Servings 4 servings
Calories 250
A comforting and quick chicken noodle soup perfect for a cozy meal in under an hour.

Ingredients

Broth

  • 1 tablespoon butter
  • 0.5 cup chopped onion
  • 0.5 cup chopped celery
  • 4 14.5 ounce cans chicken broth
  • 1 14.5 ounce can vegetable broth
  • 1.5 cups egg noodles
  • 0.5 pound chopped cooked chicken breast
  • 1 cup sliced carrots
  • 0.5 teaspoon dried basil
  • 0.5 teaspoon dried oregano
  • to taste salt and ground black pepper

Instructions 

  • Melt butter in a large pot over medium heat. Add onion and celery; cook until tender, about 5 minutes.
  • Stir in chicken broth, vegetable broth, noodles, chicken, carrots, basil, oregano, salt, and pepper; bring to a boil.
  • Reduce heat and simmer for 20 minutes.
  • Serve hot and enjoy!

Notes

You can add more vegetables or adjust seasonings to taste.
Calories: 250kcal
Cost: $12
Course: Soup
Cuisine: American
Keyword: chicken, noodle, quick

Why Chicken Salad is Your Ultimate Go-To Meal

When it comes to quick meals that pack a flavorful punch, few dishes can compete with a well-made chicken salad, especially when utilizing the convenience of canned chicken. This easy chicken salad with canned chicken is not only delicious but also incredibly versatile, making it a staple for busy weeknights. In this article, we’ll dive deep into the perfect chicken salad recipe, explore variations and tips, and ensure you have everything you need to make this dish a family favorite.

Why You’ll Love This Recipe

This chicken salad is a fantastic choice for numerous reasons:

  • Quick and Easy: With minimal prep time and no cooking required, you can have this meal ready in under 30 minutes.
  • Healthy Ingredients: Packed with protein from canned chicken, vegetables, and nuts, this salad is both nutritious and satisfying.
  • Customizable: Easily modify ingredients based on your preferences or what you have on hand.
  • Perfect for Meal Prep: Make a large batch to enjoy throughout the week or for lunches.
  • Kid-Friendly: With its mild flavors and appealing texture, this chicken salad is sure to please even picky eaters.

Ingredients for Easy Chicken Salad with Canned Chicken

Gathering the right ingredients is crucial for achieving that perfect flavor and texture. Here’s what you’ll need:


Meal Prep Containers

★ Recommended Kitchen Tool

Meal Prep Containers

Make this recipe even easier with a quality Meal Prep Containers — a must-have kitchen staple!


🛒 Check Price on Amazon →

As an Amazon Associate, we earn from qualifying purchases.
  • 3 cans (12.5 oz each) chicken breast in water, drained and flaked
  • 3/4 cup mayonnaise (adjust to taste)
  • 2 tablespoons Dijon mustard
  • 1 tablespoon fresh lemon juice
  • 2 celery stalks, finely diced (about 1/2 cup)
  • 1/4 cup red onion, finely minced
  • 1/3 cup dried cranberries
  • 1/3 cup chopped walnuts or pecans
  • 2 tablespoons fresh dill, chopped (or 1 tablespoon dried dill)
  • 1 teaspoon garlic powder
  • 1/2 teaspoon salt (or to taste)
  • 1/4 teaspoon black pepper
  • 1/4 teaspoon paprika
  • Optional: 1 hard-boiled egg, chopped

Step-by-Step Instructions

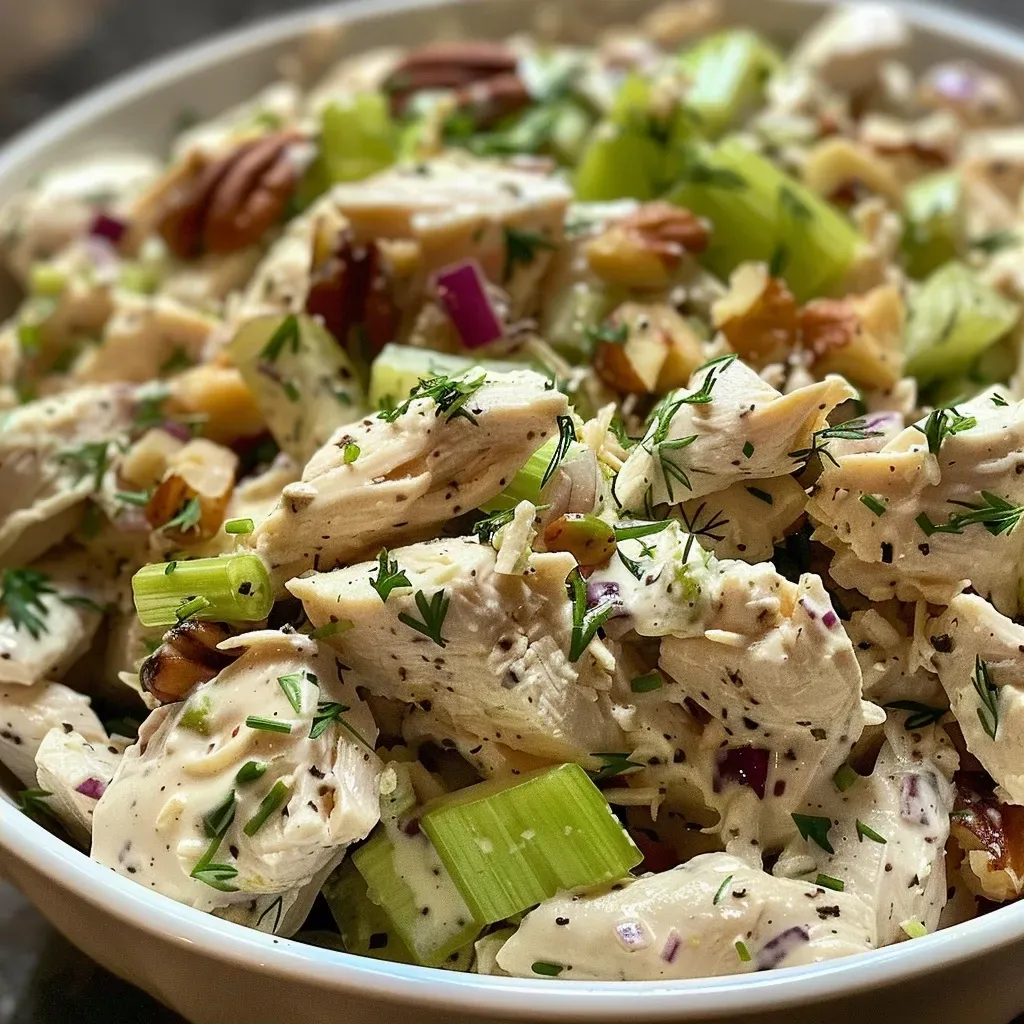
Close-up of a creamy chicken salad featuring canned chicken, garnished with herbs and cranberries.

Follow these simple steps to whip up your chicken salad:

  1. Open the canned chicken and drain thoroughly using a fine-mesh strainer. Transfer to a large mixing bowl and flake with a fork.
  2. In a small bowl, whisk together mayonnaise, Dijon mustard, and fresh lemon juice until smooth.
  3. Add diced celery, minced red onion, garlic powder, salt, pepper, and paprika to the chicken.
  4. Fold in dried cranberries, chopped nuts, and fresh dill.
  5. Pour the dressing over the chicken mixture and fold gently to combine. Taste and adjust seasoning if necessary.
  6. Cover the bowl and refrigerate for at least 30 minutes to allow flavors to meld.

Pro Tips for the Perfect Chicken Salad

To elevate your chicken salad to the next level, consider these expert insights:

  • Drain Well: Ensure the canned chicken is thoroughly drained to avoid a watery salad.
  • Chill Before Serving: Letting the salad sit in the refrigerator enhances the flavors.
  • Customize Your Crunch: Experiment with different nuts (almonds, pecans) or add seeds for extra texture.
  • Herbs for Freshness: Fresh herbs like parsley or basil can add a burst of flavor.
  • Make it a Meal: Serve the salad on a bed of greens, in a sandwich, or in a wrap for a complete meal.
  • Mix it Up: Try adding different fruits like grapes or apples for added sweetness.
  • Adjust the Creaminess: Tailor the amount of mayonnaise to your taste preference; Greek yogurt can be a lighter alternative.
  • Season to Taste: Always taste your salad before serving to ensure the seasoning is just right.

Common Mistakes and Troubleshooting

Even simple recipes can go awry. Here’s how to avoid common pitfalls:

  • Too Watery: If your salad turns out watery, make sure to drain the chicken well and avoid adding too much mayonnaise.
  • Overseasoning: Add seasonings gradually; you can always add more, but you can’t take it out!
  • Mushy Texture: Avoid overmixing the ingredients; fold gently to maintain a pleasing texture.

Delicious Variations to Try

One of the best things about chicken salad is how easily it can be customized. Here are a few delicious variations:

  • Curried Chicken Salad: Add curry powder and raisins for a unique twist.
  • Avocado Chicken Salad: Substitute half the mayonnaise with mashed avocado for creaminess and healthy fats.
  • Buffalo Chicken Salad: Mix in buffalo sauce for a spicy kick, perfect for sandwiches.
  • Southwestern Chicken Salad: Incorporate black beans, corn, and lime juice for a zesty flavor profile.

Storage and Make-Ahead Instructions

This chicken salad keeps well, making it a great option for meal prep:

  • Refrigerator: Store in an airtight container in the refrigerator for up to 3 days.
  • Freezing: Not recommended due to the mayonnaise; it may separate when thawed.
  • Make-Ahead: Prepare the salad a day in advance for the best flavor; just keep it chilled until serving.

Comprehensive FAQ

Here are some commonly asked questions about chicken salad:

  • Can I use fresh chicken instead of canned? Yes, cooked, shredded chicken can be used for a fresher taste.
  • How long does chicken salad last in the fridge? It lasts about 3 days when stored properly in an airtight container.
  • Can I make chicken salad without mayonnaise? Absolutely! You can substitute with Greek yogurt or avocado for a healthier option.
  • What can I serve with chicken salad? Serve it with crackers, in a sandwich, or over a bed of greens for a complete meal.
  • Is this recipe keto-friendly? Yes, you can adjust the ingredients to make it low-carb by using less mayonnaise or omitting nuts.
  • Can I add fruits to my chicken salad? Yes, grapes, apples, or dried fruits can add a delightful sweetness.
  • What’s the best way to serve chicken salad? Enjoy it chilled, and consider garnishing with fresh herbs for an appealing presentation.
  • Can I use other types of canned chicken? Yes, any canned chicken will work, but opt for white meat for best results.

Nutrition Tips and Dietary Adaptations

For a healthier twist on this classic dish, consider these adaptations:

  • Low-Fat Options: Use low-fat mayonnaise or Greek yogurt to reduce calories.
  • Gluten-Free: This recipe is naturally gluten-free; just ensure any added ingredients are certified gluten-free.
  • Vegan Variation: Substitute chicken with chickpeas or tofu and use vegan mayo for a plant-based option.

Essential Equipment for Making Chicken Salad

Having the right tools can make your cooking experience smoother:

  • Mixing Bowls: A large bowl for mixing the salad and a smaller bowl for the dressing.
  • Fine-Mesh Strainer: Useful for draining canned chicken effectively.
  • Fork: For flaking the chicken and mixing ingredients.
  • Whisk: Handy for combining the dressing ingredients smoothly.

Serving Suggestions

There are countless ways to enjoy your chicken salad. Here are a few ideas:

  • On a Sandwich: Spread on your favorite bread or roll for a hearty lunch.
  • As a Wrap: Use lettuce leaves or tortillas for a fresh, handheld option.
  • On a Salad Bed: Serve over mixed greens for a light dinner option.

With this comprehensive guide, you’re fully equipped to make a delicious chicken salad that’s perfect for any occasion. Whether you’re enjoying it as a quick meal or serving it at a gathering, this recipe is sure to impress. Happy cooking!

Easy Chicken Salad with Canned Chicken

Prep Time 10 minutes
Total Time 10 minutes
Servings 4 servings
Calories 350
A quick and flavorful chicken salad perfect for sandwiches or served on its own. Made with canned chicken and fresh ingredients, it’s a healthy and satisfying meal.

Ingredients

Canned Chicken

  • 3 cans chicken breast in water, drained and flaked
  • 3/4 cup mayonnaise
  • 2 tablespoons Dijon mustard
  • 1 tablespoon fresh lemon juice
  • 2 celery stalks finely diced celery (about 1/2 cup)
  • 1/4 cup red onion, finely minced
  • 1/3 cup dried cranberries
  • 1/3 cup chopped walnuts or pecans
  • 2 tablespoons fresh dill, chopped (or 1 tablespoon dried dill)
  • 1 teaspoon garlic powder
  • 1/2 teaspoon salt (or to taste)
  • 1/4 teaspoon black pepper
  • 1/4 teaspoon paprika
  • 1 hard-boiled egg (optional) chopped (optional)

Instructions 

  • Drain and flake the canned chicken, then transfer to a bowl.
  • Mix mayonnaise, Dijon mustard, and lemon juice until smooth.
  • Add diced celery, red onion, garlic powder, salt, pepper, and paprika to the chicken.
  • Fold in cranberries, nuts, dill, and chopped egg if using. Add dressing and mix gently.
  • Refrigerate for at least 30 minutes before serving.

Notes

For extra flavor, let the salad chill for at least 30 minutes before serving.
Calories: 350kcal
Cost: $10
Course: Salad
Cuisine: American
Keyword: chicken, easy, quick

Transform Your Weeknights with This Quick and Colorful Chicken Stir Fry

When it comes to weeknight dinners, finding a recipe that is both quick to prepare and delightful to eat can feel like a challenge. Enter this Quick and Colorful Chicken Stir Fry—a vibrant dish that brings together tender chicken, fresh vegetables, and a savory sauce in under 30 minutes! Perfect for busy families, this recipe will not only satisfy picky eaters but also leave you feeling accomplished in the kitchen. Let’s dive into why this chicken stir fry should be on your dinner table tonight!

Why You’ll Love This Recipe

  • Speedy Preparation: Whip up this dish in just 30 minutes, making it ideal for hectic weeknights.
  • Versatile Ingredients: Use whatever vegetables you have on hand to create a stir fry that suits your family’s tastes.
  • Healthy and Nutritious: Packed with protein and vegetables, this recipe offers a balanced meal that’s good for you.
  • Kid-Friendly: The colorful presentation and delicious flavors make it a hit with children and adults alike.
  • Perfect for Meal Prep: Make a double batch for easy lunches throughout the week—just reheat and enjoy!

Ingredient Breakdown

Let’s take a closer look at what you’ll need to make this delicious chicken stir fry:

  • Chicken: 3 skinless, boneless chicken breast halves, thinly sliced. You can also use chicken thighs for more flavor.
  • Vegetables: 1 head of broccoli, 1 onion, 1 cup of sliced carrots, and 1 green bell pepper. Feel free to substitute with your favorites like snap peas or bell peppers of different colors.
  • Sauce: A mix of ⅔ cup soy sauce, ¼ cup brown sugar, 1 tablespoon cornstarch, and flavor boosters like minced ginger and garlic.
  • Rice: Serve it over 2 cups of cooked white rice; quinoa is a great gluten-free alternative.
  • Sesame Oil: 2 tablespoons to cook your veggies and chicken for a nice nutty flavor.

How to Make Chicken Stir Fry

Close-up view of a colorful chicken stir fry featuring broccoli, carrots, and bell pepper.

Follow these simple steps to create your dish:


Air Fryer XL

★ Recommended Kitchen Tool

Air Fryer XL

Make this recipe even easier with a quality Air Fryer XL — a must-have kitchen staple!


🛒 Shop This Tool →

As an Amazon Associate, we earn from qualifying purchases.
  1. Gather all ingredients.
  2. Bring 4 cups of water and 2 cups of rice to a boil in a saucepan. Reduce heat to medium-low, cover, and simmer until tender, about 20-25 minutes.
  3. In a bowl, combine soy sauce, brown sugar, and cornstarch. Stir until smooth, then add ginger, garlic, and red pepper flakes. Mix in the chicken, cover, and marinate for at least 15 minutes.
  4. Heat 1 tablespoon sesame oil in a large skillet or wok over medium-high heat. Add broccoli, onion, carrots, and bell pepper. Stir-fry until just tender, about 5 minutes. Remove and set aside.
  5. In the same skillet, heat the remaining sesame oil and add the marinated chicken (reserve the marinade). Cook until browned, about 2 minutes per side.
  6. Return the vegetables to the skillet, add the reserved marinade, and bring to a boil. Cook until chicken is no longer pink and vegetables are tender, about 5-7 minutes.
  7. Serve the stir fry over rice and enjoy!

Pro Tips for the Best Stir Fry

  • Cut Uniformly: Ensure chicken and vegetables are cut into similar sizes for even cooking.
  • High Heat: Stir fry over medium-high heat to achieve that signature smoky flavor.
  • Don’t Overcrowd the Pan: If necessary, cook in batches to avoid steaming the ingredients.
  • Use Fresh Ingredients: Fresh vegetables yield the best flavor and texture.
  • Marinate for Flavor: Allow the chicken to marinate longer for deeper flavor absorption.
  • Experiment with Sauces: Feel free to add oyster sauce or hoisin sauce for a unique twist.
  • Garnish: Top with sesame seeds or sliced green onions for added texture and flavor.
  • Temperature Check: Make sure the chicken reaches an internal temperature of 165°F for food safety.

Common Mistakes and Troubleshooting

Even the best cooks make mistakes! Here are some common issues and how to fix them:

  • Overcooked Chicken: If your chicken is tough, try cooking it for a shorter time or using a meat thermometer.
  • Soggy Vegetables: If your vegetables are mushy, they may have been cooked too long or at too low of a temperature. Keep them crisp by cooking quickly over high heat.
  • Watery Sauce: If your sauce is too thin, mix extra cornstarch with a bit of water and stir it into the sauce while cooking.

Variations to Try

Don’t hesitate to switch up this chicken stir fry recipe! Here are a few variations:

  • Protein Swap: Substitute chicken with shrimp, tofu, or beef for a different flavor profile.
  • Vegetarian Delight: Replace chicken with a mix of your favorite vegetables or tofu for a hearty vegan option.
  • Add Some Heat: Incorporate sliced jalapeños or a dash of sriracha for a spicy kick.
  • Nutty Addition: Toss in some cashews or peanuts for added crunch and flavor.

Storage and Make-Ahead Instructions

This chicken stir fry is perfect for meal prep:

  • Refrigerate: Store leftovers in an airtight container in the fridge for up to 3 days.
  • Freeze: You can freeze the stir fry for up to 2 months. Reheat in a skillet over medium heat until warmed through.
  • Make Ahead: Prep your veggies and marinate the chicken the night before to save time on a busy evening.

Frequently Asked Questions

  • Can I use frozen vegetables? Yes, frozen vegetables work well; just add them for a few minutes longer during cooking.
  • What other sauces can I use? Besides soy sauce, try teriyaki, hoisin, or peanut sauce for different flavors.
  • How do I make it gluten-free? Use tamari or coconut aminos instead of soy sauce.
  • What can I serve with chicken stir fry? Serve with rice, quinoa, or even noodles for a filling meal.
  • Can I prepare the sauce ahead of time? Absolutely! Whip up the sauce a day in advance and store it in the fridge.
  • How do I prevent the chicken from being dry? Marinate it well and cook over high heat for a short time to keep it juicy.
  • Is this recipe suitable for kids? Yes, it’s mild yet flavorful, making it perfect for children.
  • Can I double the recipe? Definitely! Just ensure your skillet is large enough to handle all the ingredients.

Nutrition Tips and Dietary Adaptations

This chicken stir fry is not only delicious but can easily be adapted to fit various dietary needs:

  • Low-Carb: Skip the rice and serve over cauliflower rice or zucchini noodles.
  • Paleo: Use coconut aminos instead of soy sauce and avoid sugar in the sauce.
  • Whole30: Ensure all ingredients comply with Whole30 rules, especially the sauces.

Equipment Recommendations

To make your cooking experience smoother, consider the following tools:

  • Wok: A wok is ideal for stir frying as it heats evenly and allows for quick cooking.
  • Chef’s Knife: A sharp knife is essential for cutting uniform pieces of chicken and vegetables.
  • Cutting Board: A sturdy cutting board will help keep your workspace organized and safe.
  • Measuring Cups and Spoons: Accurate measurements are crucial for perfecting the sauce.

Serving Suggestions

This chicken stir fry is versatile and can be served in various ways:

  • On Rice: The classic way—serve over fluffy white or brown rice.
  • In Lettuce Wraps: For a low-carb option, serve in crisp lettuce leaves.
  • With Quinoa: A nutritious alternative that adds a nutty flavor.

In conclusion, this Quick and Colorful Chicken Stir Fry is not just a recipe; it’s a lifesaver for busy nights when you need a quick, healthy, and delicious meal. With its vibrant colors, bold flavors, and endless variations, you’ll never tire of this dish. So gather your ingredients, follow the steps, and prepare to impress your family with a delightful meal that comes together in a snap!

Chicken Stir Fry

Prep Time 15 minutes
Cook Time 25 minutes
Total Time 40 minutes
Servings 4 servings
Calories 450
A quick and flavorful chicken stir fry with fresh vegetables and savory sauce, served over fluffy rice.

Ingredients

Rice and Water

  • 4 cups water
  • 2 cups white rice

Sauce and Marinade

  • 0.66666668653488 cup soy sauce
  • 0.25 cup brown sugar
  • 1 tablespoon cornstarch
  • 1 tablespoon minced fresh ginger
  • 1 tablespoon minced garlic
  • 0.25 teaspoon red pepper flakes

Main Protein

  • 3 skinless, boneless chicken breast halves chicken breast halves, thinly sliced

Vegetables

  • 1 head broccoli (broken into florets)
  • 1 onion onion, cut into large chunks
  • 1 cup sliced carrots
  • 1 (8 ounce) can sliced water chestnuts, drained
  • 1 green bell pepper cut into matchsticks

Oils

  • 2 tablespoons sesame oil, divided

Instructions 

  • Cook rice in boiling water until tender, about 20-25 minutes.
  • Mix soy sauce, brown sugar, and cornstarch; add ginger, garlic, red pepper flakes, and chicken. Marinate for 15 minutes.
  • Stir-fry vegetables in 1 tbsp sesame oil until just tender, about 5 minutes. Set aside.
  • Cook chicken in same pan with remaining oil until browned, about 2 minutes per side. Add vegetables and marinade; cook until chicken is cooked through, 5-7 minutes.
  • Serve stir-fry over rice.

Notes

Use fresh ginger and garlic for best flavor. Adjust spice level with red pepper flakes.
Calories: 450kcal
Cost: $15
Course: Main Course
Cuisine: Asian
Keyword: chicken

Transform Your Dinner with Zesty Lemon Chicken

Are you searching for a quick and easy way to elevate your weeknight dinners? Look no further! This **Zesty Lemon Chicken** recipe is not only simple to prepare but also packed with vibrant flavors that your family will love. With just a handful of ingredients, you can create a satisfying meal that showcases the **versatility of chicken**. Whether you’re a busy mom like me or just someone who wants to enjoy a delicious dinner without the fuss, this recipe has you covered.

Why You’ll Love This Recipe

  • Speedy Preparation: With just 30 minutes of marination and a quick cook time, this dish is perfect for those hectic weeknights.
  • Flavorful Marinade: The blend of **lemon juice**, herbs, and spices creates a delightful marinade that infuses the chicken with **zesty goodness**.
  • Family-Friendly: This dish is sure to please even the pickiest of eaters, making it a great choice for family dinners.
  • Healthy Option: Packed with protein and low in carbs, this lemon chicken is a nutritious choice for those looking to maintain a healthy diet.
  • Versatile Serving Suggestions: Pair this dish with a variety of sides—think rice, steamed vegetables, or a fresh salad—for a well-rounded meal.

Ingredient Breakdown

Here’s what you will need to create this **delicious lemon chicken**:

  • 4 boneless skinless chicken breasts: Choose high-quality chicken for the best flavor.
  • 1/2 cup lemon juice (about 2 lemons): Freshly squeezed is best for a bright flavor.
  • 2 tablespoons extra virgin olive oil: Adds richness and helps the marinade stick.
  • 2 teaspoons lemon pepper: Enhances the lemon flavor while adding a little heat.
  • 1 teaspoon dried basil: Offers an aromatic touch to the dish.
  • 1 teaspoon dried oregano: Complements the lemon and adds depth to the flavor.
  • 1/4 teaspoon salt: Just enough to enhance the flavors without overpowering them.

Substitutions

Close-up side view of juicy lemon chicken on a plate, garnished with herbs.

If you need to adjust the recipe to suit your diet or preferences, consider these substitutions:


Nonstick Grill Pan

★ Recommended Kitchen Tool

Nonstick Grill Pan

Make this recipe even easier with a quality Nonstick Grill Pan — a must-have kitchen staple!


🛒 View on Amazon →

As an Amazon Associate, we earn from qualifying purchases.
  • Chicken thighs: If you prefer dark meat, chicken thighs are a great alternative.
  • Fresh herbs: Use fresh basil or oregano instead of dried for a more vibrant flavor.
  • Honey or maple syrup: For a touch of sweetness, add a tablespoon of honey or maple syrup to the marinade.
  • Vegan option: Substitute chicken with **tofu** or **tempeh** marinated in the same lemon mixture.

Pro Tips for Perfect Lemon Chicken

To ensure your lemon chicken turns out perfectly every time, keep these expert tips in mind:

  • Marinate for Flavor: While 30 minutes is sufficient, marinating for up to 8 hours deepens the flavor.
  • Don’t Overcrowd the Pan: Cook the chicken in batches if necessary; overcrowding can lead to steaming rather than searing.
  • Check Internal Temperature: Ensure the chicken reaches an internal temperature of 165°F (74°C) for safe eating.
  • Let It Rest: Allow the chicken to rest for a few minutes after cooking to retain its juices.
  • Use a Cast Iron Skillet: This can help achieve a lovely sear and even cooking.
  • Garnish with Fresh Herbs: A sprinkle of fresh parsley or cilantro before serving can elevate the presentation.
  • Experiment with Citrus: Mix in lime or orange juice for a different citrus twist.
  • Double the Recipe: If cooking for a crowd, simply double the ingredients for leftovers!

Common Mistakes and Troubleshooting

Avoid these common pitfalls to ensure your lemon chicken is a hit:

  • Using Bottled Lemon Juice: Always opt for fresh lemon juice; it makes a significant difference in flavor.
  • Not Patting the Chicken Dry: Ensure your chicken is dry before cooking to achieve a good sear.
  • Skipping the Resting Time: Cutting into the chicken too soon can cause it to lose moisture.

Delicious Variations

Want to switch things up? Try these tasty variations:

  • Lemon Garlic Chicken: Add minced garlic to the marinade for an extra flavor boost.
  • Honey Lemon Chicken: Incorporate honey into the marinade for a sweet and tangy flavor.
  • Lemon Chicken Skewers: Cut the chicken into cubes, marinate, and thread onto skewers for grilling.
  • Sheet Pan Lemon Chicken: Add vegetables like bell peppers and zucchini to the baking sheet for a complete meal.

Storage and Make-Ahead Instructions

Planning ahead can make your weeknight dinners even smoother:

  • Refrigerator: Store cooked lemon chicken in an airtight container for up to 3 days.
  • Freezer: Freeze cooked chicken for up to 3 months. Thaw in the refrigerator before reheating.
  • Make-Ahead Marinade: Prepare the marinade and store it in the fridge for up to a week. Just add the chicken when ready to cook!

Comprehensive FAQ

Here are some frequently asked questions that can help you master this recipe:

  • Can I use chicken thighs instead of breasts? Yes, chicken thighs work wonderfully and will be even more moist.
  • How long should I marinate the chicken? A minimum of 30 minutes is ideal, but up to 8 hours is even better.
  • What should I serve with lemon chicken? It pairs excellently with rice, quinoa, or a fresh garden salad.
  • Can I grill this chicken? Absolutely! This recipe is perfect for grilling as well.
  • Is this recipe gluten-free? Yes, all the ingredients are gluten-free, making it suitable for gluten-sensitive diets.
  • Can I make this recipe without lemon? You can substitute with lime or orange juice for a different flavor profile.
  • How do I know when the chicken is done? Check that the internal temperature reaches 165°F (74°C).
  • Can I marinate the chicken overnight? Yes, overnight marination will enhance the flavors even more.

Nutritional Tips and Dietary Adaptations

This lemon chicken recipe is not only delicious but also adaptable to various dietary needs:

  • Low-Calorie Option: Pair with steamed vegetables instead of high-carb sides for a lighter meal.
  • High-Protein Meal: Great for post-workout dinners, providing ample protein to fuel recovery.
  • Low-Carb Variant: Serve with cauliflower rice or zoodles for a low-carb alternative.

Recommended Equipment

To make this recipe, you’ll need:

  • Heavy Skillet or Cast Iron Pan: Perfect for achieving a good sear on the chicken.
  • Resealable Plastic Bag: Ideal for marinating the chicken evenly.
  • Meat Thermometer: Ensures your chicken is cooked perfectly every time.

Serving Suggestions

Make your meal complete by pairing your lemon chicken with:

  • Garlic Mashed Potatoes: Creamy and flavorful, they complement the zesty chicken beautifully.
  • Roasted Vegetables: Seasonal veggies roasted to perfection add color and nutrients to your plate.
  • Simple Green Salad: A fresh salad with a light vinaigrette balances the richness of the chicken.
  • Quinoa or Rice Pilaf: These options can soak up the delicious juices from the chicken.

With this **Zesty Lemon Chicken** recipe, you’re well on your way to creating a delicious and satisfying dinner that your whole family will love. Remember, the key to great cooking is confidence and creativity—don’t hesitate to make it your own!

Quick and Easy Lemon Chicken

Prep Time 10 minutes
Cook Time 15 minutes
Total Time 25 minutes
Servings 4 servings
Calories 250
This flavorful lemon chicken is quick to prepare and perfect for a healthy weeknight dinner.

Ingredients

Protein

  • 4 pieces boneless skinless chicken breast
  • 0.5 cup lemon juice (about 2 lemons)
  • 2 tablespoons extra virgin olive oil
  • 2 teaspoons lemon pepper
  • 1 teaspoon dried basil
  • 1 teaspoon dried oregano
  • 0.25 teaspoon salt

Instructions 

  • Place chicken in a resealable bag with lemon juice, olive oil, lemon pepper, basil, oregano, and salt. Shake to coat and marinate for at least 30 minutes.
  • Heat a skillet over medium-high heat. Remove chicken from marinade and cook for 6-7 minutes per side until golden and cooked through.
  • Let the chicken rest for 2-3 minutes, then serve hot garnished with parsley and lemon slices if desired.

Notes

For extra flavor, add fresh herbs or a squeeze of lemon before serving.
Calories: 250kcal
Cost: $12
Course: Main Course
Cuisine: American
Keyword: chicken, lemon

Your Ultimate Guide to Easy Chicken Parmesan

Welcome to your go-to resource for making Easy Chicken Parmesan! This dish is not just a crowd-pleaser; it’s a fantastic solution for busy weeknights when you want something hearty and satisfying without spending hours in the kitchen. With perfectly breaded chicken cutlets smothered in rich tomato sauce and topped with gooey mozzarella and Parmesan, this chicken parmesan recipe will quickly become a family favorite.

In this article, we will explore everything from ingredients and cooking tips to variations and storage solutions. Let’s dive into why you’ll love making this easy chicken parmesan!

Why You’ll Love This Recipe

  • Quick and Easy: This recipe takes just 45 minutes from prep to plate, making it perfect for those busy evenings.
  • Family-Friendly: With its cheesy goodness and crispy texture, even the pickiest eaters will ask for seconds!
  • Versatile Pairings: Serve with pasta, a fresh salad, or even on a sub roll for a delicious chicken parmesan sandwich!
  • Make-Ahead Friendly: Prepare the chicken cutlets in advance and bake when you’re ready to eat for an effortless dinner.
  • Freezer-Friendly: Leftovers can be frozen, allowing you to enjoy this dish later without any extra cooking time.

Ingredients Breakdown

Here’s what you’ll need:


Nonstick Grill Pan

★ Recommended Kitchen Tool

Nonstick Grill Pan

Make this recipe even easier with a quality Nonstick Grill Pan — a must-have kitchen staple!


🛒 Check Price on Amazon →

As an Amazon Associate, we earn from qualifying purchases.
  • 2.5 cups pasta sauce: Use your favorite store-bought or homemade sauce for best flavor.
  • 6 tablespoons CRACKER BARREL Finely Shredded 100% Parmesan Cheese: This adds a rich, nutty flavor to your dish.
  • 6 small boneless skinless chicken breasts: You can also use chicken thighs for a juicier option.
  • 330 grams spaghetti, uncooked: Any pasta type works, but spaghetti is traditional.
  • 1.5 cups CRACKER BARREL Shredded Mozzarella Cheese: The gooier, the better!

Feel free to substitute ingredients based on your preferences or dietary needs:

  • Gluten-free: Use gluten-free pasta and breadcrumbs.
  • Low-carb: Swap pasta for zucchini noodles.
  • Dairy-free: Use dairy-free cheese alternatives for a similar taste.

Pro Tips for Perfect Chicken Parmesan

Juicy chicken parmesan topped with melted mozzarella and parmesan cheese, served on a plate.
  • Even Thickness: Pound your chicken breasts to an even thickness for uniform cooking.
  • Quality Breadcrumbs: Use panko breadcrumbs for extra crunch and texture.
  • Let it Rest: Allow the cooked chicken to rest for a few minutes after baking for better juiciness.
  • Layer Wisely: Start with sauce, then chicken, and finish with cheese for optimum flavor.
  • Use Fresh Herbs: Adding basil or parsley enhances the flavor profile significantly.
  • Preheat Properly: Make sure your oven is fully preheated to ensure even cooking.
  • Don’t Overcrowd: Bake chicken in a single layer to avoid steaming.
  • Experiment with Spices: Add Italian seasoning or garlic powder to breadcrumbs for a flavor boost.

Common Mistakes and Troubleshooting

Even the best cooks make mistakes! Here are some common pitfalls and how to avoid them:

  • Chicken Not Cooked Through: Always check that the internal temperature reaches 165°F (75°C).
  • Soggy Chicken: Avoid this by ensuring breading is dry before baking.
  • Cheese Not Melting: If your mozzarella isn’t melting, try increasing the oven temperature in the last few minutes.

Variations to Try

Switch things up with these delicious variations:

  • Buffalo Chicken Parmesan: Add buffalo sauce to the chicken before baking for a spicy kick!
  • Vegetable Parmesan: Substitute chicken with eggplant or zucchini for a vegetarian option.
  • Chicken Parmesan Bake: Layer cooked pasta with chicken and sauce for a casserole twist.
  • Caprese Style: Top with fresh tomatoes and basil for a refreshing summer version.

Storage and Make-Ahead Instructions

This chicken parmesan is perfect for meal prep!

  • Refrigerator: Store leftovers in an airtight container for up to 3 days.
  • Freezer: Freeze baked chicken parmesan for up to 3 months. Thaw overnight in the fridge before reheating.
  • Reheating: Reheat in the oven for best results; microwave if in a hurry.

Frequently Asked Questions

Here are some common questions to help you along the way:

  • Can I use frozen chicken breasts? Yes, just ensure they are fully thawed before cooking.
  • What can I serve with chicken parmesan? Spaghetti, garlic bread, or a fresh salad are excellent choices.
  • Can I bake instead of fry the chicken? Absolutely! This recipe is designed for baking.
  • How do I know when the chicken is done? Use a meat thermometer to check for 165°F (75°C).
  • Can I prepare this dish ahead of time? Yes, you can bread the chicken and prepare the sauce in advance.
  • Is this recipe gluten-free? Substitute breadcrumbs and pasta with gluten-free options.
  • What cheese is best for chicken parmesan? A mix of mozzarella and Parmesan works best!
  • Can I use a different type of sauce? Yes! Any marinara or tomato sauce will work.

Nutritional Tips and Dietary Adaptations

This chicken parmesan can fit into a balanced diet:

  • Protein Power: Chicken is an excellent source of lean protein, essential for muscle repair and growth.
  • Carb Conscious: Pair with whole-grain pasta or a salad for added fiber.
  • Low-Calorie Options: Use less cheese and sauce to lower calorie content.

Essential Equipment Recommendations

Having the right tools can make all the difference:

  • Meat Mallet: For pounding chicken to an even thickness.
  • Oven-safe Baking Dish: A good quality dish ensures even cooking.
  • Meat Thermometer: To check chicken doneness accurately.
  • Mixing Bowls: For preparing breading and sauce.

Serving Suggestions

Make your chicken parmesan meal complete:

  • Classic Pairings: Serve with spaghetti for a traditional Italian meal.
  • Salad Side: A Caesar or arugula salad adds freshness.
  • Bread Option: Garlic bread or a crusty loaf is perfect for soaking up sauce.

With this comprehensive guide, you’re now ready to whip up an easy chicken parmesan that will impress your family and friends alike. Remember, cooking is all about enjoying the process, so have fun in the kitchen and make it your own! Happy cooking!

Easy Chicken Parmesan

Prep Time 10 minutes
Cook Time 40 minutes
Total Time 50 minutes
Servings 4 servings
Calories 650
A delicious and comforting Italian-inspired dish featuring breaded chicken topped with cheese and served over spaghetti.

Ingredients

Sauces and Cheeses

  • 2.5 cups pasta sauce
  • 6 tablespoons CRACKER BARREL Finely Shredded 100% Parmesan Cheese
  • 6 small boneless skinless chicken breasts
  • 330 grams spaghetti, uncooked
  • 1.5 cups CRACKER BARREL Shredded Mozzarella Cheese

Instructions 

  • Preheat oven to 375°F (190°C).
  • Pour sauce into a sprayed baking dish, stir in 1/4 cup Parmesan, add chicken, coat evenly, then cover.
  • Bake for 30 minutes, cook spaghetti separately.
  • Top chicken with remaining cheeses, bake uncovered for 5 minutes until melted.
  • Drain spaghetti, serve topped with chicken and sauce.

Notes

For a crispier crust, bread chicken before baking.
Calories: 650kcal
Cost: $15
Course: Main Course
Cuisine: Italian
Keyword: Cheese, chicken, pasta