Author

Emily

Browsing

When it comes to quick weeknight dinners, chicken is often the star of the show, and for a good reason! In just 30 minutes, you can whip up a flavorful and zesty One Pan Chicken Piccata that’s not only delicious but also incredibly easy to make. This dish combines tender chicken breasts with bright lemon and briny capers, creating a pan sauce that elevates your meal without a ton of effort. Let’s dive into why this recipe should be your go-to solution for busy nights!

Why You’ll Love This Recipe

  • Quick & Easy: You’ll have this satisfying meal on the table in just 30 minutes, making it perfect for those hectic weeknights.
  • One Pan Wonder: With only one pan to clean, you can spend more time enjoying dinner with your family and less time washing dishes.
  • Versatile Ingredients: Made with everyday staples like chicken, lemon juice, and capers, this dish is as accessible as it is delicious.
  • Flavorful Sauce: The combination of butter, chicken broth, and lemon creates a bright and tangy sauce that perfectly complements the chicken.
  • Meal Prep Friendly: Leftovers store well and can be reheated for a quick lunch or dinner later in the week.

Ingredients and Substitutions

To make this delightful chicken piccata, gather the following ingredients:

  • ¼ cup all-purpose flour: This helps create a beautiful crust. If you need a gluten-free option, feel free to use rice flour.
  • 2 pounds chicken breasts: Cut in half horizontally or pounded thin for even cooking. Chicken thighs can also be used for a more flavorful dish.
  • 6 tablespoons unsalted butter: This enriches the sauce. Substitute with olive oil if you prefer a dairy-free version.
  • 1 tablespoon minced garlic: Fresh garlic adds a wonderful aroma and depth of flavor.
  • ½ cup chicken broth: Use low-sodium broth to control the saltiness of the dish.
  • ⅓ cup lemon juice: Freshly squeezed is best for that bright, tangy flavor.
  • ¼ cup capers: Drained and rinsed to reduce their saltiness.
  • ½ teaspoon pepper: For seasoning; feel free to adjust according to your taste.

How to Make One Pan Chicken Piccata

Follow these simple steps to create this delightful dish:

  1. Prepare the chicken breasts by either pounding them to about ½-inch thickness or cutting them in half horizontally.
  2. Pour the flour into a shallow bowl, then dip each piece of chicken in the flour, shaking off any excess.
  3. Melt 4 tablespoons of butter in a large frying pan over medium heat.
  4. Pan-sear the chicken for about 4-5 minutes on each side until golden brown. Remove from the pan and set aside.
  5. Melt the remaining butter in the same pan, then sauté the minced garlic for about 2 minutes until fragrant.
  6. Add the chicken broth, lemon juice, and capers to the pan and bring to a boil.
  7. Return the chicken to the pan and simmer for about 5 minutes until the chicken reaches an internal temperature of 165ºF.
  8. Season with pepper to taste, then serve warm.

Pro Tips for the Perfect Chicken Piccata
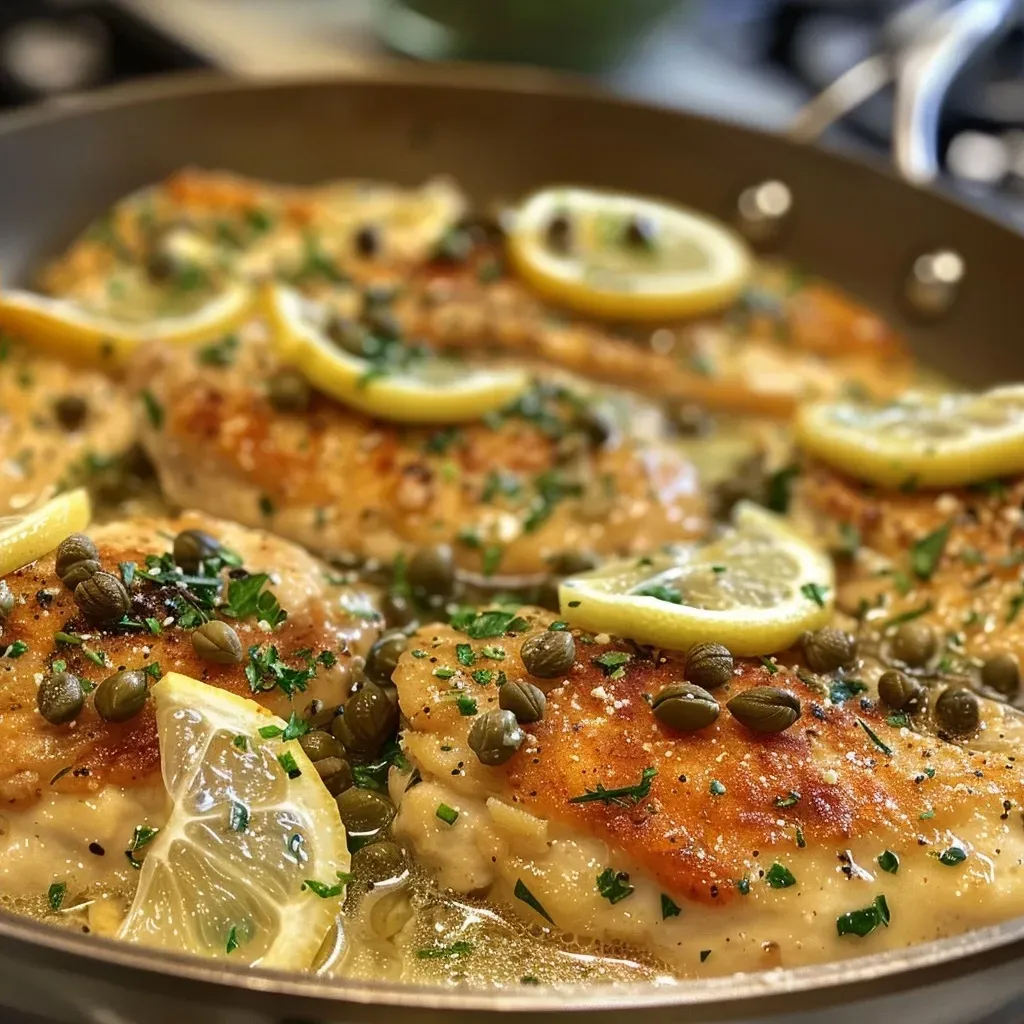
Close-up view of a juicy One Pan Chicken Piccata plated with lemon slices and capers.
  • Even Thickness: Ensure your chicken is of even thickness for consistent cooking. Pounding helps achieve this.
  • Hot Pan: Start with a hot pan to get a nice sear on the chicken, enhancing the flavor.
  • Don’t Overcrowd: If you need to cook in batches, give each piece of chicken enough space to brown properly.
  • Adjust the Sauce: If the sauce is too tangy, feel free to add a teaspoon of sugar to balance the flavors.
  • Experiment with Herbs: Add fresh parsley or thyme at the end for an extra layer of flavor.
  • Thicken the Sauce: If you prefer a thicker sauce, add a cornstarch slurry (cornstarch mixed with water) after adding the broth.
  • Pairing Options: Serve with pasta, rice, or a fresh salad to round out the meal.
  • Make-Ahead: You can prepare the chicken and sauce ahead of time, just reheat them gently when ready to serve.

Common Mistakes and Troubleshooting

Even the best cooks can encounter hurdles. Here are some common pitfalls and how to avoid them:

  • Overcooking the Chicken: Always use a meat thermometer to check for doneness at 165ºF.
  • Too Much Flour: Be sure to shake off excess flour before cooking to avoid a gummy texture.
  • Sauce Too Salty: If you accidentally over-season, add a bit of cream or more broth to dilute the saltiness.
  • Burnt Garlic: Keep a close eye on the garlic while sautéing, as it can burn quickly and become bitter.

Variations to Try

Feeling adventurous? Here are some variations to customize your chicken piccata:

  • Caprese Piccata: Add fresh mozzarella and basil for an Italian twist.
  • Mushroom Piccata: Sauté sliced mushrooms with the garlic for a hearty addition.
  • Spinach Piccata: Stir in fresh spinach at the end for added nutrition and color.
  • Spicy Piccata: Add a pinch of red pepper flakes to the sauce for a kick.

Storage and Make-Ahead Instructions

This dish is perfect for meal prep! Here’s how to store and reheat:

  • Refrigerate: Store leftovers in an airtight container in the fridge for up to 3 days.
  • Freeze: For longer storage, freeze the chicken and sauce in a freezer bag for up to 3 months. Thaw overnight in the fridge before reheating.
  • Reheat: Gently reheat in a pan over low heat, adding a splash of chicken broth to loosen the sauce.

Frequently Asked Questions

  • Can I use chicken thighs instead of breasts? Absolutely! Chicken thighs will add more flavor and moisture.
  • What can I serve with chicken piccata? This dish pairs wonderfully with pasta, rice, or a simple green salad.
  • Can I make this dairy-free? Yes, substitute the butter with olive oil or a dairy-free butter alternative.
  • How do I know when the chicken is done? Use a meat thermometer to ensure it reaches 165ºF.
  • Can I use other citrus fruits? Yes! Try lime or orange juice for a different flavor profile.
  • Is this recipe gluten-free? Use a gluten-free flour alternative to make it gluten-free.
  • How long does it take to cook? The entire dish takes about 30 minutes from start to finish.
  • Can I use frozen chicken? It’s best to thaw the chicken first for even cooking.

Nutrition Tips and Dietary Adaptations

This One Pan Chicken Piccata can be adapted to fit various dietary needs:

  • Low-Carb Option: Serve with steamed vegetables instead of pasta for a low-carb meal.
  • Low-Sodium Version: Use low-sodium broth and skip the added salt.
  • Paleo-Friendly: Substitute flour with almond flour for dredging the chicken.
  • Vegan Alternative: Use tofu instead of chicken, and substitute vegetable broth for chicken broth.

Equipment Recommendations

To make this recipe smoothly, here are some kitchen essentials:

  • Large Frying Pan: A non-stick or cast-iron skillet works best for even cooking.
  • Meat Thermometer: To ensure your chicken is cooked perfectly every time.
  • Shallow Bowl: For dredging the chicken in flour.
  • Spatula: A sturdy spatula will help you flip the chicken without breaking it.

Serving Suggestions

Complete your meal with these delightful sides:

  • Pasta: Angel hair or spaghetti tossed in olive oil and garlic.
  • Rice: Fragrant jasmine or basmati rice works beautifully.
  • Salad: A fresh green salad with a lemon vinaigrette.
  • Bread: Crusty bread for dipping in the delicious sauce.

In conclusion, this Speedy One Pan Chicken Piccata is not just a meal; it’s a solution for busy families looking to enjoy a tasty, wholesome dinner without the stress. With its bright flavors and simple cooking method, you’ll find yourself reaching for this recipe time and again. So gather your ingredients, and let’s make dinner a breeze!
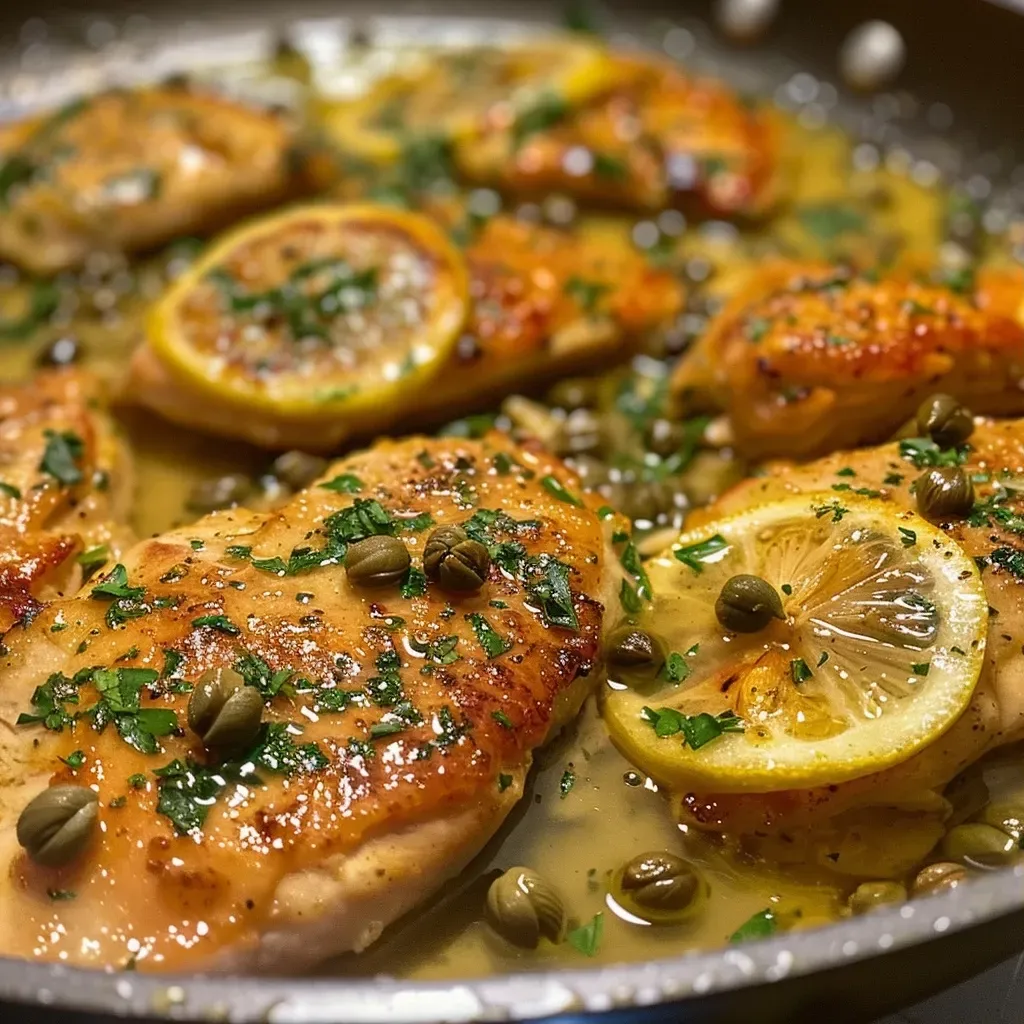
One Pan Chicken Piccata

Prep Time 10 minutes
Cook Time 15 minutes
Total Time 25 minutes
Servings 4 servings
Calories 350
A quick and flavorful Italian-inspired dish featuring tender chicken in a tangy lemon caper sauce, all cooked in one pan for easy cleanup.

Ingredients

Dried ingredients

  • 0.25 cup all purpose flour
  • 2 pounds chicken breasts (cut in half horizontally or pounded thin)
  • 6 tablespoons unsalted butter (divided)
  • 1 tablespoon minced garlic
  • 0.5 cup chicken broth
  • 0.33 cup lemon juice
  • 0.25 cup capers (drained and rinsed)
  • 0.5 teaspoon pepper

Instructions 

  • Pound or cut chicken thin, then dip in flour, shaking off excess.
  • Melt 4 tbsp butter in a pan over medium heat and cook chicken until browned, about 4-5 minutes per side. Remove and set aside.
  • In the same pan, melt remaining butter, sauté garlic for 2 minutes, then add broth, lemon juice, and capers. Bring to a boil.
  • Return chicken to pan, simmer for 5 minutes until cooked through, then season with pepper and serve.
Notes

For extra flavor, garnish with fresh parsley or lemon slices.
Calories: 350kcal
Cost: $15
Course: Main Course
Cuisine: Italian
Keyword: chicken

The Ultimate Guide to Crispy Air Fryer Korean Fried Chicken

Looking for a way to elevate your weeknight dinners without the hassle? Look no further! Our Crispy Air Fryer Korean Fried Chicken is not only a flavor-packed delight but also a quick and easy meal that the whole family will love. Packed with everyday ingredients, this recipe takes the humble chicken to new heights, making it a go-to solution for busy cooks everywhere. With just a few simple steps, you can whip up a batch that’s crispy on the outside and juicy on the inside—all in your air fryer!

This recipe is perfect for those who might be feeling stuck in a dinner rut. Whether you’re a seasoned cook or just starting out, you’ll find that with the right technique, chicken can turn into something extraordinary. Let’s dive into why you’ll love this recipe!

Why You’ll Love This Recipe

  • Quick and Easy: Ready in under 30 minutes, making it perfect for busy weeknights.
  • Healthier Option: Enjoy the crispy texture of fried chicken without the excess oil of traditional frying.
  • Family-Friendly: Kids and adults alike will love the crispy coating and flavorful sauce.
  • Versatile: Serve it as an appetizer, main dish, or even in a salad for a unique twist.
  • Meal Prep Friendly: Make a large batch ahead of time for quick lunch or dinner options.

Ingredients Breakdown

Let’s take a closer look at what you’ll need to make this delicious dish. Each ingredient plays a key role in achieving that authentic Korean fried chicken flavor.

  • 1 ½ pounds boneless (skinless chicken thighs): These are perfect for a tender bite; feel free to use chicken breasts if you prefer.
  • 2 tablespoons rice vinegar: This adds a nice tanginess and helps tenderize the chicken.
  • 1 tablespoon soy sauce: Essential for umami flavor.
  • 2 teaspoons minced fresh ginger: Adds warmth and depth to the marinade.
  • ¾ teaspoon kosher salt: Enhances the overall flavor.
  • ½ teaspoon freshly ground black pepper: For a mild kick.
  • 2 large eggs (beaten): Acts as a binder for the coating.
  • 1 cup cornstarch: Key for achieving that crispy exterior.
  • 3 tablespoons ketchup: Sweetness to balance the heat.
  • 3 tablespoons gochujang: The star ingredient for authentic heat and flavor.
  • 3 tablespoons honey: Adds sweetness to the sauce.
  • 2 tablespoons soy sauce: For added depth in the sauce.
  • 1 tablespoon sesame oil: Infuses a nutty flavor.
  • 2 garlic cloves (minced): Essential for depth of flavor.
  • 4 scallions (thinly sliced): For garnish and a fresh crunch.
  • Toasted sesame seeds: Adds a nice finish and texture.

Pro Tips for Perfect Korean Fried Chicken

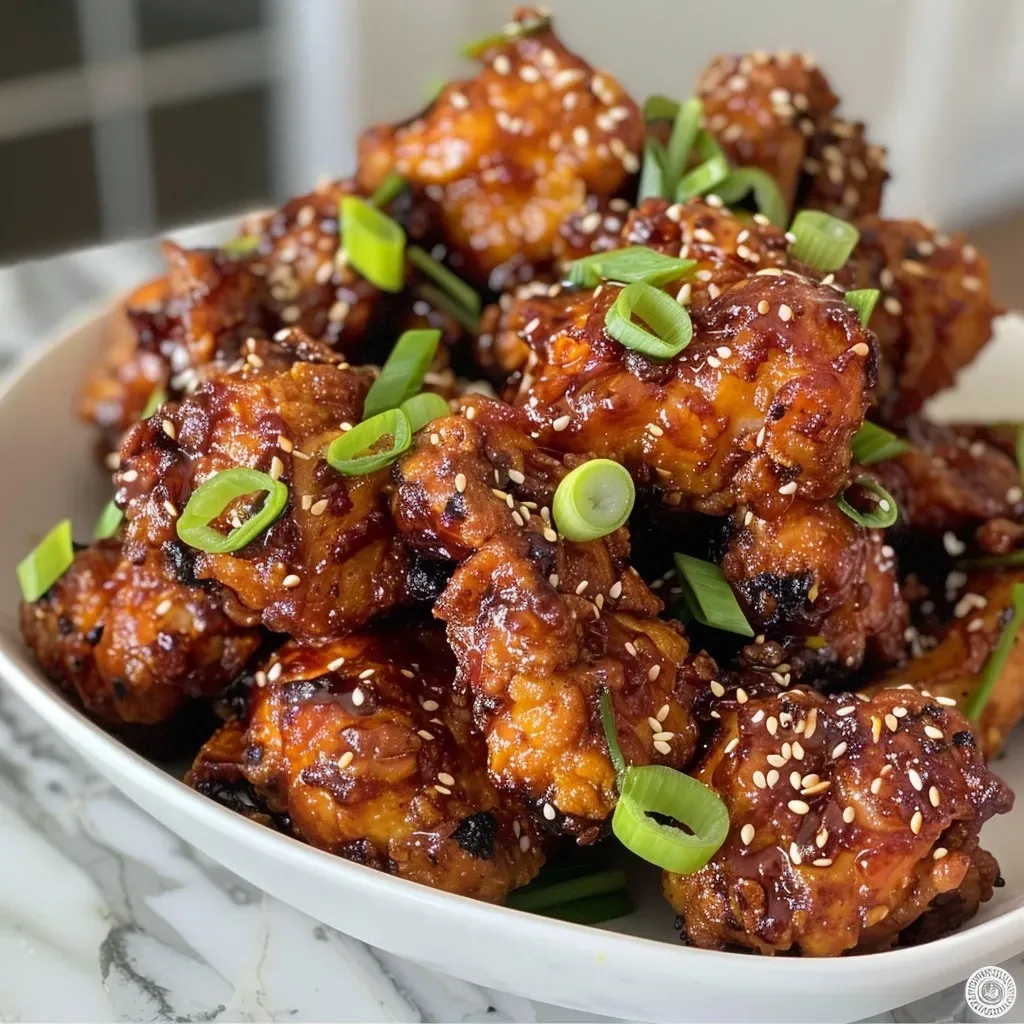
Close-up of golden-brown Air Fryer Korean Fried Chicken pieces garnished with scallions and sesame seeds.

To ensure your chicken turns out perfectly every time, keep these expert insights in mind:

  • Marinate Longer: If time allows, marinate the chicken for up to overnight for deeper flavor.
  • Use Parchment Paper: Line the air fryer basket to prevent sticking and ensure easy cleanup.
  • Work in Batches: Don’t overcrowd the air fryer; this allows for even cooking and crispiness.
  • Adjust Cooking Time: Depending on your air fryer model, you may need to tweak the cooking time slightly.
  • Spray for Crispiness: A light spritz of cooking oil before frying helps achieve that beautiful golden color.
  • Check Internal Temperature: Ensure chicken reaches 165°F for safe consumption.
  • Let it Rest: Allow the chicken to rest for a few minutes before serving to retain moisture.
  • Customize the Sauce: Feel free to adjust the sweetness or spice level of the sauce to your liking.

Common Mistakes and Troubleshooting

Even the best cooks encounter issues. Here are common pitfalls and how to avoid them:

  • Chicken Isn’t Crispy: Ensure you don’t overcrowd the basket and use enough cornstarch.
  • Too Spicy: If you find the sauce too spicy, balance it out with additional honey or ketchup.
  • Uneven Cooking: Shake the basket halfway through cooking to ensure even browning.
  • Sauce Gets Soggy: Toss the chicken in the sauce just before serving to maintain crispiness.

Variations to Try

Want to switch things up? Here are some delicious variations to adapt this recipe:

  • Honey Garlic Chicken: Substitute gochujang with garlic sauce for a milder flavor.
  • Spicy Buffalo Chicken: Use buffalo sauce instead of the Korean sauce for a spicy twist.
  • Teriyaki Chicken: Swap the sauce for teriyaki for a sweet and savory flavor profile.
  • Vegetarian Version: Use cauliflower florets instead of chicken for a vegetarian-friendly alternative.

Storage and Make-Ahead Instructions

This recipe is a great option for meal prepping. Here’s how to store and reheat:

  • Refrigeration: Store leftovers in an airtight container in the fridge for up to 3 days.
  • Freezing: Freeze cooked chicken in a single layer on a baking sheet, then transfer to a freezer-safe bag for up to 2 months.
  • Reheating: To maintain crispiness, reheat in the air fryer at 350°F for about 5-7 minutes.

FAQs About Air Fryer Korean Fried Chicken

Here are some frequently asked questions to help you make the most of this recipe:

  • Can I use chicken breasts instead of thighs? Yes, chicken breasts can be used but may result in drier chicken.
  • What if I don’t have gochujang? You can substitute with sriracha or another hot sauce, but the flavor will differ.
  • Can I bake this chicken instead? Yes, bake at 400°F for about 20-25 minutes, flipping halfway through.
  • Is it possible to use a different air fryer model? Absolutely! Cooking times may vary, so keep an eye on the chicken.
  • How do I make it gluten-free? Use gluten-free soy sauce and check all other ingredients for gluten.
  • Can I double the recipe? Yes, just remember to cook in batches for even cooking.
  • What sides go well with Korean fried chicken? Try serving with steamed rice, pickled vegetables, or a fresh salad.
  • How spicy is this recipe? The spice level can be adjusted by using more or less gochujang to suit your taste.

Nutrition Tips and Dietary Adaptations

This recipe is a crowd-pleaser, but here are some tips to make it even healthier:

  • Low-Calorie Option: Use less honey and oil to cut down on calories.
  • Protein Boost: Add more chicken or serve with a side of edamame for extra protein.
  • Vegetable Additions: Mix in veggies like bell peppers or broccoli into the air fryer for a complete meal.

Equipment Recommendations

To achieve the best results, here’s what you’ll need:

  • Quality Air Fryer: Invest in a reliable air fryer that has good reviews for even cooking.
  • Measuring Cups and Spoons: For accurate ingredient measurements.
  • Mixing Bowls: Use for marinating and combining sauces.
  • Cooking Spray: A must for achieving that crispy exterior.

Serving Suggestions

This crispy air fryer Korean fried chicken can be served in various ways to suit your flavor preferences:

  • Classic Plate: Serve with steamed white rice and a side of kimchi.
  • Wrap It Up: Use in a lettuce wrap for a fresh and crunchy bite.
  • Fajita Bowl: Slice the chicken and serve over rice with bell peppers and onions.
  • Salad Topper: Add to a mixed green salad with sesame dressing for a light meal.

With this comprehensive guide, you’re now equipped to create the most flavorful, crispy air fryer Korean fried chicken your family will love! Say goodbye to the same five chicken recipes and hello to a world of delicious possibilities. Happy cooking!

Air Fryer Korean Fried Chicken

Prep Time 20 minutes
Cook Time 15 minutes
Total Time 35 minutes
Servings 4 servings
Calories 450
Enjoy crispy, flavorful Korean-style fried chicken made healthier with the air fryer and a spicy-sweet sauce.

Ingredients

Chicken

  • 1.5 pounds boneless (skinless chicken thighs, cut into bite-size pieces)
  • 2 tablespoons rice vinegar
  • 1 tablespoon soy sauce
  • 2 teaspoons minced fresh ginger
  • 0.75 teaspoon kosher salt
  • 0.5 teaspoon freshly ground black pepper
  • 2 large eggs (beaten)
  • 1 cup cornstarch
  • 3 tablespoons ketchup
  • 3 tablespoons gochujang
  • 3 tablespoons honey
  • 2 tablespoons soy sauce
  • 1 tablespoon sesame oil
  • 2 cloves garlic (minced)
  • 4 scallions thinly sliced

Toasted sesame seeds

Instructions 

  • Marinate chicken with vinegar, soy, ginger, salt, and pepper for 15-20 minutes.
  • Beat eggs and coat chicken pieces in egg and cornstarch.
  • Arrange coated chicken in the air fryer, spritz with oil, and cook at 400ºF for 8 minutes. Turn, oil again, and cook for 7 more minutes.
  • Prepare sauce by mixing ketchup, gochujang, honey, soy, sesame oil, and garlic.
  • Toss cooked chicken with sauce, garnish with sesame seeds and scallions.

Notes

For extra crispiness, spray chicken with oil before air frying.
Calories: 450kcal
Cost: $15
Course: Main Course
Cuisine: Korean
Keyword: air fryer, chicken, Spicy

Transform Your Dinner Routine with This High Protein Creamy Chicken Noodle Casserole

Welcome to your new weeknight dinner hero! This High Protein Creamy Chicken Noodle Casserole is not just another chicken dinner; it’s a hearty, satisfying meal that checks all the boxes for a busy family. Packed with shredded chicken, protein-rich Greek yogurt, and a colorful mix of veggies, this dish is designed to please even the pickiest eaters. In under an hour, you can whip up a comforting casserole that’s perfect for those hectic evenings.

Why You’ll Love This Recipe

This casserole isn’t just filling; it’s a nutritional powerhouse! Here are five reasons to make this dish a staple in your home:

  • High Protein Content: Each serving is loaded with protein from chicken, Greek yogurt, and cheese, helping to keep your family satisfied and energized.
  • Quick Preparation: With a total time of about 40 minutes, this recipe is perfect for busy weeknights when you need something quick yet delicious.
  • Versatile Ingredients: Use leftover chicken or swap in your favorite vegetables to customize this casserole to your family’s tastes.
  • Family-Friendly: This dish is a hit with both kids and adults, making it a stress-free option for family dinners.
  • Make-Ahead Friendly: Prepare it in advance and simply pop it in the oven when you’re ready to eat!

Ingredient Breakdown

Let’s dive into the ingredients and some possible substitutions to suit your kitchen and dietary needs:

  • 24 oz Chicken Breast: Cooked and shredded. Use leftover rotisserie chicken for a quicker option!
  • 1 lb Wide Egg Noodles: These provide the classic noodle texture. You can substitute with whole grain or gluten-free noodles if desired.
  • 2 cans Condensed Chicken Soup: This is key for creaminess. Use low-sodium versions to control salt intake.
  • 2 cups 2% Ultra Filtered Milk: You can use any milk, including dairy-free options like almond or oat milk.
  • 12 oz Peas and Carrots (frozen): A quick way to add veggies. Feel free to swap with fresh or other frozen vegetables.
  • 2 cups Reduced Fat Cheddar: For a lower fat option, try mozzarella or nutritional yeast for a vegan twist.
  • 1 cup Fat Free Greek Yogurt: Adds protein and creaminess. Substitute with a plant-based yogurt if needed.
  • 1 cup French Fried Onions: These add crunch; however, you can use crushed crackers or nuts for a different texture.
  • Seasonings: Salt, pepper, and garlic powder enhance flavor; adjust to taste.

Pro Tips for the Perfect Casserole

Close-up of a creamy chicken noodle casserole with a golden topping.

To ensure your casserole turns out beautifully every time, keep these expert tips in mind:

  • Shred Chicken Warm: Shredding chicken while it’s warm makes it easier and prevents it from drying out.
  • Don’t Overcook Noodles: Cook them just until al dente; they will finish cooking in the oven.
  • Mix Thoroughly: Ensure that all ingredients are well combined for even flavor distribution.
  • Rest Before Serving: Let the casserole sit for a few minutes after baking to help it set and make serving easier.
  • Experiment with Spices: Add herbs like thyme or basil for extra flavor; they complement the chicken beautifully.
  • Double the Recipe: Make a larger batch for leftovers or to freeze for later meals.
  • Use a Deep Dish: A deeper casserole dish can hold more ingredients and prevents overflow.
  • Monitor Baking Time: Ovens vary; check for bubbling edges and a golden top as indicators of doneness.

Avoiding Common Mistakes

Even the best home cooks can run into issues. Here’s how to troubleshoot some common mistakes:

  • Watery Casserole: If your casserole ends up watery, try adding a bit more cheese or a thickening agent like cornstarch mixed with water.
  • Soggy Noodles: To prevent this, ensure they are cooked al dente, and avoid excess liquid in the mixture.
  • Uneven Cooking: Stir the casserole halfway through baking for even heat distribution.

Flavor Variations

Get creative with your casserole! Here are some variations to consider:

  • Buffalo Chicken Casserole: Mix in buffalo sauce for a spicy kick!
  • Vegetarian Version: Replace chicken with chickpeas and add more veggies.
  • Mediterranean Twist: Incorporate olives, sun-dried tomatoes, and feta cheese for a Mediterranean flavor.
  • Curry Chicken Casserole: Add curry powder and substitute peas with peas and carrots for an exotic flavor.

Storage and Make-Ahead Instructions

This casserole can be made ahead of time and stored for later enjoyment:

  • Refrigerator: Store leftovers in an airtight container in the refrigerator for up to 3 days.
  • Freezer: You can freeze the assembled but unbaked casserole for up to 3 months. Just thaw and bake when ready to eat.
  • Reheating: Reheat in the oven at 350°F until hot throughout, about 20-25 minutes.

Frequently Asked Questions

If you have questions about your casserole journey, here are common inquiries:

  • Can I use other types of noodles? Yes! Whole wheat, gluten-free, or even zucchini noodles can work.
  • Is this recipe kid-friendly? Absolutely! The creamy texture and cheesy flavor make it a hit with kids.
  • Can I make this dairy-free? Yes! Substitute Greek yogurt with a plant-based yogurt and use dairy-free cheese.
  • How long does it take to make? The total time is about 40 minutes, including prep and baking.
  • Can I add more vegetables? Definitely! Broccoli, bell peppers, or spinach can be great additions.
  • What’s the best way to reheat leftovers? Oven reheating is best to maintain texture but microwave works too.
  • Can I use fresh chicken? Yes! Just cook it thoroughly before shredding.
  • What should I serve with this casserole? A fresh salad or garlic bread makes a perfect side!

Nutritional Tips and Dietary Adaptations

For those monitoring their nutrition, consider these tips:

  • Protein Boost: Add extra chicken or use a higher protein noodle alternative.
  • Lower Carb Options: Use spiralized vegetables instead of noodles for a lower carb version.
  • Reduce Sodium: Opt for low-sodium soup and seasonings to control salt intake.

Essential Equipment for Success

To prepare this casserole, you’ll need:

  • 9×13 Inch Casserole Dish: Ideal for baking and serving.
  • Mixing Bowls: For combining ingredients thoroughly.
  • Pot for Cooking Noodles: A large pot is necessary to cook the noodles evenly.
  • Whisk: Perfect for mixing sauces smoothly.
  • Measuring Cups and Spoons: Ensure accurate ingredient measurements for the best results.

Serving Suggestions

For a complete meal, consider these serving ideas:

  • Fresh Side Salad: A simple green salad with a light vinaigrette pairs perfectly.
  • Garlic Bread: Serve with warm garlic bread for a comforting side.
  • Steamed Vegetables: Broccoli or green beans can add color and nutrients to your plate.

Conclusion

This High Protein Creamy Chicken Noodle Casserole is more than just a meal; it’s a solution to busy weeknights and a way to bring your family together over delicious food. With its comforting flavors and easy preparation, you’ll find it quickly becomes a family favorite. So gather your ingredients, get cooking, and enjoy the satisfaction of a homemade dish that everyone will love!

High Protein Creamy Chicken Noodle Casserole

Prep Time 15 minutes
Cook Time 30 minutes
Total Time 45 minutes
Servings 6 servings
Calories 650
A hearty and creamy casserole combining tender chicken, noodles, and vegetables, topped with cheesy goodness and crispy onions.

Ingredients

Protein

  • 24 oz Chicken Breast (cooked and shredded)
  • 1 lb Wide Egg Noodles (cooked)

Canned Soups

  • 2 cans Condensed Chicken Soup (10.5 oz cans)

Dairy & Vegetables

  • 2 cups 2% Ultra Filtered Milk
  • 12 oz Peas and Carrots (frozen)
  • 1 cup Fat Free Greek Yogurt

Cheese & Toppings

  • 2 cups Reduced Fat Cheddar
  • 1 cup French Fried Onions
  • 1 tsp Salt
  • ¼ tsp Pepper
  • ½ tsp Garlic Powder

Instructions 

  • Preheat oven to 350°F and grease a 9x13-inch dish.
  • Cook noodles until al dente, drain, and set aside.
  • Mix soup, milk, yogurt, salt, pepper, and garlic powder until smooth.
  • Stir in chicken, half the cheese, peas, and carrots into the sauce.
  • Combine with noodles, then pour into dish. Top with remaining cheese and fried onions.
  • Bake uncovered for 25–30 minutes, then rest 5 minutes before serving.

Notes

For extra flavor, add herbs or spices as desired.
Calories: 650kcal
Cost: $15
Course: Main Course
Cuisine: American
Keyword: casserole, chicken, protein

Whip up these Easy Chicken Fajita Bowls in no time! Packed with vibrant flavors, tender chicken, and your favorite toppings, this dinner solution is both satisfying and healthy. Perfect for busy weeknights! Whether you’re a culinary novice or an experienced home cook, this recipe will make your dinner routine feel exciting and effortless. Let’s dive into the world of chicken fajita bowls and discover how you can transform simple ingredients into a delicious meal your family will love.

Why You’ll Love This Recipe

This chicken fajita bowl recipe is a game-changer for busy nights. Here are a few reasons why:

  • Quick and Easy: This recipe comes together in about 30 minutes, making it perfect for weeknight dinners.
  • Customizable: Tailor each bowl to your family’s taste with a variety of toppings and ingredients.
  • Healthy and Satisfying: Packed with lean protein, fresh veggies, and healthy fats, these bowls are as nutritious as they are delicious.
  • Meal Prep Friendly: Make a batch ahead of time and store it for easy lunches or dinners throughout the week.
  • Family-Friendly: The colorful presentation and delicious flavors make it a hit with both kids and adults.

Ingredient Breakdown

To create your own chicken fajita bowls, gather the following ingredients:

  • Chicken Breasts: 2 large chicken breasts, pounded to ½ inch thick for even cooking.
  • Olive Oil: ¼ cup plus more for cooking; this helps with browning and adds flavor.
  • Lime Juice: Freshly squeezed juice from 1 lime enhances the flavor profile.
  • Spices: Chili powder, paprika, ground cumin, dried oregano, garlic powder, Kosher salt, and black pepper for seasoning.
  • Rice: 3 cups of cooked long grain rice or a healthy alternative like cauliflower rice.
  • Cilantro: ¼ cup chopped fresh cilantro for garnish and flavor.
  • Bell Peppers and Onions: 2 large bell peppers (any color) and 1 large yellow onion, sliced.
  • Toppings: Guacamole, pico de gallo (or diced tomatoes), corn kernels, canned black beans, shredded Monterey Jack cheese, and shredded romaine lettuce.

If you’re missing any specific ingredients, here are a few substitutions you can make:

  • Chicken: Swap out chicken breasts for thighs or use a rotisserie chicken for a quicker option.
  • Rice: Quinoa or even lettuce wraps can serve as a great base.
  • Spices: If you don’t have all the spices, a fajita seasoning mix can work just as well.
  • Vegetables: Feel free to add zucchini, mushrooms, or any other veggies you love.

Pro Tips for Success

To ensure your chicken fajita bowls are a hit, consider these expert tips:

  • Marinate Longer: For maximum flavor, marinate the chicken for 2-3 hours or overnight.
  • Don’t Overcrowd the Pan: When cooking the veggies, make sure the pan isn’t overcrowded to get that perfect char.
  • Rest the Chicken: Let the cooked chicken rest for 10 minutes before slicing to keep it juicy.
  • Customize Your Bowls: Encourage your family to create their own bowls with a variety of toppings for a fun experience.
  • Easy Cleanup: Use parchment paper on your baking sheet for easy cleanup if you choose to roast the veggies.

Common Mistakes and Troubleshooting

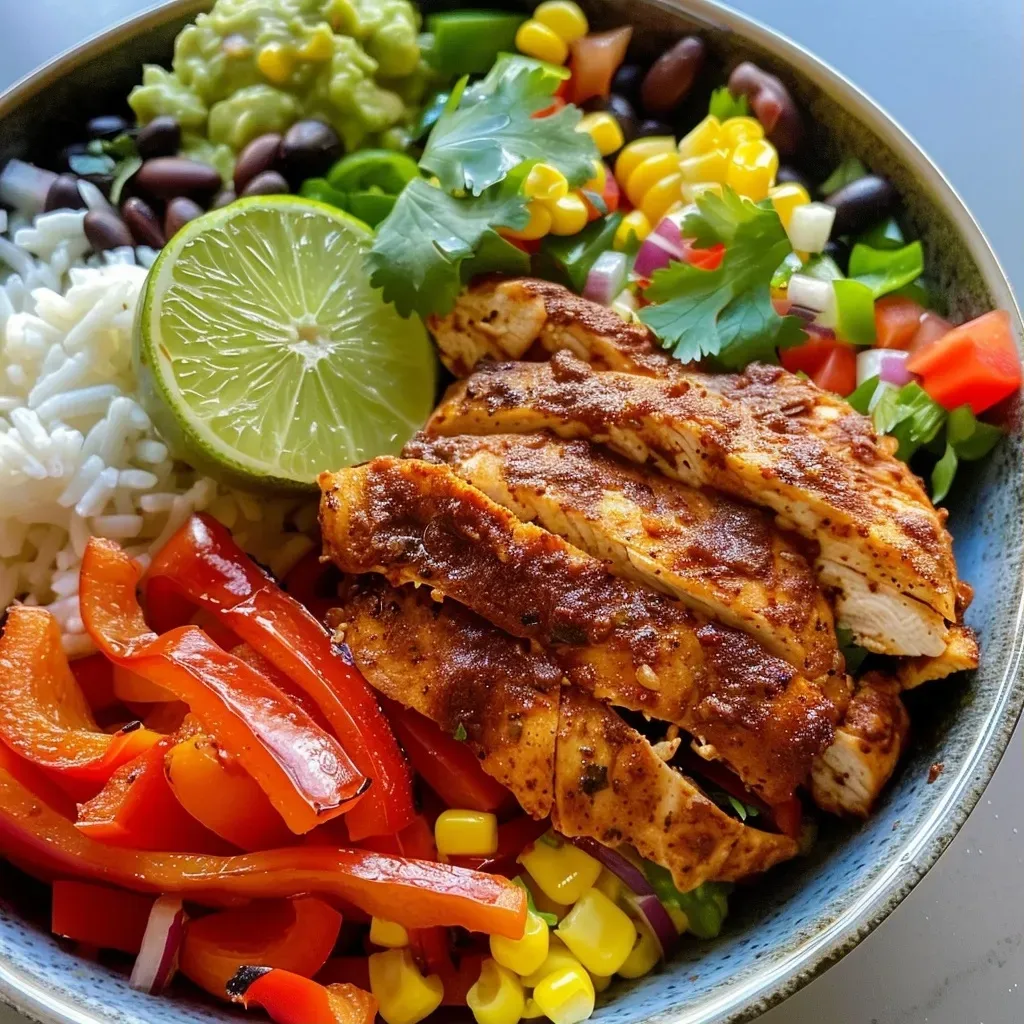
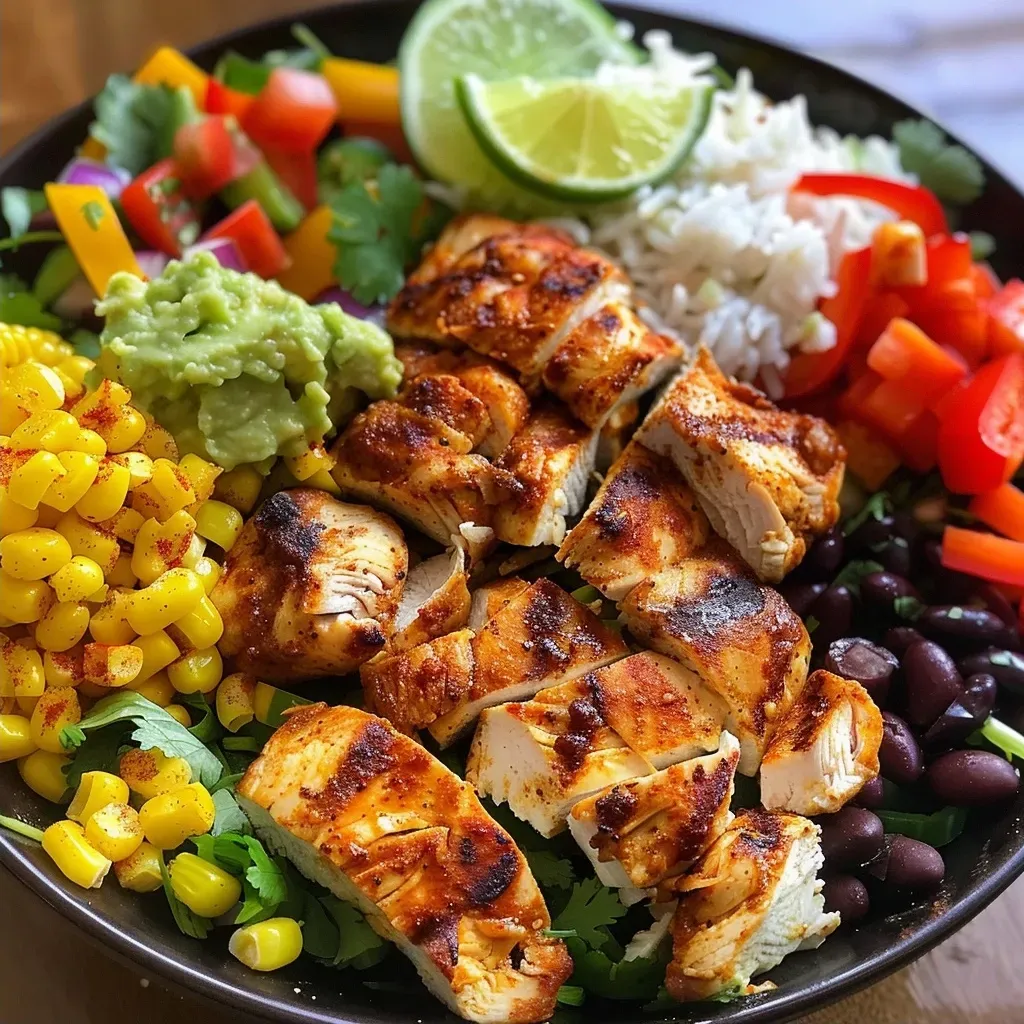
Close-up view of a vibrant chicken fajita bowl with sliced bell peppers and rice.

Even the best cooks make mistakes! Here are some common pitfalls and how to avoid them:

  • Dry Chicken: Overcooking will lead to dry chicken. Use a meat thermometer to check for doneness (165°F).
  • Too Much Spice: If the seasoning is too strong, balance it out with sour cream or guacamole.
  • Underseasoned Rice: Don’t forget to season your rice with salt and lime juice for extra flavor.

Variations on Chicken Fajita Bowls

Want to mix things up? Here are some tasty variations to try:

  • Steak Fajita Bowls: Swap out chicken for steak for a hearty option.
  • Vegetarian Fajita Bowls: Use grilled mushrooms, zucchini, and bell peppers for a delicious veggie bowl.
  • Spicy Fajita Bowls: Add jalapeños or a dash of cayenne pepper for a kick.
  • Breakfast Fajita Bowls: Top with scrambled eggs and avocado for a breakfast twist.

Storage and Make-Ahead Instructions

You can easily prepare these chicken fajita bowls ahead of time:

  • Make Ahead: Marinate the chicken the night before for enhanced flavor.
  • Storing: Store cooked ingredients in airtight containers in the fridge for up to 4 days.
  • Freezing: Freeze cooked chicken and veggies separately for up to 3 months. Thaw before reheating.

Frequently Asked Questions

Here are some common questions about chicken fajita bowls:

  • Can I use frozen chicken? Yes, just make sure to thaw it completely before marinating.
  • How do I make these bowls lower in calories? Use less oil and opt for brown rice or cauliflower rice.
  • Can I make this in a slow cooker? Yes, cook chicken and veggies on low for 6-8 hours.
  • What should I serve with chicken fajita bowls? A fresh salad or tortilla chips make great sides.
  • Can I use other proteins? Absolutely! Shrimp or tofu make excellent substitutes.
  • How do I reheat leftovers? Simply microwave or heat in a skillet until warm.
  • Can I add beans to the chicken fry? Yes, black beans or pinto beans add protein and fiber.
  • What toppings can I use? Get creative! Consider olives, cheese, or fresh salsa.

Nutritional Tips and Dietary Adaptations

These chicken fajita bowls can adapt to various dietary needs:

  • Gluten-Free: Ensure all sauces and toppings are gluten-free.
  • Dairy-Free: Skip cheese or use a dairy-free alternative.
  • Paleo-Friendly: Use cauliflower rice and omit beans for a paleo-friendly option.

Equipment Recommendations

To make the cooking process smoother, consider using:

  • Cast Iron Skillet: Perfect for achieving a nice sear on the chicken and veggies.
  • Meat Thermometer: Ensures your chicken is cooked to perfection.
  • Rice Cooker: Makes cooking rice a breeze and ensures fluffy results.

Serving Suggestions

Make your chicken fajita bowls even more exciting with these serving ideas:

  • Layer It Up: Start with a base of rice, then layer with chicken, veggies, and toppings.
  • Family Style: Serve all ingredients in separate bowls and let everyone build their own bowl.
  • Wrap It Up: If you have leftovers, wrap everything in a tortilla for a delicious wrap.

In conclusion, these quick and flavorful chicken fajita bowls are the perfect solution for busy weeknights. They’re packed with flavor, easy to customize, and sure to please even the pickiest eaters. With a little prep, you’ll have a delicious meal on the table in no time. So, gather your ingredients, gather your family, and enjoy a night of delicious fajita bowls together!

Easy Chicken Fajita Bowls

Prep Time 20 minutes
Cook Time 20 minutes
Total Time 40 minutes
Servings 4 servings
Calories 550
Delicious and colorful chicken fajita bowls packed with flavorful toppings and easy to prepare.

Ingredients

Marinade

  • 2 large chicken breasts (pounded to ½ inch thick)
  • ¼ cup olive oil (plus more for cooking)
  • 1 each lime (juice of 1 lime)
  • 1 teaspoon chili powder
  • ¾ teaspoon paprika
  • ½ teaspoon ground cumin
  • 1 teaspoon dried oregano
  • 1.5 teaspoons garlic powder
  • 1 teaspoon Kosher salt
  • ¼ teaspoon ground black pepper
  • 3 cups cooked long grain rice
  • ¼ cup chopped fresh cilantro (plus more to taste)
  • 1 each freshly squeezed lime
  • Salt to taste Salt
  • 2 large bell peppers (sliced (red, yellow, green))
  • 1 large yellow onion (sliced)

Guacamole

Pico de gallo

Corn kernels

Canned black beans

Shredded Monterey Jack cheese

Shredded romaine lettuce

Instructions 

  • Marinate chicken: Combine marinade ingredients, coat chicken, and refrigerate 2-3 hours.
  • Prepare rice: Mix cooked rice with lime juice and salt, keep warm.
  • Cook chicken: Sauté in oil 6 minutes per side until cooked, then rest and slice.
  • Cook veggies: Sauté peppers and onions 5 minutes until charred and tender, season with salt and pepper.
  • Assemble bowls: Layer rice, chicken, veggies, and toppings. Serve immediately.

Notes

Use fresh ingredients for best flavor and customize toppings to taste.
Calories: 550kcal
Cost: $15
Course: Main Course
Cuisine: Mexican
Keyword: chicken, Fajita

Are you looking for a delicious and satisfying meal that can be whipped up in no time? Look no further! Our Chicken Teriyaki Bowls are not only packed with flavor but also perfect for those hectic weeknights when time is of the essence. This recipe features juicy chicken, fluffy jasmine rice, and vibrant vegetables—all coated in a sweet and savory teriyaki sauce. Whether you’re feeding a family or just yourself, this meal is a guaranteed winner!

Why You’ll Love This Recipe

This Chicken Teriyaki Bowl isn’t just any ordinary dish; here’s why it stands out:

  • Quick to Prepare: This dish comes together in about 30 minutes—perfect for busy evenings!
  • Versatile Ingredients: You can easily swap in whatever veggies you have on hand, making it adaptable to your family’s tastes.
  • High Protein: Packed with chicken and nutritional veggies, this meal keeps you full and satisfied.
  • Flavor Explosion: The homemade teriyaki sauce is a delightful blend of sweet and savory that clings to every bite.
  • Meal Prep Friendly: These bowls store well, making them a great option for lunch the next day or for meal prep!

Ingredients for Chicken Teriyaki Bowls

Here’s what you’ll need to create these flavorful bowls:

  • 1 package Chicken: Boneless, skinless chicken breast or thighs work best.
  • 1 cup Jasmine rice: This fluffy rice complements the teriyaki sauce beautifully.
  • 1 package Frozen Broccoli: Or substitute with any of your favorite vegetables like bell peppers or snap peas.
  • 1/4 cup Teriyaki Sauce: Opt for a store-bought variety or make your own for an extra flavor boost.
  • 2 tbsp Sesame Seeds: Adds a nice crunch and nuttiness to the dish.
  • 1/2 medium Avocado: Sliced avocado enhances creaminess and provides healthy fats.

How to Make Chicken Teriyaki Bowls

Follow these simple steps to whip up your chicken teriyaki bowls:

  1. Prepare the Rice: Rinse the jasmine rice under cold water until the water runs clear. In a medium pot, combine the rice with 2 cups of water and bring to a boil. Reduce heat to low, cover, and simmer for 12-15 minutes, or until water is absorbed. Remove from heat and let sit covered for 5 minutes, then fluff with a fork.
  2. Cook the Chicken: While the rice cooks, cut chicken into small bite-sized pieces. Heat a large skillet over medium heat with a light coat of oil or cooking spray. Add the chicken and cook, stirring occasionally, until fully cooked and no longer pink, about 6-8 minutes.
  3. Add the Sauce: Pour in the teriyaki sauce, stir to coat, and let simmer for 1-2 minutes until warmed through. Sprinkle sesame seeds on top of the chicken and stir to combine.
  4. Steam the Veggies: In a separate pot, bring water to a boil and add frozen broccoli. Cook for 3-5 minutes, until tender and bright green, then drain well.
  5. Assemble Your Bowls: Start with a base of jasmine rice, top with teriyaki chicken, and finish with broccoli. Drizzle extra sauce on top if desired.

Pro Tips for Perfect Chicken Teriyaki Bowls

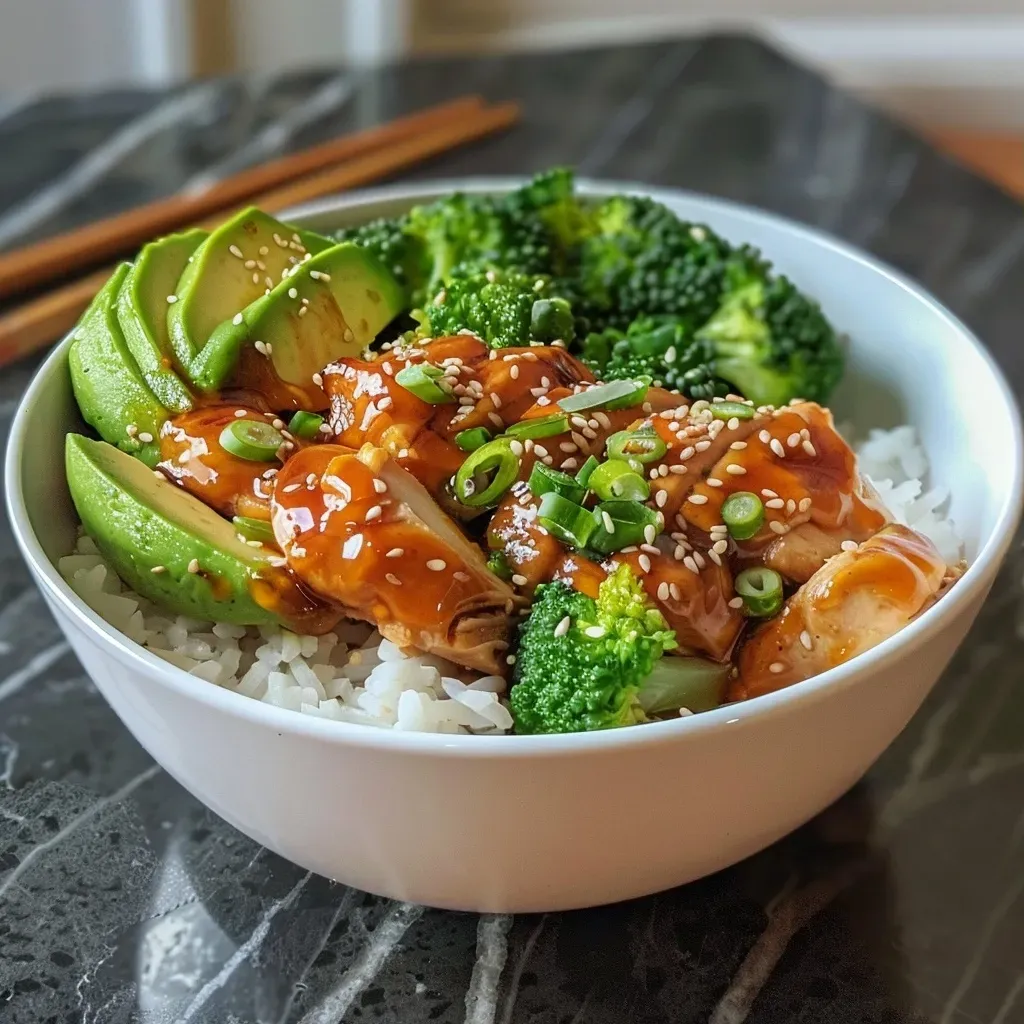
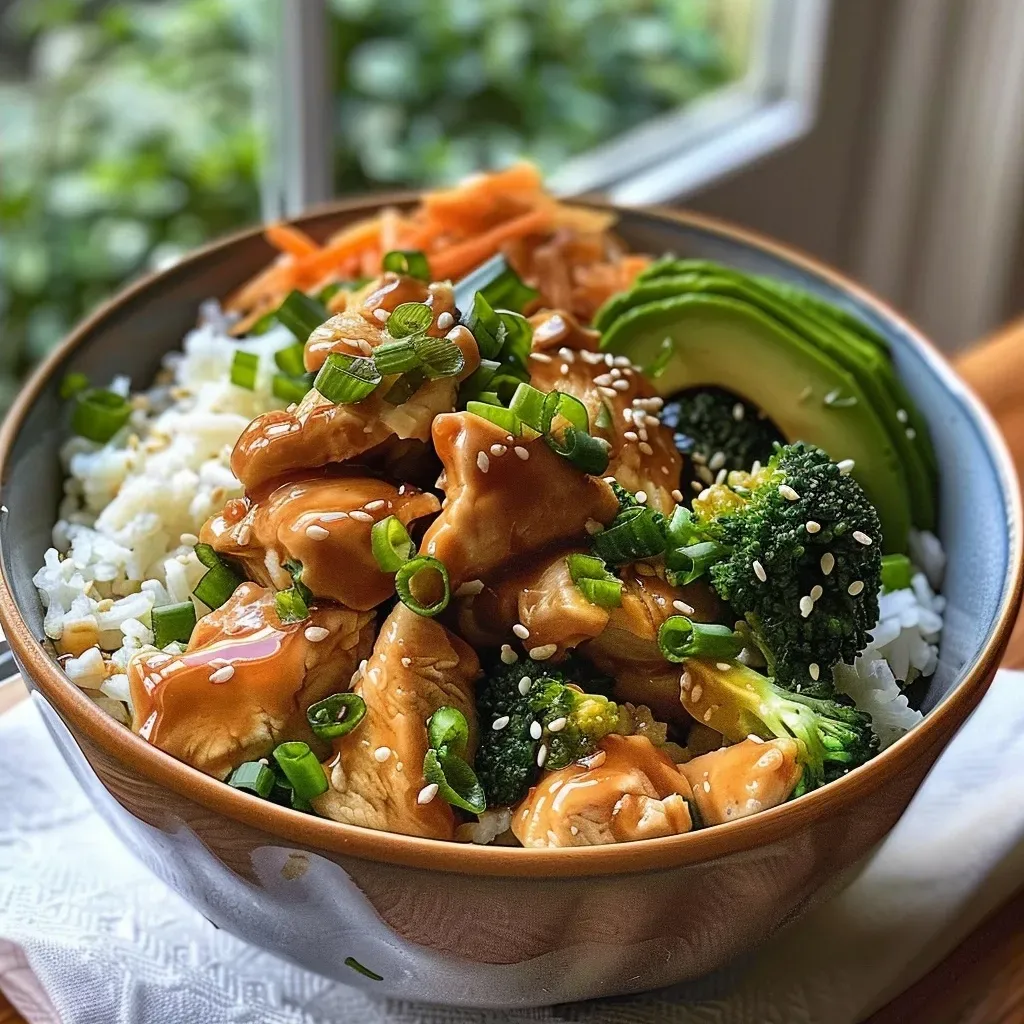
Juicy Chicken Teriyaki Bowl featuring chicken, rice, and broccoli.
  • Marinate the Chicken: For extra flavor, marinate your chicken in teriyaki sauce for at least 30 minutes before cooking.
  • Customize Your Veggies: Feel free to add in fresh veggies like carrots, snap peas, or bell peppers for extra color and nutrition.
  • Use a Non-Stick Pan: This helps prevent the chicken from sticking and ensures even cooking.
  • Adjust the Sauce: If you prefer a sweeter or saltier dish, adjust the amount of teriyaki sauce to your taste.
  • Experiment with Garnishes: Top your bowl with sliced green onions, red pepper flakes, or chopped cilantro for added flavor.
  • Meal Prep: Make extra chicken and rice during the week for quick lunches. Store in airtight containers for up to 4 days.

Common Mistakes and Troubleshooting

Here are some pitfalls to avoid while making your Chicken Teriyaki Bowls:

  • Overcooking the Chicken: Make sure to cook the chicken just until it’s no longer pink to keep it juicy.
  • Undercooking the Rice: Always check your rice and adjust cooking time as needed based on your stove and pot.
  • Using Too Much Sauce: Start with less sauce and add more as needed to prevent the dish from becoming too salty.
  • Not Steaming the Veggies: Make sure your vegetables are bright and tender; this adds to the overall freshness of the dish.

Variations on Chicken Teriyaki Bowls

Here are a few ways to switch up your teriyaki bowls:

  • Beef Teriyaki Bowls: Swap chicken for thinly sliced beef for a different protein option.
  • Vegan Option: Use tofu or tempeh instead of chicken and a vegan teriyaki sauce.
  • Spicy Teriyaki Bowls: Add sriracha or chili flakes to the sauce for a spicy kick.
  • Fried Rice Bowls: Incorporate your teriyaki chicken into fried rice instead of plain jasmine rice for a unique twist.

Storage and Make-Ahead Instructions

This Chicken Teriyaki Bowl can be made ahead and stored for later! Here’s how:

  • Refrigerate: Store in airtight containers in the fridge for up to 4 days.
  • Freeze: You can freeze the chicken and rice for up to 3 months. Just reheat thoroughly before serving.
  • Reheat: To reheat, microwave until hot, or warm on the stove with a splash of water to prevent drying out.

Nutritional Tips and Dietary Adaptations

This recipe can easily be adapted to fit various dietary needs:

  • Low-Carb Option: Replace jasmine rice with cauliflower rice for a lower-carb version.
  • Gluten-Free: Use a gluten-free teriyaki sauce and ensure all other ingredients are gluten-free.
  • High-Protein: Add edamame or chickpeas for an extra protein boost without additional meat.

Equipment Recommendations

To make this recipe, you’ll need:

  • Medium Pot: For cooking the rice.
  • Large Skillet: Ideal for cooking the chicken.
  • Steamer Pot: Useful for steaming the broccoli or other vegetables.
  • Measuring Cups and Spoons: For precise ingredient measurements.

Serving Suggestions

Serve your Chicken Teriyaki Bowls with:

  • A Side Salad: A fresh green salad with sesame vinaigrette pairs beautifully.
  • Spring Rolls: These make for a great appetizer or side dish.
  • Fruit: Fresh fruit like pineapple or mango enhances the meal’s tropical flavors.

Frequently Asked Questions (FAQs)

  • Can I use frozen chicken? Yes, just make sure it’s fully thawed before cooking!
  • Is teriyaki sauce healthy? It can be! Look for low-sugar or homemade versions for a healthier option.
  • Can I add more vegetables? Absolutely! Feel free to add any veggies you like.
  • How do I store leftovers? Keep in airtight containers in the fridge for up to 4 days.
  • Can I make this dish in advance? Yes! Prepare the chicken and rice ahead of time for quick meals.
  • What should I serve with it? Pair with a side salad or fresh fruit for a complete meal.
  • Is this dish suitable for meal prep? Yes! It stores well and is easy to reheat.
  • What if I don’t have teriyaki sauce? You can make a quick substitute using soy sauce, honey, and ginger.

Now that you have all the tips and tricks for making the perfect Chicken Teriyaki Bowl, it’s time to get cooking! With its irresistible flavor and quick preparation, this dish is bound to become a favorite in your household. Enjoy your cooking adventure!

Chicken Teriyaki Bowl

Prep Time 10 minutes
Cook Time 20 minutes
Total Time 30 minutes
Servings 4 servings
Calories 550
A quick and delicious Asian-inspired dish featuring tender chicken, jasmine rice, and broccoli coated in savory teriyaki sauce.

Ingredients

Protein

  • 1 package Chicken

Grain

  • 1 cup Jasmine rice

Vegetable

  • 1 package Frozen Broccoli

Sauce

  • 1/4 cup Teriyaki Sauce

Seeds & Garnish

  • 2 tbsp Sesame Seeds

Avocado

  • 1/2 medium Avocado

Instructions 

  • Cook jasmine rice in boiling water for 12–15 minutes, then let sit covered for 5 minutes and fluff.
  • Cook chicken in a skillet until no longer pink, then add teriyaki sauce and simmer for 1–2 minutes. Sprinkle sesame seeds.
  • Boil broccoli for 3–5 minutes until tender, then drain.
  • Assemble bowls with rice, chicken, broccoli, and sliced avocado. Drizzle extra sauce if desired.
  • Serve and enjoy!

Notes

For extra flavor, marinate chicken in teriyaki sauce for 30 minutes before cooking.
Calories: 550kcal
Cost: $15
Course: Main Course
Cuisine: Asian
Keyword: chicken

Welcome to a delightful culinary adventure! If you’re looking for a quick, satisfying dinner solution that bursts with flavor, you’ve come to the right place. This Moroccan Chicken Couscous Bowl is not just a meal; it’s a comforting experience that brings the vibrant tastes of Moroccan cuisine right to your dinner table. Perfect for busy nights, this dish is packed with healthy ingredients and is sure to please the whole family!

Why You’ll Love This Recipe

This Moroccan Chicken Couscous Bowl is not only delicious but also incredibly practical for busy weeknights. Here are just a few reasons why you’ll adore this recipe:

  • Quick and Easy: This recipe comes together in about 30 minutes, making it perfect for those hectic evenings when time is of the essence.
  • Flavor-Packed: The Moroccan spice mix adds a burst of flavor that transforms simple chicken into a culinary delight.
  • Healthy and Nutritious: With lean protein from the chicken and fresh veggies, this meal is both satisfying and nutritious.
  • Customizable: You can easily modify the ingredients based on what you have on hand or your family’s preferences.
  • Meal Prep Friendly: This dish is great for meal prep, ensuring you have delicious lunches or dinners ready to go!

Ingredient Breakdown

Let’s dive into the ingredients that make this Moroccan Chicken Couscous Bowl a winner, along with some substitution options to help you customize your dish:

  • Boneless Skinless Chicken Breast: The main protein source. You can substitute it with thighs for more flavor or even tofu for a vegetarian option.
  • Moroccan Spice Mix: A blend of spices that gives the dish its unique flavor. You can make your own using cumin, coriander, cinnamon, paprika, ginger, nutmeg, and cayenne.
  • Tomato Paste: Adds richness to the sauce. Crushed tomatoes can also work in a pinch.
  • Olive Oil: For cooking. Feel free to use avocado oil or canola oil if preferred.
  • Chicken Broth: Enhances the flavor of the couscous. Vegetable broth is a great alternative.
  • Couscous: The base of the bowl. If you need a gluten-free option, quinoa or rice can be used instead.
  • Fresh Vegetables: Cucumber, cherry tomatoes, and red onion add freshness and crunch. Other veggies like bell peppers or spinach can be great substitutes.
  • Greek Yogurt: For creaminess and tang. You can use sour cream or a dairy-free yogurt alternative.
  • Fresh Parsley: Adds a pop of color and freshness. Cilantro can be used for a different flavor.

How to Make Moroccan Chicken Couscous Bowl

Ready to create this delightful dish? Follow these easy steps:

  1. Bring 1 1/2 cups of salty water or broth to a boil in a saucepan. Once boiling, stir in 1 cup of dry couscous, place a lid on, and remove it from the heat. Let it steam while you prepare the chicken.
  2. In a bowl, combine all the ingredients for the Moroccan spice mix: 1 1/2 tablespoons ground cinnamon, 1 teaspoon smoked paprika, 1/2 teaspoon ground ginger, 1/2 teaspoon ground nutmeg, 1/2 teaspoon cayenne pepper, and 1/2 teaspoon sea salt.
  3. In a large bowl, mix 1 1/2 pounds of chopped boneless skinless chicken breast with 1 tablespoon of the Moroccan spice mix and 1 tablespoon of olive oil until well combined.
  4. Heat the remaining tablespoon of oil in a large skillet over medium-high heat. Add the seasoned chicken and cook for 3-4 minutes until it starts to brown, but is not fully cooked.
  5. Stir in 1/4 cup of tomato paste and 3/4 cup of chicken broth. Continue cooking until the sauce thickens and the chicken is cooked through, about 5-7 minutes. Taste and season with salt and pepper as needed.
  6. In a separate bowl, combine diced cucumber, quartered cherry tomatoes, and sliced red onion. Toss to mix.
  7. Once the couscous is cooked, fluff it with a fork. Divide the cooked couscous into bowls, top with the chicken mixture, and the fresh veggie mix.
  8. Finish by adding 2 tablespoons of chopped parsley and 1/3 cup of Greek yogurt to each bowl. Serve and enjoy your flavorful Moroccan Chicken Couscous Bowl!

Expert Tips for Perfecting Your Bowl

Close-up view of a Moroccan Chicken Couscous Bowl with colorful ingredients.

To take your Moroccan Chicken Couscous Bowl to the next level, keep these expert tips in mind:

  • Marinate for Extra Flavor: If you have time, marinate the chicken in the spice mix and olive oil for at least 30 minutes to enhance the depth of flavor.
  • Don’t Overcook the Chicken: Aim for juicy chicken by cooking just until it reaches an internal temperature of 165°F.
  • Experiment with Spices: Feel free to adjust the spice levels according to your taste. Add more cayenne for heat or more cinnamon for sweetness.
  • Use High-Quality Broth: A good chicken or vegetable broth can elevate the flavors significantly.
  • Fluff the Couscous: Fluffing the couscous with a fork after it steams helps create a light and airy texture.
  • Keep it Fresh: Add fresh herbs just before serving for the best flavor and color.
  • Batch Cooking: Make a double batch of the chicken and couscous for easy lunches throughout the week.
  • Choose Your Bowl: A wide, shallow bowl will help showcase the beautiful layers of your dish!

Common Mistakes and Troubleshooting

Even the best recipes can have hiccups! Here are some common mistakes to avoid and troubleshooting tips:

  • Too Dry Couscous: If your couscous turns out dry, try adding a splash of broth or water to rehydrate it.
  • Overcooked Chicken: If your chicken is dry, reduce the cooking time next time and ensure it’s not overcooked.
  • Flavor Lacking: Adjust seasonings as needed, and don’t hesitate to add a squeeze of lemon juice for brightness.
  • Vegetables Soggy: Add fresh veggies last to keep them crisp and vibrant.

Variations to Try

Here are some fun variations you can try with this recipe:

  • Vegetarian Version: Substitute the chicken with chickpeas or lentils for a protein-rich vegetarian option.
  • Spicy Chicken Bowl: Add more cayenne pepper or even some harissa for a spicy kick.
  • Grilled Version: Grill the chicken for a smoky flavor and serve it over the couscous.
  • Different Grains: Swap couscous for quinoa, bulgur, or farro for a different texture and flavor.

Storage and Make-Ahead Instructions

This Moroccan Chicken Couscous Bowl is perfect for meal prep! Here’s how to store it:

  • Refrigeration: Store leftovers in airtight containers for up to 3 days in the fridge.
  • Freezing: You can freeze the chicken mixture for up to 2 months. Just cook the couscous fresh when ready to serve.
  • Reheating: Reheat the chicken and couscous in the microwave or on the stovetop, adding a splash of broth for moisture.
  • Make Ahead: Prepare the chicken and couscous in advance, then assemble the bowls just before serving.

Frequently Asked Questions

Here are some common questions and answers about the Moroccan Chicken Couscous Bowl:

  • Can I use a different type of grain? Yes! Feel free to replace couscous with quinoa, rice, or any grain you prefer.
  • How do I make it gluten-free? Use gluten-free couscous or substitute with quinoa.
  • Can I prepare this in advance? Absolutely! You can cook the chicken and couscous ahead of time and reheat when ready to serve.
  • What vegetables can I add? Any fresh veggies work! Try bell peppers, zucchini, or spinach for extra nutrition.
  • Is this recipe spicy? The spice level can be adjusted based on your preference; just reduce the cayenne pepper for a milder flavor.
  • Can I make this dish vegetarian? Yes! Substitute chicken with chickpeas or lentils for a hearty vegetarian meal.
  • What can I serve with this dish? This bowl pairs well with a simple green salad or pita bread on the side.
  • How do I store leftovers? Keep leftovers in an airtight container in the fridge for up to 3 days.

Nutrition Tips and Dietary Adaptations

For those mindful of nutrition, here are a few tips:

  • Protein Boost: Add more lean protein by including beans or legumes.
  • Low-Carb Option: Serve the chicken and veggies over a bed of greens instead of couscous.
  • Heart-Healthy Fats: Use olive oil for cooking to incorporate healthy fats.
  • Fiber-Rich: Incorporate more vegetables for added fiber and nutrients.

Equipment Recommendations

Having the right tools can make cooking easier. Here are some recommended items:

  • Non-Stick Skillet: Perfect for cooking chicken without sticking.
  • Measuring Cups and Spoons: Essential for accurate ingredient measurements.
  • Mixing Bowls: Use these for marinating and mixing ingredients.
  • Fork: Ideal for fluffing couscous after steaming.

Serving Suggestions

For a complete meal, consider these serving suggestions:

  • Fresh Herbs: Sprinkle extra parsley or cilantro on top for added freshness.
  • Side Salad: A simple green salad pairs beautifully with the bowl.
  • Pita Bread: Serve with warm pita for a delightful scoop!
  • Yogurt Drizzle: A drizzle of extra yogurt on top adds creaminess.

Cooking can be a joy, especially when you’re creating dishes as vibrant and satisfying as this Moroccan Chicken Couscous Bowl. Remember, the kitchen is your playground, so feel free to experiment and make this dish your own. Enjoy your flavorful journey!

Moroccan Chicken Couscous Bowl

Prep Time 15 minutes
Cook Time 20 minutes
Total Time 35 minutes
Servings 4 servings
Calories 520
A flavorful and colorful dish combining spiced chicken, fluffy couscous, and fresh vegetables for a satisfying meal.

Ingredients

Protein

  • 1.5 pounds Boneless skinless chicken breast (chopped to bite sizes)
  • 1 tablespoon Moroccan spice mix (store bought or homemade)
  • 0.25 Cup Tomato paste
  • 2 tablespoons Olive Oil (or avocado oil)
  • 0.75 Cup Chicken Broth (or vegetable broth)
  • to taste Salt and pepper

Grains

  • 1 Cup Dry couscous
  • 1.5 Cup Water or broth (to cook the couscous)

Vegetables

  • 1 Cucumber Cucumber (diced)
  • 1 Cup Cherry Tomatoes (cut into quarters)
  • 1 Red Onion Red Onion (sliced or diced)

Dairy & Herbs

  • 0.33 Cup Greek yogurt
  • 2 tablespoons Fresh Chopped parsley

Instructions 

  • Bring 1.5 cups of water or broth to a boil, stir in the couscous, cover, and remove from heat. Fluff after steaming.
  • Mix Moroccan spices in a bowl. Season chicken with spice mix and 1 tablespoon oil, then cook in a skillet for 3-4 minutes until browned.
  • Add tomato paste and broth to the chicken, cook until sauce thickens and chicken is cooked through, about 5-7 minutes. Season with salt and pepper.
  • Combine cucumber, cherry tomatoes, and red onion in a bowl. Divide couscous, chicken, and veggies into bowls, top with parsley and Greek yogurt. Serve.

Notes

Adjust seasoning to taste and enjoy a vibrant, healthy meal.
Calories: 520kcal
Cost: $15
Course: Main Course
Cuisine: Moroccan
Keyword: chicken, Couscous, Spices

Discover the Joy of Cooking with Sizzling Chili Lime Chicken

Are you ready to transform your weeknight dinners with a vibrant and flavorful dish? Meet your new go-to recipe: **Sizzling Chili Lime Chicken**. This baked chicken recipe combines juicy, tender chicken breasts with a zesty lime marinade that brings a burst of flavor to your table. Perfect for busy nights, this dish is not only quick to prepare but also packs a nutritious punch, making it ideal for families looking to enjoy healthy meals without the hassle. In this post, I’ll guide you through the ins and outs of making this deliciousness, from ingredient choices to expert tips, ensuring you feel confident in the kitchen.

Whether you’re a seasoned cook or just starting out, these **baked chili lime chicken breasts** will delight your family and keep them coming back for more. Let’s dive into the details!

Why You’ll Love This Recipe

This recipe isn’t just about great taste; it comes with numerous benefits that make it a must-try!

  • Quick Preparation: With minimal prep time, this chicken dish can go from the oven to your table in under an hour, making it perfect for busy weeknights.
  • Flavor Explosion: The combination of **chili powder**, **lime juice**, and **pure maple syrup** creates a marinade that enhances the natural flavor of the chicken, making each bite a delight.
  • Healthy Ingredients: Using **boneless, skinless chicken breasts** ensures you’re serving a lean protein packed with nutrients, ideal for health-conscious eaters.
  • Meal Prep Friendly: This dish can be marinated ahead of time and is great for meal prep, allowing you to enjoy flavorful meals throughout the week.
  • Versatility: Serve this chicken alongside a variety of side dishes, from salads to rice, making it adaptable to your family’s taste preferences.

Ingredient Breakdown

Let’s take a closer look at the ingredients for this **chili lime chicken** recipe, including some handy substitutions:

  • 1.5 lbs boneless skinless chicken breasts: This is the star of the dish. You can substitute with chicken thighs for a juicier option.
  • 3 Tbsp avocado oil: A great healthy fat; substitute with olive oil if needed.
  • ¼ cup fresh lime juice: Fresh is best, but bottled lime juice works in a pinch.
  • 2 Tbsp pure maple syrup: Adds a touch of sweetness; honey can be used as an alternative.
  • 1.5 Tbsp chili powder: A key component for flavor; adjust based on your spice preference.
  • 1 tsp garlic powder: For a robust flavor; you can use fresh minced garlic if you prefer.
  • ½ tsp sea salt (to taste): Enhances all the flavors; adjust according to your dietary needs.

How to Make Baked Chili Lime Chicken Breasts

Close-up view of juicy baked chicken breasts garnished with lime and chili spices.

Ready to get cooking? Follow these simple steps to achieve perfectly baked chili lime chicken:

  1. Add the ingredients for the chicken marinade to a small bowl (avocado oil, lime juice, pure maple syrup, chili powder, garlic powder, and sea salt), and stir well until everything is combined.
  2. Transfer the raw chicken breasts to a large zip lock bag along with the marinade. Seal the bag and swish everything around until the chicken is coated with marinade. Marinate for at least 1 hour, up to 24 hours for the best flavor.
  3. When you’re ready to cook the chicken, preheat the oven to 350 degrees Fahrenheit.
  4. Transfer the chicken, along with the marinade, to a large casserole dish or rimmed baking sheet.
  5. Bake on the center rack of the preheated oven for 15 minutes.
  6. Remove the chicken from the oven and baste it using the juices from the baking dish. Spoon the juices over the chicken breasts for extra moisture.
  7. Place your oven on the high broil setting and broil the chicken for 3 to 8 minutes, or until it has a deeper golden brown color and is cooked through.
  8. Check doneness with a meat thermometer; chicken is fully cooked at 145 degrees Fahrenheit.
  9. Let chicken rest for at least 10 minutes before slicing and serving.
  10. Serve your **Chili Lime Chicken Breasts** with your choice of side dishes and enjoy!

Pro Tips for Perfect Chili Lime Chicken

To elevate your chili lime chicken to the next level, consider these expert insights:

  • Marinate Longer: If time allows, marinate the chicken for up to 24 hours. This enhances flavor and tenderness.
  • Use a Meat Thermometer: To ensure proper doneness, always check the internal temperature of the chicken.
  • Experiment with Spices: Don’t hesitate to add cumin or paprika for an extra flavor kick.
  • Try Grilling: For a smoky flavor, grill the marinated chicken instead of baking it.
  • Let It Rest: Allowing the chicken to rest before slicing will keep it juicy.
  • Customize the Sweetness: Adjust the amount of maple syrup to suit your taste; you can always reduce or increase it.
  • Pair with Fresh Herbs: Garnish with chopped cilantro or green onions for added freshness.
  • Include Vegetables: Add bell peppers or onions to the baking dish for a complete meal in one.

Common Mistakes and Troubleshooting

Even the best cooks can run into issues. Here are some common mistakes to avoid:

  • Skipping the Marinade: Don’t skip marinating; it’s crucial for flavor and tenderness.
  • Overcooking: Keep an eye on the chicken while broiling—overcooked chicken can become dry.
  • Not Using Enough Salt: Salt enhances flavors; don’t be afraid to season generously.
  • Ignoring Rest Time: Cutting into the chicken too soon can result in juices running out, leading to dry meat.

Variations to Try

Feel free to switch things up with these delicious variations:

  • Honey Lime Chicken: Substitute pure maple syrup with honey for a different sweetness.
  • Spicy Chili Lime Chicken: Add a pinch of cayenne pepper or red pepper flakes to the marinade for added heat.
  • Grilled Chili Lime Chicken: Marinate and then grill the chicken for a smoky flavor and beautiful grill marks.
  • Chili Lime Chicken Tacos: Shred the cooked chicken and serve in corn tortillas with avocado and salsa for a fresh twist.

Storage and Make-Ahead Instructions

This chili lime chicken is perfect for meal prepping!

  • Refrigerate: Store leftover chicken in an airtight container in the fridge for up to 4 days.
  • Freeze: Freeze marinated chicken for up to 3 months. Thaw in the refrigerator before cooking.
  • Reheat: Reheat in the oven or microwave until warmed through. Avoid overcooking to maintain juiciness.

Frequently Asked Questions

Here are some common questions about this recipe:

  • Can I use chicken thighs instead of breasts? Yes! Chicken thighs will add extra moisture and flavor.
  • What should I serve with this chicken? Pair it with rice, quinoa, or a fresh salad for a balanced meal.
  • How do I know when the chicken is done? Use a meat thermometer to check for an internal temperature of 145°F.
  • Can I grill this chicken instead of baking? Absolutely! Grilling adds a fantastic smoky flavor.
  • Can I use bottled lime juice? Yes, but fresh lime juice offers the best flavor.
  • How long can I marinate the chicken? You can marinate it for up to 24 hours for the best flavor.
  • What if I don’t have avocado oil? Olive oil is a great substitute.
  • Can I add vegetables to the baking dish? Yes! Bell peppers and onions work great alongside the chicken.

Nutrition Tips and Dietary Adaptations

This dish is not only delicious but also nutritious! Here are some tips:

  • Low-Carb Option: Pair with cauliflower rice instead of regular rice for a low-carb meal.
  • Gluten-Free: This recipe is naturally gluten-free; ensure all ingredients are certified gluten-free.
  • Dairy-Free: This recipe is dairy-free, catering to various dietary needs.
  • High-Protein: Chicken breasts are an excellent source of protein, making this dish great for muscle recovery.

Equipment Recommendations

To make this recipe easier, consider having the following tools on hand:

  • Meat Thermometer: Ensures your chicken is cooked perfectly every time.
  • Zip Lock Bags: Ideal for marinating chicken without any mess.
  • Baking Dish: A large casserole or baking dish is perfect for cooking multiple chicken breasts at once.
  • Mixing Bowl: Use a medium-sized bowl for mixing the marinade ingredients.

Serving Suggestions

Here’s how to make this meal even more delightful:

  • Side Salads: Pair with a fresh garden salad or a zesty coleslaw.
  • Grains: Serve with quinoa, brown rice, or a wild rice blend for a wholesome meal.
  • Vegetables: Roast or steam seasonal vegetables for a colorful plate.
  • Tortillas: Serve in warm tortillas for a delicious taco night!

With this **Sizzling Chili Lime Chicken**, you’ll bring excitement back to your dinner table! Enjoy experimenting with flavors and variations while making mealtime a breeze. Remember, cooking should be enjoyable, and with this recipe, you’ll create a delicious meal that satisfies your family’s taste buds and nourishes their bodies. Happy cooking!

Baked Chili Lime Chicken Breasts

Prep Time 10 minutes
Cook Time 20 minutes
Total Time 30 minutes
Servings 4 pieces
Calories 250
Enjoy flavorful baked chicken breasts marinated in a zesty chili lime sauce, perfect for a quick and healthy meal.

Ingredients

Chicken

  • 1.5 lbs boneless skinless chicken breasts
  • 3 Tbsp avocado oil
  • 0.25 cup fresh lime juice
  • 2 Tbsp pure maple syrup
  • 1.5 Tbsp chili powder
  • 1 tsp garlic powder
  • 0.5 tsp sea salt ((to taste))

Instructions 

  • Mix avocado oil, lime juice, maple syrup, chili powder, garlic powder, and sea salt in a bowl.
  • Marinate chicken in the mixture for at least 1 hour.
  • Preheat oven to 350°F (175°C). Transfer chicken and marinade to a baking dish.
  • Bake for 15 minutes, then baste with juices and broil for 3-8 minutes until golden and cooked through.
  • Check internal temperature; it should reach 145°F (63°C). Rest for 10 minutes before serving.

Notes

Marinate for several hours for best flavor.
Calories: 250kcal
Cost: $15
Course: Main Course
Cuisine: American
Keyword: chicken, lime, Spicy

Delight in a Refreshing Mexican Chicken Salad

Are you searching for a quick, satisfying meal that your entire family will love? Look no further! This Mexican Chicken Salad is not only packed with flavor but also boasts a delightful crunch from fresh veggies and a creamy dressing that ties it all together. Perfect for busy weeknights, this recipe will become a go-to in your kitchen!

Why You’ll Love This Recipe

Here are just a few reasons to whip up this Mexican Chicken Salad:

  • Time-saving: Quick to prepare, perfect for those hectic nights.
  • Versatile: Great as a side dish or a main course, ideal for potlucks.
  • Nutritious: Packed with protein from chicken and vitamins from veggies.
  • Flavorful: A vibrant mix of spices and fresh ingredients make every bite exciting.
  • Customizable: Easily adjust ingredients to fit your family’s tastes or dietary needs.

Ingredient Breakdown

Let’s dive into the ingredients that make this salad so special. Each component adds not only flavor but also texture and nutrition.

  • 16 oz chicken breast: Cooked and shredded, this is the star of the salad. You can use rotisserie chicken for convenience.
  • 8 oz carrots: Cooked and diced, they add sweetness and color. Substitute with bell peppers for a crunchier bite.
  • 14 oz potato: Cooked and diced, potatoes make the salad hearty. Sweet potatoes can be a delicious alternative.
  • 5 oz celery: Finely chopped for a refreshing crunch. If you’re not a fan, try cucumber instead.
  • 6 oz canned sweet peas: Drained, they provide a pop of sweetness. Fresh peas can be used if in season.
  • 1 apple: Peeled and diced, it adds a nice contrast. Consider using a tart variety like Granny Smith.
  • 1 cup Mayonnaise: For creaminess, you can substitute Greek yogurt for a healthier option.
  • 1 spring of parsley: For garnish, adding a touch of freshness.
  • Saltine crackers: Perfect for serving; they offer a delightful crunch. Tortilla chips are another great option.
  • Pickled jalapeños and carrot slices: For an extra kick; fresh jalapeños can also work.
  • 16 oz elbow pasta: Cooked according to package instructions, it makes the salad heartier. Swap for whole-grain pasta for a healthier choice.
  • 1 cup sour cream: Or Mexican cream, for a rich flavor. Use low-fat options to lighten it up.
  • 1 cup American or sharp Cheddar Cheese: Adds creaminess and flavor. You can also try feta or cotija for a different twist.
  • Salt and pepper: To taste, enhancing all the flavors.

Pro Tips for Perfecting Your Salad

A close-up view of a vibrant Mexican Chicken Salad with colorful ingredients.

Want to ensure your Mexican Chicken Salad turns out perfectly every time? Here are some expert insights:

  • Shred the chicken: Use two forks to shred the chicken for a more even texture.
  • Chill before serving: Letting the salad sit in the fridge for at least an hour enhances the flavors.
  • Texture balance: Combine crunchy and creamy ingredients for a satisfying bite.
  • Season gradually: Adjust the seasoning gradually to avoid overpowering the dish.
  • Mix in stages: Combine wet ingredients first, then add dry ingredients to prevent sogginess.
  • Experiment with herbs: Fresh cilantro or dill can elevate the flavor profile.
  • Use high-quality mayonnaise: Your dressing’s flavor will shine through, so choose a brand you love.
  • Make it a meal: Serve it on a bed of greens for a complete dinner.

Common Mistakes and Troubleshooting

Even the best cooks can run into issues. Here’s how to avoid common pitfalls:

  • Too dry: If the salad feels dry, add more mayonnaise or sour cream to moisten it.
  • Overseasoned: Balance flavors with additional ingredients if you overdo it on spices.
  • Too much liquid: If your salad is too watery, drain the veggies before mixing.
  • Unbalanced flavors: If it tastes bland, a squeeze of lemon juice can brighten it up.

Variations to Try

Feeling adventurous? Here are some variations to keep things interesting:

  • Spicy twist: Add more jalapeños or a dash of hot sauce for heat.
  • Vegan version: Substitute chicken with chickpeas and use vegan mayo.
  • Fruit-forward: Incorporate diced pineapple or mango for a tropical flair.
  • Greek-inspired: Replace cheddar with feta and add olives for a Mediterranean touch.

Storage and Make-Ahead Instructions

This salad can be prepared ahead of time, making it perfect for meal prep:

  • Refrigerate: Store in an airtight container for up to 3 days.
  • Make-ahead: Prepare the salad without mayo and add it just before serving to maintain freshness.
  • Freezing: Not recommended due to the mayonnaise and veggies’ texture changes.

Frequently Asked Questions

Have questions? We’ve got answers!

  • Can I serve this salad warm? While it’s typically served cold, you can enjoy it warm if you prefer.
  • How long does this salad last in the refrigerator? It will be good for up to 3 days when stored properly.
  • Can I add nuts or seeds? Absolutely! Chopped nuts or sunflower seeds add a nice crunch.
  • Is it possible to make this salad dairy-free? Yes! Use vegan mayonnaise and leave out the cheese.
  • What can I serve with Mexican Chicken Salad? It’s great on its own or served with tortilla chips or over greens.
  • Can I make this salad in advance? Yes, prepare it up to a day ahead for best flavor.
  • What’s the best way to shred chicken? Use two forks or a stand mixer for shredded chicken perfection.
  • How can I make this recipe healthier? Opt for Greek yogurt instead of mayonnaise and reduce cheese.

Nutrition Tips and Dietary Adaptations

This Mexican Chicken Salad can be adapted to fit various dietary preferences:

  • Low-carb: Skip the pasta and add more veggies for a hearty salad.
  • High-protein: Increase the chicken or add beans to boost protein content.
  • Gluten-free: Ensure all ingredients, especially pasta, are gluten-free.

Equipment Recommendations

Make your cooking experience smoother with the right tools:

  • Sharp knife: For easy chopping and dicing of your ingredients.
  • Mixing bowls: Large bowls are essential for combining all your ingredients.
  • Measuring cups and spoons: Accurate measurements ensure consistent results.
  • Storage containers: Airtight containers help keep your salad fresh in the fridge.

Serving Suggestions

Bring your meal to the next level with these serving suggestions:

  • On a bed of greens: Serve over lettuce for a light, refreshing meal.
  • With tortilla chips: Great for scooping, it adds crunch to every bite.
  • In a wrap: Use a tortilla to create a delicious wrap for lunch.

In conclusion, this Mexican Chicken Salad is not just a meal; it’s an experience filled with vibrant flavors and textures. Whether you’re making it for dinner or prepping for the week ahead, this dish promises to please even the pickiest eaters. So grab those ingredients and let’s make dinner a breeze!

Mexican Chicken Salad

Prep Time 20 minutes
Cook Time 20 minutes
Total Time 40 minutes
Servings 4 servings
Calories 650
A flavorful and hearty salad combining cooked chicken, vegetables, pasta, and a creamy dressing with a Mexican twist.

Ingredients

Protein

  • 16 oz chicken breast (cooked and shredded)

Vegetables

  • 8 oz carrots (cooked and diced)
  • 14 oz potato (cooked and diced)
  • 5 oz celery (finely chopped)
  • 6 oz canned sweet peas (drained)
  • 1 apple apple (peeled and diced)

Dressing and Cheese

  • 1 cup Mayonnaise
  • 1 cup sour cream or Mexican cream
  • 1 cup American or sharp Cheddar Cheese

Additional

  • to taste Salt and pepper
  • Saltine crackers Saltine crackers
  • Pickled jalapeños and carrot slices Pickled jalapeños and carrot slices
  • 16 oz elbow pasta (cooked according to package instructions)
  • 1 cup of sour cream or Mexican cream
  • 1 cup American or sharp Cheddar Cheese

Instructions 

  • Combine cooked chicken, vegetables, pasta, and diced apple in a large bowl.
  • Mix mayonnaise, sour cream, and shredded cheese to make the dressing.
  • Pour dressing over the salad and toss to combine.
  • Season with salt and pepper to taste and garnish with parsley.
  • Serve chilled with saltine crackers and pickled jalapeños on the side.

Notes

For extra flavor, chill the salad for at least 30 minutes before serving.
Calories: 650kcal
Cost: $15
Course: Salad
Cuisine: Mexican
Keyword: chicken

Why This Creamy Baked Chicken Alfredo Pasta Will Become Your Go-To Family Favorite

When it comes to weeknight dinners, finding a recipe that pleases everyone can feel like a daunting task. Enter Creamy Baked Chicken Alfredo Pasta—the ultimate comfort food that combines rich flavors and simple ingredients, making it a weeknight lifesaver. This dish is not only satisfying but also incredibly easy to prepare, ensuring that dinner is served without the stress. With creamy Alfredo sauce, tender chicken, and gooey cheese, it’s a meal that will have your family coming back for seconds (and thirds!).

Why You’ll Love This Recipe

  • Quick to Prepare: With just a few simple steps, you can have this mouthwatering dish ready to bake in no time, making it perfect for busy evenings.
  • Family Approval: It’s a crowd-pleaser! Even picky eaters will enjoy this creamy, cheesy pasta dish, which can make mealtime a lot more pleasant.
  • Versatile Ingredients: You can easily customize the recipe with whatever chicken you have on hand, whether it’s rotisserie, grilled, or leftover from another meal.
  • Perfect for Meal Prep: This recipe doubles beautifully, making it a fantastic option for meal prep or feeding a larger crowd.
  • Comfort Food at Its Finest: The combination of rich Alfredo sauce and cheesy goodness makes this dish a true comfort food classic that warms the heart.

Ingredient Breakdown: What You Need

To make this delicious Baked Chicken Alfredo Pasta, you’ll need the following ingredients:

  • 2 cups cooked chicken (chopped or shredded) – leftovers work perfectly!
  • 16 ounces uncooked penne pasta – feel free to swap for your favorite pasta shape.
  • ½ cup unsalted butter – essential for creating a rich base for your sauce.
  • 2 cups heavy whipping cream – this gives the sauce its luscious texture.
  • 4 ounces cream cheese – adds creaminess and tang.
  • ½ teaspoon minced garlic – fresh is best, but jarred works too!
  • 1 teaspoon garlic powder – for an extra depth of flavor.
  • 1 teaspoon Italian seasoning – brings a wonderful herbaceous note.
  • ¼ teaspoon salt and ¼ teaspoon pepper – to taste.
  • 1 cup grated parmesan cheese – a must-have for that classic Alfredo flavor.
  • 2 cups mozzarella – for that gooey, melted topping.
  • ¼ cup parmesan – for an extra cheesy crust.

Pro Tips for the Best Baked Chicken Alfredo

Close-up view of Baked Chicken Alfredo Pasta with melted cheese.
  • Cook Pasta Al Dente: Make sure your pasta is slightly undercooked since it will continue to cook in the oven, absorbing the sauce.
  • Use Quality Chicken: Opt for flavorful chicken, whether it’s seasoned, grilled, or roasted. It makes all the difference!
  • Adjust the Sauce Thickness: If you prefer a thicker sauce, let it simmer longer or add a bit more cream cheese.
  • Add Vegetables: Sneak in some spinach, broccoli, or bell peppers for added nutrition and color.
  • Experiment with Cheeses: Mix in different cheeses like gouda or fontina for a unique twist.
  • Let it Rest: Allow the dish to sit for a few minutes after baking; this helps the cheese set and makes serving easier.
  • Make Ahead: Assemble the dish ahead of time, just cover it and refrigerate until you’re ready to bake.
  • Save Some Sauce: Reserve a bit of sauce to drizzle over the top before serving for extra creaminess.

Common Mistakes and Troubleshooting

Even the best recipes can go awry sometimes. Here are some common pitfalls and how to avoid them:

  • Overcooked Pasta: Ensure you cook your pasta just under al dente; it’ll continue to cook in the oven.
  • Dry Casserole: If your mixture seems dry, add a splash of chicken broth or more cream to keep it moist.
  • Cheese Not Melting: Use freshly grated cheese instead of pre-shredded to ensure a gooey melt.
  • Flavorless Sauce: Don’t skimp on the seasonings! Taste as you go and adjust to your preference.

Delicious Variations to Try

Feel free to mix things up with these tasty variations:

  • Buffalo Chicken Alfredo: Add buffalo sauce to the chicken for a spicy kick!
  • Mediterranean Twist: Incorporate sun-dried tomatoes, olives, and feta for a Mediterranean flair.
  • Vegetarian Option: Substitute the chicken with sautéed mushrooms or eggplant, and add a mix of colorful veggies.
  • Cheesy Spinach Alfredo: Include fresh spinach and a blend of cheeses for a nutrient-packed variation.

Storage and Make-Ahead Instructions

This dish is perfect for meal prep! Here’s how to store it:

  • Refrigerate: Store leftovers in an airtight container for up to 3-4 days.
  • Freeze: Freeze any leftovers for up to 2 months. Thaw in the fridge before reheating.
  • Reheat: To reheat, cover with foil and warm in the oven at 350°F until heated through, or microwave individual portions.

Frequently Asked Questions

  • Can I use a different type of pasta? Absolutely! Feel free to use any pasta shape you prefer.
  • What if I don’t have heavy cream? You can substitute with half-and-half or whole milk, but the sauce will be less rich.
  • Can I use store-bought Alfredo sauce? Yes, but homemade sauce is so easy and tasty; I recommend trying it!
  • How can I make this recipe gluten-free? Substitute with gluten-free pasta and ensure all other ingredients are gluten-free.
  • Can I add more vegetables? Yes, vegetables like broccoli, peas, or zucchini work great in this dish.
  • What’s the best way to reheat leftovers? Reheat gently in the oven or microwave, adding a splash of cream or broth if needed.
  • Can I make this dish vegetarian? Yes, simply replace the chicken with vegetables or a plant-based protein.
  • Is this recipe kid-friendly? Definitely! The creamy, cheesy flavors are a hit with kids.

Nutritional Insights and Dietary Adaptations

This dish can be adapted to fit various dietary needs:

  • Low Carb: Use zucchini noodles or cauliflower rice instead of pasta.
  • Lower Fat: Substitute heavy cream with Greek yogurt for a lighter version.
  • Vegan: Use plant-based cream cheese and nutritional yeast for the cheesy flavor.

Essential Equipment for Success

To make your cooking experience smoother, gather these kitchen essentials:

  • Large Pot: For boiling pasta.
  • Medium Saucepan: To make the Alfredo sauce.
  • 9×13 Baking Dish: Perfect for baking this casserole.
  • Whisk: For combining ingredients smoothly.
  • Wooden Spoon: For mixing everything together.

Serving Suggestions for a Complete Meal

Pair this delicious pasta bake with:

  • Garlic Bread: A classic side that complements the creamy sauce beautifully.
  • Garden Salad: Fresh greens add a crunchy contrast to the rich pasta.
  • Steamed Vegetables: Broccoli or green beans make a nutritious side.

With the right ingredients and a few pro tips, you’re on your way to making the ultimate Creamy Baked Chicken Alfredo Pasta. This dish is not only easy to prepare but also a surefire way to keep your family happy and well-fed, even on the busiest of nights. So, roll up your sleeves, gather your ingredients, and get ready to enjoy a comforting meal that everyone will love!

Baked Chicken Alfredo Pasta

Prep Time 15 minutes
Cook Time 30 minutes
Total Time 45 minutes
Servings 6 servings
Calories 850
A creamy, cheesy baked pasta dish featuring tender chicken and rich Alfredo sauce, perfect for a comforting family dinner.

Ingredients

Protein

  • 2 cups cooked chicken, (chopped or shredded)

Pasta

  • 16 ounces uncooked penne pasta

Dairy & Fats

  • ½ cup unsalted butter
  • 2 cups heavy whipping cream
  • 4 ounces cream cheese

Garlic & Seasonings

  • ½ teaspoon minced garlic
  • 1 teaspoon garlic powder
  • 1 teaspoon Italian seasoning
  • ¼ teaspoon salt
  • ¼ teaspoon pepper

Cheese

  • 1 cup grated parmesan cheese
  • 2 cups mozzarella
  • ¼ cup parmesan

Instructions 

  • Preheat oven to 350°F. Cook pasta, drain, and set aside.
  • Make Alfredo sauce: melt butter, add cream and cream cheese, whisk until smooth. Add garlic, seasonings, and cheese; simmer until thickened.
  • Combine cooked pasta and chicken with sauce. Layer half in baking dish, top with half mozzarella, repeat, then add remaining mozzarella and parmesan.
  • Bake at 350°F for 20-30 minutes until bubbly and golden. Rest 5 minutes before serving.

Notes

For a lighter version, use less cheese or substitute with low-fat options.
Calories: 850kcal
Cost: $15
Course: Main Course
Cuisine: Italian
Keyword: pasta

Unlock the Secrets to Juicy, Melt-In-Your-Mouth Baked Chicken Breasts

When it comes to quick and satisfying dinners, few ingredients can rival the versatility of chicken. As a busy mom, I know how essential it is to whip up meals that are not only easy to prepare but also delicious enough to please the whole family. This melt-in-your-mouth baked chicken breast recipe is a game-changer, transforming ordinary chicken into a mouthwatering dish that will have everyone asking for seconds. With just a handful of everyday ingredients, you can create a dinner that feels special without the fuss.

In this comprehensive guide, I’ll walk you through everything you need to know about making the perfect baked chicken breasts. From understanding the ingredients to expert tips and variations, you’ll find all the information you need to make this recipe your go-to for busy weeknights.

Why You’ll Love This Recipe

  • Effortless Preparation: With just a few simple steps, you can have a flavorful dinner ready in under an hour.
  • Kid-Friendly: This recipe is perfect for picky eaters, as the creamy topping keeps the chicken moist and flavorful.
  • Budget-Friendly: Chicken breasts are an affordable protein option, making this recipe easy on the wallet.
  • Customizable: The topping can be adjusted with different seasonings and ingredients to suit your taste.
  • Leftover Friendly: Make extra for delicious lunches or quick dinners throughout the week.

Ingredients You’ll Need

To create these juicy baked chicken breasts, gather the following ingredients:

  • 4 boneless, skinless chicken breasts
  • 1 cup mayonnaise (or plain Greek yogurt for a lighter version)
  • ½ cup grated Parmesan cheese
  • 1 teaspoon garlic powder
  • 1 teaspoon onion powder
  • 1 teaspoon salt
  • ½ teaspoon black pepper
  • ½ teaspoon paprika or Italian seasoning (for topping)

Each ingredient plays a crucial role in building flavors and ensuring the chicken stays moist. If you need substitutions, here are some ideas:

  • Mayonnaise: Substitute with plain Greek yogurt or sour cream for a tangy twist.
  • Parmesan Cheese: Swap for cheddar cheese or nutritional yeast for a dairy-free option.
  • Seasonings: Feel free to experiment with your favorite herbs like thyme, rosemary, or a dash of cayenne for heat.

How to Make Melt-In-Your-Mouth Baked Chicken Breast Recipe

Close-up side view of a juicy baked chicken breast on a plate.

Follow these simple steps to achieve perfectly baked chicken:

  1. Preheat your oven to 375°F (190°C). Grease a 9×13-inch baking dish or line it with parchment paper to prevent sticking and make cleanup easier.
  2. Pound the chicken: Place the chicken breasts between two sheets of plastic wrap or parchment paper and pound them to an even thickness of about ¾ inch. This ensures uniform cooking and a tender texture.
  3. Prepare the topping: In a medium bowl, combine the mayonnaise, grated Parmesan cheese, garlic powder, onion powder, salt, and black pepper. Stir until the mixture is smooth and well blended.
  4. Coat the chicken: Spread the prepared topping evenly on the surface of each chicken breast, ensuring the entire top is covered for maximum flavor and moisture.
  5. Bake the chicken: Arrange the coated chicken breasts in the baking dish and sprinkle with paprika or Italian seasoning if desired. Bake uncovered for 35 to 45 minutes, or until the internal temperature reaches 165°F (74°C) and the topping is golden brown and slightly crisp.
  6. Rest before serving: Allow the chicken to rest for 5 minutes once out of the oven to retain juices, enhancing tenderness and flavor before serving.

Pro Tips for Making Melt-In-Your-Mouth Baked Chicken Breast Recipe

  • Use a meat thermometer: This is the best way to ensure your chicken is cooked perfectly without drying it out.
  • Pound evenly: This helps the chicken cook uniformly, preventing dry edges and undercooked centers.
  • Keep the topping intact: Make sure to cover the chicken completely to lock in moisture.
  • Let it rest: Resting the chicken allows the juices to redistribute, making each bite tender and juicy.
  • Experiment with flavors: Don’t hesitate to add different herbs and spices to the topping for a unique twist each time.
  • Make it a meal: Serve with roasted vegetables, rice, or a fresh salad for a complete dinner.
  • Prep ahead: You can prepare the chicken and topping in advance, then bake it fresh when you’re ready!
  • Store leftovers properly: Keep any leftover chicken in an airtight container in the fridge for up to 3 days.

Common Mistakes and Troubleshooting

Even the best recipes can go awry sometimes. Here are some common pitfalls and how to avoid them:

  • Dry Chicken: This can happen if the chicken is overcooked. Always use a meat thermometer to check for doneness.
  • Uneven Cooking: If the chicken breasts are of varying thickness, they won’t cook at the same rate. Pound them to ensure they’re all the same thickness.
  • Flavorless Chicken: Make sure to season the topping generously and cover the chicken entirely to enhance flavor.
  • Sticking to the Pan: Using parchment paper or greasing the pan helps prevent sticking and makes cleanup easier.

Variations to Try

Feeling adventurous? Here are some delicious variations to switch up your melt-in-your-mouth chicken:

  • Buffalo Chicken: Add hot sauce to the mayonnaise mixture for a spicy kick.
  • Pesto Chicken: Mix in some store-bought or homemade pesto with the mayonnaise for an Italian twist.
  • Herb-Infused Chicken: Use fresh herbs like basil, thyme, and rosemary in place of dried herbs for a fresh flavor.
  • Cheesy Spinach Chicken: Mix in chopped spinach and mozzarella cheese into the topping for a creamy, cheesy layer.

Storage and Make-Ahead Instructions

This recipe is perfect for meal prep! Here’s how to store and reheat your baked chicken:

  • Make Ahead: You can prepare the chicken and topping up to 24 hours in advance. Store them separately in the refrigerator until you’re ready to bake.
  • Storing Leftovers: Keep leftover chicken in an airtight container in the fridge for up to 3 days. Reheat in the oven or microwave until warmed through.
  • Freezing: This dish can be frozen before baking. Just wrap the prepared chicken tightly in foil and place it in a freezer-safe bag. To cook, thaw in the fridge overnight and bake as instructed.

FAQs

Got questions? Here are some common queries about this melt-in-your-mouth baked chicken recipe:

  • Can I use frozen chicken breasts? Yes! Just make sure to thaw them completely before cooking.
  • What should I serve with this chicken? Pair it with steamed vegetables, rice, or a fresh salad for a balanced meal.
  • Can I use chicken thighs instead? Absolutely! Just adjust the cooking time as thighs may take a bit longer to cook through.
  • How do I know when the chicken is done? Use a meat thermometer; the internal temperature should reach 165°F (74°C).
  • What if I don’t have mayonnaise? You can substitute it with Greek yogurt or sour cream for a lighter version.
  • Can I add vegetables to the baking dish? Yes! Adding vegetables like broccoli or bell peppers can make a one-pan meal.
  • Is this recipe gluten-free? Yes, as long as you ensure all ingredients used are gluten-free.
  • Can I prepare this dish in advance? Yes! You can prep and store the chicken and topping separately for up to 24 hours.

Nutrition Tips and Dietary Adaptations

This recipe can easily be adapted to suit various dietary needs:

  • Low-Carb: Use Greek yogurt instead of mayonnaise for a lower-calorie option.
  • Gluten-Free: All ingredients are naturally gluten-free; just double-check labels.
  • Dairy-Free: Replace cheese with nutritional yeast or a vegan cheese alternative for a dairy-free version.

Equipment Recommendations

To make this recipe, you’ll need:

  • A good quality meat thermometer to ensure perfect doneness.
  • A 9×13-inch baking dish for even cooking.
  • A meat mallet or rolling pin for pounding the chicken to an even thickness.
  • A mixing bowl for preparing the topping.

Serving Suggestions

This melt-in-your-mouth baked chicken pairs wonderfully with:

  • Garlic mashed potatoes for a creamy, comforting side.
  • Steamed asparagus or green beans for a fresh touch.
  • A crisp garden salad drizzled with vinaigrette for a light addition.
  • Rice or quinoa to soak up all the delicious juices from the chicken.

Now that you have all the tips, tricks, and insights to make the perfect melt-in-your-mouth baked chicken breasts, it’s time to gather your ingredients and get cooking. Remember, cooking is all about enjoying the process and making meals that bring your family together. Happy cooking!

Melt-In-Your-Mouth Baked Chicken Breast Recipe

Prep Time 10 minutes
Cook Time 40 minutes
Total Time 50 minutes
Servings 4 pieces
Calories 350
This delicious baked chicken breast is coated with a creamy Parmesan topping, resulting in tender, flavorful meat with a golden crust.

Ingredients

Chicken

  • 4 pieces boneless, skinless chicken breasts
  • 1 cup mayonnaise (or plain Greek yogurt) (for lighter version)
  • 0.5 cup grated Parmesan cheese
  • 1 teaspoon garlic powder
  • 1 teaspoon onion powder
  • 1 teaspoon salt
  • 0.5 teaspoon black pepper
  • 0.5 teaspoon paprika or Italian seasoning (for topping)

Instructions 

  • Preheat oven to 375°F (190°C). Prepare baking dish.
  • Pound chicken to ¾ inch thickness. Mix mayonnaise, Parmesan, garlic, onion, salt, and pepper.
  • Spread topping on chicken, place in dish, sprinkle with paprika or Italian seasoning.
  • Bake for 35-45 minutes until internal temp reaches 165°F (74°C) and topping is golden.
  • Rest for 5 minutes before serving to retain juices.

Notes

Use Greek yogurt for a lighter version or adjust seasoning to taste.
Calories: 350kcal
Cost: $15
Course: Main Course
Cuisine: American
Keyword: baked, chicken, Parmesan