Author

Emily

Browsing

Unlock the Secrets of Rustic Baked Chicken: A Family Favorite

Welcome to your go-to guide for creating the ultimate rustic baked chicken with herbs! If you’re looking for a delicious, hassle-free meal that can be on the table in just 30 minutes, you’ve come to the right place. This recipe not only champions the humble chicken but also elevates it with vibrant flavors from fresh herbs, garlic, and lemon. Let’s dive into the details and discover why this dish will quickly become a staple in your household!

Why You’ll Love This Recipe

This rustic baked chicken is not just another meal; it’s a celebration of flavor, ease, and family bonding. Here are five reasons why you’ll adore this recipe:

  • Speedy Preparation: Ready in just 30 minutes, making it perfect for busy weeknights when time is of the essence.
  • Affordable Ingredients: Utilizing simple ingredients like a whole chicken and fresh herbs, this recipe is budget-friendly without sacrificing taste.
  • Versatile Flavor: The combination of herbs and lemon elevates the dish, allowing you to customize it with your favorite flavors.
  • One-Pan Wonder: Less cleanup required as everything cooks in one roasting pan, letting you enjoy more time with your family.
  • Impressive Presentation: The golden, crispy skin and vibrant vegetables create a stunning centerpiece for any dinner table.

Ingredients: Your Shopping List

Before we get cooking, let’s gather the ingredients. Here’s what you’ll need:


Nonstick Grill Pan

★ Recommended Kitchen Tool

Nonstick Grill Pan

Make this recipe even easier with a quality Nonstick Grill Pan — a must-have kitchen staple!


🛒 Shop This Tool →

As an Amazon Associate, we earn from qualifying purchases.
  • 4 lb whole chicken
  • 2 tbsp olive oil
  • 1 tbsp salt
  • 1 tsp black pepper
  • 2 tsp dried thyme
  • 2 tsp dried rosemary
  • 1 lemon, quartered
  • 4 cloves garlic, minced
  • 1 cup chicken broth

Ingredient Substitutions
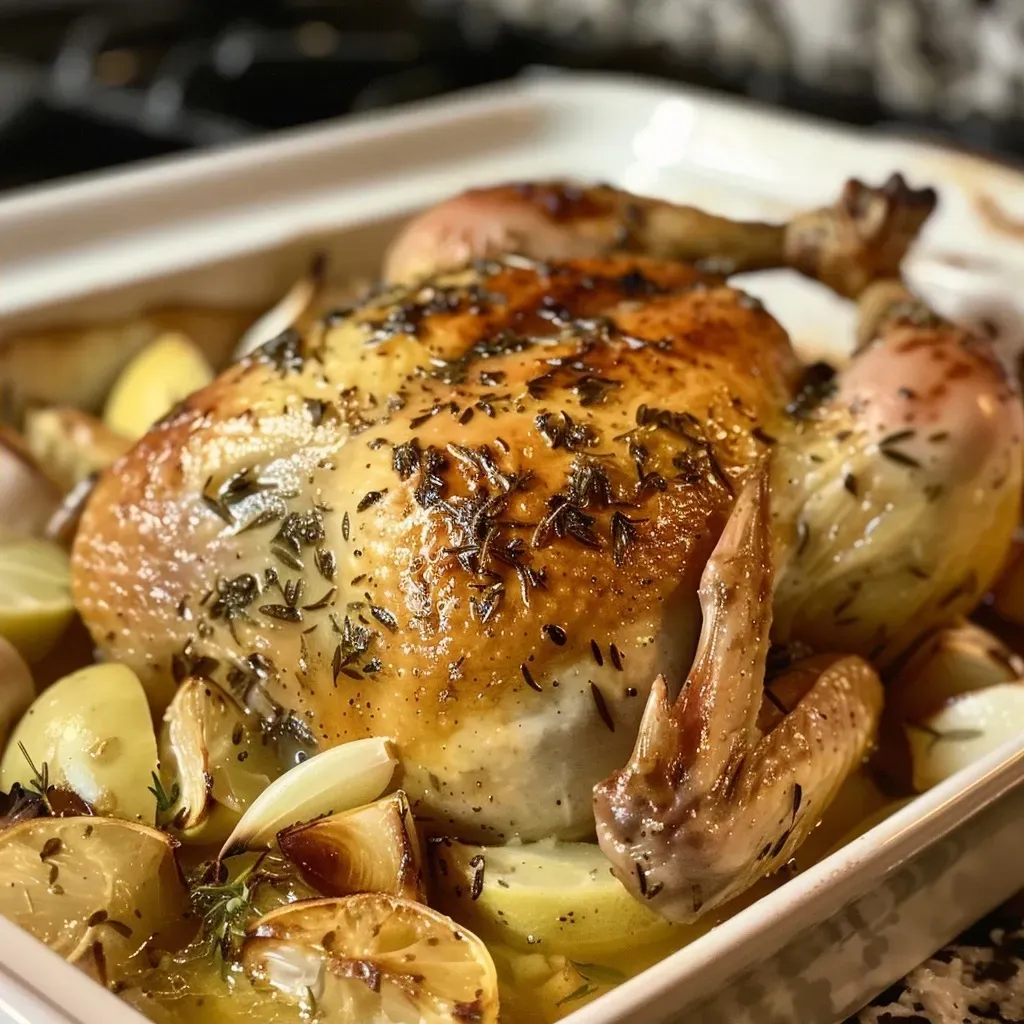
Juicy rustic baked chicken with herbs, garnished with lemon and garlic.

If you don’t have a specific ingredient on hand, don’t worry! Here are some substitutions you can make:

  • Whole Chicken: Use chicken pieces like thighs or breasts if you prefer.
  • Olive Oil: Substitute with canola oil or melted butter for a different flavor profile.
  • Dried Herbs: Fresh herbs can be used in a 3:1 ratio (3 times more fresh than dried).
  • Chicken Broth: Water or vegetable broth can be used in a pinch.

How to Make Rustic Baked Chicken with Herbs

Follow these simple steps to create a mouthwatering rustic baked chicken that your family will love:

  1. Preheat the oven to 375°F (190°C).
  2. Pat the chicken dry with paper towels.
  3. Rub the chicken with olive oil, salt, and black pepper.
  4. Sprinkle dried thyme and rosemary evenly over the chicken.
  5. Stuff the cavity with lemon quarters and minced garlic.
  6. Place the chicken in a roasting pan and pour chicken broth around it.
  7. Bake for 1 hour and 15 minutes, or until the internal temperature reaches 165°F (74°C).
  8. Let the chicken rest for 10 minutes before carving.
  9. Serve with pan juices for added flavor.

Pro Tips for Perfect Rustic Baked Chicken

To ensure your baked chicken turns out perfectly every time, consider these expert tips:

  • Pat Dry for Crispier Skin: Ensure the chicken is thoroughly dried before applying oil and seasoning to achieve that coveted crispy skin.
  • Use a Meat Thermometer: For accuracy, check the internal temperature in the thickest part of the chicken to avoid undercooking.
  • Rest Before Carving: Letting the chicken rest allows the juices to redistribute, ensuring moist and flavorful meat.
  • Experiment with Flavors: Feel free to customize the herbs or add spices like paprika for an extra kick.
  • Save the Bones: Use leftover bones to make homemade chicken broth for future recipes!
  • Use Vegetables: Add vegetables like carrots, potatoes, or onions to the roasting pan for a complete meal!
  • Don’t Skip the Marinade: For enhanced flavor, marinate the chicken overnight with herbs and spices.
  • Cover with Foil: If the skin browns too quickly, cover the chicken loosely with foil to prevent burning while it cooks through.

Common Mistakes and Troubleshooting

Even the best cooks make mistakes! Here are some common issues and how to fix them:

  • Dry Chicken: This can happen if the chicken is overcooked. Always check the internal temperature with a meat thermometer.
  • Rubbery Skin: Insufficient drying before seasoning can lead to rubbery skin. Always pat the chicken dry.
  • Uneven Cooking: If using chicken pieces, ensure they are of similar size for even cooking.
  • Lack of Flavor: If the chicken tastes bland, ensure you season it well and use fresh herbs.

Variations: Make It Your Own

Want to switch things up? Here are some creative variations for your rustic baked chicken:

  • Herb-Crusted Chicken: Blend fresh herbs with breadcrumbs for a crunchy topping.
  • Spicy Lemon Chicken: Add red pepper flakes to the seasoning for a spicy kick.
  • Honey Garlic Chicken: Drizzle honey over the chicken before baking for a sweet glaze.
  • Mediterranean Chicken: Incorporate olives and feta cheese for a Mediterranean twist.

Storage and Make-Ahead Instructions

This rustic baked chicken can be made ahead of time and stored for later enjoyment:

  • Refrigeration: Store leftover chicken in an airtight container in the fridge for up to 4 days.
  • Freezing: Freeze cooked chicken for up to 3 months. Thaw in the refrigerator before reheating.
  • Reheating: Reheat in the oven at 350°F (175°C) until warmed through to maintain the skin’s crispiness.

Frequently Asked Questions

Here are some common questions about rustic baked chicken:

  • Can I use frozen chicken? Yes, but ensure it is fully thawed before cooking for even results.
  • How do I know when the chicken is done? The internal temperature should reach 165°F (74°C).
  • Can I cook this in an air fryer? Yes! Adjust the cooking time to 30-40 minutes at 375°F (190°C).
  • What sides pair well with this dish? Roasted vegetables, mashed potatoes, or a fresh salad complement this meal perfectly.
  • Can I use fresh herbs instead of dried? Absolutely! Use three times more fresh herbs than dried.
  • Is this recipe gluten-free? Yes, all ingredients are naturally gluten-free.
  • Can I make this recipe in advance? You can prep the chicken and season it a day ahead, then bake it when ready.
  • What’s the best way to carve a roasted chicken? Let it rest, then use a sharp knife to carve the chicken, separating the legs, breasts, and wings.

Nutritional Information and Dietary Adaptations

This rustic baked chicken is not only delicious but also offers a nutritious meal option:

  • Calories: Approximately 350 per serving, depending on portion size and sides.
  • Protein: A great source of lean protein, essential for muscle health and recovery.
  • Low-Carb Option: Pair it with non-starchy vegetables for a satisfying low-carb meal.
  • Heart-Healthy Fat: Olive oil provides healthy fats that can support heart health.

Equipment Recommendations

Having the right tools can make a significant difference in your cooking experience:

  • Roasting Pan: A sturdy roasting pan allows for even cooking and easy cleanup.
  • Meat Thermometer: Essential for ensuring your chicken is cooked to perfection.
  • Chef’s Knife: A sharp knife makes carving the chicken easy and efficient.
  • Cutting Board: A large cutting board provides ample space for prepping and serving.

Serving Suggestions: Make It a Meal

Here are some ideas to round out your rustic baked chicken dinner:

  • Classic Mashed Potatoes: Creamy mashed potatoes make a comforting side.
  • Seasonal Vegetables: Roast seasonal vegetables alongside the chicken for a colorful plate.
  • Fresh Salad: A crisp green salad with a light vinaigrette balances the richness of the chicken.
  • Crusty Bread: Serve with crusty bread to soak up those delicious pan juices.

Conclusion: Your New Dinner Hero

Now that you have the ultimate guide to making rustic baked chicken with herbs, it’s time to get cooking! This dish not only offers a satisfying meal for the whole family but also brings a sense of warmth and comfort to your dining table. Remember, cooking should be enjoyable, and with this easy recipe, you can create a delicious dinner without the stress. So roll up your sleeves, grab that chicken, and let’s make some magic in the kitchen!
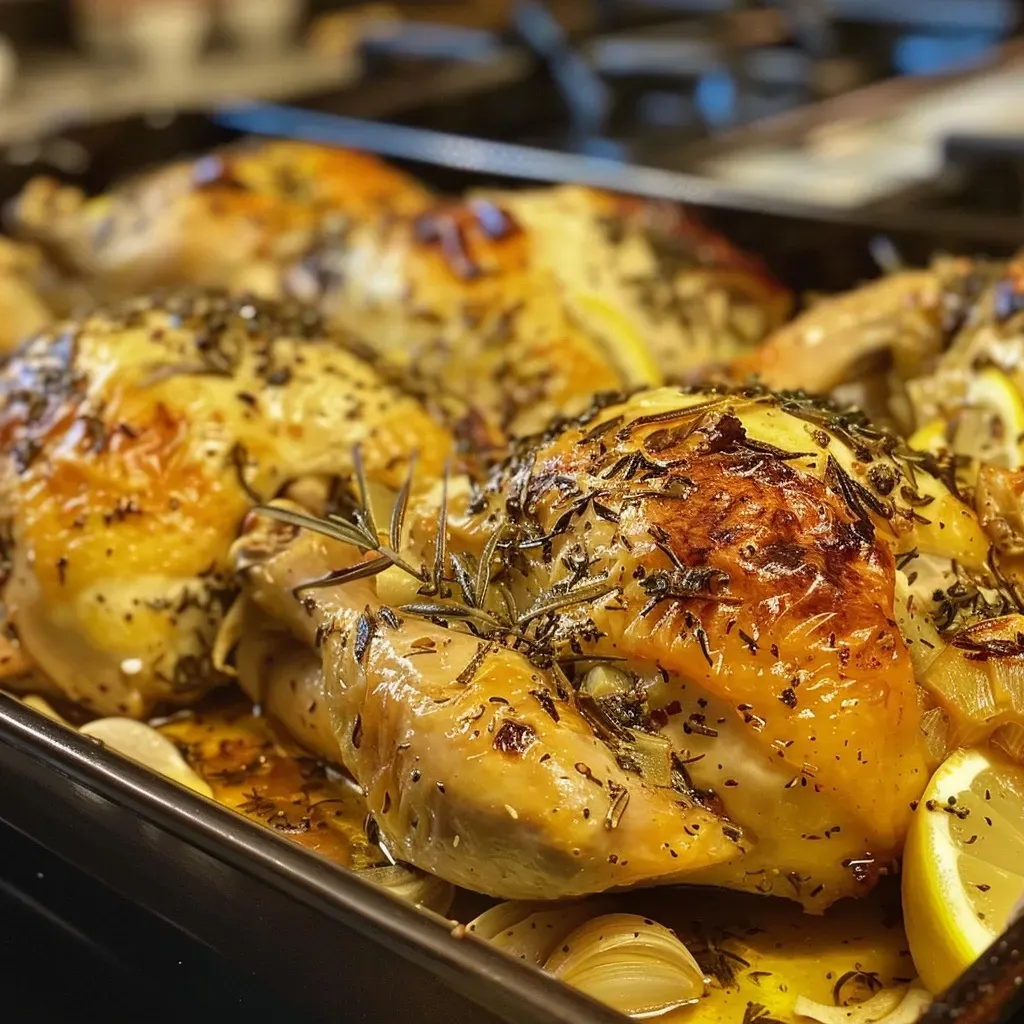
Rustic Baked Chicken with Herbs: A Delicious 30-Minute Meal

Prep Time 10 minutes
Cook Time 1 hour 15 minutes
Total Time 1 hour 25 minutes
Servings 4 servings
Calories 850
This flavorful baked chicken is infused with herbs and lemon, making it a perfect quick and hearty meal.

Ingredients

Main

  • 4 lb whole chicken
  • 2 tbsp olive oil
  • 1 tbsp salt
  • 1 tsp black pepper
  • 2 tsp dried thyme
  • 2 tsp dried rosemary
  • 1 each lemon, quartered
  • 4 cloves garlic, minced
  • 1 cup chicken broth

Instructions 

  • Preheat oven to 375°F (190°C).
  • Pat chicken dry, rub with olive oil, salt, and pepper.
  • Sprinkle herbs over chicken, stuff cavity with lemon and garlic.
  • Place in pan, pour broth around, and bake for 75 minutes.
  • Rest for 10 minutes, then carve and serve.

Notes

Ensure the chicken reaches an internal temperature of 165°F for safety.
Calories: 850kcal
Cost: $15
Course: Main Course
Cuisine: American
Keyword: chicken

Transform Your Dinner Routine with This Chicken Pasta Bake

Welcome to the ultimate solution for busy weeknights: a flavorful Chicken Pasta Bake that combines tender chicken, creamy sauce, and gooey cheese. This comforting dish is not only a crowd-pleaser but also incredibly easy to prepare, making it perfect for families on the go. Whether you’re a seasoned cook or just starting, this recipe will help you get a satisfying meal on the table without the stress. Let’s dive into why this chicken pasta bake should become a staple in your kitchen!

Why You’ll Love This Recipe

This Chicken Pasta Bake is a harmonious blend of flavors and textures, and here are just a few reasons why it stands out:

  • Quick and Easy: With simple steps and everyday ingredients, you can whip this dish up in no time, making it ideal for busy evenings.
  • Family-Friendly: This recipe is guaranteed to please even the pickiest eaters, with its cheesy goodness and rich flavors.
  • Versatile Ingredients: Use rotisserie chicken or any leftover chicken you have on hand, and feel free to switch up the pasta type to suit your family’s preferences.
  • Make-Ahead Friendly: Prepare it ahead of time for an effortless dinner option. Just assemble it and pop it in the oven when you’re ready to eat.
  • Comforting and Satisfying: This baked pasta dish is the ultimate comfort food, featuring a creamy sauce that wraps around each piece of pasta.

Ingredients and Variations

Gather your ingredients for this delicious Chicken Pasta Bake. Here’s what you’ll need:


Air Fryer XL

★ Recommended Kitchen Tool

Air Fryer XL

Make this recipe even easier with a quality Air Fryer XL — a must-have kitchen staple!


🛒 Shop This Tool →

As an Amazon Associate, we earn from qualifying purchases.
  • 3 cups chopped cooked chicken breast (rotisserie or grilled chicken are best)
  • 12 ounces short pasta of choice (farfalle, penne, elbows, etc.; can also use gluten-free pasta)
  • ¼ cup salted butter
  • 1 yellow onion, diced
  • 2 cloves garlic, minced
  • 2 tablespoons all-purpose flour (or gluten-free flour)
  • 2 tablespoons tomato paste
  • 14.5 oz canned diced tomatoes, drained
  • 2 cups whole milk
  • 2-3 teaspoons Italian seasoning (or substitute with fresh herbs like basil)
  • ¼ to ½ teaspoon red pepper flakes (to taste)
  • ½ teaspoon salt
  • Ground black pepper to taste
  • 2 cups shredded mozzarella cheese, divided
  • ¾ cup shredded parmesan cheese, divided
  • ¼ cup fresh chopped parsley (plus more for garnish)

Feel free to customize this recipe! Here are some variations:

  • Vegetable Boost: Add in steamed broccoli, spinach, or bell peppers for extra nutrition.
  • Cheesy Delight: Mix in different types of cheese like cheddar or gouda for a unique flavor.
  • Spice It Up: Add jalapeños or use spicy Italian sausage instead of chicken for a kick.
  • Gluten-Free Option: Use gluten-free pasta and flour to adapt this recipe for those with dietary restrictions.

How to Make It

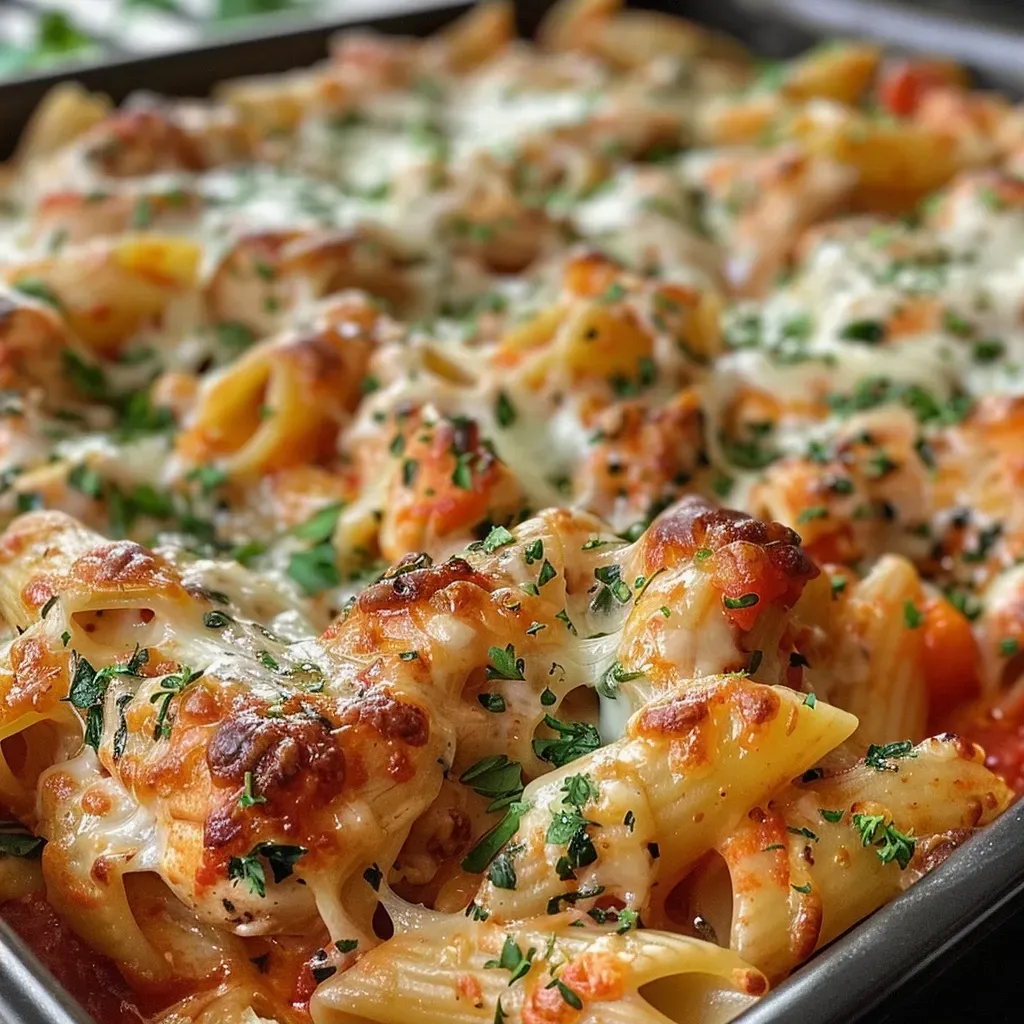
Close-up view of a juicy Chicken Pasta Bake, showcasing pasta and melted cheese.

Ready to cook? Follow these simple steps to create your Chicken Pasta Bake:

  1. Preheat the oven to 400˚F. Lightly grease a 9×13” baking dish.
  2. Cook the pasta in salted water according to package instructions. Reserve a ½ cup pasta water, drain the rest, and set the pasta aside.
  3. Melt butter in a large skillet over medium heat. Add the onion and sauté for 3-5 minutes. Add the garlic and continue cooking for 30 seconds until fragrant.
  4. Evenly sprinkle in the flour, add the tomato paste, and stir well. Continue cooking for 1-2 minutes, stirring often.
  5. Add the diced tomatoes and slowly stir in the milk until well combined. Sprinkle in the Italian seasoning, red pepper flakes, salt, and pepper. Bring to a simmer and cook for a few minutes, stirring often, until the sauce starts to thicken.
  6. Add the parsley, 1 ½ cups mozzarella cheese, and ½ cup parmesan cheese. Stir until cheese is melted, then whisk in the reserved pasta water until the sauce is nicely thinned and smooth. Fold in the diced cooked chicken.
  7. Add the cooked pasta to the prepared baking dish, then top with the chicken/sauce mixture. Stir well to combine and top with remaining mozzarella and parmesan cheese.
  8. Bake uncovered for 20 minutes, until the cheese is golden brown and bubbly. Serve immediately topped with fresh parsley.

Pro Tips for Success

For the best results, keep these expert tips in mind:

  • Cook Pasta Al Dente: Ensure that your pasta is slightly undercooked before mixing it with the sauce, as it will continue to cook in the oven.
  • Flavor Boost: Consider adding a splash of white wine to the sauce for an extra depth of flavor.
  • Layering Cheese: For a gooey, cheesy topping, sprinkle some cheese halfway through the baking time.
  • Storage Tip: Store leftovers in an airtight container in the fridge for up to 3 days.
  • Freezing Option: Assemble the dish without baking, cover tightly, and freeze for up to 3 months. Thaw in the refrigerator before baking.
  • Test for Doneness: The internal temperature of the chicken should reach 165˚F for safe consumption.
  • Garnish for Freshness: Fresh herbs like parsley or basil on top add a burst of color and flavor.
  • Don’t Skip the Rest: Let the baked pasta rest for a few minutes before serving to allow it to set and enhance its flavor.

Common Mistakes and Troubleshooting

Even the best cooks can run into issues. Here are some common mistakes and how to avoid them:

  • Overcooked Pasta: If the pasta is too soft when you add it to the bake, it can turn mushy. Aim for al dente.
  • Sauce Too Thick: If your sauce is too thick, whisk in a little more milk or reserved pasta water until it reaches your desired consistency.
  • Cheese Not Melting: If the cheese isn’t melting well, consider covering the dish with foil for the first half of baking, then removing it to brown the cheese.
  • Uneven Cooking: Make sure to stir the pasta and sauce mixture well before baking to ensure even distribution of ingredients.

Storage and Make-Ahead Instructions

This Chicken Pasta Bake is perfect for meal prep. Here’s how to store and reheat it:

  • Refrigerate: Store leftovers in an airtight container in the fridge for up to 3 days.
  • Freezing: Assemble the dish without baking, cover tightly, and freeze for up to 3 months. Thaw in the refrigerator overnight before baking.
  • Reheating: Reheat in the oven at 350˚F until heated through, about 20-25 minutes. You can also microwave individual portions for convenience.

Frequently Asked Questions

Here are some common questions about this Chicken Pasta Bake:

  • Can I use uncooked chicken? Yes, you can use uncooked chicken. Just ensure it is fully cooked before adding it to the bake.
  • What can I substitute for pasta? Various options like quinoa, rice, or zucchini noodles can be used for a gluten-free or low-carb alternative.
  • Can I make this recipe vegetarian? Absolutely! Substitute the chicken with roasted vegetables or beans for protein.
  • What types of cheese work best? Mozzarella and parmesan are traditional, but feel free to mix in your favorites like cheddar or gouda.
  • How can I make it spicier? Add more red pepper flakes or use spicy sausage instead of chicken for a kick.
  • Can I prepare this in advance? Yes, you can assemble it a day ahead and store it in the fridge until you’re ready to bake it.
  • What should I serve with this pasta bake? A side salad or steamed vegetables complement this dish well.
  • How do I know when it’s done? The cheese should be golden and bubbly, and the internal temperature should reach 165˚F.

Nutritional Tips and Dietary Adaptations

This Chicken Pasta Bake can be adapted for various dietary needs:

  • Low-Calorie Option: Use whole grain pasta and low-fat cheese to reduce calories.
  • Gluten-Free: Use gluten-free pasta and flour as mentioned.
  • High Protein: Add extra chicken or beans for a protein boost.
  • Vegetarian: As noted, replace chicken with beans or lentils.

Equipment Recommendations

To make this recipe, you’ll need:

  • 9×13” Baking Dish: Perfect for this casserole dish size.
  • Large Skillet: Essential for cooking the sauce and mixing everything together.
  • Pot for Pasta: A large pot for boiling pasta is crucial to avoid overcrowding.

Serving Suggestions

For a complete meal, consider pairing your Chicken Pasta Bake with:

  • Garlic Bread: A crusty loaf with garlic butter is a perfect side.
  • Side Salad: A fresh garden salad adds a nice crunch and freshness.
  • Steamed Vegetables: Broccoli or green beans work well as a nutritious side.

Conclusion

Your quest for the ultimate weeknight dinner ends here with this Chicken Pasta Bake recipe. It brings together the comforting flavors your family craves while being easy to prepare. With endless variations and quick prep, it’s a dish that you can confidently serve any night of the week. Don’t forget to share your experience and leave a review! Happy cooking!

Chicken Pasta Bake

Prep Time 15 minutes
Cook Time 20 minutes
Total Time 35 minutes
Servings 6 servings
Calories 650
A comforting baked pasta dish combining tender chicken, flavorful tomato sauce, and melted cheese, perfect for a family dinner.

Ingredients

Protein

  • 3 cups chopped cooked chicken breast (rotisserie or grilled chicken)
  • 12 ounces short pasta of choice (farfalle, penne, elbows, etc.)
  • ¼ cup salted butter
  • 1 yellow onion diced yellow onion
  • 2 cloves garlic (minced)
  • 2 tablespoons all-purpose flour (or gluten-free)
  • 2 tablespoons tomato paste
  • 14.5 oz canned diced tomatoes (drained)
  • 2 cups whole milk
  • 2-3 teaspoons Italian seasoning (or chopped fresh herbs)
  • ¼ to ½ teaspoon red pepper flakes (to taste)
  • ½ teaspoon salt
  • to taste ground black pepper
  • 2 cups shredded mozzarella cheese (divided)
  • ¾ cup shredded parmesan cheese (divided)
  • ¼ cup fresh chopped parsley (plus more for garnish)

Instructions 

  • Preheat oven to 400°F and grease a 9×13 inch baking dish.
  • Cook pasta in salted water, reserve ½ cup pasta water, then drain and set aside.
  • Melt butter, sauté onion, add garlic, then stir in flour, tomato paste, and cook briefly.
  • Add tomatoes and milk, season, simmer until thickened, then stir in parsley and cheeses. Whisk in pasta water and fold in chicken.
  • Combine pasta with sauce, transfer to baking dish, top with remaining cheese, and bake for 20 minutes until bubbly and golden.

Notes

For extra flavor, sprinkle fresh herbs on top before serving.
Calories: 650kcal
Cost: $15
Course: Main Course
Cuisine: American
Keyword: bake, chicken, pasta

Welcome to the world of comforting meals, where a humble chicken pot pie can transform your busy weeknight into a cozy family gathering! In this comprehensive guide, I’ll show you how to make a delicious Smoked Chicken Pot Pie that’s not just easy to whip up but also packed with flavor. Using simple ingredients, this recipe promises to be a hit at your dinner table, making it a perfect choice for any night of the week.

This guide is designed to be your go-to resource, filled with expert tips, variations, and everything you need to know to make this dish shine. If you’re ready to elevate your chicken game, let’s dive in!

Why You’ll Love This Recipe

Before we get into the nitty-gritty of the recipe, here are a few reasons why this smoked chicken pot pie deserves a spot in your meal rotation:


Digital Meat Thermometer

★ Recommended Kitchen Tool

Digital Meat Thermometer

Make this recipe even easier with a quality Digital Meat Thermometer — a must-have kitchen staple!


🛒 Shop This Tool →

As an Amazon Associate, we earn from qualifying purchases.
  • Time-Saving: With pre-smoked chicken, this dish comes together in under an hour, perfect for those hectic evenings.
  • Comfort Food at Its Best: This recipe combines savory flavors with a flaky crust that warms your heart and fills your belly.
  • Family-Friendly: Even picky eaters will love the creamy filling and crust; it’s a sure way to please everyone at the table!
  • Versatile Ingredients: You can easily swap in or out ingredients based on what you have on hand, making it adaptable to your pantry.
  • Leftover Magic: This dish tastes even better the next day, making it a fantastic option for meal prep.

Ingredients You’ll Need

Here’s a detailed breakdown of the ingredients for your smoked chicken pot pie, along with some handy substitutions:

  • 2 Pie Crusts: Use store-bought for convenience or homemade for a personal touch. A buttery crust pairs beautifully with the filling.
  • 10.5 oz Can Cream of Chicken: This adds creaminess; feel free to use a homemade version or substitute with cream of mushroom if preferred.
  • 10.5 oz Can Cream of Potatoes: Provides a rich texture; you can replace it with sour cream or plain Greek yogurt for a tangy twist.
  • 1 Pound Shredded Smoked Chicken: The star of the dish! Leftover smoked chicken works wonderfully, or you can use rotisserie chicken for a shortcut.
  • 16 oz Frozen Peas and Carrots: A convenient way to add veggies; feel free to mix in other frozen vegetables like corn or green beans.
  • Salt and Pepper: Season to taste; adding a pinch of garlic salt can elevate the flavor profile.
  • 1 Egg: For the egg wash, giving your crust that golden finish.
  • Garlic Salt: Optional, but it enhances the overall flavor.

How to Make Smoked Chicken Pot Pie

Follow these simple steps to create a pot pie that’s sure to impress:

  • 1. Smoke your chicken beforehand. If you’re using leftovers, ensure they are shredded and ready to go.
  • 2. Lay one of your pie crusts into a greased pie plate. A disposable pie plate works great, but a glass one is fine if you don’t mind potential staining.
  • 3. In a small bowl, crack your egg and mix it up with a fork to break the yolk.
  • 4. Brush the egg mixture onto the bottom crust using a pastry brush, which helps create a barrier that prevents sogginess.
  • 5. In a large mixing bowl, combine the shredded chicken, peas and carrots, cream soups, and seasonings.
  • 6. Pour your filling into the pie crust in your pie dish.
  • 7. Lay the second pie crust over the top of the filled pie dish, crimping the edges to seal.
  • 8. Cut 4 vent slices into the top crust to allow steam to escape.
  • 9. Brush the top with the remaining egg wash for that beautiful golden color.
  • 10. Preheat your smoker to 350°F and place the pie inside. Cook until the top is golden brown, about 45 minutes.
  • 11. Let it cool slightly before serving, enjoy your delicious creation!

Pro Tips for Perfecting Your Pot Pie

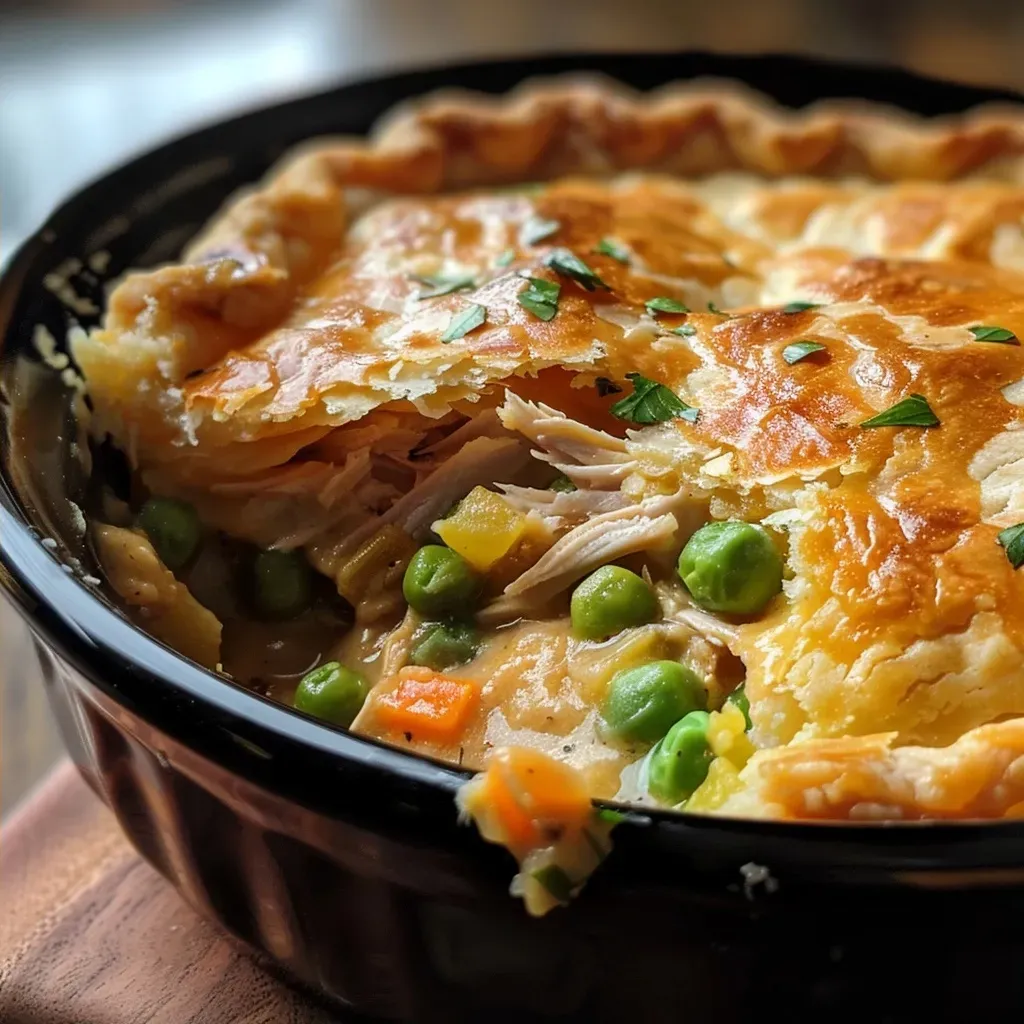
A close-up side view of a golden-brown smoked chicken pot pie with visible flaky crust.

Here are some expert insights to ensure your pot pie turns out perfectly:

  • Use cold ingredients: Cold pie crust helps maintain its structure. Don’t let it get too warm before baking.
  • Don’t overfill: Leave a little space at the top to allow for bubbling and expansion during cooking.
  • Cover edges with foil: If the crust browns too quickly, cover the edges with foil to prevent burning.
  • Let it rest: Allow the pot pie to rest for about 10 minutes after baking. This will help the filling set.
  • Experiment with fillings: Try different meats or vegetables to find your family’s favorite combination!
  • Season well: Taste the filling before sealing the pie; adjust seasonings as needed.
  • Use a pie shield: A pie shield can help keep the edges of your crust from over-baking while the filling cooks.
  • Pair with sides: A fresh salad or roasted vegetables make excellent companions for your pot pie!

Common Mistakes and Troubleshooting

Even the best cooks can run into issues. Here are some common pitfalls and how to avoid them:

  • Soggy crust: Ensure the bottom crust is brushed with egg wash and baked at the right temperature to create a barrier.
  • Underseasoned filling: Always taste your filling before sealing. It should be well-seasoned!
  • Burnt crust: If the edges brown too quickly, cover with foil and reduce the heat slightly.
  • Runny filling: If using fresh vegetables, consider pre-cooking them to reduce moisture.

Variations to Try

Feel free to switch things up! Here are some delightful variations of the classic smoked chicken pot pie:

  • Buffalo Chicken Pot Pie: Add buffalo sauce to the filling for a spicy kick!
  • Vegetarian Pot Pie: Replace chicken with mushrooms, lentils, and a variety of vegetables.
  • Cheesy Chicken Pot Pie: Mix in shredded cheese for a creamy, cheesy twist.
  • Herbed Chicken Pot Pie: Add fresh herbs like thyme or rosemary for an aromatic flavor boost.

Storage and Make-Ahead Instructions

This pot pie is perfect for meal prepping! Here’s how to store it:

  • Refrigerator: Store leftovers in an airtight container for up to 3 days.
  • Freezer: Wrap the unbaked pie tightly in plastic wrap and freeze for up to 2 months. Bake from frozen, adding extra time.
  • Reheating: Reheat slices in the oven at 350°F for 20-25 minutes or until warmed through.

Frequently Asked Questions

Got questions? Here are some common inquiries about making smoked chicken pot pie:

  • Can I use fresh chicken instead of smoked? Absolutely! Just cook and shred it before adding to the filling.
  • What can I substitute for cream of chicken? You can use homemade cream or substitute with any cream-based soup.
  • Can I make this recipe gluten-free? Yes! Use gluten-free pie crusts and ensure your soups are gluten-free.
  • How can I make it dairy-free? Use coconut cream and dairy-free crusts for a dairy-free version.
  • What if I don’t have a smoker? You can bake the chicken in the oven or use a grill instead.
  • How do I prevent the crust from burning? Cover the edges with foil if they brown too quickly.
  • Can I make it ahead of time? Yes! Prepare the filling and assemble, then bake before serving.
  • What sides go well with pot pie? A simple green salad, roasted veggies, or garlic bread are fantastic choices!

Nutritional Tips and Dietary Adaptations

To cater to various dietary needs, consider these adaptations:

  • Lower-Calorie Option: Use less cream and more veggies to lighten the dish.
  • Protein Boost: Add beans or chickpeas for additional protein and fiber.
  • Vegan Adaptation: Substitute chicken with tofu or tempeh and use plant-based cream.
  • Low-Carb Version: Use a cauliflower crust instead of traditional pie crust.

Essential Equipment Recommendations

Having the right tools can make your cooking experience smoother. Here’s what I recommend:

  • Pie Dish: A deep-dish pie plate offers plenty of room for filling.
  • Pastry Brush: Essential for applying egg wash and ensuring a perfect crust.
  • Mixing Bowls: A set of various sizes will help in preparing your ingredients.
  • Smoker or Grill: A reliable smoker or grill for the chicken is a must for that smoky flavor.

Serving Suggestions

Make your pot pie meal even more delightful with these serving ideas:

  • Pair with a Side Salad: A fresh garden salad with vinaigrette complements the richness of the pie.
  • Serve with Garlic Bread: Crunchy garlic bread is a perfect accompaniment.
  • Offer Roasted Vegetables: Roasted broccoli or carrots add color and nutrients to your meal.
  • Top with Fresh Herbs: A sprinkle of chopped parsley or thyme adds freshness!

Now that you have everything you need to create a mouthwatering smoked chicken pot pie, I hope you feel inspired to take on this recipe. Remember, cooking is all about experimenting and having fun. Your family will love the warmth and comfort this dish brings to your table, making it a perfect solution for those busy nights. Enjoy your cooking adventure!

Smoked Chicken Pot Pie Recipe

Prep Time 20 minutes
Cook Time 1 hour 20 minutes
Total Time 1 hour 40 minutes
Servings 6 servings
Calories 450
A delicious smoked chicken pot pie with a flaky crust, packed with flavorful filling and cooked to perfection in a smoker.

Ingredients

Pie Crusts

  • 2 pieces Pie Crust
  • 10.5 cans Cream of Chicken Soup
  • 10.5 cans Cream of Potatoes Soup
  • 1 pound Shredded Smoked Chicken
  • 16 ounces Frozen Peas and Carrots
  • Salt Salt
  • Pepper Pepper
  • 1 egg Egg
  • Garlic Salt Garlic Salt

Instructions 

  • Smoke the chicken beforehand.
  • Line a greased pie plate with one pie crust. Mix shredded chicken, peas and carrots, soups, and seasonings. Pour filling into crust.
  • Cover with second pie crust, crimp edges, and cut vents. Brush top with beaten egg.
  • Smoke at 225°F (107°C) for 1 hour, then increase to 350°F (177°C) and cook until golden.
  • Check pellet supply and rotate pie if needed. Serve hot.

Notes

Ensure the smoker maintains consistent temperature for best results.
Calories: 450kcal
Cost: $15
Course: Main Course
Cuisine: American
Keyword: chicken, Pie, Smoked

Discover the Comfort of Dutch Oven Braised Chicken Thighs

Welcome to a delicious journey in the kitchen! Today, we’re diving into a recipe that’s not just easy to make but also brings warmth and flavor to your busy weeknight dinners. Dutch Oven Braised Chicken Thighs with Apple Cider is the perfect dish for any home cook looking to create something special without spending hours in the kitchen. In this comprehensive guide, you’ll learn everything from the ingredients to the expert tips that will ensure your chicken turns out perfectly every time.

Why You’ll Love This Recipe

  • Quick and Easy Preparation: With just 15 minutes of active cooking time, this recipe is perfect for weeknights when you’re short on time.
  • Flavor Explosion: The combination of savory herbs and sweet apple cider creates a rich, mouthwatering sauce that elevates the chicken.
  • Budget-Friendly: Chicken thighs are typically more affordable than other cuts, making this dish easy on the wallet.
  • One-Pot Wonder: Everything is cooked in a single Dutch oven, which means less cleanup for you!
  • Adaptable Ingredients: With simple substitutions, you can easily customize this recipe to fit your family’s tastes.

Ingredients You’ll Need

Gather these simple ingredients for a warm, savory dish that your family will love:

  • 1.5 lbs Chicken Thighs (boneless, skinless): Look for high-quality, fresh chicken thighs for the best flavor.
  • 1 teaspoon Sea Salt: Essential for enhancing the natural flavors of the chicken.
  • ½ teaspoon Black Pepper: Adds a hint of spice to the dish.
  • 1 tablespoon Olive Oil: For searing the chicken to perfection.
  • 2-3 large Shallots (thinly sliced): Their sweetness will balance the dish beautifully.
  • 2 cloves Garlic (minced): Adds depth and aroma to the sauce.
  • ¾ cup Apple Cider (unfiltered preferred): This is the star of the show, imparting sweetness and acidity.
  • ½ cup Chicken Broth: Enhances the sauce’s richness.
  • 1 teaspoon Stone Ground Mustard: For a little tang and complexity.
  • ¾ teaspoon Fresh Rosemary (finely chopped): A fragrant herb that complements the chicken.
  • ¾ teaspoon Fresh Thyme (finely chopped): Adds earthiness to the dish.
  • ¾ teaspoon Fresh Sage (finely chopped): A classic herb pairing with chicken.
  • 1 Pinch Red Pepper Flakes (optional): For those who enjoy a little heat.
  • 1 large Pink Lady Apple (thinly sliced): Adds sweetness and a wonderful texture contrast.

Step-by-Step Instructions

Close-up view of juicy braised chicken thighs garnished with fresh herbs and apple slices.

Follow these simple steps to create your delicious Dutch Oven Braised Chicken Thighs:


Nonstick Grill Pan

★ Recommended Kitchen Tool

Nonstick Grill Pan

Make this recipe even easier with a quality Nonstick Grill Pan — a must-have kitchen staple!


🛒 Check Price on Amazon →

As an Amazon Associate, we earn from qualifying purchases.
  1. Pat the chicken thighs dry with a paper towel and season both sides generously with salt and pepper.
  2. Heat the olive oil in a Dutch oven over medium-high heat. Once hot, sear the chicken for 3-4 minutes on each side, until nicely browned. If your pot is small, work in batches.
  3. Once browned, transfer the chicken to a plate and set aside.
  4. Reduce the heat to medium. In the same pot, add the sliced shallots and cook for 2-3 minutes until softened. Stir in the garlic and cook for another 30 seconds, just until fragrant.
  5. Add the apple cider to deglaze the pot, scraping up any bits stuck to the bottom. Pour in the chicken broth and stir in the mustard, rosemary, thyme, sage, and red pepper flakes if using. Let everything come together for a minute or two.
  6. Nestle the chicken back into the pot so it’s partially submerged in the sauce. Add the sliced apples on top.
  7. Cover the pot and transfer it to a preheated oven at 325°F. Braise for 25-30 minutes, until the chicken is tender and the flavors meld beautifully.

Pro Tips for Perfect Braised Chicken

  • Choose the right chicken: For the best results, opt for bone-in, skin-on thighs if you prefer more flavor and moisture.
  • Sear properly: Don’t overcrowd the pan; this prevents browning. Sear in batches if necessary.
  • Deglaze effectively: Ensure you scrape up all the brown bits from the bottom of the pot; this depth of flavor is key!
  • Monitor the braising time: Check the chicken at the 25-minute mark. You want it tender but not falling apart.
  • Let it rest: After removing from the oven, let the chicken rest for a few minutes before serving to lock in moisture.
  • Mix up the herbs: Feel free to substitute other herbs like oregano or marjoram based on your taste preferences.
  • Use flavorful broth: Opt for homemade chicken broth if possible for the best flavor.
  • Experiment with spices: Add a cinnamon stick or star anise for a unique twist!

Common Mistakes and Troubleshooting

Even seasoned cooks can make mistakes! Here’s how to avoid common pitfalls:

  • Overcooking: Braise just until the chicken is tender; cooking too long can lead to dry meat.
  • Insufficient seasoning: Don’t skip the salt! It’s essential for flavor development.
  • Not deglazing: Skipping this step means missing out on a rich sauce!
  • Incorrect oven temperature: Always preheat your oven to ensure even cooking.

Variations to Try

Want to switch things up? Here are some delicious variations to this recipe:

  • Honey Garlic Version: Add 2 tablespoons of honey to the sauce for a sweet twist.
  • Mushroom Medley: Stir in 1 cup of sliced mushrooms with the shallots for extra umami.
  • Spicy Kick: Add more red pepper flakes or a splash of hot sauce for those who love heat.
  • Vegetable Medley: Toss in carrots and potatoes to make it a heartier meal.

Storage and Make-Ahead Instructions

This dish is perfect for meal prep! Here’s how to store and reheat:

  • Refrigeration: Store leftovers in an airtight container for up to 3 days.
  • Freezing: Freeze in a freezer-safe container for up to 3 months. Thaw in the fridge before reheating.
  • Reheating: Gently reheat in a saucepan over low heat, adding a splash of chicken broth to prevent drying out.

Frequently Asked Questions

Here are some common questions about this recipe:

  • Can I use chicken breasts instead of thighs? Yes, but chicken breasts may dry out quicker. Adjust the cooking time accordingly.
  • What if I don’t have a Dutch oven? You can use any oven-safe pot with a lid, or even a slow cooker!
  • Can I substitute apple cider? Yes! You can use white wine or chicken broth as alternatives.
  • How can I make this dish gluten-free? Ensure your mustard and broth are gluten-free.
  • Is this recipe spicy? It’s mild, but you can adjust the red pepper flakes to your taste.
  • How do I know when the chicken is done? It should be tender and have an internal temperature of 165°F.
  • What should I serve with this dish? It pairs beautifully with rice, mashed potatoes, or a fresh salad.
  • Can I make this in advance? Yes, it tastes even better the next day after the flavors meld!

Nutritional Tips and Dietary Adaptations

This dish can be adapted to fit various dietary needs:

  • Low-Carb: Serve with steamed vegetables instead of starchy sides.
  • Paleo-Friendly: Use coconut aminos instead of mustard for a paleo-approved version.
  • Dairy-Free: This recipe is naturally dairy-free, making it suitable for lactose-intolerant individuals.

Equipment Recommendations

To make this recipe, you’ll need:

  • Dutch Oven: Essential for even cooking and perfect braising.
  • Measuring Cups and Spoons: For precise ingredient measurements.
  • Wooden Spoon: Ideal for stirring and deglazing the pot.
  • Sharp Knife: For slicing shallots and apples with ease.

Serving Suggestions

Elevate your dining experience with these serving ideas:

  • Over Rice: Serve the chicken and sauce over fluffy white or brown rice.
  • With Crusty Bread: Perfect for soaking up the delicious sauce.
  • Alongside a Salad: A light green salad balances the richness of the dish.

Wrap-Up

Now that you have all the knowledge and tools, it’s time to make Dutch Oven Braised Chicken Thighs with Apple Cider a staple in your home! This recipe not only promises a hearty, satisfying meal but also allows you to experiment with flavors and ingredients. Remember, cooking should be fun and stress-free! Enjoy your culinary adventure, and don’t forget to share this recipe with friends and family!

Dutch Oven Braised Chicken Thighs (With Apple Cider)

Prep Time 15 minutes
Cook Time 30 minutes
Total Time 45 minutes
Servings 4 servings
Calories 350
Enjoy tender, flavorful chicken thighs braised in apple cider with fresh herbs and sliced apples for a comforting meal.

Ingredients

Protein

  • 1.5 lbs Chicken Thighs (boneless, skinless)
  • 1 teaspoon Sea Salt
  • ½ teaspoon Black Pepper
  • 1 tablespoon Olive Oil
  • 2-3 large Shallots (thinly sliced)
  • 2 cloves Garlic (minced)
  • ¾ cup Apple Cider (unfiltered preferred)
  • ½ cup Chicken Broth
  • 1 teaspoon Stone Ground Mustard
  • ¾ teaspoon Fresh Rosemary (finely chopped)
  • ¾ teaspoon Fresh Thyme (finely chopped)
  • ¾ teaspoon Fresh Sage (finely chopped)
  • 1 pinch Red Pepper Flakes (optional)
  • 1 large Pink Lady Apple (thinly sliced)

Instructions 

  • Pat chicken dry, season with salt and pepper. Sear in hot oil until browned, then set aside.
  • Sauté shallots 2-3 min, add garlic and cook 30 sec. Deglaze with apple cider, add broth and herbs, simmer briefly.
  • Return chicken to pot, add sliced apples, cover, and braise in oven at 325°F for 25-30 min until tender.

Notes

Use unfiltered apple cider for best flavor and adjust seasoning to taste.
Calories: 350kcal
Cost: $15
Course: Main Course
Cuisine: American
Keyword: apple cider, Braised, chicken

Welcome to your new favorite comfort food! This creamy chicken ramen soup is a delightful blend of flavors and textures, ready to warm your heart and nourish your family. Using just a handful of pantry staples, you can whip up this delicious meal in minutes. Perfect for busy weeknights, this recipe is a lifesaver when you need something quick yet comforting.

Let’s dive into why this chicken ramen recipe is not just another soup, but a heartwarming dish that fits perfectly into your family’s dinner rotation.

Why You’ll Love This Recipe

  • Quick and Easy: Ready in under 10 minutes, perfect for those hectic weeknights.
  • Kid-Friendly: A creamy texture and familiar flavors make it a hit with picky eaters.
  • Versatile Ingredients: Use whatever you have on hand—substitute proteins or add veggies as you like!
  • Rich and Satisfying: The creamy broth combined with ramen noodles creates a comforting bowl of goodness.
  • Customizable: Add your favorite toppings, spices, or even extra protein to make it your own!

Gathering Your Goodness: Key Ingredients for This Hearty Ramen

This recipe calls for simple, everyday ingredients that you likely already have in your pantry. Here’s a closer look at each one:


Air Fryer XL

★ Recommended Kitchen Tool

Air Fryer XL

Make this recipe even easier with a quality Air Fryer XL — a must-have kitchen staple!


🛒 Check Price on Amazon →

As an Amazon Associate, we earn from qualifying purchases.
  • Ramen Noodles: One package of chicken flavor ramen noodle soup serves as the base. Feel free to explore other flavors or brands!
  • Dried Herbs: Use 2 teaspoons of your favorite seasoning mix. Italian herbs, garlic powder, or a touch of ginger work beautifully.
  • Cream: For that rich texture, use 2 tablespoons of cream, half and half, or even whole milk.
  • Chicken Broth: 1/4 cup to enhance the soup’s flavor. Homemade or store-bought works great!
  • Parmesan Cheese: Optional but recommended! A tablespoon adds extra depth to the soup.

Your Path to Perfect Creamy Chicken Ramen Soup: Step-by-Step

Making this ramen soup is as easy as 1-2-3! Here’s how to do it:

  1. Pour the broken-up noodles into a deep, BPA-free, microwave-safe bowl. Add enough water to cover the noodles and place the bowl in the microwave. Cook for 4 minutes on high.
  2. After microwaving, stir in the seasoning packet, seasoning mix, cream (or half and half), and chicken broth. Add any extras like cooked chicken or veggies at this stage.
  3. Top with grated Parmesan cheese and serve immediately for a comforting meal!

Pro Tips for the Best Creamy Chicken Ramen

Close-up view of a creamy chicken ramen soup in a bowl, garnished with herbs.
  • Perfect Texture: Add noodles just before serving to keep them from becoming soggy.
  • Mix It Up: Experiment with various herbs and spices to elevate the flavor. Try adding a dash of soy sauce or sesame oil for an Asian twist!
  • Protein Power: For a heartier meal, add shredded rotisserie chicken or tofu for vegetarian options.
  • Veggie Boost: Toss in frozen peas, spinach, or broccoli to sneak in some greens!
  • Make Ahead: Prepare the broth in advance and store in the fridge. Just add noodles when ready to serve!
  • Storage: Store leftovers in an airtight container in the fridge for 2-3 days. Reheat gently on the stove or in the microwave.
  • Serving Suggestions: Pair with a side salad or garlic bread for a complete meal.
  • Flavor Enhancements: Top with sliced green onions, sesame seeds, or a drizzle of chili oil for extra flavor.

Common Mistakes and Troubleshooting

Even the best cooks make mistakes! Here are some common issues and how to avoid them:

  • Soggy Noodles: Avoid this by adding noodles just before serving, cooking them for only 2-3 minutes.
  • Too Thick: If your soup is too thick, simply add a little more broth or water until you reach your desired consistency.
  • Flavorless Broth: If your broth lacks depth, consider adding a splash of soy sauce or a pinch of salt to enhance the flavor profile.
  • Overcooked Chicken: If using pre-cooked chicken, add it last to avoid overcooking and drying it out.

Variations to Spice Up Your Ramen

This recipe is incredibly adaptable! Here are some delicious variations to consider:

  • Spicy Chicken Ramen: Add a tablespoon of sriracha or chili paste to spice things up!
  • Vegetarian Version: Replace chicken broth with vegetable broth and add tofu instead of chicken.
  • Creamy Mushroom Ramen: Toss in sautéed mushrooms for an earthy flavor boost.
  • Cheesy Chicken Ramen: Mix in shredded cheddar cheese for an even creamier texture.

Nutrition Tips and Dietary Adaptations

Making healthier choices can be easy with this creamy chicken ramen soup:

  • Lower Fat Option: Use low-fat milk instead of cream for a lighter version.
  • Gluten-Free: Choose gluten-free ramen noodles to make this dish suitable for gluten-sensitive diets.
  • Increase Fiber: Add beans or lentils for extra fiber and protein without much additional effort.

Comprehensive FAQ

  • Can I make this soup vegetarian? Absolutely! Simply substitute chicken broth with vegetable broth and omit the chicken.
  • How can I store leftovers? Store in an airtight container in the fridge for 2-3 days.
  • Can I use homemade ramen noodles? Yes! Just adjust cooking times as needed.
  • What can I add for extra protein? Consider adding tofu, beans, or pre-cooked chicken.
  • How spicy can I make it? Adjust the spice level by adding more or less sriracha or chili paste.
  • Can I freeze this soup? It’s best fresh, but you can freeze the broth without noodles for up to 3 months.
  • What are some good toppings? Green onions, sesame seeds, or a drizzle of chili oil work wonderfully!
  • Is this soup kid-friendly? Yes! Its creamy nature and mild flavors make it a hit with kids.

Equipment Recommendations

To make your cooking experience seamless, consider these kitchen essentials:

  • Microwave-Safe Bowl: A deep bowl is crucial for cooking ramen noodles without spills.
  • Measuring Cups: For precise ingredient measurements, especially when adding broth and cream.
  • Grater: For fresh Parmesan cheese, enhancing the flavor dramatically.

Conclusion

This cream chicken ramen soup is more than just a meal; it’s a warm hug in a bowl that can be made in minutes. No more boring dinners or stressful cooking! With a few simple ingredients, you can create something delicious that your whole family will love. So grab your ingredients and get cooking—dinner is just a microwave away!

Pantry Creamy Chicken Ramen Soup

Prep Time 2 minutes
Cook Time 4 minutes
Total Time 6 minutes
Servings 2 servings
Calories 350
A quick and comforting soup using pantry staples, perfect for a cozy meal in minutes.

Ingredients

Noodles

  • 1 package chicken flavor ramen noodle soup
  • 2 teaspoon dried herbs or seasoning mix
  • 2 tablespoon cream or milk
  • 1/4 cup chicken broth
  • 1 tablespoon Parmesan cheese (optional)

Instructions 

  • Break the noodles into smaller pieces and place in a microwave-safe bowl. Cover with water and microwave for 4 minutes.
  • Add seasoning, cream, and chicken broth to the bowl. Stir well.
  • Microwave for an additional 1-2 minutes until hot.
  • Stir and sprinkle Parmesan cheese on top before serving.

Notes

You can customize with your favorite herbs or add vegetables for extra flavor.
Calories: 350kcal
Cost: $5
Course: Soup
Cuisine: American
Keyword: creamy, quick, ramen

Unlock the Secrets of Instant Pot Chicken Cacciatore

Welcome to your new favorite weeknight dinner! This Instant Pot Chicken Cacciatore recipe is not just about convenience; it’s about flavor, nutrition, and the ability to create a satisfying meal with minimal effort. Whether you’re a busy parent like me or simply looking for a way to spice up your dinner routine, this dish will quickly become a staple in your home. Let’s dive into the delicious world of chicken cacciatore!

Why You’ll Love This Recipe

Chicken Cacciatore is a classic Italian dish that brings warmth and comfort to your table. Here are five reasons why this Instant Pot version will win your heart:

  • Quick Cooking Time: Thanks to the Instant Pot, you can have this flavorful dish ready in about 30 minutes, making it perfect for busy weeknights.
  • One-Pot Wonder: Everything cooks together in the Instant Pot, reducing cleanup time and ensuring all the flavors meld beautifully.
  • Versatile Ingredients: The recipe uses everyday ingredients, and you can easily switch things up based on what you have on hand.
  • Healthy Comfort Food: Packed with lean protein and vegetables, this meal is both hearty and nutritious.
  • Kid-Friendly: Chicken Cacciatore is a hit with picky eaters, making it an ideal choice for family dinners.

Ingredient Breakdown

Let’s take a closer look at the ingredients that make this dish so delicious:


Air Fryer XL

★ Recommended Kitchen Tool

Air Fryer XL

Make this recipe even easier with a quality Air Fryer XL — a must-have kitchen staple!


🛒 Check Price on Amazon →

As an Amazon Associate, we earn from qualifying purchases.
  • 1 tablespoon olive oil: For sautéing the onions and adding richness to the dish.
  • 1/2 medium onion (chopped): Adds sweetness and depth of flavor.
  • 6 boneless, skinless chicken thighs: Tender and juicy, chicken thighs are perfect for this recipe, but you can substitute with chicken breasts if you prefer.
  • 1 (28 fluid ounce) can fire-roasted crushed tomatoes: The base of the sauce, offering a smoky and rich flavor.
  • 2 tablespoons tomato paste: Enhances the tomato flavor and thickens the sauce.
  • 1 red bell pepper (chopped): Adds sweetness and color.
  • 1 large carrot (sliced): A great source of vitamins and adds a slight sweetness.
  • 6 cloves garlic (minced): Infuses the dish with aromatic flavor.
  • Leaves from 4 sprigs fresh thyme: Fresh herbs make a huge difference in flavor.
  • 1/2 teaspoon dried oregano: A classic herb for Italian dishes.
  • 1/4 cup pitted Kalamata olives: Adds a salty, briny flavor that balances the sweetness of the tomatoes.
  • Salt & pepper (to taste): Essential for seasoning.
  • 1 tablespoon fresh basil (sliced thin): For garnish and a fresh burst of flavor.
  • 1 tablespoon fresh parsley (chopped): For garnish and added freshness.

Pro Tips for Perfect Chicken Cacciatore

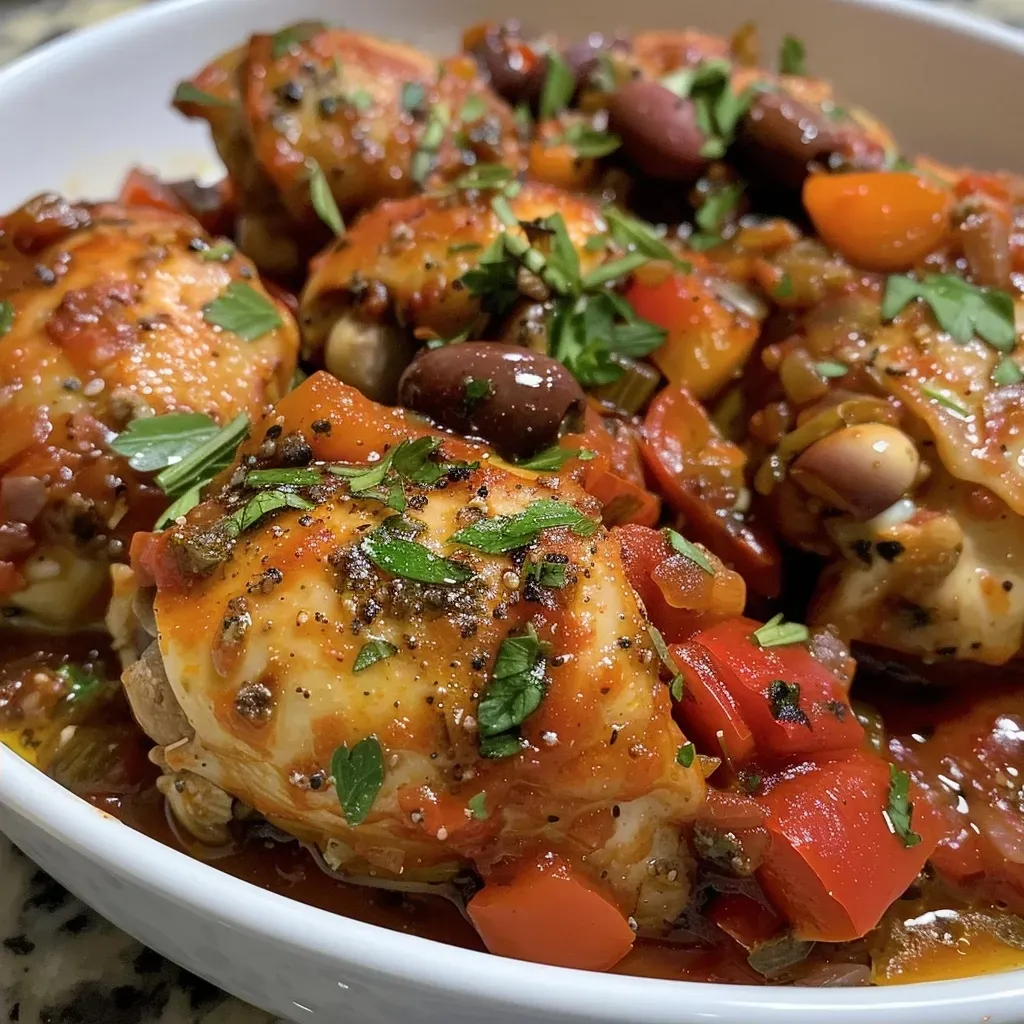
Close-up of a hearty serving of Instant Pot Chicken Cacciatore, featuring chicken thighs and vibrant vegetables.

To ensure your Instant Pot Chicken Cacciatore turns out perfectly every time, consider these expert insights:

  • Brown the Chicken: Searing the chicken thighs for a few minutes before pressure cooking enhances the flavor.
  • Use Fresh Ingredients: Whenever possible, opt for fresh herbs and vegetables for the best flavor.
  • Adjust the Liquids: If you prefer a thicker sauce, reduce the amount of crushed tomatoes slightly.
  • Season Generously: Don’t be shy with salt and pepper; they are crucial for enhancing the overall taste.
  • Let it Rest: After cooking, allow the Cacciatore to sit for a few minutes before serving to let the flavors meld.
  • Experiment with Spices: For a kick, add red pepper flakes or a dash of smoked paprika for extra depth.
  • Pair It Right: Serve with crusty bread or over pasta for a classic Italian experience.
  • Meal Prep Friendly: This dish can be made ahead of time and reheated, making it perfect for meal prepping.

Common Mistakes and Troubleshooting

Even the best cooks can run into issues. Here’s how to troubleshoot some common problems:

  • Burn Notice: If you see a burn notice on your Instant Pot, it may be due to not enough liquid. Always ensure there’s enough moisture in the pot.
  • Overcooked Chicken: If your chicken is dry, it may have been cooked too long. Be sure to follow cooking times closely.
  • Too Thick Sauce: If your sauce is too thick, add a splash of chicken broth or water to loosen it up.
  • Flavorless Dish: If the dish lacks flavor, it could be under-seasoned. Taste and adjust the spices before serving.

Variations to Try

Feel free to customize this recipe to suit your taste or dietary needs:

  • Vegetarian Version: Swap the chicken for hearty vegetables like eggplant or mushrooms for a vegetarian take.
  • Spicy Cacciatore: Add sliced jalapeños or crushed red pepper flakes for a spicy kick.
  • Different Proteins: Try using pork or beef for a different flavor profile.
  • Herb Variations: Experiment with different herbs like rosemary or sage for unique tastes.

Storage and Make-Ahead Instructions

Want to make your life even easier? Here’s how to store and prep this dish:

  • Refrigerate: Store leftovers in an airtight container in the fridge for up to 3 days.
  • Freeze: This dish freezes well! Just make sure to cool it completely before transferring to a freezer-safe container.
  • Make Ahead: You can prepare the ingredients ahead of time; just store them separately until you’re ready to cook.

Comprehensive FAQ

Here are answers to some commonly asked questions about Chicken Cacciatore:

  • Can I use chicken breasts instead of thighs? Yes, but chicken thighs are recommended for their juiciness.
  • What can I serve with Chicken Cacciatore? It pairs beautifully with pasta, rice, or a side of crusty bread.
  • How do I make it gluten-free? Ensure all your ingredients, like broth and sauces, are gluten-free.
  • Can I add other vegetables? Absolutely! Feel free to add zucchini, mushrooms, or spinach.
  • How long does it take to cook? The cooking time is about 10 minutes, but allow time for the Instant Pot to come to pressure.
  • Can I double the recipe? Yes, just ensure not to exceed the maximum fill line of your Instant Pot.
  • Is this recipe good for meal prep? Yes, it stores well and tastes even better the next day!
  • What’s the best way to reheat leftovers? Reheat in the microwave or on the stovetop with a splash of water or broth to keep it moist.

Nutrition Tips and Dietary Adaptations

This recipe is not only delicious but can also be modified to meet various dietary needs:

  • Low-Carb Option: Serve over zucchini noodles instead of pasta for a low-carb alternative.
  • Dairy-Free: This recipe is naturally dairy-free, making it a great choice for those with lactose intolerance.
  • High-Protein: Add chickpeas or lentils for an additional protein boost.

Equipment Recommendations

To make your cooking experience smoother, here are a few tools I recommend:

  • Instant Pot: A reliable electric pressure cooker to save time and enhance flavor.
  • Cutting Board: A sturdy surface for chopping your vegetables.
  • Sharp Knife: Essential for quick and safe ingredient prep.
  • Measuring Cups and Spoons: Accurate measurements are key to delicious cooking.

Serving Suggestions

Serve your Chicken Cacciatore hot from the pot with:

  • Crusty Bread: Perfect for soaking up the delicious sauce.
  • Pasta or Rice: Serve over your favorite pasta or a bed of fluffy rice.
  • Fresh Salad: A side salad adds freshness and crunch to your meal.

Conclusion

There you have it—a delicious, easy-to-make Instant Pot Chicken Cacciatore that’s sure to impress your family and friends. With its rich flavors and comforting qualities, this dish is more than just a meal; it’s a way to bring everyone together. So, roll up your sleeves, gather your ingredients, and let’s make a memorable dinner tonight! Happy cooking!

Easy Instant Pot Chicken Cacciatore

Prep Time 10 minutes
Cook Time 15 minutes
Total Time 25 minutes
Servings 4 servings
Calories 350
A flavorful and hearty Italian-inspired chicken dish cooked quickly in the Instant Pot, perfect for a comforting weeknight dinner.

Ingredients

Main ingredients

  • 1 tablespoon olive oil
  • 1/2 medium onion (chopped)
  • 6 pieces boneless, skinless chicken thighs
  • 1 can (28 fluid ounces) fire roasted crushed tomatoes (with juices)
  • 2 tablespoons tomato paste
  • 1 red bell pepper chopped
  • 1 large carrot (sliced)
  • 6 cloves garlic (minced)
  • 4 sprigs fresh thyme (leaves only)
  • 1/2 teaspoon dried oregano
  • 1/4 cup pitted Kalamata olives
  • 1 tablespoon fresh basil (sliced thin)
  • 1 tablespoon fresh parsley (chopped)

Instructions 

  • Add olive oil and onion to Instant Pot; sauté for 3 minutes.
  • Add chicken and cook for 2 minutes per side.
  • Add tomatoes, tomato paste, bell pepper, carrot, garlic, thyme, and oregano. Seal and cook on high pressure for 10 minutes.
  • Let pressure release naturally for 15 minutes, then manually release remaining pressure.
  • Season with salt and pepper; stir in olives, basil, and parsley before serving.

Notes

This dish pairs well with crusty bread or over pasta for a complete meal.
Calories: 350kcal
Cost: $15
Course: Main Course
Cuisine: Italian
Keyword: chicken

Transform Your Weeknight Dinners with Savory Garlic Butter Chicken

There’s something incredibly comforting about a well-cooked chicken dinner, especially when it’s combined with the rich flavors of garlic and butter. Welcome to your new go-to weeknight dinner: Savory Garlic Butter Chicken. This recipe is not only quick and easy to prepare but also packed with flavor that pleases even the pickiest of eaters. In under an hour, you can whip up a mouthwatering meal that will make everyone at the table happy. Let’s dive into why this dish should become a staple in your dinner rotation!

Why You’ll Love This Recipe

  • Quick Preparation: With minimal ingredients and straightforward steps, you can have this dish ready in no time, perfect for busy weeknights.
  • Flavorful and Versatile: The combination of garlic and butter creates a rich sauce that elevates simple chicken breasts to a gourmet level.
  • Health-Conscious Option: Chicken breast is low in fat and high in protein, making this dish a healthy choice for families.
  • Kid-Friendly: The mild flavors and tender texture make it appealing to children, ensuring that even picky eaters will eat their dinner.
  • Easy Cleanup: Cooking in a cast iron skillet means less mess and fewer dishes to wash, making your post-dinner routine easier.

Key Ingredients You’ll Need

This garlic butter chicken recipe uses everyday ingredients you likely already have in your kitchen, making it not just easy but also budget-friendly. Here’s a detailed breakdown:

  • 3 boneless skinless chicken breasts: The star of the dish! Choose fresh or thawed chicken for the best results.
  • Salt and black pepper: Essential seasonings to enhance the flavor of the chicken.
  • 1/2 + 1/4 teaspoon paprika: Adds a subtle smokiness and vibrant color to the dish.
  • 4 tablespoons butter (melted): The base of the delicious garlic butter sauce that coats the chicken.
  • 1 teaspoon Italian seasoning: A blend of herbs that complements the garlic wonderfully.
  • 1 tablespoon fresh parsley (chopped): For a fresh pop of color and flavor.
  • 2 cloves of garlic (minced): The key ingredient that infuses the dish with savory depth.
  • 1 tablespoon olive oil (extra virgin): Used for searing the chicken, adding extra flavor and preventing sticking.

How to Make Savory Garlic Butter Chicken

Juicy garlic butter baked chicken breast with herbs on a plate.

Follow these simple steps to create a restaurant-quality dish right in your own kitchen:


Digital Meat Thermometer

★ Recommended Kitchen Tool

Digital Meat Thermometer

Make this recipe even easier with a quality Digital Meat Thermometer — a must-have kitchen staple!


🛒 View on Amazon →

As an Amazon Associate, we earn from qualifying purchases.
  1. Preheat your oven: Set it to 400°F (200°C) to ensure the chicken bakes evenly.
  2. Season the chicken: Generously sprinkle salt, black pepper, and 1/2 teaspoon of paprika over the chicken breasts. Set aside while preparing the garlic butter.
  3. Prepare the garlic butter: In a small bowl, mix the remaining 1/4 teaspoon paprika, melted butter, Italian seasoning, chopped parsley, and minced garlic. This fragrant mixture will be poured over the chicken later.
  4. Sear the chicken: In a cast iron skillet, heat the olive oil over medium heat. Once hot, add the seasoned chicken breasts, cooking for about 1-2 minutes on each side until they are golden brown.
  5. Bake the chicken: Pour the garlic butter mixture over the seared chicken and transfer the skillet to the preheated oven. Bake for approximately 20 minutes, or until the internal temperature of the chicken reaches 165°F (75°C).
  6. Finish and serve: Remove the skillet from the oven. Using a spoon, drizzle some of the remaining butter sauce over the chicken before serving. Optionally, garnish with additional fresh herbs.

Pro Tips for Perfect Garlic Butter Chicken

  • Pound for even cooking: To ensure the chicken cooks evenly, pound the breasts to an even thickness before seasoning.
  • Use fresh garlic: Fresh minced garlic will provide the best flavor, but garlic powder can be used in a pinch.
  • Let it rest: Allow the chicken to rest for a few minutes after baking. This helps retain its juices for a more tender bite.
  • Experiment with herbs: Feel free to add other herbs like thyme or rosemary for added depth of flavor.
  • Check for doneness: Use a meat thermometer to ensure the chicken is fully cooked without overcooking it.
  • Make-ahead option: You can marinate the chicken in the garlic butter mixture a few hours ahead for even more flavor.
  • Pair it right: Serve with sides like roasted vegetables or mashed potatoes to complete the meal.
  • Store leftovers properly: Refrigerate any leftovers in an airtight container for up to 3 days.

Common Mistakes and Troubleshooting

Even the best recipes can have hiccups. Here are some common mistakes and how to avoid them:

  • Overcooking the chicken: Always check the internal temperature to avoid dry, tough chicken. 165°F is the sweet spot!
  • Not seasoning enough: Don’t be shy with the salt and pepper; they enhance the chicken’s natural flavor.
  • Skipping the sear: Searing the chicken creates a delicious crust and locks in moisture, so don’t skip this step!
  • Using cold chicken: Allow chicken to come to room temperature before cooking to ensure even cooking.
  • Not letting it rest: Resting the chicken after cooking allows juices to redistribute, resulting in a juicier meal.

Delicious Variations

Feel free to switch things up! Here are some tasty variations to try with this garlic butter chicken recipe:

  • Italian Style: Add sun-dried tomatoes and spinach to the garlic butter mixture for a Mediterranean twist.
  • Lemon Garlic: Incorporate lemon juice and zest into the butter for a bright, zesty flavor.
  • Spicy Kick: Add red pepper flakes to the garlic butter for a spicy version that packs a punch.
  • Herbaceous Delight: Mix in fresh herbs like basil or cilantro along with the parsley for a fresh taste.

Storage and Make-Ahead Instructions

Planning ahead can save you time later. Here’s how to store and prepare this meal in advance:

  • Refrigeration: Store cooked chicken in an airtight container in the fridge for up to 3 days.
  • Freezing: You can freeze the cooked chicken for up to 2 months. Just make sure to wrap it well to prevent freezer burn.
  • Reheating: Reheat in the oven at 350°F until warmed through, or microwave in short intervals.
  • Make-ahead option: Marinate the chicken in the garlic butter mixture up to 24 hours before cooking for an even deeper flavor.

Frequently Asked Questions

Got questions? We’ve got answers! Here are some common inquiries about making garlic butter chicken:

  • Can I use chicken thighs instead of breasts? Absolutely! Just adjust the cooking time as thighs may take a bit longer.
  • What if I don’t have a cast iron skillet? Any oven-safe skillet will work, or you can use a baking dish instead.
  • How can I make this recipe dairy-free? Substitute the butter with a plant-based alternative like vegan butter or olive oil.
  • Can I add vegetables to this recipe? Yes! Feel free to add vegetables like broccoli or asparagus to the skillet during the last 10 minutes of baking.
  • What should I serve with garlic butter chicken? Pair it with rice, quinoa, or a simple salad for a complete meal.
  • How do I know when the chicken is done? Use a meat thermometer to check that it has reached an internal temperature of 165°F.
  • Can I make this a one-pan meal? Yes, add your favorite vegetables to the skillet before baking for a complete meal in one dish.
  • How can I make it spicier? Add chili powder or red pepper flakes to the garlic butter mixture for an extra kick.

Nutrition Tips and Dietary Adaptations

This recipe is naturally healthy, but here are some additional tips for different dietary needs:

  • Low-Carb/Keto: Serve with a side of sautéed spinach or cauliflower rice for a low-carb option.
  • Paleo: Use ghee instead of butter for a Paleo-friendly version.
  • Gluten-Free: This recipe is inherently gluten-free; just be sure any seasonings used are also gluten-free.

Recommended Equipment

For best results, here are some tools that can make your cooking experience smoother:

  • Cast Iron Skillet: Ideal for searing and baking, it retains heat well.
  • Meat Thermometer: Ensures your chicken reaches the perfect internal temperature.
  • Mixing Bowls: Useful for preparing your garlic butter mixture and seasonings.

Serving Suggestions

Complete your meal with these delicious sides:

  • Garlic Mashed Potatoes: Creamy potatoes that complement the garlic butter sauce.
  • Steamed Broccoli: A healthy, colorful side that balances the richness of the chicken.
  • Simple Green Salad: Fresh greens tossed in a light vinaigrette for a refreshing contrast.
  • Quinoa: A nutritious, protein-packed base to soak up the garlic butter sauce.

With this Savory Garlic Butter Chicken recipe, you’re armed with everything you need to create a delicious, satisfying meal that your family will love. So roll up your sleeves, gather your ingredients, and let’s get cooking! Remember, every busy mom deserves a stress-free, delightful dinner solution. Happy cooking!

Garlic Butter Baked Chicken Breast

Prep Time 10 minutes
Cook Time 20 minutes
Total Time 30 minutes
Servings 4 pieces
Calories 350
This flavorful baked chicken breast is infused with garlic and herbs, topped with buttery goodness, and cooked to perfection for a quick and satisfying meal.

Ingredients

Chicken

  • 3 pieces boneless skinless chicken breasts
  • 0.5 teaspoon paprika
  • 0.25 teaspoon paprika
  • 4 tbsp butter (melted)
  • 1 teaspoon Italian seasoning
  • 1 tablespoon fresh parsley (chopped)
  • 2 cloves garlic (minced)
  • 1 tbsp olive oil (extra virgin)

Instructions 

  • Preheat oven to 400°F (200°C). Season chicken with salt, pepper, and 1/2 teaspoon paprika.
  • Mix 1/4 teaspoon paprika, melted butter, Italian seasoning, parsley, and garlic in a small bowl.
  • Heat olive oil in a skillet over medium heat. Sear chicken 1-2 minutes per side until golden.
  • Pour garlic butter mixture over chicken. Transfer skillet to oven and bake for 20 minutes or until internal temperature reaches 165°F.
  • Remove from oven. Spoon some sauce over chicken and garnish with fresh herbs before serving.

Notes

For extra flavor, marinate the chicken with the garlic butter mixture for 30 minutes before cooking.
Calories: 350kcal
Cost: $12
Course: Main Course
Cuisine: American
Keyword: butter, chicken, garlic

Welcome to your new go-to chicken dinner! This high protein chicken curry is not only easy to make but also packed with flavor and nutrition. Perfect for those busy weeknights, it combines tender chicken, vibrant vegetables, and creamy coconut milk to create a dish that is sure to please even the pickiest eaters. Let’s dive into why this recipe will become a staple in your home!

Why You’ll Love This Recipe

  • Quick Cooking Time: This curry can be made in under 30 minutes, making it ideal for weeknight dinners.
  • High Protein: Packed with protein-rich chicken and Greek yogurt, it’s great for muscle repair and satiety.
  • Nutritious Ingredients: The addition of vegetables adds fiber and vitamins, making this a well-rounded meal.
  • Versatile Base: Use this recipe as a base to explore different flavors and ingredients that your family loves.
  • Perfect for Meal Prep: Make a large batch for quick lunches or dinners throughout the week.

Ingredient Breakdown

Here’s what you’ll need to make this delicious high protein chicken curry:

  • 200 grams (7 oz.) chicken breast: Boneless and skinless, diced for quick cooking.
  • 1 small onion: Finely chopped for a flavorful base.
  • ½ garlic clove: Minced (or more to taste) for that aromatic punch.
  • ½ red pepper: Sliced for color and sweetness.
  • 120 ml (½ cup) coconut milk: Low-fat version keeps it creamy without the guilt.
  • 3 tbsp Greek yogurt: Adds creaminess and a protein boost.
  • 1 tbsp curry powder: For that essential curry flavor.
  • 1 tbsp olive oil: To sauté the ingredients.
  • Salt and pepper: To taste, enhancing all the flavors.
  • Cooked rice: Serve as a side or mix in for a complete meal.

Pro Tips for the Best Chicken Curry

  • Marinate the Chicken: If you have time, marinate the chicken in yogurt and spices for at least 30 minutes to enhance flavor.
  • Adjust Spice Levels: Feel free to add chili powder or fresh chilies if you like it spicy!
  • Use Fresh Ingredients: Fresh garlic, ginger, and vegetables will elevate the dish significantly.
  • Cook on Medium Heat: This helps avoid burning while allowing flavors to meld beautifully.
  • Experiment with Veggies: Add peas, spinach, or carrots for more nutrients and color.
  • Finish with Fresh Herbs: Garnish with cilantro or parsley for a fresh touch.
  • Make it Creamy: Stir in more coconut milk or yogurt at the end for extra creaminess.
  • Rest Before Serving: Let the curry sit for a few minutes before serving to allow flavors to deepen.

Common Mistakes and Troubleshooting

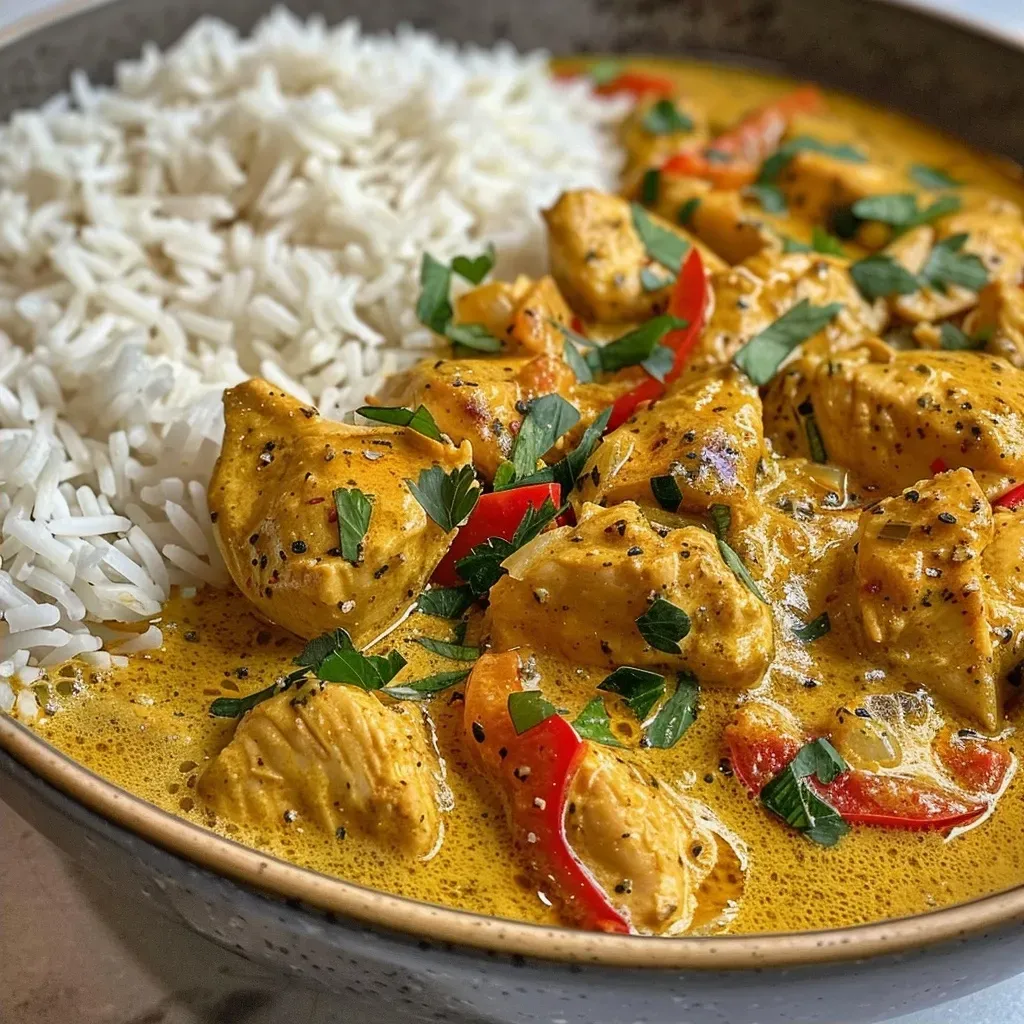
Close-up shot of a bowl of High Protein Chicken Curry with vibrant colors.

Here are some common pitfalls to avoid and how to fix them:


Digital Meat Thermometer

★ Recommended Kitchen Tool

Digital Meat Thermometer

Make this recipe even easier with a quality Digital Meat Thermometer — a must-have kitchen staple!


🛒 Check Price on Amazon →

As an Amazon Associate, we earn from qualifying purchases.
  • Too Watery: If your curry is too thin, simmer it uncovered for a few minutes to reduce the liquid.
  • Bland Flavor: Always taste and adjust with more salt, spices, or a splash of lime juice right before serving.
  • Overcooked Chicken: Ensure you cook the chicken just until it’s no longer pink to keep it tender.

Variations to Try

Feel free to switch things up with these tasty variations:

  • Vegetable Curry: Replace chicken with chickpeas or lentils for a vegetarian option packed with protein.
  • Thai-Style Curry: Use red or green curry paste and serve with jasmine rice for a Thai twist.
  • Curry with Nuts: Add cashews or peanuts for a delightful crunch and extra nutrients.
  • Slow Cooker Version: Add all ingredients to a slow cooker and cook on low for 6-8 hours for a hands-off meal.

Storage and Make-Ahead Instructions

This chicken curry is perfect for meal prep! Here’s how to store it:

  • Refrigerate: Store in an airtight container for up to 3 days.
  • Freeze: Portion into freezer-safe bags and freeze for up to 3 months. Thaw in the fridge before reheating.
  • Reheat: Heat in the microwave or on the stove with a splash of water to loosen it up.

FAQ About High Protein Chicken Curry

  • Can I use chicken thighs instead of breasts? Yes, chicken thighs will add more flavor and moisture.
  • Is this curry spicy? Adjust the curry powder to your taste; you can always add more heat!
  • Can I make this dairy-free? Yes, simply omit the yogurt or use a dairy-free alternative.
  • What can I serve it with? Serve with rice, quinoa, or naan for a complete meal.
  • How can I make it lower in calories? Use less oil and opt for low-fat coconut milk.
  • Can I add more vegetables? Absolutely! Feel free to experiment with your favorites.
  • Is this recipe gluten-free? Yes, all ingredients used are gluten-free, making it safe for those with gluten sensitivities.
  • How do I know when the chicken is cooked through? The internal temperature should reach 165°F (75°C).

Nutrition Tips and Dietary Adaptations

This recipe is not only delicious but also nutritious! Here’s how you can adapt it:

  • Protein Boost: Add edamame or black beans for additional protein.
  • Increase Fiber: Toss in some leafy greens like spinach or kale.
  • Low-Carb Option: Serve over cauliflower rice instead of traditional rice to reduce carbs.

Equipment Recommendations

To make this recipe, you’ll need:

  • Non-Stick Pan: For sautéing without sticking.
  • Measuring Cups and Spoons: For accurate ingredient measurements.
  • Spatula: For stirring and mixing your ingredients well.

Serving Suggestions

Make your meal even more delightful with these serving ideas:

  • Top with Fresh Herbs: Adding cilantro or parsley enhances flavor and freshness.
  • Accompany with a Side Salad: A light salad can balance the richness of the curry.
  • Serve with Naan: Warm naan bread is perfect for scooping up curry.

In conclusion, this Quick and Creamy High Protein Chicken Curry is not just a meal; it’s a solution for your busy nights. With its ease of preparation, nutritious ingredients, and the ability to customize it to your family’s tastes, you’ll find yourself making this dish over and over. Enjoy your culinary adventure and happy cooking!

High Protein Chicken Curry

Prep Time 10 minutes
Cook Time 20 minutes
Total Time 30 minutes
Servings 2 servings
Calories 350
A flavorful and protein-packed chicken curry made with coconut milk and aromatic spices, perfect served over rice.

Ingredients

Protein

  • 200 grams chicken breast (boneless and skinless, diced)
  • 1 small onion (finely chopped)
  • 0.5 clove garlic (minced) ((or more to taste))
  • 0.5 red pepper red pepper (sliced)
  • 120 ml coconut milk (low-fat)
  • 3 tbsp Greek yogurt (or preferred yogurt)
  • 1 tbsp curry powder
  • 1 tbsp olive oil
  • to taste salt and pepper salt and pepper
  • cooked rice side dish cooked rice (or your favorite side dish)

Instructions 

  • Sauté the chopped onion and minced garlic in olive oil until fragrant.
  • Add the diced chicken and cook until browned.
  • Stir in curry powder, red pepper, coconut milk, salt, and pepper. Simmer for 15 minutes.
  • Mix in Greek yogurt and cook for another 2 minutes.
  • Serve hot over cooked rice or side dish.

Notes

Using low-fat coconut milk and Greek yogurt keeps the dish light and high in protein.
Calories: 350kcal
Cost: $12
Course: Main Course
Cuisine: International
Keyword: chicken, Curry, High Protein

Do you ever find yourself in a dinner rut, staring blankly into the fridge, wondering what to make with the same old chicken? You’re not alone! Chicken is a versatile hero in many kitchens, and with the right recipe, it can transform into something extraordinary. This Juicy Zesty Chicken recipe is here to rescue your busy weeknights. In just 35 minutes, you’ll have a flavorful meal on the table that your family will love. Let’s dive into why this recipe is my go-to solution for quick dinners!

Why You’ll Love This Recipe

  • Quick to prepare: With just 35 minutes from prep to plate, this chicken dish is perfect for busy weeknights.
  • Packed with flavor: The combination of fresh lemon, garlic, and spices creates a zesty explosion that will brighten up your dinner.
  • Healthy option: This dish is low in calories, high in protein, and made with wholesome ingredients, making it a guilt-free choice.
  • Flexible and adaptable: Use it in salads, sandwiches, or as a main course—this zesty chicken can fit into any meal plan.
  • Family-friendly: Even picky eaters will enjoy this recipe, thanks to its balanced flavors that appeal to everyone.

Ingredients for Juicy Zesty Chicken

To whip up this delicious chicken, you’ll need the following ingredients. Each one plays a crucial role in enhancing the flavor and texture of the dish:

  • 4 boneless, skinless chicken breasts: The star of the recipe—choose fresh or thawed chicken for the best results.
  • 2 tbsp olive oil: Adds richness and helps the spices adhere to the chicken.
  • 1 tbsp lemon zest: Provides a bright, citrusy aroma and flavor.
  • 2 tbsp lemon juice: Enhances the zesty flavor and tenderizes the chicken.
  • 2 cloves garlic, minced: Imparts a savory depth that complements the lemon perfectly.
  • 1 tsp paprika: Adds a mild smokiness and vibrant color.
  • 1 tsp dried oregano: Infuses the dish with an herby fragrance.
  • 1/2 tsp salt: Essential for bringing out the flavors.
  • 1/4 tsp black pepper: Adds a mild kick.
  • 1/4 tsp red pepper flakes (optional): For those who enjoy a bit of heat in their meals.

How to Make Juicy Zesty Chicken

Follow these simple steps to create your Juicy Zesty Chicken:


Nonstick Grill Pan

★ Recommended Kitchen Tool

Nonstick Grill Pan

Make this recipe even easier with a quality Nonstick Grill Pan — a must-have kitchen staple!


🛒 See Deals on Amazon →

As an Amazon Associate, we earn from qualifying purchases.
  1. Preheat your oven to 375°F (190°C).
  2. In a small bowl, mix together the olive oil, lemon zest, lemon juice, minced garlic, paprika, oregano, salt, black pepper, and red pepper flakes.
  3. Coat the chicken breasts evenly with the marinade, ensuring they are well covered.
  4. Place the marinated chicken in a baking dish and bake for 25-30 minutes or until the internal temperature reaches 165°F (74°C).
  5. Let the chicken rest for 5 minutes before serving to allow the juices to redistribute.

Pro Tips for Perfect Zesty Chicken

A close-up view of juicy zesty chicken breasts garnished with herbs and lemon zest.

Ready to elevate your chicken game? Here are some expert insights to ensure your Zesty Chicken turns out perfectly every time:

  • Marinate longer: For even more flavor, marinate the chicken for at least 30 minutes, or up to 2 hours if time allows.
  • Use fresh ingredients: Fresh garlic and fresh lemon juice will always yield a more vibrant flavor than their dried counterparts.
  • Adjust spice level: Feel free to increase or decrease the amount of red pepper flakes based on your family’s taste preferences.
  • Check doneness: Always use a meat thermometer to ensure your chicken is cooked through but still juicy.
  • Rest before slicing: Letting the chicken rest allows the juices to settle, resulting in a more tender bite.
  • Experiment with herbs: Fresh herbs like thyme or rosemary can be substituted for oregano for an interesting twist.
  • Choose the right baking dish: A shallow baking dish promotes even cooking, while a deeper dish may trap steam and affect texture.
  • Pair with sides: This chicken pairs excellently with roasted vegetables, rice, or a fresh salad for a complete meal.

Common Mistakes and Troubleshooting

Even the best cooks make mistakes! Here’s how to avoid common pitfalls when preparing your Zesty Chicken:

  • Over-marinating: Don’t marinate for too long; the acidity in lemon juice can make chicken mushy if left too long.
  • Not preheating the oven: Always preheat your oven to ensure even cooking from the start.
  • Skipping the resting period: Cutting into the chicken right after cooking can lead to dry meat. Always let it rest for at least 5 minutes.
  • Ignoring internal temperature: Undercooked chicken is unsafe to eat; always check with a thermometer.

Zesty Chicken Variations

This recipe is incredibly adaptable! Here are some creative variations to try:

  • Herb-Infused Zesty Chicken: Add fresh herbs like basil or cilantro to the marinade for a fresh twist.
  • Honey Lemon Glaze: Drizzle honey over the chicken before baking for a sweet and tangy flavor.
  • Grilled Zesty Chicken: Marinate and then grill for a smoky flavor; serve with grilled veggies for a summer meal.
  • Stuffed Zesty Chicken: Create a pocket in the chicken breasts and stuff with spinach and feta before baking.

Storage and Make-Ahead Instructions

Make your life easier by preparing your Zesty Chicken in advance:

  • Make ahead: Marinate the chicken in advance and store it in the fridge for up to 2 days before cooking.
  • Storing leftovers: Refrigerate any leftovers in an airtight container for up to 4 days.
  • Freezing: Freeze marinated chicken for up to 3 months. Thaw in the fridge before cooking.
  • Reheating: Reheat leftovers in the oven at 350°F (175°C) until warmed through for best results.

Comprehensive FAQ

Got questions? Here are some frequently asked questions about making Zesty Chicken:

  • Can I use bone-in chicken? Yes, just adjust the cooking time to ensure it reaches the right internal temperature.
  • What can I serve with Zesty Chicken? This chicken pairs well with rice, quinoa, or a fresh salad.
  • Is this recipe gluten-free? Yes, all ingredients are gluten-free—perfect for gluten-sensitive diets!
  • Can I make this recipe in advance? Absolutely! You can marinate the chicken ahead of time for convenience.
  • What if I don’t have lemon? You can substitute lime juice and zest for a similar zesty flavor.
  • How do I know when the chicken is done? Use a meat thermometer to check for an internal temperature of 165°F (74°C).
  • Can I cook this chicken in a slow cooker? Yes! Cook on low for 4-6 hours or until the chicken is tender and cooked through.
  • What’s the best way to reheat leftovers? Reheat in the oven or on the stovetop for best texture; microwaving can dry them out.

Nutritional Tips and Dietary Adaptations

This Zesty Chicken recipe is not only delicious but also packed with nutrients. Here’s how to adapt it for various dietary needs:

  • Low-carb: Serve with steamed vegetables instead of rice for a lower-carb meal.
  • Low-fat: Use less olive oil or substitute with a cooking spray for fewer calories.
  • Paleo-friendly: Stick to the basic ingredients, avoiding any added sugars or processed ingredients.
  • Vegetarian option: Substitute chicken with firm tofu, using the same marinade for flavor.

Equipment Recommendations

To make your cooking experience seamless, here are some essential tools:

  • Oven-safe baking dish: A good quality dish ensures even cooking and easy cleanup.
  • Meat thermometer: Essential for checking the internal temperature of the chicken.
  • Mixing bowls: Useful for preparing marinades and mixing ingredients.
  • Cutting board: A sturdy board helps with prepping your chicken and garlic.

Serving Suggestions

Once your Juicy Zesty Chicken is cooked and rested, it’s time to serve! Here are some ideas:

  • Over a bed of greens: Serve sliced chicken on a fresh salad with your favorite dressing.
  • In a wrap: Use tortillas to wrap the chicken with veggies and a drizzle of ranch or yogurt dressing.
  • With a side of grains: Pair with quinoa or brown rice for a filling meal.
  • As a sandwich: Slice and layer on a bun with lettuce and tomato for a tasty chicken sandwich.

Conclusion

There you have it—your ultimate guide to making Juicy Zesty Chicken in just 35 minutes! With its bright flavors and healthy ingredients, this recipe is sure to become a staple in your kitchen. Remember, cooking should be fun and stress-free, and with this zesty chicken recipe, you’ll never feel stuck in a dinner rut again. Happy cooking!

Juicy Zesty Chicken Recipe – 35-Minute Flavor Bomb

Prep Time 10 minutes
Cook Time 25 minutes
Total Time 35 minutes
Servings 4 servings
Calories 250
This quick and flavorful chicken recipe is perfect for a zesty, satisfying meal in just 35 minutes.

Ingredients

Protein

  • 4 pieces boneless, skinless chicken breasts

Dressing

  • 2 tbsp olive oil
  • 1 tbsp lemon zest
  • 2 tbsp lemon juice
  • 2 cloves garlic, minced
  • 1 tsp paprika
  • 1 tsp dried oregano
  • 0.5 tsp salt
  • 0.25 tsp black pepper
  • 0.25 tsp red pepper flakes (optional)

Instructions 

  • Preheat oven to 375°F (190°C).
  • Mix olive oil, lemon zest, lemon juice, garlic, paprika, oregano, salt, black pepper, and red pepper flakes.
  • Coat chicken with marinade and bake for 25 minutes.
  • Rest for 5 minutes before serving.

Notes

Use fresh lemon for best flavor.
Calories: 250kcal
Cost: $15
Course: Main Course
Cuisine: American
Keyword: chicken

Welcome to the world of braised chicken and rice—a dish that combines comfort, flavor, and simplicity in one pot. If you’re looking for a recipe that transforms humble ingredients into a delightful meal, you’re in the right place! This Ultimate Braised Chicken and Rice recipe is perfect for busy weeknights, ensuring your family enjoys a hearty dinner without the stress. Let’s get started!

Why You’ll Love This Recipe

  • Effortless Preparation: With just a few simple steps, you can have a delicious meal ready, making it ideal for busy evenings.
  • One-Pot Wonder: Save time on cleanup with this one-pot recipe, which means less fuss and more family time.
  • Customizable Flavors: From Mediterranean to Indian, you can adapt the spices and herbs to suit your family’s taste.
  • Healthy and Nutritious: Packed with protein and essential nutrients, this dish keeps you satisfied without compromising health.
  • Kid-Approved: With tender chicken and fluffy rice, even the pickiest eaters will ask for seconds!

Ingredient Breakdown

Here’s what you’ll need to create this delicious dish:

  • 6 bone-in skin-on chicken thighs (1-1.25 kg): These provide great flavor and tenderness. You can substitute with chicken breasts if preferred, but thighs are juicier.
  • 3 tbsp canola oil: For sautéing the chicken and aromatics. Use olive oil for a richer flavor.
  • 1.5 cups jasmine or basmati rice (rinsed and drained): Both types of rice work well. Feel free to use brown rice for a heartier option, but adjust cooking time accordingly.
  • 3 cups chicken or vegetable broth: Homemade or store-bought. This adds depth to the dish.
  • Juice of 1 large lemon (about 3 tbsp, zest reserved): Fresh lemon juice brightens the flavors.
  • 1/2 tsp sea salt or kosher salt: Adjust to taste.
  • 2 tbsp your favorite ground spice blend: Tandoori Masala is great for a bold flavor, or use Italian seasoning for something milder.
  • Pulses: Choose one for added texture—garlic, fresh ginger, or onion work wonderfully.
  • Tomato or herbs: Use either diced tomatoes for a rich base or fresh herbs like cilantro for freshness.

Pro Tips for Perfect Braised Chicken and Rice

  • Brown the Chicken: Searing the chicken skin-side down until golden enhances flavor.
  • Use Aromatics Wisely: Don’t skip onions and garlic—they add layers of flavor to your dish.
  • Rinse Your Rice: This removes excess starch, preventing your rice from becoming gummy.
  • Adjust Liquid Ratios: Different rice types absorb varying amounts of liquid. Check packaging for guidelines.
  • Let it Rest: After cooking, allow your dish to sit for 10 minutes—this helps the flavors meld.
  • Experiment with Spices: Don’t hesitate to try different spice blends to elevate your dish.
  • Finish with Fresh Herbs: Adding fresh herbs just before serving brightens the overall flavor.
  • Monitor Cooking Time: Ensure the chicken reaches an internal temperature of 165°F (75°C) for safety.
  • Don’t Rush the Braise: Allowing the chicken to cook slowly ensures tenderness and flavor.
  • Use a Heavy Pot: A good-quality braiser distributes heat evenly, preventing burning.

Common Mistakes and Troubleshooting

'detailed 'side 'vibrant a and atop bed braised chicken close-up dish's emphasizing featuring fluffy garnished herbs, highlighting image juicy meat of on over photo plate presentation.', resting rice, sauce.', savory served showcasing tenderness textures the view with

Even the best cooks encounter hiccups. Here are some common mistakes to avoid:


Digital Meat Thermometer

★ Recommended Kitchen Tool

Digital Meat Thermometer

Make this recipe even easier with a quality Digital Meat Thermometer — a must-have kitchen staple!


🛒 Shop This Tool →

As an Amazon Associate, we earn from qualifying purchases.
  • Skipping the Sear: Avoid skipping the browning step; it adds essential flavor.
  • Overcrowding the Pot: Cook in batches if necessary. Overcrowding can lead to steaming instead of browning.
  • Not Enough Liquid: If the rice is undercooked, you may not have added enough broth. Adjust as needed.
  • Ignoring Rest Time: Cutting into the chicken too soon can lead to dry meat.

Delicious Variations

This recipe is highly adaptable! Here are some variations to consider:

  • Mexican Style: Use cumin, chili powder, and top with avocado and lime.
  • Italian Twist: Substitute with Italian herbs and add bell peppers and olives.
  • Thai Coconut: Replace broth with coconut milk and add Thai basil and lime.
  • Vegetarian Option: Substitute chicken with hearty vegetables like eggplant and mushrooms, and use vegetable broth.

Storage and Make-Ahead Instructions

This dish can be made ahead and stored easily:

  • Refrigerate: Store in an airtight container for up to 4 days.
  • Freeze: Freeze in portions for up to 3 months. Thaw in the fridge before reheating.
  • Reheat Gently: Use the stovetop or microwave, adding a splash of broth if needed to revive the moisture.

Comprehensive FAQ

Here are answers to some common questions:

  • Can I use boneless chicken? Yes, but reduce cooking time to avoid dryness.
  • What is the best rice to use? Jasmine or basmati rice are ideal for their texture and flavor.
  • Can I use frozen chicken? Yes, but ensure it’s fully thawed for even cooking.
  • How do I know when the chicken is done? Use a meat thermometer; it should read 165°F (75°C).
  • Can I add vegetables? Absolutely! Carrots, peas, or bell peppers can add color and nutrition.
  • What if my rice is too dry? Add a bit more broth and let it simmer for a few minutes.
  • Can I make this dish in a slow cooker? Yes! Just follow the same steps and cook on low for 6-8 hours.
  • Is this recipe gluten-free? Yes, just ensure your broth is gluten-free.

Nutrition Tips and Dietary Adaptations

This dish can fit various dietary needs:

  • Low-Carb: Substitute rice with cauliflower rice for a lower-carb option.
  • Dairy-Free: This recipe is naturally dairy-free—great for lactose intolerant diets.
  • Whole30 Approved: Stick to fresh herbs and spices without additives.

Equipment Recommendations

To make this recipe a breeze, consider the following equipment:

  • Heavy-Bottomed Pot or Dutch Oven: Essential for even heat distribution.
  • Meat Thermometer: Ensures your chicken is cooked perfectly every time.
  • Cutting Board and Sharp Knife: For prepping your ingredients efficiently.

Serving Suggestions

Pair your braised chicken and rice with:

  • Fresh Salad: A light green salad drizzled with lemon vinaigrette.
  • Sautéed Greens: Spinach or kale sautéed with garlic complements the richness of the dish.
  • Crusty Bread: Perfect for soaking up the delicious broth.

Conclusion

This Ultimate Braised Chicken and Rice recipe is sure to become a staple in your kitchen. Easy to prepare and packed with flavor, it’s the perfect way to bring your family together for a comforting meal. Enjoy experimenting with different spices and flavors to make it uniquely yours. Happy cooking!

Braised Chicken and Rice : The Mother of All Recipes

Prep Time 15 minutes
Cook Time 45 minutes
Total Time 1 hour
Servings 4 servings
Calories 650
A flavorful and hearty dish combining tender chicken thighs with aromatic rice and spices, perfect for a comforting meal.

Ingredients

Chicken

  • 6 pieces bone-in skin-on chicken thighs ([1-1.25 kg])
  • 3 tbsp canola oil

Rice

  • 1.5 cups jasmine or basmati rice ((rinsed and drained))
  • 3 cups chicken or vegetable broth
  • 3 tbsp juice of 1 large lemon ([about 3 tbsp, zest reserved])
  • 0.5 tsp sea salt or kosher salt
  • 2 tbsp ground spice blend (e.g., Tandoori Masala)

Additional Spices and Herbs

  • 3-5 cloves minced garlic
  • 1 inch fresh ginger (optional)
  • 1 medium onion
  • 1 cup fresh green herbs (cilantro, basil, parsley) (large-leaf herbs)
  • 1-2 slices preserved lemon or Seville orange (optional)

Spice Mixes

  • 1 broken cinnamon stick
  • 1 tsp saffron
  • 1 tsp turmeric
  • 1 tsp ground cardamom
  • 1 tsp amchoor powder (optional)
  • 1 tsp ground coriander
  • 0.5 tsp coriander seeds
  • 0.5 tsp cumin seeds
  • 0.5 tsp fenugreek
  • 0.5 tsp ground chili powder

Instructions 

  • Season chicken thighs with salt and spice blend. Brown in canola oil until golden.
  • Add chopped onion, garlic, ginger, and cook until fragrant.
  • Stir in spices, lemon juice, and preserved lemon if using. Add rice and broth, then bring to a boil.
  • Reduce heat, cover, and simmer until chicken is cooked and rice is tender, about 40 minutes.
  • Garnish with fresh herbs and lemon zest before serving.

Notes

For extra flavor, let the dish rest for 10 minutes before serving.
Calories: 650kcal
Cost: $15
Course: Main Course
Cuisine: International
Keyword: chicken, rice, Spices