Author

Emily

Browsing

Welcome to your go-to guide for creating the ultimate chicken sandwich! Whether you’re a busy parent, a student, or just someone who loves flavorful food, this chicken sandwich recipe is perfect for you. In under 30 minutes, you can have a satisfying, homemade meal that rivals your favorite restaurant offerings. With a few simple ingredients and a bit of creativity, you can tailor this recipe to suit your tastes and dietary needs. Let’s dive into why this chicken sandwich should become a staple in your weeknight dinner rotation!

Why You’ll Love This Recipe

  • Quick and Easy: With just a few steps, you can have dinner on the table in under 30 minutes, perfect for busy weeknights.
  • Customizable: You can adjust the ingredients and seasonings to suit your family’s preferences, making it a versatile choice.
  • Healthy Option: Packed with lean protein and fresh veggies, this chicken sandwich is a nourishing meal that won’t weigh you down.
  • Budget-Friendly: Chicken is an affordable ingredient, and this recipe makes the most of it, ensuring you can feed your family without breaking the bank.
  • Endless Variations: From spicy to tangy to sweet, you can transform this recipe to match any craving you have!

Ingredient Breakdown

This recipe calls for some everyday ingredients that you might already have in your pantry. Here’s what you’ll need:

  • Chicken: Use 180 grams (6.5 ounces) of boneless chicken (breast or thigh). You can also use 1 cup (4 ounces) of shredded roast or boiled chicken for a quicker option.
  • Oil: 1 tablespoon of oil is needed for cooking. You can use olive oil, canola oil, or even butter for a richer flavor.
  • Mayonnaise: 1½ to 2 tablespoons for creaminess. Substitute with Greek yogurt if you prefer a healthier option.
  • Sour Cream: 1 to 1½ tablespoons can be used alongside or instead of mayonnaise; cream cheese works well too if you want a thicker spread.
  • Mustard: ¼ teaspoon of dry mustard (or Dijon) adds a nice tang.
  • Seasonings: Salt, black pepper, paprika, garlic powder, and garam masala to enhance the flavor profile.
  • Fresh Veggies: ¼ cup of shredded lettuce, 2 tablespoons of chopped cilantro, and 2 tablespoons of finely chopped red onion for crunch and freshness.
  • Bread: Any bread works, but for best results, use 4 slices of your favorite sandwich bread or a baguette.

Pro Tips for the Perfect Chicken Sandwich

  • Cook Thoroughly: Ensure the chicken is fully cooked; it should reach an internal temperature of 165°F (75°C).
  • Don’t Rush the Seasoning: Allow the chicken to soak up the spices for at least 5 minutes before serving for enhanced flavor.
  • Toast Your Bread: Butter the bread and toast it for a crispy texture that holds up better against fillings.
  • Shred the Chicken: Shredding the chicken ensures even distribution of flavors in every bite.
  • Use Fresh Ingredients: Fresh herbs and vegetables make a significant difference in taste, adding brightness and crunch.
  • Experiment with Spices: Feel free to play around with different spices; try adding cayenne for heat or cumin for an earthy flavor.
  • Make It Ahead: You can prepare the chicken filling in advance and store it in the fridge for up to 3 days.
  • Try Different Breads: Experiment with ciabatta, pita, or even lettuce wraps for a low-carb option.

Common Mistakes and Troubleshooting

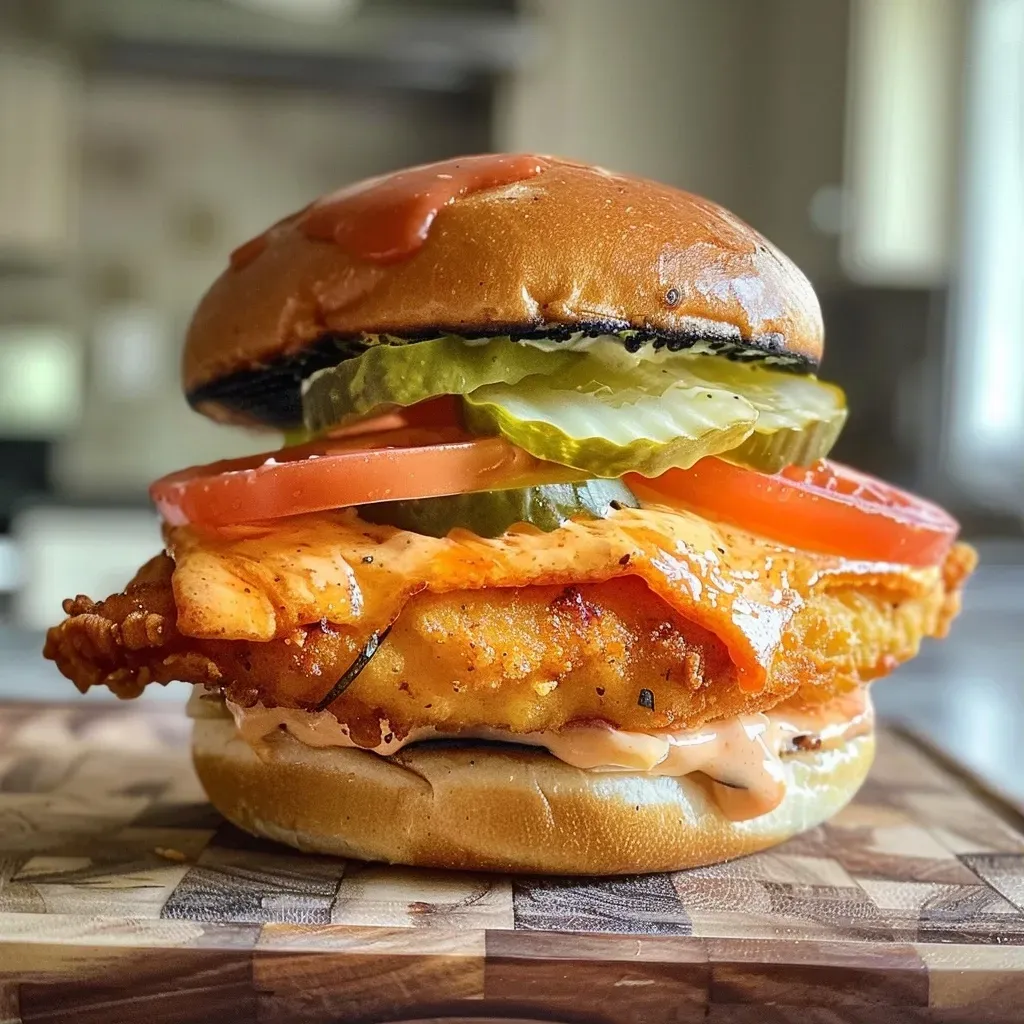
Juicy chicken sandwich with lettuce and tomato, viewed from the side.

Even the best cooks make mistakes! Here are some common pitfalls and how to avoid them:


Digital Meat Thermometer

★ Recommended Kitchen Tool

Digital Meat Thermometer

Make this recipe even easier with a quality Digital Meat Thermometer — a must-have kitchen staple!


🛒 Shop This Tool →

As an Amazon Associate, we earn from qualifying purchases.
  • Dry Chicken: If your chicken turns out dry, it likely cooked too long. Use a meat thermometer to check doneness.
  • Flavorless Filling: Don’t skip the seasoning! The key to a tasty sandwich is well-seasoned chicken.
  • Soggy Bread: To avoid sogginess, toast the bread well and serve immediately after assembling.
  • Too Much Sauce: Balance is key; start with less sauce and add more to taste.

Delicious Variations

Here are some exciting ways to switch up your chicken sandwich:

  • Spicy Buffalo Chicken Sandwich: Toss the cooked chicken in buffalo sauce and serve with ranch dressing.
  • Mediterranean Chicken Sandwich: Add feta cheese, kalamata olives, and tzatziki for a Greek twist.
  • BBQ Chicken Sandwich: Mix shredded chicken with BBQ sauce and top with coleslaw for a Southern flair.
  • Caprese Chicken Sandwich: Layer fresh mozzarella, tomatoes, and basil for an Italian-inspired treat.

Storage and Make-Ahead Instructions

This chicken filling can be made ahead of time to save you stress during the week. Here’s how:

  • Refrigeration: Store the cooked chicken filling in an airtight container in the fridge for up to 3 days.
  • Freezing: You can freeze the cooked chicken for up to 3 months. Thaw overnight in the fridge before reheating.
  • Make-Ahead Sandwiches: Assemble the sandwiches, but toast the bread separately to keep it crispy, and store in the fridge for up to 1 day.

Frequently Asked Questions

Here are some common questions about making the perfect chicken sandwich:

  • Can I use frozen chicken? Yes, but ensure it’s fully thawed before cooking for even results.
  • What can I substitute for mayonnaise? Greek yogurt, avocado, or hummus are great alternatives.
  • How can I make this sandwich gluten-free? Use gluten-free bread or wrap it in lettuce.
  • Can I grill the chicken instead? Absolutely! Grilling adds a lovely smoky flavor.
  • What other toppings work well? Sliced avocado, jalapeños, or pickles can add an extra kick!
  • How do I know when the chicken is done? Use a meat thermometer to check for an internal temperature of 165°F (75°C).
  • Can I prepare the filling ahead of time? Yes, prepare the filling and store it in the fridge for up to 3 days.
  • What sides pair well with this sandwich? Fresh fruit, fries, or a simple salad make great companions!

Nutrition Tips and Dietary Adaptations

This chicken sandwich is not only delicious but can also be tailored to fit various dietary needs:

  • Low-Carb Option: Use lettuce wraps instead of bread for a lighter version.
  • Dairy-Free Option: Substitute dairy-based ingredients with vegan alternatives or leave them out.
  • High-Protein Variation: Add extra chicken or incorporate legumes like chickpeas into the filling.
  • Whole Grain Bread: Opt for whole grain or sprouted bread for added fiber and nutrients.

Equipment Recommendations

While you can make this chicken sandwich with basic kitchen tools, here are some recommended items for best results:

  • Non-Stick Skillet: Perfect for cooking the chicken and preventing sticking.
  • Meat Thermometer: Ensures your chicken is cooked perfectly every time.
  • Sharp Knife: Essential for slicing and shredding the chicken easily.
  • Cutting Board: A sturdy board helps with safe preparation.

Serving Suggestions

This chicken sandwich is versatile enough to pair with a variety of sides. Here are some ideas:

  • Fresh Salad: A light salad with vinaigrette complements the richness of the sandwich.
  • Sweet Potato Fries: A healthier twist on traditional fries, these add a sweet touch.
  • Coleslaw: A crunchy, tangy slaw balances the flavors of the sandwich.
  • Fruit Salad: Fresh seasonal fruit can cleanse the palate beautifully.

In conclusion, the ultimate chicken sandwich is not just a meal; it’s a canvas for creativity in your kitchen. With this comprehensive guide, you’re now equipped with all the tools, tips, and tricks to make a delicious chicken sandwich that suits your taste. Enjoy exploring the endless possibilities, and remember, cooking is about having fun and making something delicious for yourself and your loved ones!
Chicken Sandwich Recipe

Prep Time 10 minutes
Cook Time 15 minutes
Total Time 25 minutes
Servings 2 servings
Calories 350
A delicious and easy chicken sandwich perfect for a quick lunch or dinner, combining tender chicken with flavorful seasonings and fresh toppings.

Ingredients

Protein

  • 180 grams boneless chicken (breast/thigh/any or shredded roast/boiled chicken)
  • 1 tablespoon oil ((+ 1 tbsp butter optional))
  • 1.5 tablespoons mayonnaise ((or Greek yogurt))
  • 1 to 1.5 sour cream ((or Greek yogurt or cream cheese))
  • 0.25 teaspoon dry mustard ((or ¼ tablespoon Dijon mustard))
  • 0.125 to 0.25 teaspoon black pepper crushed ((or powder))
  • 0.5 to 1 tablespoon lemon juice ((use only if required))
  • 0.25 cup lettuce ((shredded plus 2 to dress sandwiches))
  • 2 tablespoons cilantro ((coriander leaves or parsley or dill))
  • 2 tablespoons red onion ((finely chopped))
  • 4 slices bread ((or baguette or bloomer))
  • 2 tablespoons unsalted butter
  • 0.25 teaspoon paprika ((or red chili powder or chili flakes))
  • 0.25 teaspoon garlic powder ((or 2 cloves minced))
  • 0.25 teaspoon onion powder
  • 0.125 to 0.25 teaspoon black pepper ((crushed/powder))
  • 0.25 teaspoon salt
  • 0.25 teaspoon garam masala ((or ¼ tsp coriander + ¼ tsp cumin powder))

Instructions 

  • Heat oil in a pan over medium heat and cook the chicken until tender and fully cooked. Add butter if desired.
  • Check doneness by cutting into the thickest part; it should be easily cut.
  • Lower heat, add salt and seasonings; stir fry for 1 minute, then turn off.
  • Shred or cut the chicken into smaller pieces and cool completely.
  • Optional: Butter the bread slices and toast until crisp on a pan, toaster, or air fryer.

Notes

For extra flavor, toast the bread and add fresh toppings as desired.
Calories: 350kcal
Cost: $10
Course: Main Course
Cuisine: International
Keyword: chicken, Sandwich

Elevate Your Weeknight Dinners with This One-Skillet Creamy Garlic Butter Chicken Linguine

Imagine a cozy evening where the aroma of garlic and butter fills your kitchen, and all it takes is a single skillet to create a dinner that feels like a warm hug. This creamy garlic butter chicken linguine is about to become your go-to recipe for busy weeknights. It combines juicy chicken, rich flavors, and gooey cheese, delivering a satisfying meal that the whole family will love. Plus, it’s quick to make, so you can enjoy more time with your loved ones and less time fussing in the kitchen.

Why You’ll Love This Recipe

  • Time-Saver: From prep to plate in about 30 minutes, this dish is perfect for those hectic evenings.
  • One-Pan Wonder: Fewer dishes to wash means more time to relax after dinner.
  • Family-Friendly: The creamy sauce and tender chicken make it a hit with kids and adults alike.
  • Customizable: Add your favorite veggies or adjust the spices to make it your own.
  • Comfort Food Perfection: Rich, savory flavors that will warm you from the inside out.

Ingredients You’ll Need

Here’s what you’ll need to whip up this delicious dish:

  • 1 pound boneless, skinless chicken breasts, cut into bite-sized pieces
  • 4 tablespoons unsalted butter, divided
  • 5 cloves garlic, minced
  • 1 teaspoon smoked paprika
  • 1 teaspoon Cajun seasoning (optional for a spicy kick)
  • Salt and black pepper, to taste
  • 8 ounces linguine pasta
  • 1 ½ cups heavy cream
  • 1 cup grated Parmesan cheese
  • ½ cup cream cheese, softened
  • 1 cup shredded mozzarella cheese
  • ¼ teaspoon nutmeg (optional, for warmth)
  • ½ cup chopped fresh parsley (plus extra for garnish)

Step-by-Step Instructions to Make Creamy Garlic Butter Chicken Linguine

Close-up view of creamy garlic butter chicken linguine skillet with chicken pieces, pasta, and herbs.

Follow these simple steps to create your creamy garlic butter chicken linguine:


Air Fryer XL

★ Recommended Kitchen Tool

Air Fryer XL

Make this recipe even easier with a quality Air Fryer XL — a must-have kitchen staple!


🛒 View on Amazon →

As an Amazon Associate, we earn from qualifying purchases.
  1. Prepare the Pasta: Bring a large pot of salted water to a boil. Add the linguine pasta and cook according to package instructions until al dente. Reserve ½ cup of the pasta water before draining and set the pasta aside.
  2. Cook the Chicken: While the pasta cooks, heat 2 tablespoons of butter in a large skillet over medium-high heat. Season the chicken pieces with salt, black pepper, smoked paprika, and Cajun seasoning if using. Add the chicken to the skillet and cook for about 5 to 6 minutes, stirring occasionally until the chicken is golden brown and cooked through. Remove the chicken from the skillet and set aside.
  3. Make the Garlic Butter Sauce: In the same skillet, melt the remaining 2 tablespoons of butter over medium heat. Add the minced garlic and sauté for 1 to 2 minutes until fragrant, being careful not to burn the garlic.
  4. Create the Creamy Base: Lower the heat to medium and slowly stir in the heavy cream and softened cream cheese. Keep stirring until the cream cheese melts and the sauce becomes smooth.
  5. Incorporate the Cheeses: Gradually add the Parmesan and mozzarella cheeses to the skillet. Stir constantly until the cheeses melt and the sauce thickens. If the sauce feels too thick, add the reserved pasta water a little at a time until you reach the desired consistency.
  6. Combine and Serve: Add the cooked linguine and the chicken back into the skillet. Gently toss everything together to ensure every piece of pasta and chicken is well coated in that luscious garlic butter cream sauce. Let it simmer on low heat for 1 to 2 minutes to allow the flavors to meld and the sauce to thicken slightly.
  7. Finish with Freshness: Stir in the chopped fresh parsley, reserving a little for garnish. Taste the sauce and adjust seasoning with salt and pepper if needed.
  8. Plate and Enjoy: Serve the pasta hot, topped with a sprinkle of fresh parsley and an optional extra handful of Parmesan cheese.

Pro Tips for Perfect Garlic Butter Chicken Linguine

  • Fresh Ingredients: Always use fresh garlic for the best flavor. Dried garlic powder will not provide the same aroma.
  • Cheese Choices: For an even richer flavor, try using aged Parmesan or a combination of cheeses.
  • Don’t Overcook: Keep an eye on the chicken to prevent it from drying out; it should be golden and juicy.
  • Adjust the Creaminess: If you prefer a lighter sauce, substitute half of the heavy cream with chicken broth.
  • Keep It Green: Incorporate spinach or kale for added nutrition and color.
  • Let It Rest: After cooking, let the dish sit for a few minutes before serving to allow the flavors to develop.
  • Save Leftovers: Store any leftovers in an airtight container in the fridge for up to 3 days.
  • Reheat Gently: When reheating, add a splash of cream or pasta water to maintain the sauce’s consistency.

Common Mistakes and Troubleshooting

  • Too Thick Sauce: If your sauce is too thick, gradually add reserved pasta water until you reach the desired consistency.
  • Burnt Garlic: Keep the heat on medium to avoid burning the garlic. If it burns, start over with fresh garlic.
  • Undercooked Chicken: Ensure your chicken is cooked through and no longer pink in the center. A meat thermometer can help!
  • Flavorless Sauce: Don’t forget to season your sauce with salt and pepper, tasting as you go for the best results.

Delicious Variations to Try

  • Veggie Delight: Add steamed broccoli or sautéed bell peppers for a nutritious twist.
  • Spicy Kick: Incorporate red pepper flakes or jalapeños for added heat.
  • Herb Infusion: Experiment with fresh basil or thyme for a burst of herbal flavor.
  • Protein Swap: Substitute chicken with shrimp or even tofu for a vegetarian option.

Storage and Make-Ahead Instructions

You can make this creamy garlic butter chicken linguine ahead of time to save precious minutes during busy weeknights.

  • Make-Ahead: Prepare the chicken and sauce in advance, then combine with freshly cooked pasta when ready to serve.
  • Leftover Storage: Store any leftovers in an airtight container in the refrigerator for up to 3 days.
  • Freezing: While not recommended for best texture, you can freeze the dish for up to 2 months. Reheat gently, adding cream or broth to restore creaminess.

Frequently Asked Questions (FAQs)

  • Can I use whole wheat pasta instead of linguine? Absolutely! Whole wheat pasta is a great alternative and adds more fiber.
  • What can I substitute for heavy cream? You can use half-and-half or a plant-based cream for a lighter option.
  • Is this recipe suitable for meal prep? Yes! It stores well and can be reheated for quick lunches or dinners.
  • Can I add more garlic? Definitely! If you’re a garlic lover, feel free to increase the amount to taste.
  • What sides would pair well with this dish? A simple green salad or garlic bread complements the meal beautifully.
  • Can I make this dish dairy-free? Yes! Use dairy-free cheeses and cream alternatives for a dairy-free version.
  • How do I make it gluten-free? Substitute the linguine with gluten-free pasta, and ensure all other ingredients are gluten-free.
  • Can I use frozen chicken? For best results, use thawed chicken. Frozen chicken can release extra moisture, affecting the sauce.

Nutritional Tips and Dietary Adaptations

This creamy garlic butter chicken linguine can be easily adapted to meet various dietary needs:

  • Low-Carb Option: Swap traditional pasta for zucchini noodles or spaghetti squash.
  • High-Protein: Add extra chicken or incorporate chickpeas for added protein.
  • Vegan Version: Use plant-based chicken alternatives, coconut cream, and nutritional yeast for a cheesy flavor.

Equipment Recommendations

To create this one-skillet wonder, you’ll need:

  • Large Skillet: A sturdy skillet is essential for even cooking and easy sauce preparation.
  • Pot for Pasta: A large pot to cook the linguine ensures it has enough room to move freely.
  • Cutting Board and Knife: For chopping chicken and veggies with ease.
  • Meat Thermometer: To ensure your chicken is cooked to perfection.

Serving Suggestions

Enhance your dining experience with these serving ideas:

  • Garnish: Finish with a sprinkle of fresh parsley and extra Parmesan for a restaurant-worthy presentation.
  • Pair with Wine: A chilled white wine, like Sauvignon Blanc, complements the creamy flavors beautifully.
  • Side Dishes: Serve with garlic bread or a fresh side salad to balance the richness of the dish.

This one-skillet creamy garlic butter chicken linguine is not just a meal; it’s a culinary hug that brings comfort and satisfaction to your dinner table. With its rich flavors and simple preparation, this recipe will quickly become a staple in your home. Enjoy every bite!

Creamy Garlic Butter Chicken Linguine Skillet

Prep Time 10 minutes
Cook Time 20 minutes
Total Time 30 minutes
Servings 4 servings
Calories 850
A rich and flavorful pasta dish featuring tender chicken in a creamy garlic butter sauce, perfect for a comforting dinner.

Ingredients

Protein

  • 1 pound boneless, skinless chicken breasts, cut into bite-sized pieces

Dairy & Fats

  • 4 tablespoons unsalted butter, divided
  • 1 ½ cups heavy cream
  • ½ cup cream cheese, softened
  • 1 cup grated Parmesan cheese
  • 1 cup shredded mozzarella cheese

Dry Spices & Seasonings

  • 1 teaspoon smoked paprika
  • 1 teaspoon Cajun seasoning (optional) (for a spicy kick)
  • ½ teaspoon nutmeg (optional) (for warmth)

Pasta & Vegetables

  • 8 ounces linguine pasta

Fresh Herbs

  • ½ cup chopped fresh parsley (plus extra for garnish)

Salt & Pepper

  • to taste Salt and black pepper

Instructions 

  • Cook linguine in salted boiling water until al dente; reserve ½ cup pasta water, then drain.
  • Sauté seasoned chicken in 2 tbsp butter until golden and cooked through; set aside.
  • Melt remaining butter, sauté garlic until fragrant, then add cream and cream cheese; stir until smooth.
  • Add cheeses, melt, and thicken sauce; adjust with reserved pasta water if needed.
  • Return pasta and chicken to skillet, toss to coat, and simmer briefly. Stir in parsley, then serve garnished with extra parsley and Parmesan.

Notes

For extra flavor, sprinkle additional Parmesan or fresh herbs before serving.
Calories: 850kcal
Cost: $15
Course: Main Course
Cuisine: American
Keyword: chicken, creamy, pasta

Transform Your Dinner Routine with Buffalo Chicken Alfredo Bake

Are you looking for a way to elevate your weeknight dinners while keeping them simple and delicious? Look no further than this Buffalo Chicken Alfredo Bake. This recipe is a perfect fusion of creamy Alfredo sauce and zesty buffalo chicken, making it an irresistible comfort food that your family will love. Not only is it a breeze to prepare, but it also makes excellent leftovers, ensuring you can enjoy it for seconds throughout the week.

In this comprehensive guide, you’ll discover everything you need to know about making this fantastic dish, from ingredient substitutions to expert tips that will take your cooking to the next level. Let’s dive in!

Why You’ll Love This Recipe

There are countless reasons to adore this Buffalo Chicken Alfredo Bake, but here are the top five:


Air Fryer XL

★ Recommended Kitchen Tool

Air Fryer XL

Make this recipe even easier with a quality Air Fryer XL — a must-have kitchen staple!


🛒 Shop This Tool →

As an Amazon Associate, we earn from qualifying purchases.
  • Quick and Easy: With minimal prep time and straightforward steps, you can have this dish ready in under an hour, making it perfect for busy weeknights.
  • Family-Friendly: The blend of creamy and spicy flavors is a hit with both kids and adults, ensuring everyone leaves the dinner table satisfied.
  • Versatile Ingredients: This recipe allows for numerous substitutions, meaning you can adapt it based on what you have on hand or your family’s preferences.
  • Meal Prep Friendly: Leftovers are just as delicious, making it great for meal prep—enjoy it for lunch or dinner the next day!
  • Comfort Food at Its Best: The combination of buffalo sauce with cheesy pasta creates a cozy, fulfilling meal that feels like a warm hug on a plate.

Ingredient Breakdown

To make the perfect Buffalo Chicken Alfredo Bake, you’ll need the following ingredients:

  • 1/3 cup buffalo sauce: This adds the signature spicy kick. Feel free to adjust the amount to your spice preference.
  • 2 cups diced rotisserie chicken: Using rotisserie chicken not only saves time but also infuses the dish with rich flavor. You can substitute with any cooked, diced chicken.
  • 24 oz Alfredo sauce: Opt for store-bought or homemade—both work well to create a creamy base.
  • 10 oz shredded mozzarella cheese: Mozzarella melts beautifully, giving your bake that gooey texture we all crave.
  • 16 oz cooked pasta: While small shells are a great choice, any pasta shape you adore will work wonderfully!

How to Make Buffalo Chicken Alfredo Bake

Close-up view of a creamy Buffalo Chicken Alfredo Bake with melted cheese and pasta.

Follow these simple steps to create your delicious Buffalo Chicken Alfredo Bake:

  1. Preheat your oven: Set your oven to 350°F (175°C).
  2. Prepare the chicken: In a small bowl, combine the buffalo sauce and diced chicken. Set aside.
  3. Mix the pasta and sauce: In a large bowl, mix the Alfredo sauce, cooked pasta, and about 3 oz of the mozzarella cheese. Set aside.
  4. Assemble the dish: Spoon half of the pasta mixture into a greased 3-quart baking dish. Top with the buffalo chicken mixture, then layer the remaining pasta on top. Finish with the rest of the cheese.
  5. Bake: Cover the dish with foil and bake for 30 minutes. Remove the foil and bake for another 5-10 minutes until the cheese is bubbly and golden.
  6. Serve: Allow the bake to rest for several minutes before serving to let the flavors meld.

Pro Tips for the Perfect Bake

Want to elevate your baking game? Here are some expert tips:

  • Pasta Choice: Opt for pasta shapes that hold sauce well, such as rotini or penne, for maximum flavor in every bite.
  • Buffalo Sauce Level: If you’re sensitive to spice, start with less buffalo sauce and gradually add more to taste.
  • Cheese Variations: Experiment with different cheeses like Monterey Jack or cheddar for a unique flavor profile.
  • Resting Time: Allowing the dish to rest before serving helps it set and makes portioning easier.
  • Layering: For added flavor, sprinkle some buffalo sauce between the layers of pasta and chicken.
  • Garnish: Top with chopped green onions or fresh parsley for a burst of color and freshness before serving.

Common Mistakes and Troubleshooting

Even the best cooks can encounter challenges. Here’s how to avoid common pitfalls:

  • Overcooking Pasta: Make sure to cook your pasta al dente, as it will continue to cook in the oven.
  • Sauce Separation: If your Alfredo sauce seems too thin, add a touch of cornstarch to thicken it up before mixing.
  • Dry Bake: If your bake seems dry after cooking, consider adding a splash of chicken broth or extra sauce before baking.

Recipe Variations

This recipe is wonderfully adaptable. Here are four tasty variations to try:

  • Buffalo Chicken Alfredo Bake with Veggies: Add some steamed broccoli or bell peppers for extra nutrition and color.
  • Mexican Twist: Substitute the buffalo sauce with taco seasoning and add black beans and corn for a zesty Tex-Mex flavor.
  • Cheesy Spinach Alfredo Bake: Incorporate fresh spinach into the pasta mix for a healthy green addition.
  • BBQ Chicken Alfredo Bake: Replace buffalo sauce with your favorite BBQ sauce for a smoky flavor.

Storage and Make-Ahead Instructions

Planning ahead can save time during busy weeks:

  • Make-Ahead: You can prepare this dish a day in advance. Assemble it, cover, and refrigerate. Bake when ready to serve.
  • Storage: Keep leftovers in an airtight container in the fridge for up to 3 days. Reheat in the oven for the best texture.
  • Freezing: This dish freezes well! Just thaw in the refrigerator overnight before baking.

Frequently Asked Questions

Here are some common queries about the Buffalo Chicken Alfredo Bake:

  • Can I use frozen chicken? Absolutely! Just ensure it’s cooked before adding it to the recipe.
  • What if I don’t have Alfredo sauce? You can easily make a quick homemade version using cream, butter, and Parmesan cheese.
  • How spicy is this dish? The spice level depends on the buffalo sauce brand you use. Adjust to your taste!
  • Can I make this gluten-free? Yes! Use gluten-free pasta and ensure the sauce is gluten-free as well.
  • What sides pair well with this bake? Consider a fresh salad or garlic bread to complement the dish.
  • Is this recipe kid-friendly? Definitely! Most kids love the creamy, cheesy pasta with a mild kick from the buffalo sauce.
  • How do I reheat leftovers? Reheat in the microwave or oven, adding a little extra sauce to keep it moist.
  • Can I add more cheese? Of course! Feel free to sprinkle more cheese on top before baking for a cheesier dish.

Nutritional Tips and Dietary Adaptations

This Buffalo Chicken Alfredo Bake can be adjusted to fit various dietary needs:

  • Low-Calorie: Use light Alfredo sauce and reduced-fat cheese to cut calories.
  • Dairy-Free: Substitute with dairy-free Alfredo sauce and cheese options.
  • High-Protein: Add extra chicken or include beans for a protein boost.

Essential Equipment for Success

Having the right tools makes cooking easier:

  • 3-quart baking dish: A must-have for this casserole.
  • Mixing bowls: Ensure you have enough bowls for mixing your ingredients.
  • Oven mitts: Protect your hands when handling hot dishes!

Serving Suggestions

For the best dining experience, consider these serving ideas:

  • Top with Fresh Herbs: Sprinkle chopped parsley or cilantro for added flavor.
  • Serve with a Side Salad: A simple green salad can balance the richness of the bake.
  • Pair with a Drink: A light beverage, like sparkling water with lemon, complements the dish beautifully.

Now that you have everything you need for a successful cooking experience, it’s time to make your Buffalo Chicken Alfredo Bake. With its comforting flavors and easy preparation, you’ll find yourself returning to this recipe time and again. Happy cooking!

Buffalo Chicken Alfredo Bake

Prep Time 10 minutes
Cook Time 35 minutes
Total Time 45 minutes
Servings 6 servings
Calories 850
A creamy, spicy baked pasta dish combining buffalo chicken and Alfredo sauce for a comforting meal with a kick.

Ingredients

Sauces and Proteins

  • 1/3 cup buffalo sauce
  • 2 cups diced rotisserie chicken (or any cooked, diced chicken)
  • 24 oz alfredo sauce
  • 10 oz shredded mozzarella cheese
  • 16 oz cooked pasta (small shells)

Instructions 

  • Preheat oven to 350°F (175°C).
  • Mix buffalo sauce and chicken; set aside.
  • Combine Alfredo sauce, pasta, and 3 oz cheese; set aside.
  • Layer half of pasta in a greased dish, add chicken, then remaining pasta. Top with cheese.
  • Bake covered 30 mins, uncover and bake 5-10 mins until bubbly.
  • Let rest a few minutes before serving.

Notes

For extra flavor, sprinkle with fresh herbs before serving.
Calories: 850kcal
Cost: $15
Course: Main Course
Cuisine: American
Keyword: Buffalo Chicken

Welcome to a culinary adventure where the humble chicken transforms into a star dish with just a few ingredients! If you’re looking for a quick, delicious, and satisfying meal for your family, this apple cider chicken recipe is the answer. It’s perfect for busy weeknights and offers a delightful blend of sweet and savory flavors that both kids and adults will love. Let’s dive into the details of this incredible dish.

Why You’ll Love This Recipe

  • Quick and Easy: This recipe takes just 30 minutes from start to finish, making it ideal for busy nights.
  • Flavorful Sauce: The combination of apple cider, chicken broth, and Dijon mustard creates a tangy sauce that elevates the chicken.
  • Family-Friendly: With its sweet and savory profile, this dish appeals to both picky eaters and gourmet lovers.
  • Versatile Ingredients: You can easily substitute or add ingredients based on what you have at home.
  • Healthy Meal Option: This recipe is packed with protein, and you can adjust the ingredients to make it even healthier.

Key Ingredients in Apple Cider Chicken

Before we get into the step-by-step instructions, let’s look at the essential ingredients you’ll need to make this flavorful apple cider chicken:

  • 4 boneless, skinless chicken breasts: The star of the dish, providing a lean source of protein.
  • 1 cup apple cider: Adds sweetness and depth of flavor.
  • 1/2 cup chicken broth: Enhances the sauce’s richness.
  • 1/4 cup apple cider vinegar: Balances the sweetness with a tangy kick.
  • 2 tablespoons olive oil: For sautéing the chicken and adding healthy fats.
  • 1 tablespoon Dijon mustard: Adds a zesty flavor to the sauce.
  • 2 tablespoons minced garlic: Provides aromatic and savory notes.
  • 1 medium onion, thinly sliced: Contributes sweetness and texture.
  • 1 teaspoon dried thyme: Adds an earthy flavor.
  • Salt and pepper to taste: Essential for seasoning.
  • 2 tablespoons butter: For richness and flavor enhancement.
  • 2 tablespoons fresh parsley, chopped (for garnish): Freshens up the dish visually and flavor-wise.

How to Make Apple Cider Chicken

Follow these easy steps to create a delicious apple cider chicken that your family will rave about:


Digital Meat Thermometer

★ Recommended Kitchen Tool

Digital Meat Thermometer

Make this recipe even easier with a quality Digital Meat Thermometer — a must-have kitchen staple!


🛒 View on Amazon →

As an Amazon Associate, we earn from qualifying purchases.
  1. Season the chicken breasts with salt and pepper on both sides.
  2. Heat olive oil in a large skillet over medium-high heat. Add chicken breasts and sear on each side until golden brown, about 3-4 minutes per side. Remove the chicken from the skillet and set aside.
  3. In the same skillet, add butter and melt over medium heat. Add minced garlic and sliced onion, sauté for 2-3 minutes until the onion is softened and fragrant.
  4. Stir in the apple cider, chicken broth, apple cider vinegar, and Dijon mustard, making sure to scrape any browned bits from the bottom of the skillet.
  5. Return the chicken breasts to the skillet, adding the thyme. Bring the mixture to a simmer, cover, and let cook for 15-20 minutes until the chicken is cooked through and the sauce has slightly thickened.
  6. Once cooked, remove the chicken and let it rest on a plate.
  7. Turn the heat up to medium-high and reduce the sauce for 3-5 minutes until it reaches the desired consistency.
  8. Pour the reduced sauce over the chicken breasts, garnish with fresh parsley, and serve immediately.

Pro Tips for Perfect Apple Cider Chicken

Close-up view of juicy Apple Cider Chicken with herbs.
  • Use a meat thermometer: Ensure the chicken reaches an internal temperature of 165°F for safe consumption.
  • Let the chicken rest: Allowing the chicken to rest after cooking helps retain its juices, making it more tender.
  • Adjust sweetness: If you prefer a sweeter sauce, add a bit more apple cider or a teaspoon of honey.
  • Try different mustards: Experiment with whole grain or spicy mustard for added texture and flavor.
  • Use fresh herbs: Fresh thyme or rosemary can elevate the flavor profile even more.
  • Make it in advance: Prepare the chicken and sauce ahead of time and reheat for an easy weeknight meal.
  • Pair with sides: Serve with rice, mashed potatoes, or steamed vegetables to complete your meal.
  • Freeze leftovers: This dish freezes well, so you can enjoy it later without the fuss of cooking again.

Common Mistakes and Troubleshooting

  • Overcooking the chicken: Always monitor the cooking time to avoid dry chicken; it should be juicy and tender.
  • Not deglazing the skillet: Scraping the browned bits is crucial for flavor; don’t skip this step!
  • Skipping the resting period: Allowing the chicken to rest is essential for moisture retention.
  • Incorrect sauce consistency: If the sauce is too thin, let it reduce longer; if too thick, add a splash of chicken broth or water.

Variations of Apple Cider Chicken

Feel free to get creative with these variations:

  • Apple Cider Chicken with Bacon: Add crumbled bacon for a smoky flavor boost.
  • Apple Cider Chicken and Veggies: Toss in carrots and Brussels sprouts for a one-pan meal.
  • Spicy Apple Cider Chicken: Add a pinch of cayenne pepper for a kick.
  • Slow Cooker Apple Cider Chicken: Place all ingredients in a slow cooker and let it do the work for you!

How to Store Apple Cider Chicken

Storing your apple cider chicken properly can help maintain its flavor and texture:

  • Refrigeration: Store leftovers in an airtight container in the fridge for up to 4 days.
  • Freezing: Freeze in a freezer-safe container for up to 3 months. Thaw in the fridge before reheating.
  • Reheating: Reheat in a skillet over low heat or in the microwave until warmed through.

Frequently Asked Questions

  • Can I use bone-in chicken? Yes, just adjust the cooking time to ensure it cooks through.
  • What can I serve with apple cider chicken? It pairs well with rice, quinoa, or roasted vegetables.
  • Is this recipe gluten-free? Yes, just ensure your mustard and chicken broth are gluten-free.
  • Can I make this recipe dairy-free? Omit the butter or use a dairy-free alternative.
  • How can I make this dish spicier? Add red pepper flakes or jalapeños to the sauce for heat.
  • Can I use other types of cider? Yes, any fruit cider can be substituted, but apple cider works best.
  • What is the best way to cut chicken? Slice against the grain for tender pieces.
  • Can I double the recipe? Absolutely! Just ensure your skillet is large enough to accommodate the chicken.

Nutrition Tips and Dietary Adaptations

This apple cider chicken is not only delicious but also nutritious. Here are some tips to make it even healthier:

  • Lean Protein: Use skinless chicken breasts or consider turkey breasts for a leaner option.
  • Low-Sodium Broth: Choose low-sodium chicken broth to reduce salt intake.
  • Vegetable Additions: Boost the dish with assorted vegetables like bell peppers or broccoli.
  • Whole Grain Side Dishes: Serve with brown rice or whole grain bread to increase fiber content.

Equipment Recommendations

To make this apple cider chicken, you’ll need a few handy kitchen tools:

  • Large Skillet: A non-stick skillet works best for easy cooking and cleanup.
  • Meat Thermometer: Essential for checking the doneness of the chicken.
  • Cutting Board: For preparing your ingredients safely.
  • Chef’s Knife: A sharp knife will make slicing and dicing easier.

Serving Suggestions

Enhance your apple cider chicken experience with these serving ideas:

  • Rice Bowl: Serve over a bed of fluffy rice for a hearty meal.
  • Salad: Pair it with a fresh salad for a light and nutritious option.
  • Side of Bread: A crusty baguette or rolls to soak up the delicious cider sauce.
  • Wine Pairing: A glass of white wine, like a Chardonnay, complements the flavors beautifully.

Conclusion

With this apple cider chicken recipe, you can turn a simple dinner into a delightful experience for your family. Whether it’s a busy weeknight or a special occasion, this dish is sure to impress. Don’t be afraid to try different variations and make it your own. Happy cooking!

Apple Cider Chicken

Prep Time 10 minutes
Cook Time 25 minutes
Total Time 35 minutes
Servings 4 servings
Calories 350
Enjoy tender chicken breasts simmered in a flavorful apple cider sauce, perfect for a cozy dinner.

Ingredients

Protein

  • 4 pieces boneless, skinless chicken breasts
  • 1 cup apple cider
  • 1/2 cup chicken broth
  • 1/4 cup apple cider vinegar
  • 2 tablespoons olive oil
  • 1 tablespoon Dijon mustard
  • 2 tablespoons minced garlic
  • 1 medium onion, thinly sliced
  • 1 teaspoon dried thyme
  • Salt and pepper to taste
  • 2 tablespoons butter
  • 2 tablespoons fresh parsley, chopped (for garnish)

Instructions 

  • Season chicken with salt and pepper.
  • Sear chicken in olive oil until golden, then set aside.
  • Melt butter, sauté garlic and onion until fragrant.
  • Add cider, broth, vinegar, and mustard; scrape browned bits.
  • Return chicken, simmer covered 15-20 mins, then reduce sauce.
  • Pour sauce over chicken, garnish with parsley, serve.

Notes

Use fresh parsley for best flavor.
Calories: 350kcal
Cost: $15
Course: Main Course
Cuisine: American
Keyword: apple cider, chicken

Discover the Comfort of Chicken Curry

Are you ready to transform your weeknight dinners? This simple chicken curry recipe is your answer! Not only does it deliver rich, comforting flavors, but it also uses everyday ingredients that you probably already have in your pantry. In under an hour, you can whip up a satisfying meal that the whole family will love. Let’s dive into why you’ll adore this recipe and how to make it a staple in your home.

Why You’ll Love This Recipe

This chicken curry isn’t just another dish; it’s a culinary experience that brings warmth and satisfaction to your table. Here’s why you’ll fall in love with it:

  • Quick and Easy: With just a handful of steps, you can create a delicious meal that’s ready in under 30 minutes!
  • Flavorful and Satisfying: The combination of spices and coconut milk creates a rich, creamy sauce that envelops tender chicken.
  • Versatile: Customize this recipe with your favorite vegetables or proteins to keep things interesting.
  • Kid-Friendly: The mild spices make it appealing for picky eaters, while still being flavorful for adults.
  • Make-Ahead Friendly: This dish keeps well in the fridge and even tastes better the next day, making it perfect for meal prep.

Essential Ingredients Breakdown

Let’s take a closer look at the ingredients you’ll need to create this delightful chicken curry. Understanding your ingredients will help you feel more confident in the kitchen.


Digital Meat Thermometer

★ Recommended Kitchen Tool

Digital Meat Thermometer

Make this recipe even easier with a quality Digital Meat Thermometer — a must-have kitchen staple!


🛒 View on Amazon →

As an Amazon Associate, we earn from qualifying purchases.
  • Chicken Breasts: 1 ½ pounds, cut into bite-sized pieces. You can also use thighs for a juicier texture.
  • Chili Powder: 1 teaspoon, for a subtle kick. Adjust according to your spice preference.
  • Turmeric Powder: ½ teaspoon, this gives a lovely color and an earthy flavor.
  • Olive Oil: 3 tablespoons total. This will be used for sautéing the chicken and vegetables.
  • Yellow Onion: 1 medium, diced. Onion adds sweetness and depth to the curry.
  • Garlic: 1 teaspoon, minced. Fresh garlic is essential for flavor.
  • Tomato Paste: 2 tablespoons, for richness and acidity that balances the coconut milk.
  • Curry Powder: 1 ½ tablespoons, the star of the show! This blend of spices defines the dish.
  • Coconut Milk: 13.5 ounces (1 can). This creamy base adds richness and balances the spices.
  • Cilantro: 1 tablespoon, chopped, for garnish.
  • Lemon Wedges: To serve, adding a burst of freshness.

Pro Tips for the Perfect Chicken Curry

Close-up of a vibrant bowl of chicken curry with colorful spices and garnishes.

Enhance your cooking skills with these expert tips to take your chicken curry to the next level:

  • Marinate the Chicken: For deeper flavor, let your chicken marinate in the spices for at least 30 minutes before cooking.
  • Use Fresh Ingredients: Whenever possible, opt for fresh garlic and spices for the best flavor.
  • Adjust the Spice Level: If you prefer a milder curry, reduce the chili powder or serve with yogurt on the side.
  • Let it Simmer: Allow the curry to simmer for at least 15-20 minutes to develop the flavors fully.
  • Serve with a Side: Pair your curry with steamed rice or flatbreads, like naan, to soak up the delicious sauce.
  • Experiment with Vegetables: Add bell peppers, spinach, or peas for added nutrition and color.
  • Use Leftovers Wisely: Leftover curry makes a fantastic filling for wraps or sandwiches the next day.
  • Garnish Creatively: Fresh herbs like mint or basil can add a unique twist to your curry.

Common Mistakes to Avoid

Cooking can be daunting, but you can avoid these common pitfalls:

  • Overcooking the Chicken: Ensure your chicken is cooked just until tender to prevent it from drying out.
  • Skipping the Spices: Don’t omit spices or the tomato paste; they are essential for flavor.
  • Not Simmering Long Enough: Skipping the simmering step can lead to a bland curry. Give it time!
  • Using Low-Quality Coconut Milk: Choose a good quality coconut milk for the best flavor and creaminess.

Delicious Variations to Try

There are countless ways to enjoy chicken curry. Here are a few variations to inspire your creativity:

  • Vegetable Curry: Substitute chicken with chickpeas and assorted vegetables for a hearty vegetarian option.
  • Butter Chicken: For a richer taste, add cream and butter to the curry and adjust the spices.
  • Thai Curry: Use Thai red or green curry paste in place of traditional curry powder for a different flavor profile.
  • Curry with Nuts: Add cashews or almonds for a nutty flavor and crunchy texture.

Storage and Make-Ahead Instructions

This chicken curry is perfect for meal prep. Here’s how to store and reheat it:

  • Refrigerate: Store the curry in an airtight container for up to 4 days.
  • Freeze: The curry can be frozen for up to 3 months. Thaw overnight in the fridge before reheating.
  • Reheat: Gently reheat on the stovetop over low heat, adding a splash of water or coconut milk if needed.

Frequently Asked Questions

Here are some common questions about making chicken curry:

  • Can I use frozen chicken? Yes, but ensure it’s fully thawed before cooking for even results.
  • What can I serve with chicken curry? Rice, naan, or quinoa are great options to accompany this dish.
  • How spicy is this curry? It’s mild, but you can adjust the chili powder to your spice preference.
  • Can I make this curry in advance? Absolutely! It tastes even better the next day.
  • What if I don’t have coconut milk? Substitute with heavy cream or chicken broth for a different flavor.
  • Is it okay to add vegetables? Yes! Feel free to add vegetables like peas, carrots, or bell peppers.
  • Can I use a slow cooker? Yes, you can cook it on low for 4-6 hours.
  • What is the best way to store leftovers? Store in an airtight container in the fridge for up to 4 days.

Nutritional Tips and Dietary Adaptations

This chicken curry can be adapted to suit various dietary needs:

  • Low-Carb Option: Serve without rice or use cauliflower rice instead.
  • Dairy-Free: Ensure that the coconut milk is your only dairy source.
  • Gluten-Free: All ingredients in this recipe are gluten-free, making it safe for those with gluten intolerance.

Essential Equipment for Success

Having the right tools can make cooking easier and more enjoyable:

  • 4 qt Dutch Oven: Perfect for simmering your curry evenly.
  • Cutting Board: Essential for chopping ingredients efficiently.
  • Chef’s Knife: A sharp knife makes prep work quicker and safer.
  • Measuring Cups and Spoons: Ensure accurate measurements for consistent results.

Serving Suggestions

This chicken curry can be enjoyed in various ways:

  • With Rice: Serve over fluffy white rice or basmati for a classic pairing.
  • With Naan: Soft naan bread is perfect for scooping up the curry.
  • As a Wrap: Use leftover curry in wraps for a quick lunch option.
  • With a Salad: Pair with a fresh green salad for a balanced meal.

In conclusion, this simple chicken curry is not just a recipe; it’s a comforting hug on a plate that can be customized to fit your family’s preferences. With easy-to-follow steps, flavorful ingredients, and the potential for endless variations, it’s bound to become a favorite in your home. So, roll up your sleeves, gather your ingredients, and let’s make a delicious chicken curry that everyone will love!

Chicken Curry Recipe

Prep Time 10 minutes
Cook Time 25 minutes
Total Time 35 minutes
Servings 4 servings
Calories 450
A flavorful and hearty chicken curry made with aromatic spices and coconut milk, perfect for a comforting meal.

Ingredients

Protein

  • 1.5 pounds chicken breasts (cut into bite-sized pieces)
  • 1 teaspoon chili powder
  • 2 teaspoons salt
  • 0.5 teaspoon turmeric powder
  • 3 tablespoons olive oil
  • 1 medium yellow onion (diced)
  • 1 teaspoon garlic (minced)
  • 2 tablespoons tomato paste
  • 1.5 tablespoons curry powder
  • 13.5 ounces coconut milk (one can)
  • 1 tablespoon cilantro (chopped)

Garnish

  • Lemon wedges Lemon wedges (to garnish)

Instructions 

  • Combine chicken with spices and coat well.
  • Sear chicken in oil for 4-5 minutes, then set aside.
  • Sauté onion and garlic in the same pot until translucent.
  • Add tomato paste, curry powder, salt, then stir in coconut milk. Simmer with chicken for 15-20 minutes.
  • Stir in cilantro, garnish with lemon wedges, and serve.

Notes

Use fresh cilantro for best flavor and serve with rice.
Calories: 450kcal
Cost: $15
Course: Main Course
Cuisine: Indian
Keyword: chicken, Curry

Transform Your Dinner with Chicken Fajita Bowls

Are you looking to break free from the mundane dinner routine? Let me introduce you to the world of chicken fajita bowls! These vibrant, high-protein meals are not only quick to prepare but also incredibly versatile, making them perfect for busy weeknights. In this guide, we’ll explore everything you need to create mouth-watering chicken fajita bowls that your family will love.

Why You’ll Love This Recipe

  • Quick and Easy: This recipe comes together in just 30 minutes, making it ideal for those hectic nights when you need to get dinner on the table fast.
  • Flavor-Packed: With a blend of spices, fresh vegetables, and juicy chicken, each bite bursts with flavor, making meals exciting again.
  • Customizable: Everyone can enjoy their bowl just the way they like it! Offer a variety of toppings, from guacamole to cheese, to cater to picky eaters.
  • Meal Prep Friendly: Prepare everything in advance or store leftovers for a quick lunch option throughout the week.
  • Nutritional Powerhouse: Packed with protein from the chicken and fiber from the veggies and beans, this meal is as healthy as it is delicious.

Ingredient Breakdown

Let’s take a closer look at the ingredients that make up this delightful dish. Each element plays a critical role in flavor and nutrition.

  • Chicken: 1½ lbs of boneless, skinless chicken breasts serve as the primary protein source. You can substitute with thighs for a juicier option.
  • Lime Juice: 2 tbsp of lime juice adds a zesty kick that brightens all the flavors.
  • Olive Oil: 3 tbsp for sautéing the chicken and vegetables, providing healthy fats.
  • Garlic: 3 cloves minced to give a depth of flavor.
  • Spices: Half a teaspoon each of salt, cumin, chili powder, and red pepper flakes for a robust flavor profile.
  • Vegetables: A colorful mix of 1 poblano pepper, 1 red bell pepper, 1 yellow bell pepper, and onions for texture and nutrients.
  • Rice: 3 cups of steamed white, brown, or cauliflower rice serve as the base.
  • Beans: 1 cup of black beans for added fiber and protein.
  • Toppings: Fresh tomatoes, guacamole, lime wedges, and cilantro for garnishing.

Step-by-Step Instructions

Close-up view of a colorful chicken fajita bowl featuring sliced peppers and rice.

Follow these simple steps to whip up your chicken fajita bowls:


Digital Meat Thermometer

★ Recommended Kitchen Tool

Digital Meat Thermometer

Make this recipe even easier with a quality Digital Meat Thermometer — a must-have kitchen staple!


🛒 Shop This Tool →

As an Amazon Associate, we earn from qualifying purchases.
  • Marinate: In a bowl, combine chicken, lime juice, olive oil, garlic, and spices. Let it marinate for at least 30 minutes (or overnight for deeper flavor).
  • Cook the Chicken: Heat a skillet over medium-high heat. Add the marinated chicken and cook until golden brown and cooked through, approximately 6-7 minutes per side.
  • Sauté Vegetables: In the same skillet, add sliced peppers and onions, cooking until they’re tender and slightly charred (about 5 minutes).
  • Assemble the Bowls: In individual bowls, layer rice, black beans, sautéed vegetables, and sliced chicken. Top with tomatoes, guacamole, lime wedges, and fresh cilantro.

Pro Tips for Perfection

  • Quality Ingredients: Use fresh, high-quality produce and chicken for the best flavor.
  • Don’t Rush the Marinade: Letting the chicken marinate longer enhances the flavor significantly.
  • Cook in Batches: If making for a crowd, cook chicken and veggies in batches to avoid overcrowding the pan.
  • Experiment with Spices: Feel free to adjust spices to your taste or try adding new ones like smoked paprika or oregano for a twist.
  • Use a Meat Thermometer: Ensure chicken is cooked to an internal temperature of 165°F (75°C) for safety.
  • Make it Colorful: Use a variety of colored peppers and vegetables to make the dish visually appealing.
  • Keep it Warm: If serving a crowd, keep bowls warm in a low oven until ready to serve.
  • Save Leftovers Smartly: Store leftover components separately to keep everything fresh.

Common Mistakes and Troubleshooting

Even the best recipes can have hiccups. Here’s how to troubleshoot common issues:

  • Dry Chicken: Overcooking can lead to dry chicken. Use a meat thermometer to ensure perfect cooking.
  • Too Spicy: If your dish turns out too spicy, add a dollop of sour cream or extra guacamole to tone it down.
  • Flavorless Rice: Cook rice with broth instead of water for added flavor.

Variations to Try

Switch things up with these delicious variations:

  • Steak Fajita Bowls: Substitute chicken with steak for a hearty alternative.
  • Vegetarian Option: Use tofu or chickpeas instead of chicken for a plant-based meal.
  • Spicy Fajita Bowls: Add jalapeños or a dash of hot sauce for an extra kick.
  • Breakfast Bowls: Top with scrambled eggs and avocado for a breakfast twist.

Storage and Make-Ahead Instructions

Need to prepare in advance? Here’s how to store and reheat:

  • Refrigeration: Store components separately in airtight containers for up to 4 days.
  • Freezing: Chicken and veggies can be frozen for up to 3 months. Reheat in a skillet or microwave until warmed through.
  • Meal Prep: Prepare bowls in advance and store for quick lunches. Just add toppings before serving.

Comprehensive FAQ

1. Can I use frozen chicken?

Yes, just ensure it’s fully thawed before marinating and cooking.

2. How can I make this gluten-free?

Ensure all sauces and toppings are gluten-free and use rice as your base.

3. Can I make fajita bowls in advance?

Absolutely! Just store components separately and assemble when ready to eat.

4. What if I don’t like beans?

You can omit beans or substitute them with extra veggies or quinoa.

5. Can I use other proteins?

Yes! Shrimp, tofu, or even tempeh work well in this recipe.

6. How do I make it dairy-free?

Simply skip cheese and sour cream, and opt for avocado or dairy-free alternatives.

7. What toppings do you recommend?

Try guacamole, salsa, fresh cilantro, lime wedges, or shredded cheese.

8. What sides pair well with fajita bowls?

Consider serving with a fresh salad, tortilla chips, or even grilled corn on the cob.

Nutritional Tips and Dietary Adaptations

This recipe is naturally high in protein, with room for dietary adaptations:

  • Low-Carb: Swap rice for cauliflower rice or skip the grains altogether.
  • Vegetarian: Replace chicken with beans, tofu, or tempeh for a protein-packed vegetarian option.
  • Low-Fat: Use skinless chicken breasts and limit the amount of oil used in cooking.

Equipment Recommendations

Here are a few kitchen tools that can make your cooking experience smoother:

  • Skillet: A good non-stick or cast iron skillet is essential for cooking.
  • Cutting Board: A sturdy cutting board is necessary for chopping vegetables.
  • Meat Thermometer: To ensure your chicken is cooked perfectly every time.

Serving Suggestions

Serve your chicken fajita bowls with:

  • Fresh Lime Wedges: A squeeze of lime adds freshness at the end.
  • Cilantro: Chopped cilantro enhances flavor and adds a pop of color.
  • Side Salad: A simple green salad complements the meal beautifully.

In conclusion, chicken fajita bowls are a delightful addition to your weeknight dinner repertoire. They are not only quick and easy but also customizable and loaded with nutrients. With this guide, you have all the tools you need to create your own delicious bowls that will satisfy your family and keep dinnertime exciting. So, roll up your sleeves and get cooking—your next family favorite is just a bowl away!

Simple Chicken Fajita Bowl for High Protein Lunches

Prep Time 15 minutes
Cook Time 20 minutes
Total Time 35 minutes
Servings 4 servings
Calories 650
A flavorful and protein-packed lunch bowl featuring seasoned chicken, colorful peppers, rice, and fresh toppings.

Ingredients

Protein

  • 1.5 lbs boneless, skinless chicken breasts
  • 2 tbsp lime juice
  • 3 tbsp olive oil
  • 3 cloves garlic, minced
  • ½ tsp salt
  • ½ tsp ground cumin
  • ½ tsp chili powder
  • ½ tsp red pepper flakes

Vegetables

  • 1 poblano pepper poblano pepper, thinly sliced
  • 1 red bell pepper red bell pepper, thinly sliced
  • 1 yellow bell pepper yellow bell pepper, thinly sliced
  • ½ yellow onion yellow onion, thinly sliced
  • ½ red onion red onion, thinly sliced

Carbohydrates

  • 3 cups steamed white rice (or brown/cauliflower rice)
  • 1 cup black beans, rinsed and drained
  • 1 cup charred corn

Toppings & Fresh Items

  • 1 cup chopped fresh tomatoes (or pico de gallo)
  • 1 batch guacamole
  • Lime wedges Lime wedges
  • to taste Fresh chopped cilantro

Instructions 

  • Marinate chicken with lime juice, olive oil, garlic, salt, cumin, chili powder, and red pepper flakes.
  • Cook chicken until fully cooked, then slice.
  • Sauté sliced peppers and onions until tender.
  • Assemble bowls with rice, chicken, sautéed vegetables, beans, corn, and toppings.
  • Garnish with chopped cilantro and lime wedges before serving.

Notes

Using cauliflower rice reduces carbs; adjust seasoning to taste.
Calories: 650kcal
Cost: $15
Course: Lunch
Cuisine: Mexican
Keyword: chicken

Transform Your Dinner Routine with Butter Chicken Pasta Bake

In the hustle and bustle of everyday life, finding time to create a delicious meal can feel overwhelming. Luckily, the Butter Chicken Pasta Bake is here to rescue your weeknight dinners! Combining tender chicken, rich spices, and gooey cheese, this dish is not only satisfying but also incredibly easy to prepare. If you’re looking for a way to turn a staple into something extraordinary, this creamy pasta bake is your answer. Let’s dive into the details of why this recipe is a must-try!

Why You’ll Love This Recipe

This Butter Chicken Pasta Bake is packed with flavor and has so much to offer. Here are just a few reasons to love it:

  • Quick Preparation: With minimal prep time, you can have this dish ready to go in no time, making it perfect for busy weeknights.
  • Kid-Approved: The combination of creamy sauce and cheesy goodness will have even your pickiest eaters asking for seconds.
  • Versatile Ingredients: You can easily swap out proteins or pasta types based on what you have on hand, making it adaptable to your pantry.
  • Meal Prep Friendly: This dish holds up well in the fridge, making it ideal for leftovers or meal prep.
  • Flavor Explosion: The rich spices and creamy sauce create an unforgettable taste that elevates simple chicken and pasta to gourmet levels!

Ingredients Breakdown

Let’s take a closer look at the ingredients you’ll need for this Butter Chicken Pasta Bake and some substitution options:


Digital Meat Thermometer

★ Recommended Kitchen Tool

Digital Meat Thermometer

Make this recipe even easier with a quality Digital Meat Thermometer — a must-have kitchen staple!


🛒 Check Price on Amazon →

As an Amazon Associate, we earn from qualifying purchases.
  • Plain Greek Yogurt: Provides creaminess and tang. Substitute with regular plain yogurt if needed.
  • Lemon Juice: Brightens the dish. Freshly squeezed is best, but bottled will work.
  • Kosher Salt: Enhances flavors. Adjust according to personal preference.
  • Spices (Garam Masala, Cumin, Coriander, Turmeric, Cayenne): These spices add depth and warmth. You can use a pre-mixed curry powder if you’re short on time.
  • Chicken: Boneless breasts or thighs work well. You can also use rotisserie chicken for a quicker option.
  • Pasta: Penne is ideal, but any short pasta will do.
  • Onion, Garlic, and Ginger: These aromatics build the foundation of flavor. Fresh is preferred, but you can use dried substitutes in a pinch.
  • Tomatoes: Fresh or canned work great to create a rich sauce.
  • Cheese (Mozzarella and Cheddar): Adds creaminess and flavor. Feel free to adjust the types of cheese based on your taste.
  • Fenugreek Leaves: These add an authentic touch. If you can’t find fresh or dried, feel free to omit!

Cooking Method

Close-up view of a creamy Butter Chicken Pasta Bake with visible chunks of chicken and pasta.

Now, let’s get into the nitty-gritty of how to create this delicious dish:

  1. Marinate the chicken pieces in a mixture of Greek yogurt, lemon juice, and spices to infuse flavor.
  2. In a large skillet, cook the marinated chicken until golden brown, then set it aside.
  3. Prepare the sauce by sautéing onions, garlic, and ginger until fragrant. Add tomatoes and cook until softened.
  4. Stir in the remaining spices and cream, allowing the sauce to thicken slightly.
  5. Mix the cooked pasta and chicken into the sauce, ensuring everything is well coated.
  6. Transfer to a baking dish, top with cheese, and bake until bubbly and golden.

Pro Tips for Perfecting Your Pasta Bake

These expert insights will help you make the best Butter Chicken Pasta Bake possible:

  • Don’t rush the marination: Allowing the chicken to marinate for at least 30 minutes enhances flavor.
  • Pre-cook your pasta: Ensure your pasta is al dente before mixing it into the sauce to prevent it from becoming mushy.
  • Use a mix of cheeses: Combining mozzarella for stretch and cheddar for flavor creates the perfect cheesy topping.
  • Layer it well: When transferring to the baking dish, layer the chicken and pasta with sauce to ensure even flavor distribution.
  • Let it rest: Allow the dish to sit for 5-10 minutes after baking; this helps it set and makes serving easier.

Common Mistakes and Troubleshooting

Even the best of us can make mistakes in the kitchen! Here are a few common pitfalls and how to avoid them:

  • Overcooking the chicken: Cook until just done; it will continue cooking in the oven.
  • Too much liquid: If your sauce is too runny, let it simmer longer to thicken it up.
  • Cheese burning: If the cheese browns too quickly, cover the dish with foil until the last few minutes of baking.
  • Flavorless sauce: Don’t skip the spices; they are crucial for that authentic butter chicken taste!

Delicious Variations

Want to mix things up? Try these fun variations of the Butter Chicken Pasta Bake:

  • Vegetarian Version: Substitute chicken with chickpeas or your favorite veggies like bell peppers and zucchini.
  • Spicy Twist: Add extra cayenne or some diced jalapeños for a kick.
  • Creamy Spinach: Toss in fresh spinach before baking for a nutritional boost and added flavor.
  • Cheesy Broccoli: Mix steamed broccoli florets into the pasta for a wholesome addition.

Storage and Make-Ahead Instructions

Planning ahead? Here’s how you can store and prepare this dish:

  • Storing Leftovers: Store in an airtight container in the fridge for up to 3 days.
  • Reheating: Reheat in the oven or microwave until heated through; sprinkle a little extra cheese on top for added yum!
  • Make-Ahead: Assemble the dish a day in advance and keep it covered in the fridge. Just pop it in the oven when you’re ready to bake!

FAQs about Butter Chicken Pasta Bake

Here are some common questions about this delicious dish:

  • Can I freeze this dish? Yes! Freeze before baking for up to 3 months. Thaw in the fridge before cooking.
  • What’s a good side dish? Garlic naan or a simple salad pairs beautifully with this pasta bake.
  • Can I substitute the chicken? Absolutely! Tofu, shrimp, or even lentils work great in this recipe.
  • Is this dish gluten-free? Use gluten-free pasta to make it gluten-free.
  • How spicy is it? You can adjust the cayenne to your spice preference; start with less if you’re unsure!
  • What can I use instead of fenugreek leaves? If you can’t find them, simply omit or use a pinch of dried herbs instead.
  • How do I make it creamier? Add more cream or a dollop of cream cheese for extra richness.
  • Can I use whole wheat pasta? Yes, whole wheat pasta is a great, healthier alternative!

Nutritional Tips and Dietary Adaptations

This Butter Chicken Pasta Bake can be tailored to fit various dietary needs:

  • Low-Carb Option: Use cauliflower rice instead of pasta for a low-carb meal.
  • Dairy-Free: Swap cream for coconut milk and use dairy-free cheese.
  • High-Protein: Add Greek yogurt or extra chicken to boost protein content.

Essential Equipment Recommendations

For this recipe, you’ll need:

  • Large Skillet: Ideal for sautéing and combining ingredients.
  • Baking Dish: A 9×13 inch dish works perfectly for this pasta bake.
  • Measuring Cups and Spoons: For accurate ingredient measurements.
  • Mixing Bowls: Essential for marinating and mixing your ingredients.

Serving Suggestions

This hearty dish pairs wonderfully with:

  • Fresh Salad: A light green salad balances the rich flavors.
  • Warm Bread: Garlic naan or crusty bread is perfect for scooping up the creamy sauce.
  • Chutney: A side of mango chutney adds a sweet contrast to the spiciness of the dish.

Wrap Up Your Busy Night with Comfort

The Butter Chicken Pasta Bake is the ultimate comfort food that brings families together around the dinner table. Whether you’re cooking for your loved ones or meal prepping for the week, this dish is sure to impress. By combining everyday ingredients with a touch of spice, you can create a satisfying meal that feels special, even on the busiest nights. So grab your apron, and let’s get cooking—because delicious, stress-free dinners are just a recipe away!

Butter Chicken Pasta Bake

Prep Time 20 minutes
Cook Time 30 minutes
Total Time 50 minutes
Servings 4 servings
Calories 650
A flavorful fusion dish combining the rich spices of butter chicken with comforting pasta, baked to perfection.

Ingredients

Spices and Seasonings

  • 5 TBLS Plain Greek Style Yogurt (or plain yogurt)
  • 1 TBLS freshly squeezed Lemon Juice
  • 1 TSP Kosher Salt
  • 1 TSP Garam Masala
  • 1 TSP ground Cumin
  • 1 TSP Coriander powder
  • 1 TSP Turmeric powder
  • ½-1 TSP ground Cayenne (or Kashmiri red chili powder), to taste
  • 2 TBLS Ginger Garlic Paste

Main Protein

  • 2 Chicken Breasts or Thighs (about 400 grams / 0.88 pounds), boneless, skinless (cut into bite-sized pieces)

Cooking Fats

  • 1 TBLS Unsalted Butter
  • 1 TBLS Olive Oil

Pasta and Vegetables

  • 9 ounces uncooked Pasta
  • 1 medium Red Onion (small chopped)
  • 10 cloves Garlic cloves (minced)
  • 1.5 inch knob of Ginger (about 2 TBLS minced)
  • 2 medium Tomatoes (skinned, small chopped)
  • 5-10 Red Chilies Red Chilies (chopped, to taste)
  • 1-2 Green Chilies Green Chilies (chopped, to taste)

Additional Spices and Liquids

  • ¾ TSP Kosher Salt (to taste)
  • 1/8 TSP freshly cracked Black Pepper (a pinch)
  • ½ TSP Garam Masala
  • ¾ TSP ground Cumin
  • ¾ TSP Coriander powder
  • 1 TSP Turmeric powder
  • 1 TSP ground Cayenne (or Kashmiri red chili powder), to taste

Sauce and Liquids

  • 1 cup Water
  • ½ TSP Tandoori Color powder (or 1–2 drops red/orange food coloring)
  • 1 TSP freshly squeezed Lemon Juice
  • 200 ml Cooking Cream (20% fat) (or use single cream or half and half)
  • 1.5–2 TBLS chopped fresh or frozen Methi (fenugreek) Leaves or Kasuri Methi (or 2 TSP dried fenugreek leaves)
  • 1 cup shredded part skim low-moisture Mozzarella Cheese
  • 1 cup freshly grated Sharp Cheddar Cheese
  • 1-2 TBLS chopped Coriander (for garnish)

Instructions 

  • Marinate chicken with yogurt, lemon juice, spices, and ginger garlic paste. Set aside.
  • Sauté onions, garlic, and ginger; add chopped tomatoes and chilies. Cook until soft.
  • Add marinated chicken and cook until done. Mix in cream, methi, and food coloring. Simmer briefly.
  • Cook pasta until al dente, drain, and combine with the sauce. Transfer to a baking dish.
  • Top with shredded cheeses and bake at 375°F (190°C) for 20 minutes until bubbly and golden.

Notes

For extra flavor, garnish with fresh coriander before serving.
Calories: 650kcal
Cost: $15
Course: Main Course
Cuisine: Fusion
Keyword: Butter Chicken, pasta

Transform Your Dinner with Hot Honey Chicken Pizza

If you’re looking for a meal that will tantalize your taste buds while being effortless to prepare, this Hot Honey Chicken Pizza is your answer! Perfect for busy weeknights, this recipe combines the savory goodness of tender chicken, melty cheese, and a sweet yet spicy hot honey drizzle that will have your family reaching for seconds. Packed with flavor and made with simple ingredients, it’s a dish everyone will love!

In this article, we’ll dive deep into the specifics of creating this mouthwatering pizza, including ingredient breakdowns, expert tips, variations, and even storage methods. By the end, you’ll be ready to impress your family and friends with your culinary skills!

Why You’ll Love This Hot Honey Chicken Pizza Recipe

  • Quick and Easy: With just a few steps, you can have a delicious pizza ready in under 30 minutes, perfect for those busy evenings.
  • Flavor Explosion: The combination of sweet and spicy from the hot honey pairs beautifully with the savory chicken, creating an irresistible flavor profile.
  • Customizable: This recipe allows for a variety of toppings and substitutions, so you can cater to your family’s tastes.
  • Healthy Ingredients: With lean chicken and the option for whole wheat crust, you can enjoy a guilt-free pizza night!
  • Perfect for Leftovers: Enjoy this pizza hot out of the oven or as a satisfying lunch the next day!

Ingredients You’ll Need for This Chicken Pizza Recipe

Before we jump into the cooking process, let’s gather everything you’ll need to make this delicious Hot Honey Chicken Pizza. Here’s the ingredient list:


Air Fryer XL

★ Recommended Kitchen Tool

Air Fryer XL

Make this recipe even easier with a quality Air Fryer XL — a must-have kitchen staple!


🛒 Check Price on Amazon →

As an Amazon Associate, we earn from qualifying purchases.
  • 1 tbsp olive oil: For sautéing the chicken to perfection.
  • 1-2 chicken breasts: Use boneless, skinless chicken for ease of cooking.
  • 2 pizza crusts: Choose store-bought or homemade, and sprinkle with cornmeal for easy handling.
  • 1 cup pizza sauce: Your favorite brand or homemade.
  • 2 cups shredded mozzarella: The classic cheese choice for that gooey texture.
  • 1 tsp Italian seasoning (optional): For an extra layer of flavor.
  • 3 tbsp hot honey drizzle: This is the star of the show, adding that sweet and spicy kick!

How to Make Hot Honey Chicken Pizza

Close-up of a slice of Hot Honey Chicken Pizza drizzled with hot honey.

Now that you have all your ingredients, let’s get started on making your delicious pizza!

  • Step 1: Preheat the Oven: Preheat your oven to 475°F (245°C) to ensure a crispy crust.
  • Step 2: Prepare the Chicken: Slice the chicken breasts in half lengthwise to create four thinner pieces. Season with salt and pepper.
  • Step 3: Cook the Chicken: In a skillet, heat olive oil over medium-high heat. Cook the chicken for about 4 minutes on each side, or until it reaches an internal temperature of 165°F (75°C). Allow it to rest before slicing into bite-sized cubes.
  • Step 4: Assemble the Pizza: Spread pizza sauce over each pizza crust, add mozzarella cheese, and top with the cooked chicken and any additional toppings or spices you prefer.
  • Step 5: Bake: Bake in the oven for 12-15 minutes, or until the cheese is bubbly and golden.
  • Step 6: Drizzle Hot Honey: Before serving, drizzle hot honey over the top for that sweet and spicy finish!

Pro Tips for Perfect Hot Honey Chicken Pizza

  • Use Fresh Ingredients: Freshly shredded cheese melts better than pre-shredded, which often contains anti-caking agents.
  • Don’t Overcrowd the Toppings: Too many toppings can make the pizza soggy. Keep it simple for the best texture.
  • Let the Chicken Rest: Allowing the chicken to rest after cooking keeps it juicy.
  • Experiment with Hot Honey: If you like more heat, try adding a few slices of jalapeños or a sprinkle of red pepper flakes.
  • Invest in a Pizza Stone: For an extra crispy crust, consider using a pizza stone preheated in the oven.
  • Keep an Eye on the Oven: Ovens can vary; keep an eye on your pizza to prevent burning.
  • Pair with Fresh Herbs: Adding fresh basil or arugula after baking can elevate the flavors.
  • Make it a Meal: Serve with a side salad for a complete dinner!

Common Mistakes and Troubleshooting

  • Dry Chicken: Make sure not to overcook the chicken. Use a meat thermometer for accuracy.
  • Soggy Crust: Avoid overloading with toppings and ensure your crust is pre-baked if using a dough that requires it.
  • Too Much Heat: Adjust the amount of hot honey based on your heat tolerance—start with less and add more if needed!

Variations on Hot Honey Chicken Pizza

While this recipe is fantastic as is, here are some delicious variations you can try:

  • BBQ Chicken Pizza: Substitute the pizza sauce with BBQ sauce for a smoky flavor.
  • Vegetable Delight: Add bell peppers, onions, or mushrooms for more veggies.
  • Buffalo Chicken Pizza: Use buffalo sauce instead of pizza sauce and top with blue cheese crumbles.
  • Caprese Twist: Add fresh tomatoes and basil, and drizzle with balsamic glaze after baking.

Storage and Make-Ahead Instructions

Want to prep ahead? Here’s how to store and reheat:

  • Make-Ahead: You can prepare the chicken and sauce in advance and store them in the refrigerator for up to 2 days.
  • Storing Leftovers: Keep any leftover pizza in an airtight container in the fridge for up to 3 days.
  • Reheating: For the best texture, reheat in the oven at 350°F until heated through, rather than using the microwave.

Frequently Asked Questions

  • Can I use frozen chicken? Yes, but make sure it’s fully thawed and cooked to the right temperature.
  • What if I don’t have pizza sauce? You can use marinara or even pesto as a base for your pizza.
  • Can I make this recipe gluten-free? Absolutely! Use gluten-free pizza crust or cauliflower crust.
  • How can I make it spicier? Increase the amount of hot honey or add sliced jalapeños.
  • Is this pizza kid-friendly? Yes! The sweet honey flavor is often a hit with kids.
  • Can I prepare this ahead of time? Yes, you can prep the chicken and toppings and assemble right before baking.
  • What’s the best way to store leftovers? Keep in an airtight container in the fridge for up to 3 days.
  • Can I use other cheeses? Yes, feel free to mix in cheddar or gouda for different flavors!

Nutritional Tips and Dietary Adaptations

This recipe is flexible and can accommodate various dietary needs:

  • Low-Carb Version: Use a cauliflower crust to cut down on carbs.
  • Dairy-Free Option: Substitute the cheese with a dairy-free alternative.
  • High-Protein Adaptation: Add more chicken or include chickpeas for a protein boost.

Equipment Recommendations

To make your cooking experience smooth, consider these essential tools:

  • Pizza Stone: For a perfectly crispy crust.
  • Sharp Knife: For slicing chicken easily.
  • Meat Thermometer: To ensure your chicken is cooked to perfection.
  • Skillet: A non-stick skillet makes cooking chicken a breeze.

Serving Suggestions

Round out your meal with some delicious sides:

  • Simple Green Salad: A fresh salad can balance out the richness of the pizza.
  • Garlic Bread: A tasty addition for those who love crusty sides.
  • Fruit Salad: A light and refreshing option to contrast the spicy pizza.

Final Thoughts

This Hot Honey Chicken Pizza recipe is more than just a meal; it’s a celebration of flavor that you can easily bring to your dinner table. With its quick preparation, vibrant flavors, and customizable elements, it’s sure to become a family favorite. Whether you’re cooking for yourself or a crowd, this pizza proves that healthy and satisfying dinners are just a recipe away. So grab your ingredients and get cooking; a delicious adventure awaits in your kitchen!

Hot Honey Chicken Pizza

Prep Time 15 minutes
Cook Time 15 minutes
Total Time 30 minutes
Servings 4 pieces
Calories 950
A delicious pizza topped with spicy hot honey and tender chicken, perfect for a flavorful meal.

Ingredients

Olive Oil

  • 1 tbsp olive oil

Chicken

  • 1-2 chicken breasts chicken breasts (sliced in half lengthwise)

Pizza Crusts

  • 2 crusts pizza crusts with cornmeal for handling dough

Pizza Sauce

  • 1 cup pizza sauce

Mozzarella

  • 2 cups shredded mozzarella

Italian Seasoning

  • 1 tsp Italian seasoning (optional)

Hot Honey Drizzle

  • 3 tbsp hot honey drizzle

Instructions 

  • Preheat oven to 475°F (245°C).
  • Cook sliced chicken in olive oil until browned, then rest and cube.
  • Spread sauce on crusts, add cheese, chicken, spices, then bake 12-15 mins.
  • Drizzle hot honey over pizza before serving.

Notes

For extra flavor, add your favorite toppings before baking.
Calories: 950kcal
Cost: $15
Course: Main Course
Cuisine: American
Keyword: chicken, Honey, Pizza

Your New Go-To Recipe for 30-Minute Indian Chicken Curry

When life gets busy and dinnertime creeps up, it’s easy to fall into the trap of serving the same meals again and again. With the right recipe, though, you can whip up something truly delightful and satisfying in just 30 minutes. This 30-minute Indian chicken curry is a game changer! Featuring tender chicken, a rich sauce, and a delightful tang from Greek yogurt, it’s sure to become a favorite at your dinner table.

In this article, we’ll dive deep into why this recipe is so beloved, how to customize it to your taste, and provide you with all the tips and tricks you need to make it a success every time. Ready to transform your weeknight dinners? Let’s get started!

Why You’ll Love This Recipe

  • Quick & Easy: In just 30 minutes, you can have a delicious meal on the table, making it perfect for busy weeknights.
  • Flavorful & Comforting: The combination of spices creates a rich and aromatic sauce that’s both comforting and exciting.
  • Healthy Ingredients: Packed with protein from chicken and the richness of Greek yogurt, this dish is nutritious without sacrificing flavor.
  • Customizable: You can easily tweak the ingredients and spices to suit your family’s taste preferences and dietary needs.
  • Family-Friendly: With its mild spice level and familiar ingredients, this curry is sure to please even the pickiest eaters.

Ingredient Breakdown

Let’s take a closer look at the ingredients that make this Indian chicken curry shine, along with some smart swaps you can make.


Digital Meat Thermometer

★ Recommended Kitchen Tool

Digital Meat Thermometer

Make this recipe even easier with a quality Digital Meat Thermometer — a must-have kitchen staple!


🛒 Check Price on Amazon →

As an Amazon Associate, we earn from qualifying purchases.

Main Ingredients

  • Chicken: 2 lbs boneless, skinless chicken breast provides a lean protein base. You can also use thighs for a richer flavor.
  • Vegetable Oil: 2 tbsp is used for sautéing; olive oil or coconut oil works well too.
  • Onion: 1 medium yellow onion, finely diced adds sweetness and depth.
  • Garlic & Ginger: 3 cloves minced garlic and 1 tbsp grated fresh ginger contribute essential aromatic flavors.
  • Crushed Tomatoes: 1 cup provides the sauce base, bringing acidity and moisture.
  • Curry Powder & Garam Masala: 2 tbsp yellow curry powder and 1 tbsp garam masala deliver unique, warm flavors that are characteristic of Indian cuisine.
  • Greek Yogurt: 1/2 cup adds creaminess and a tangy finish, balancing the spices beautifully.
  • Chicken Broth: 1/2 cup helps to create the sauce and keeps everything moist.
  • Cilantro: Fresh cilantro for garnish adds brightness and a pop of color.

Smart Swaps

  • Protein Swap: Use chickpeas or tofu for a vegetarian option.
  • Yogurt Alternatives: Coconut milk can be a great dairy-free substitute; it adds creaminess without the dairy.
  • Tomato Alternatives: If you prefer, substitute crushed tomatoes with a can of diced tomatoes or fresh tomatoes.
  • Spice Adjustments: If you’re sensitive to heat, reduce the curry powder or skip the garam masala entirely.

Cooking Tools for a Faster Cook

Close-up of a bowl filled with vibrant chicken curry topped with yogurt and cilantro.

Having the right tools can make all the difference in your cooking experience. Here are some essentials:

  • Non-stick Skillet: A good-quality non-stick skillet allows for easy cooking and cleanup.
  • Cutting Board: A large cutting board makes chopping your ingredients quick and efficient.
  • Chef’s Knife: A sharp knife is essential for precise and safe chopping.
  • Measuring Cups and Spoons: Accurate measurements ensure the flavors are balanced.
  • Wooden Spoon: Great for stirring and scraping the bottom of the pan to incorporate all the flavors.

Cooking Your Curry in 30 Minutes

Follow these steps for a delicious curry that’s ready in no time:

  1. Heat the oil in a skillet over medium-high heat. Add the diced onions and sauté for 4–5 minutes until they turn translucent and slightly golden.
  2. Stir in the minced garlic and grated ginger, cooking for another 60 seconds until fragrant.
  3. Increase heat to high and add the chicken cubes in a single layer. Sear for 3 minutes without moving them to develop a golden-brown crust.
  4. Sprinkle the curry powder, garam masala, salt, and pepper over the meat, stirring constantly for 2 minutes to bloom the spices in the chicken fat.
  5. Pour in the crushed tomatoes and chicken broth. Stir to scrape up the browned bits from the bottom of the pan.
  6. Lower the heat to medium-low and simmer for 8–10 minutes until the sauce thickens and the chicken is cooked through.
  7. Remove from heat and stir in the Greek yogurt until the sauce is velvety and uniform. Garnish with chopped cilantro.

Common Mistakes & Troubleshooting

Even the best recipes can go awry if certain mistakes are made. Here’s how to avoid them:

  • Overcooking the Chicken: Ensure the chicken is cooked just until no longer pink to avoid dryness.
  • Too Thick Sauce: If the sauce becomes too thick, add a splash more chicken broth to achieve the desired consistency.
  • Burning Spices: Be careful not to cook the spices for too long; they can burn quickly and become bitter.
  • Not Enough Flavor: Taste and adjust seasoning before serving; every palate is different!

Delicious Variations to Try

Want to switch things up? Here are some creative variations to keep your meals exciting:

  • Coconut Chicken Curry: Substitute Greek yogurt with coconut milk for a creamier, dairy-free version.
  • Vegetable-Loaded Curry: Add in chopped bell peppers, carrots, or spinach for extra nutrition and color.
  • Sweet Potato Addition: Incorporate diced sweet potatoes for added sweetness and a heartier dish.
  • Spicy Kick: Add chopped green chilies or red pepper flakes if you like your curry with a bit of heat.

Storage and Make-Ahead Instructions

This curry holds up wonderfully, making it perfect for meal prep:

  • Make Ahead: You can prepare the curry up to 2 days in advance. Store it in an airtight container in the refrigerator.
  • Freezing: Allow the curry to cool completely before freezing. It can be stored for up to 3 months. Thaw in the fridge overnight before reheating.
  • Reheating: Reheat on the stovetop over low heat, adding a splash of broth if the sauce is too thick.

Comprehensive FAQ

Here are some common questions about making this delicious chicken curry:

  • Can I use frozen chicken? Yes, but be sure to thaw it completely before cooking for even results.
  • Is this recipe spicy? This curry has a mild spice level, but you can adjust it to your preference.
  • Can I add more vegetables? Absolutely! Feel free to add any veggies you love.
  • What can I serve with this curry? It pairs wonderfully with rice, naan, or a fresh salad.
  • How do I store leftovers? Store in an airtight container in the refrigerator for up to 3 days.
  • Can I make it dairy-free? Yes, simply replace Greek yogurt with coconut milk.
  • How do I enhance the flavor? Adding a squeeze of fresh lime juice before serving can brighten the flavors.
  • Can I make this in advance? Yes, it’s a great meal prep option!

Nutrition Tips and Dietary Adaptations

Here are some nutrition tips to consider when preparing this dish:

  • High-Protein: This chicken curry is rich in protein, making it a great option for those looking to build muscle.
  • Low-Carb Option: Serve it over cauliflower rice instead of traditional rice for a low-carb meal.
  • Gluten-Free: All ingredients are naturally gluten-free, making it safe for those with gluten sensitivities.
  • Calorie-Conscious: Keep an eye on portion sizes and consider using skinless chicken for a lighter option.

Equipment Recommendations

Here are some kitchen tools that can make your cooking experience smoother:

  • Skillet: A large non-stick skillet is ideal for cooking the curry without sticking.
  • Food Processor: Helpful for quickly chopping vegetables if you’re short on time.
  • Instant Pot: For those who prefer pressure cooking, this can dramatically reduce cooking time.

Serving Suggestions

To elevate your meal, consider these serving suggestions:

  • Garnish: Fresh cilantro and a squeeze of lime juice enhance the flavors.
  • Accompaniments: Serve with fluffy basmati rice, warm naan bread, or a refreshing cucumber salad.
  • Drinks: Pair with a light, crisp beverage like a sparkling water or a mild beer.

Cooking doesn’t have to be stressful, and with this 30-minute Indian chicken curry, you’ll feel confident bringing a flavorful dish to the table in no time. Remember, the joy of cooking is all about experimenting and making the dish your own—so don’t hesitate to add your personal twist! Happy cooking!

30Minute Indian Chicken Curry: Tangy Yogurt Finish

Prep Time 10 minutes
Cook Time 15 minutes
Total Time 25 minutes
Servings 4 servings
Calories 350
This quick and flavorful Indian chicken curry is finished with a tangy yogurt touch, perfect for a satisfying weeknight dinner.

Ingredients

Protein

  • 2 lbs boneless, skinless chicken breast, cut into 1-inch cubes

Oil

  • 2 tbsp vegetable oil

Vegetables

  • 1 medium yellow onion, finely diced

Aromatics

  • 3 cloves garlic, minced
  • 1 tbsp fresh ginger, grated

Canned Goods

  • 1 cup crushed tomatoes
  • 1 cup chicken broth

Spices

  • 2 tbsp yellow curry powder
  • 1 tbsp garam masala
  • 1 tsp salt
  • 0.5 tsp black pepper

Dairy

  • 0.5 cup Greek yogurt

Herbs

  • 1 tbsp fresh cilantro, chopped

Instructions 

  • Heat oil and sauté onions for 4–5 minutes until translucent and golden.
  • Add garlic and ginger; cook for 60 seconds.
  • Increase heat, sear chicken for 3 minutes, then add spices and cook 2 minutes.
  • Pour in crushed tomatoes and chicken broth; simmer 8–10 minutes until thickened and chicken is cooked.
  • Remove from heat, stir in yogurt, and garnish with cilantro.

Notes

Use full-fat Greek yogurt for creaminess and flavor.
Calories: 350kcal
Cost: $15
Course: Main Course
Cuisine: Indian
Keyword: chicken, Curry

Unlock the Secret to a Quick Chicken Curry That Will Elevate Your Weeknight Dinners

If you’re searching for a quick chicken curry recipe that delivers on flavor without consuming your entire evening, you’ve come to the right place! This wholesome dish combines pantry staples and leftover chicken to create a hearty meal that your family will love. Not only is it quick to prepare, but it’s also packed with nutrients and can be customized to suit your taste. Let’s dive into why this recipe is a must-try for busy weeknights.

Why You’ll Love This Recipe

  • Time-Saving: With a prep and cook time of less than 30 minutes, this dish is perfect for those hectic evenings.
  • Versatile Ingredients: Use whatever chicken you have on hand—rotisserie, grilled, or even leftover baked chicken.
  • Nutrient-Rich: Featuring ingredients like Greek yogurt and fire-roasted tomatoes, this recipe is full of vitamins and minerals.
  • Kid-Friendly: The mild flavors of this curry make it a hit with picky eaters, ensuring your whole family will enjoy dinner.
  • Make Ahead: This curry can be prepared in advance and reheated, making it a great meal prep option!

Ingredient Breakdown

Let’s go through the ingredients and discuss potential substitutions you might consider:

  • Extra-Virgin Olive Oil: A healthy fat choice; feel free to substitute with coconut oil for added flavor.
  • Yellow Onion: Use red or white onions if you prefer; shallots could also work well.
  • Garlic: Fresh garlic is best, but garlic powder can be a quick alternative.
  • Curry Powder: Any standard curry powder will work, but you can enhance the flavor by adding a pinch of turmeric or cumin.
  • Diced Fire-Roasted Tomatoes: These add a smoky depth; regular diced tomatoes or crushed tomatoes can be substituted if needed.
  • Low-Sodium Chicken Broth: Homemade stock is ideal, but store-bought works just fine.
  • Kosher Salt and Black Pepper: Essential for seasoning; adjust to your taste.
  • Cayenne Pepper: Optional for those who like a little heat!
  • Cooked Chicken: Any leftover chicken works; rotisserie is a great choice for flavor and convenience.
  • Plain Greek Yogurt: Adds creaminess; sour cream can be used, or even coconut yogurt for a dairy-free option.
  • Fresh Herbs: Parsley or cilantro brighten up the dish; consider adding fresh lime juice for an extra zing!
  • Chopped Peanuts: Optional for garnish; they add a nice crunch!

Pro Tips for Perfecting Your Quick Chicken Curry

A close-up view of a bowl of Quick Chicken Curry with vibrant colors and garnishes.

Here are some insider tips to ensure your curry comes out perfectly every time:


Air Fryer XL

★ Recommended Kitchen Tool

Air Fryer XL

Make this recipe even easier with a quality Air Fryer XL — a must-have kitchen staple!


🛒 Shop This Tool →

As an Amazon Associate, we earn from qualifying purchases.
  • Prep Ahead: Chop your onions and garlic ahead of time to save precious minutes during cooking.
  • Controlled Heat: If you want a milder curry, start with less cayenne and adjust as you go.
  • Thicker Consistency: If you prefer a thicker sauce, let it simmer a bit longer after adding the chicken.
  • Layering Flavors: Sauté your onions until they are golden brown for a deeper flavor base.
  • Don’t Rush the Yogurt: Stir in Greek yogurt off the heat to prevent curdling.
  • Control the Spice: Adjust the amount of curry powder based on your family’s spice tolerance.
  • Leftover Magic: This curry tastes even better the next day, making it a great leftover option!
  • Freezer Friendly: This dish freezes well; just leave out the Greek yogurt until you reheat it.

Common Mistakes and Troubleshooting

Even simple recipes can go awry. Here’s how to avoid common pitfalls:

  • Overcooking Chicken: If your chicken is overcooked, it can become dry. Add it to the curry just until heated through.
  • Too Spicy: If you’ve added too much spice, balance it out with a bit more yogurt or a touch of honey.
  • Not Enough Flavor: Always taste as you go; adjust seasoning to enhance the dish.
  • Too Thin Sauce: If your sauce is too thin, let it reduce for a few extra minutes on the stovetop.

Variations on the Classic Quick Chicken Curry

Feel free to mix things up with these variations:

  • Vegetable Curry: Add your favorite vegetables like bell peppers, carrots, or spinach for added nutrition.
  • Chickpea Curry: Replace the chicken with canned chickpeas for a hearty vegetarian option.
  • Coconut Chicken Curry: Stir in a can of coconut milk for a rich, creamy texture.
  • Spicy Chicken Curry: Add more cayenne or fresh chili peppers for a fiery kick!

Storage and Make-Ahead Instructions

This chicken curry is perfect for meal prep!

  • Refrigerator: Store leftovers in an airtight container for up to 4 days.
  • Freezer: Freeze in portions for up to 3 months. Thaw in the fridge overnight before reheating.
  • Reheating: Reheat in a saucepan over medium heat, stirring occasionally, until warmed through.

Frequently Asked Questions

  • Can I use frozen chicken? Yes, just ensure it’s fully cooked and thawed before adding it to the curry.
  • Is this curry gluten-free? Yes, as long as you use gluten-free broth and check your curry powder.
  • How can I make this dairy-free? Substitute Greek yogurt with coconut yogurt or omit it entirely.
  • Can I add more vegetables? Absolutely! Feel free to add any veggies you love.
  • How do I know when the chicken is cooked through? Chicken should reach an internal temperature of 165°F.
  • What if I don’t have curry powder? You can make your own spice blend using cumin, turmeric, and paprika.
  • Can I double the recipe? Yes, just ensure you have a pot large enough to accommodate the increased volume.
  • What do you serve with chicken curry? It pairs beautifully with rice, naan, or a fresh salad.

Nutrition Tips and Dietary Adaptations

This quick chicken curry is not only delicious but can also be tailored to meet various dietary needs:

  • Low-Calorie: Use non-fat Greek yogurt and skip the peanuts to reduce calories.
  • Keto-Friendly: Serve it with cauliflower rice instead of regular rice.
  • High-Protein: Add more chicken or include legumes like lentils for an extra protein boost.

Equipment Recommendations

For this recipe, here are some handy tools you might need:

  • Skillet: A large skillet is essential for sautéing and simmering.
  • Sharp Knife: A good knife makes chopping onions and garlic a breeze.
  • Measuring Cups and Spoons: Accurate measurements keep your recipe on point!
  • Spatula or Wooden Spoon: Perfect for stirring all the delicious ingredients together.

Serving Suggestions

Make your meal even more special with these serving ideas:

  • Serve over Rice: Pair with fluffy basmati rice or brown rice for a filling option.
  • Accompany with Naan: Warm naan bread is perfect for scooping up the curry.
  • Top with Fresh Herbs: A sprinkle of fresh cilantro or parsley adds a vibrant touch.
  • Side Salad: A light cucumber salad can help balance the flavors.

Now that you have all the tools and tips at your fingertips, you’re ready to create a stunning quick chicken curry that your family will ask for again and again. So happy to hear you’re taking this step toward effortless weeknight dinners! Enjoy your cooking journey, and remember, the key to a great dish is infusing it with love and creativity. Happy cooking!

Quick Chicken Curry

Prep Time 10 minutes
Cook Time 10 minutes
Total Time 20 minutes
Servings 4 servings
Calories 350
A quick and flavorful chicken curry made with simple ingredients, perfect for a weeknight dinner.

Ingredients

oil

  • 2 teaspoons extra-virgin olive oil

vegetables

  • 1 small yellow onion (chopped)
  • 2 cloves garlic (minced)

spices

  • 1 tablespoon curry powder

canned tomatoes

  • 1 14.5 oz. diced fire-roasted tomatoes (drained)

liquids

  • 1/3 cup low-sodium chicken broth (see notes)

seasonings

  • 1/2 teaspoon kosher salt
  • 1/4 teaspoon black pepper
  • 1/8 teaspoon cayenne pepper (optional)

protein

  • 1 1/2 cups cooked chicken (chopped (from a rotisserie or leftover))

dairy

  • 3/4 cup plain Greek yogurt (non-fat, 2% or 5% fat are all OK)

garnishes

  • Chopped fresh parsley or cilantro
  • Chopped peanuts (optional)

Instructions 

  • Heat olive oil in a large skillet over medium heat.
  • Add onion and sauté for 4-5 minutes, then add garlic and cook for 30 seconds.
  • Stir in curry powder, tomatoes, and chicken broth; season with salt, pepper, and cayenne. Simmer for 2-3 minutes.
  • Add cooked chicken and warm through for 1-2 minutes.
  • Turn off heat and stir in Greek yogurt. Serve garnished with parsley or cilantro and chopped peanuts.

Notes

For extra flavor, use leftover cooked chicken or rotisserie chicken.
Calories: 350kcal
Cost: $12
Course: Main Course
Cuisine: Indian
Keyword: chicken, Curry