Author

Emily

Browsing

Discover a Healthier Twist on Fettuccine Alfredo

Welcome to your next favorite dinner solution! If you’ve ever felt overwhelmed by the idea of cooking a classic dish like fettuccine alfredo, fear not! Our Skinny Fettuccine Alfredo recipe is here to save the day. This creamy, satisfying dish takes just 30 minutes to prepare, making it perfect for those busy weeknights when you still want to serve something delicious to your family. Let’s dive into why this recipe deserves a spot in your weekly meal rotation!

Why You’ll Love This Recipe

  • Rich and Creamy Flavor: Enjoy all the indulgent taste of traditional fettuccine alfredo without the guilt. This recipe retains that creamy texture we all love but lightens it up for a healthier meal.
  • Quick and Easy: With just a few simple ingredients and a cooking time of under 30 minutes, this dish is perfect for busy evenings.
  • Customizable Ingredients: Whether you’re looking to swap in gluten-free pasta, dairy-free options, or add in extra veggies, this recipe is flexible to your dietary needs.
  • Family-Friendly: With its comforting taste and familiar flavors, even picky eaters will be asking for seconds!
  • Budget-Friendly: Chicken stock, pasta, and a handful of pantry staples keep this meal affordable without sacrificing flavor.

Ingredient Breakdown

Let’s take a closer look at the ingredients that make this dish not only delicious but also healthy.

  • Fettuccine (12 ounces): This pasta is traditionally used, but feel free to substitute with whole wheat, gluten-free, or any pasta shape you prefer!
  • Extra Virgin Olive Oil or Butter (1 tablespoon): Use olive oil for a heart-healthy fat, or butter for that classic flavor.
  • Garlic (4 cloves, pressed or finely minced): Fresh garlic adds an aromatic boost to the sauce. Don’t skip this!
  • All-Purpose Flour (3 tablespoons): This helps thicken the sauce, giving it that creamy texture.
  • Chicken Stock (1 cup): Low-sodium chicken stock enhances flavor without excess sodium.
  • Low-Fat Milk (1 cup, 1% recommended): For a lighter option, this helps create the creamy sauce without heavy cream.
  • Parmesan Cheese (3/4 cup, freshly grated): Fresh cheese provides a richer flavor than pre-grated varieties.
  • Salt (1/2 teaspoon) and Black Pepper (1/4 teaspoon): Essential for seasoning!
  • Optional Toppings: Fresh parsley for garnish or extra Parmesan for those who want a little more indulgence!

Step-by-Step Instructions

Side view of a bowl of skinny fettuccine alfredo topped with chopped parsley and grated cheese.

Let’s get cooking! Follow these simple steps to whip up this delicious dish:


Colander Pasta Strainer

★ Recommended Kitchen Tool

Colander Pasta Strainer

Make this recipe even easier with a quality Colander Pasta Strainer — a must-have kitchen staple!


🛒 See Deals on Amazon →

As an Amazon Associate, we earn from qualifying purchases.
  1. Cook the Pasta: Prepare the fettuccine in a large pot of generously salted boiling water according to package directions until al dente.
  2. Prepare the Sauce: In a large sauté pan over medium-high heat, heat the olive oil (or melt the butter). Add the minced garlic and sauté for about 1 minute until fragrant.
  3. Thicken the Sauce: Sprinkle flour over the garlic and stir to combine. Sauté for another minute to cook the flour while stirring.
  4. Add Liquids: Gradually whisk in the chicken stock, ensuring there are no lumps. Then add the milk and bring the mixture to a gentle simmer.
  5. Incorporate Cheese: Once the sauce has thickened (about 1 minute), stir in the grated Parmesan cheese, salt, and pepper until melted and combined. Reduce heat to low.
  6. Combine Pasta and Sauce: Drain the cooked pasta and immediately add it to the sauté pan with the sauce. Toss to coat the pasta evenly.
  7. Serve: Plate the pasta and top with chopped fresh parsley and additional Parmesan if desired.

Pro Tips for Perfect Fettuccine Alfredo

  • Don’t Overcook the Pasta: Aim for al dente texture, as the pasta will continue to cook slightly when mixed with the sauce.
  • Use Fresh Ingredients: Always opt for fresh garlic and freshly grated Parmesan for the best flavor.
  • Whisk Constantly: When adding liquids to the sauce, whisk continuously to ensure a smooth texture without lumps.
  • Adjust Consistency: If your sauce is too thick, add a splash of pasta water or more milk to reach your desired consistency.
  • Make It Veggie-Heavy: Add in sautéed mushrooms, spinach, or broccoli for a nutritional boost and extra flavor.
  • Experiment with Protein: Feel free to add grilled chicken, shrimp, or even chickpeas for an added protein punch.
  • Make Ahead: Prepare the sauce ahead of time and store it in the fridge; just warm it up before adding the pasta.
  • Don’t Skip the Parsley: This adds color and a fresh taste that brightens up the dish.

Common Mistakes and Troubleshooting

Even the best cooks run into issues sometimes. Here are common mistakes to avoid and how to fix them:

  • Too Thick Sauce: If your sauce is too thick, simply add more low-fat milk or chicken stock until you reach your desired consistency.
  • Lumpy Sauce: If you notice lumps, continue whisking over low heat, or use an immersion blender for a smoother texture.
  • Overcooked Pasta: If your pasta is mushy, cook it less next time and keep in mind the residual heat when combining with the sauce.
  • Flavor Too Mild: Adjust your seasoning by adding more salt, pepper, or even a pinch of red pepper flakes for a kick.

Variations to Try

Looking to mix things up? Here are some exciting variations of this classic dish:

  • Garlic Shrimp Alfredo: Add sautéed shrimp to the pasta for a seafood twist.
  • Vegetable Alfredo: Toss in your favorite seasonal vegetables like zucchini, bell peppers, or asparagus.
  • Pesto Alfredo: Stir in a couple of tablespoons of prepared pesto for an herby flavor boost.
  • Spicy Alfredo: Add a teaspoon of crushed red pepper flakes or a dash of hot sauce for heat.

Storage and Make-Ahead Instructions

This dish is best served fresh, but you can store leftovers! Here’s how:

  • Refrigerate: Store leftover fettuccine alfredo in an airtight container in the fridge for up to 3 days.
  • Reheat: Gently reheat in a pan over low heat. Add a splash of milk to restore the creamy consistency.
  • Make Ahead: Prepare the sauce a day ahead and store it in the fridge. Cook the pasta fresh just before serving.

Comprehensive FAQ

  • Can I use heavy cream instead of milk? Yes, using heavy cream will create an even richer sauce, but it will increase the calorie count.
  • What type of pasta is best for alfredo? Fettuccine is traditional, but you can use any pasta shape you like!
  • Is this recipe suitable for freezing? While you can freeze the sauce, the texture may change upon reheating. Fresh pasta is always best!
  • Can I use a dairy-free milk alternative? Absolutely! Almond milk or oat milk work well for a dairy-free version.
  • How can I make this recipe gluten-free? Simply swap the pasta for a gluten-free variety and ensure your flour is certified gluten-free.
  • What can I serve with fettuccine alfredo? A crisp salad and garlic bread pair wonderfully with this dish.
  • How do I make it vegan? Use cashew cream or silken tofu in place of cheese and milk, and omit the butter.
  • Can I make this dish in advance? Yes, prepare the sauce ahead of time and cook the pasta just before serving for the best results.

Nutritional Tips and Dietary Adaptations

This Skinny Fettuccine Alfredo is designed to be a lighter version of the classic, but you can adapt it further to fit various dietary needs:

  • Lower Carb: Use spiralized zucchini or another vegetable noodle for a low-carb alternative.
  • Increased Protein: Add grilled chicken or shrimp for extra protein, making it even more filling.
  • Dairy-Free: Use almond or coconut milk and a dairy-free cheese alternative.

Essential Kitchen Equipment

To ensure a smooth cooking process, here’s a list of equipment you’ll need:

  • Large Pot: For boiling the pasta.
  • Sauté Pan: A large pan for making the sauce.
  • Whisk: Essential for combining the sauce ingredients smoothly.
  • Wooden Spoon or Tongs: For tossing the pasta in the sauce.

Serving Suggestions

To elevate your dining experience, consider serving this dish with:

  • Garlic Bread: A side of warm garlic bread complements the creaminess of the alfredo.
  • Crisp Salad: A light salad with a vinaigrette balances the richness of the pasta.
  • Wine Pairing: A glass of chardonnay or a light red wine pairs beautifully with this dish.

Conclusion

There you have it! A comprehensive guide to making a deliciously lighter version of the classic Skinny Fettuccine Alfredo. With its rich flavor and comforting texture, you won’t believe how easy it is to whip up this dish on a busy weeknight. Remember, cooking should be enjoyable and stress-free; with a few simple ingredients, you can create a family favorite that everyone will love. So, roll up your sleeves and get cooking—your dinner solution is just a recipe away!

Skinny Fettuccine Alfredo

Prep Time 10 minutes
Cook Time 15 minutes
Total Time 25 minutes
Servings 4 servings
Calories 430
A lighter take on classic Alfredo, this creamy pasta dish is quick to prepare and full of flavor.

Ingredients

Pasta

  • 12 ounces fettuccine (or any pasta shape)
  • 1 Tablespoon extra virgin olive oil or butter
  • 4 cloves garlic (pressed or finely-minced)
  • 3 Tablespoons all-purpose flour
  • 1 cup chicken stock
  • 1 cup low-fat milk (I used 1%)
  • 3/4 cup freshly-grated Parmesan cheese
  • 1/2 teaspoon salt
  • 1/4 teaspoon black pepper
  • optional chopped fresh parsley (extra Parmesan) (for topping)

Instructions 

  • Cook pasta al dente in salted water according to package instructions.
  • Heat olive oil or melt butter in a large pan. Add garlic and cook 1 minute. Stir in flour and cook 1 minute.
  • Whisk in chicken broth and milk, simmer until thickened. Stir in Parmesan, salt, and pepper.
  • Drain pasta and add to sauce. Toss to combine and serve topped with parsley if desired.

Notes

Use low-fat milk and Parmesan for a lighter dish.
Calories: 430kcal
Cost: $12
Course: Main Course
Cuisine: Italian
Keyword: pasta

Discover the Joy of Almond Crusted Chicken

Are you ready to transform a simple chicken dinner into a crunchy, flavor-packed meal that your family will adore? This almond crusted chicken recipe is not only easy to prepare, but it also brings a delightful twist to weeknight dinners. With a few straightforward ingredients, you can whip up this delicious dish that’s sure to impress even the pickiest eaters.

In this guide, we’ll explore everything from the ingredients you need to expert tips and creative variations. Whether you’re looking for a healthy meal or a quick chicken recipe to add to your rotation, you’ve come to the right place!

Why You’ll Love This Recipe

  • Quick and Easy: This almond crusted chicken can be prepped and baked in under 30 minutes, making it perfect for busy weeknights.
  • Kid-Friendly: The crunchy almond coating is a hit with kids and adults alike, ensuring a no-fuss dinner that everyone will enjoy.
  • Healthy and Nutritious: Packed with protein and healthy fats, this dish can fit into various meal plans, including keto and gluten-free diets.
  • Versatile: You can serve this recipe with a variety of sides, from salads to grains, making it adaptable for any occasion.
  • Make Ahead: Prep the chicken in advance and store it in the fridge for a quick meal ready to go when you need it.

Ingredients for Almond Crusted Chicken

Here’s what you’ll need to make this delicious chicken dish:


Air Fryer XL

★ Recommended Kitchen Tool

Air Fryer XL

Make this recipe even easier with a quality Air Fryer XL — a must-have kitchen staple!


🛒 View on Amazon →

As an Amazon Associate, we earn from qualifying purchases.
  • Cooking spray: To prevent sticking and achieve that perfect golden crust.
  • 1 cup dry roasted unsalted almonds: The star of the show that gives this dish its crunchy texture.
  • ½ cup grated Parmesan cheese: Adds a savory depth of flavor.
  • 1 teaspoon onion powder: For an added layer of taste.
  • 1 teaspoon paprika: Gives a subtle smokiness and beautiful color.
  • 1 teaspoon dried parsley: Freshens up the flavor profile.
  • ½ teaspoon salt: Enhances all the flavors.
  • ½ teaspoon black pepper: Adds a bit of spice.
  • 1 egg: Lightly beaten, acts as the binding agent for the almond coating.
  • 1½ pounds chicken cutlets: Boneless, skinless chicken breasts or thighs work best.

How to Make Almond Crusted Chicken

Side view of succulent almond crusted chicken garnished with herbs.

Follow these simple steps to create mouthwatering almond crusted chicken:

  1. Preheat your oven to 450˚F. Place a baking rack on top of a rimmed sheet pan and spray it with nonstick cooking spray.
  2. In a food processor, pulse the almonds until fine crumbs form. Transfer the almond crumbs to a shallow bowl, then mix in the Parmesan cheese, onion powder, paprika, parsley, salt, and pepper.
  3. In another shallow bowl, beat the egg. Pat the chicken dry with paper towels. Dip each cutlet in the egg, allowing excess to drip off, then coat it with the almond mixture, pressing to adhere.
  4. Place the coated cutlets on the prepared sheet pan. Repeat with remaining chicken. Spray the tops with additional nonstick spray.
  5. Bake for 15-18 minutes, flipping halfway through, until the chicken is cooked through and the coating is golden brown and crisp.

Expert Pro Tips for Perfect Almond Crusted Chicken

  • Use a food processor: This will ensure that your almond crumbs are fine enough to adhere well to the chicken.
  • Let the chicken rest: Allow the coated chicken to sit for a few minutes before baking for better adhesion of the crust.
  • Experiment with spices: Feel free to add your favorite spices to the almond mixture for a personalized touch.
  • Don’t overcrowd the pan: This ensures even cooking and prevents the crust from getting soggy.
  • Check for doneness: Use a meat thermometer to ensure the chicken reaches an internal temperature of 165˚F.
  • Try different nuts: Swap almonds for pecans or walnuts for a different flavor profile.
  • Opt for skinless chicken thighs: They remain juicy and flavorful throughout the cooking process.
  • Pair with a dipping sauce: A tangy yogurt sauce or a zesty lemon aioli complements the flavors beautifully.

Common Mistakes and Troubleshooting

Even the best cooks encounter hiccups! Here are some common mistakes and how to avoid them:

  • Not drying the chicken: Make sure to pat the chicken dry to help the coating stick better.
  • Using old nuts: Fresh almonds will provide the best flavor and texture.
  • Skipping the cooking spray: This is crucial for getting that crispy finish on the chicken.

Variations of Almond Crusted Chicken

Mix things up with these delicious variations!

  • Air Fryer Version: Cook in an air fryer for an even crispier result, reducing the cooking time to about 10-12 minutes.
  • Almond Crusted Chicken Tenders: Cut chicken into strips for kid-friendly tenders, perfect for dipping!
  • Baked Almond Chicken Parmesan: Add marinara sauce and mozzarella cheese on top before the last few minutes of baking.
  • Spicy Almond Crust: Add cayenne pepper to the almond mixture for an extra kick.

Storage and Make-Ahead Instructions

This almond crusted chicken is perfect for meal prep! Here’s how to store and reheat:

  • Refrigerate: Store leftovers in an airtight container in the fridge for up to 3 days.
  • Freeze: Freeze uncooked, coated chicken in a single layer on a baking sheet, then transfer to a freezer bag. Cook directly from frozen, adding a few extra minutes to the cooking time.
  • Reheat: To keep it crispy, reheat in the oven at 350˚F until warmed through.

Comprehensive FAQ on Almond Crusted Chicken

Got questions? We’ve got answers!

  • Can I use other nuts? Yes! Feel free to substitute with pecans or walnuts for a different flavor.
  • Is this chicken recipe suitable for meal prep? Absolutely! It’s great for making ahead of time.
  • How do I know when the chicken is done? The internal temperature should reach 165˚F.
  • Can I make this gluten-free? Yes! Ensure the Parmesan cheese is gluten-free and use gluten-free breadcrumbs if desired.
  • What can I serve with almond crusted chicken? A fresh salad, steamed veggies, or quinoa are all excellent choices.
  • Can I use chicken thighs instead of breasts? Yes! Chicken thighs remain juicy and add flavor.
  • How do I store leftovers? Keep them in an airtight container in the fridge for up to 3 days.
  • Can I make this dish dairy-free? Substitute nutritional yeast for Parmesan to make it dairy-free.

Nutritional Tips and Dietary Adaptations

This almond crusted chicken is not only delicious but can also fit into various dietary needs:

  • Keto-Friendly: Low in carbs, this recipe is perfect for a ketogenic diet.
  • Gluten-Free: Using gluten-free breadcrumbs or simply the almond crust makes it suitable for gluten-free diets.
  • Protein-Packed: Each serving provides a healthy dose of protein, essential for muscle repair and overall health.

Equipment Recommendations

Here are some tools that will make your cooking experience smoother:

  • Food Processor: A must-have for finely chopping almonds.
  • Baking Rack: This elevates the chicken for even cooking and crispiness.
  • Rimmed Sheet Pan: Keeps all the juices contained while baking.

Serving Suggestions

Pair your almond crusted chicken with:

  • Garlic Mashed Potatoes: Creamy and comforting, they complement the crunch of the chicken.
  • Steamed Green Beans: Add a bright, healthy veggie side for balance.
  • Caesar Salad: A classic side that pairs beautifully with the flavors of almond crusted chicken.

In conclusion, this almond crusted chicken recipe is a testament to how simple ingredients can create extraordinary meals. With its crispy texture and rich flavor, it’s sure to become a staple in your home. So roll up your sleeves and get ready to impress your family with this easy, delicious dish!

Almond Crusted Chicken

Prep Time 10 minutes
Cook Time 15 minutes
Total Time 25 minutes
Servings 4 pieces
Calories 350
Enjoy a crispy, flavorful chicken dish with a crunchy almond crust, perfect for a healthy dinner.

Ingredients

Cooking spray

  • 1 cup dry roasted unsalted almonds
  • ½ cup grated Parmesan cheese
  • 1 teaspoon onion powder
  • 1 teaspoon paprika
  • 1 teaspoon dried parsley
  • ½ teaspoon salt
  • ½ teaspoon black pepper
  • 1 egg lightly beaten egg
  • 1.5 pounds chicken cutlets

Instructions 

  • Preheat oven to 450˚F. Prepare a baking rack with nonstick spray.
  • Pulse almonds in a food processor until fine; mix with Parmesan, onion powder, paprika, parsley, salt, and pepper.
  • Beat the egg. Dip chicken in egg, then coat with almond mixture. Place on prepared pan.
  • Spray coated chicken with nonstick spray and bake for 15-18 minutes, flipping halfway.

Notes

Ensure chicken is cooked through and crust is golden brown before serving.
Calories: 350kcal
Cost: $15
Course: Main Course
Cuisine: American
Keyword: almond, chicken, crust

Discover the Magic of Cajun Chicken Pasta

If you’re looking for a quick and delicious weeknight dinner that the whole family will love, look no further than this creamy Cajun chicken pasta! This dish combines tender chicken, vibrant vegetables, and a rich sauce to create a meal that’s not only satisfying but also bursting with flavor. Perfect for busy evenings, it’s a recipe you’ll want to keep on repeat.

Why You’ll Love This Recipe

  • Quick to Prepare: This creamy Cajun chicken pasta can be ready in under 30 minutes, making it ideal for those hectic weeknights.
  • One-Pot Wonder: Fewer dishes mean less cleanup! Cook everything in one pan for a hassle-free meal.
  • Kid-Friendly: The creamy sauce and tender chicken make this dish appealing to even the pickiest eaters.
  • Versatile: You can easily customize it with your favorite veggies or proteins, like shrimp or sausage.
  • Meal Prep Friendly: This dish stores well and can be made ahead of time for easy reheating.

Ingredient Breakdown

Let’s dive into the ingredients that make this dish so special:

  • Chicken Breasts: Use skinless, boneless chicken breasts for a lean protein source. You can also substitute with chicken thighs for more flavor.
  • Cajun Seasoning: This key ingredient adds a smoky, spicy kick. Feel free to adjust the amount based on your spice preference.
  • Heavy Cream: For a rich and creamy sauce, use heavy cream. If you prefer a lighter option, substitute with half-and-half or a non-dairy cream.
  • Pasta: Penne works best to hold onto the sauce, but you can use any pasta shape you like.
  • Vegetables: Fresh bell peppers, onions, and mushrooms add flavor and nutrition. You can also add spinach, zucchini, or broccoli for more variety.

Pro Tips for Perfection

Juicy pieces of chicken and creamy sauce mixed with penne pasta in a bowl.
  • Marinate for Flavor: If you have time, marinate the chicken for at least 2 hours or overnight to enhance its flavor.
  • Don’t Overcook the Pasta: Cook the pasta until al dente, as it will continue to cook when mixed with the sauce.
  • Use Starchy Pasta Water: Reserve some pasta water to adjust the sauce’s consistency if it becomes too thick.
  • Rest the Chicken: Let the chicken rest before slicing to retain its juices and tenderness.
  • Adjust Seasoning: Taste the sauce before serving and adjust the seasoning as needed for the best flavor.
  • Fresh Herbs: Add fresh parsley or cilantro for a pop of color and flavor right before serving.
  • Cheese Extra: For an extra cheesy delight, sprinkle more Parmesan on top before serving.
  • Use a Non-stick Pan: This will help prevent the chicken from sticking and ensure even cooking.

Common Mistakes and Troubleshooting

Here are some common pitfalls and how to avoid them:


Digital Meat Thermometer

★ Recommended Kitchen Tool

Digital Meat Thermometer

Make this recipe even easier with a quality Digital Meat Thermometer — a must-have kitchen staple!


🛒 Check Price on Amazon →

As an Amazon Associate, we earn from qualifying purchases.
  • Dry Chicken: Overcooking chicken can lead to dryness. Aim for a golden-brown exterior and a juicy interior.
  • Too Thick Sauce: If your sauce is too thick, add reserved pasta water gradually until you reach the desired consistency.
  • Unbalanced Flavor: Taste as you go! Adjust seasoning with salt, pepper, or more Cajun seasoning as needed.
  • Sticky Pasta: Make sure to stir the pasta occasionally while cooking to prevent it from sticking together.

Variations to Try

If you want to mix it up, try these variations:

  • Seafood Cajun Pasta: Substitute chicken with shrimp or scallops for a seafood twist.
  • Vegetarian Version: Omit the chicken and add extra vegetables like zucchini, bell peppers, and spinach.
  • Spicy Cajun Chicken Pasta: Add chopped jalapeños or a dash of hot sauce for an extra kick.
  • One-Pan Cajun Chicken Pasta: Cook everything in a single pan for a true one-pot meal.

Storage and Make-Ahead Instructions

This creamy Cajun chicken pasta is perfect for meal prep. Here’s how to store it:

  • Refrigerate: Store leftovers in an airtight container in the refrigerator for up to 3 days.
  • Freeze: You can freeze the pasta for up to 2 months. Thaw overnight in the refrigerator before reheating.
  • Reheat: Reheat gently on the stovetop, adding a splash of cream or pasta water to loosen it up.
  • Make Ahead: Prepare the chicken and sauce a day in advance and toss them with freshly cooked pasta before serving.

Frequently Asked Questions

  • Can I use frozen chicken? Yes, but be sure to thaw it completely before marinating and cooking.
  • What can I substitute for Cajun seasoning? You can make your own blend using paprika, cayenne, garlic powder, and oregano.
  • Is this recipe gluten-free? To make it gluten-free, use gluten-free pasta and double-check other ingredients for gluten.
  • Can I add more vegetables? Absolutely! Feel free to add any vegetables you love or have on hand.
  • How can I make it healthier? Use whole grain pasta, reduce the cream, and add more veggies for a nutrient boost.
  • What should I serve with cajun chicken pasta? A simple salad or garlic bread pairs wonderfully with this dish.
  • Can I make this dish dairy-free? Yes! Use a dairy-free cream alternative and omit the cheese or use a dairy-free cheese.
  • How spicy is this dish? It’s mildly spicy due to the Cajun seasoning. Adjust the amount to suit your heat preference.

Nutrition Tips and Dietary Adaptations

Eating healthy doesn’t mean sacrificing flavor! Here are some tips:

  • Lean Protein: Opt for skinless chicken breasts or turkey to reduce fat content.
  • Whole Grains: Choose whole grain or legume-based pasta for added fiber and nutrients.
  • Load Up on Veggies: Incorporate more vegetables to increase the dish’s fiber and vitamins.
  • Watch the Cream: Use low-fat milk or almond milk to lighten the sauce while still keeping it creamy.

Essential Equipment Recommendations

Here’s what you’ll need to whip up this meal:

  • Large Skillet: A non-stick skillet is perfect for cooking the chicken and sauce.
  • Pot for Pasta: A large pot for boiling the pasta is essential.
  • Whisk: Useful for mixing the marinade and sauce ingredients.
  • Meat Thermometer: Ensures your chicken is cooked perfectly, reaching an internal temperature of 165°F (75°C).

Serving Suggestions

When it comes to serving this dish, presentation and accompaniments matter:

  • Fresh Herbs: Sprinkle fresh parsley or basil over the dish for a burst of color.
  • Grated Cheese: Serve with extra grated Parmesan on top for added richness.
  • Lime Wedges: A squeeze of fresh lime juice right before eating adds brightness to the flavors.
  • Garlic Bread: Pair with warm, crusty garlic bread for a complete meal.

In conclusion, this creamy Cajun chicken pasta is not just a recipe; it’s a way to make family dinners exciting and flavorful without spending hours in the kitchen. With its adaptability and ease, it stands out as a go-to dish for any busy night. I hope you enjoy making this meal as much as I do, and I can’t wait to hear how your family loves it!

Creamy Cajun Chicken Pasta

Prep Time 20 minutes
Cook Time 20 minutes
Total Time 40 minutes
Servings 4 servings
Calories 850
A flavorful and creamy Cajun chicken pasta dish perfect for a quick weeknight dinner or a special occasion.

Ingredients

Marinade & Chicken

  • 1 tbsp Lime Juice
  • 1 tbsp Olive Oil
  • 1 tbsp Cajun Seasoning
  • 1/4 tsp Salt
  • 1/4 tsp Black Pepper
  • 2 pcs Chicken Breasts (200-250g each)

Vegetables & Sauce

  • 3.5 oz Button Mushrooms (sliced)
  • 1 medium Onion (finely diced)
  • 2 small Peppers (cored & diced (red and green))
  • 2 cloves Garlic (finely diced)
  • 1 tbsp Cajun Seasoning
  • 1 tbsp Unsalted Butter
  • 1 cup Chicken Stock
  • 1 cup Heavy Cream (at room temp)
  • 10.5 oz Penne Pasta
  • 1.7 oz Parmesan (plus extra to serve)
  • 1 heaped tbsp Fresh Parsley (finely diced)

Additional Seasoning

  • to taste Salt & Black Pepper
  • as needed Olive Oil
  • optional Lime Juice (to serve)

Instructions 

  • Marinate chicken: Mix lime juice, oil, Cajun seasoning, salt, and pepper. Coat chicken and refrigerate for 2 hours or until ready.
  • Cook chicken: Bring to room temperature, then fry in a pan until lightly charred and cooked through. Rest and slice into strips.
  • Sauté vegetables and make sauce: Fry mushrooms, onion, peppers, and garlic. Add Cajun seasoning, butter, chicken stock, and cream. Simmer until thickened (~10 mins).
  • Cook pasta in salted boiling water until al dente. Drain, reserving some pasta water.
  • Combine: Add Parmesan and parsley to sauce, season, then toss with pasta and chicken. Thin with reserved pasta water if needed.

Notes

For extra flavor, garnish with additional Parmesan and parsley, and a squeeze of lime before serving.
Calories: 850kcal
Cost: $15
Course: Main Course
Cuisine: American
Keyword: Cajun, chicken, pasta

Transform Your Leftovers: The Ultimate Chicken Pot Pie with a Stuffing Twist

Are you searching for a delicious, comforting meal that can be whipped up in no time? Look no further! This Chicken Pot Pie with a unique stuffing topping is here to rescue your weeknight dinners. With its creamy filling and golden crust, this dish transforms leftover chicken into a cozy culinary experience that your whole family will adore. Perfect for busy nights, this recipe will make you feel like a kitchen superstar!

In this comprehensive guide, we’ll explore the ins and outs of making the best chicken pot pie, including tips for ingredient substitutions, expert advice, and variations to suit every taste. Let’s dive into the world of comfort food and discover how you can elevate your chicken leftovers with this delightful dish!

Why You’ll Love This Recipe

This chicken pot pie is not just another recipe; it’s a game-changer for your dinner routine. Here’s why:


Air Fryer XL

★ Recommended Kitchen Tool

Air Fryer XL

Make this recipe even easier with a quality Air Fryer XL — a must-have kitchen staple!


🛒 See Deals on Amazon →

As an Amazon Associate, we earn from qualifying purchases.
  • Quick & Easy: With minimal prep time and straightforward steps, this recipe is perfect for busy evenings.
  • Comforting Flavors: The creamy filling combined with the crispy stuffing topping creates an irresistible flavor profile.
  • Kid-Friendly: Even the pickiest eaters will love this dish—perfect for families!
  • Versatile Ingredients: Use whatever leftover chicken or turkey you have on hand, along with a variety of mixed vegetables.
  • Make Ahead & Freeze: This recipe is great for batch cooking. You can prepare it ahead of time and freeze for later!

Ingredient Breakdown & Substitutions

Understanding your ingredients is key to creating a delicious chicken pot pie. Here’s a detailed look at what you’ll need and possible substitutions:

  • Butter: Essential for sautéing and adding richness. You can use margarine or olive oil if desired.
  • Onion: Adds depth of flavor. Shallots or leeks can also be a great substitute.
  • Frozen Mixed Vegetables: Convenient and colorful! Feel free to use fresh veggies like peas, carrots, and corn instead.
  • Cream of Chicken Soup: This provides creaminess; you can use homemade cream sauce or any cream of mushroom soup as alternatives.
  • Milk: Makes the filling creamy. Almond milk or oat milk can be good dairy-free options.
  • Cooked Chicken: Shredded rotisserie chicken is perfect, but any leftover chicken or turkey will work.
  • Pie Crusts: Use store-bought for convenience or make your own for a homemade touch.
  • Prepared Stuffing: Leftover stuffing adds an amazing texture. You can also use cornbread or biscuit dough for a unique twist.

How to Make Leftover Chicken Pot Pie with Stuffing Topping

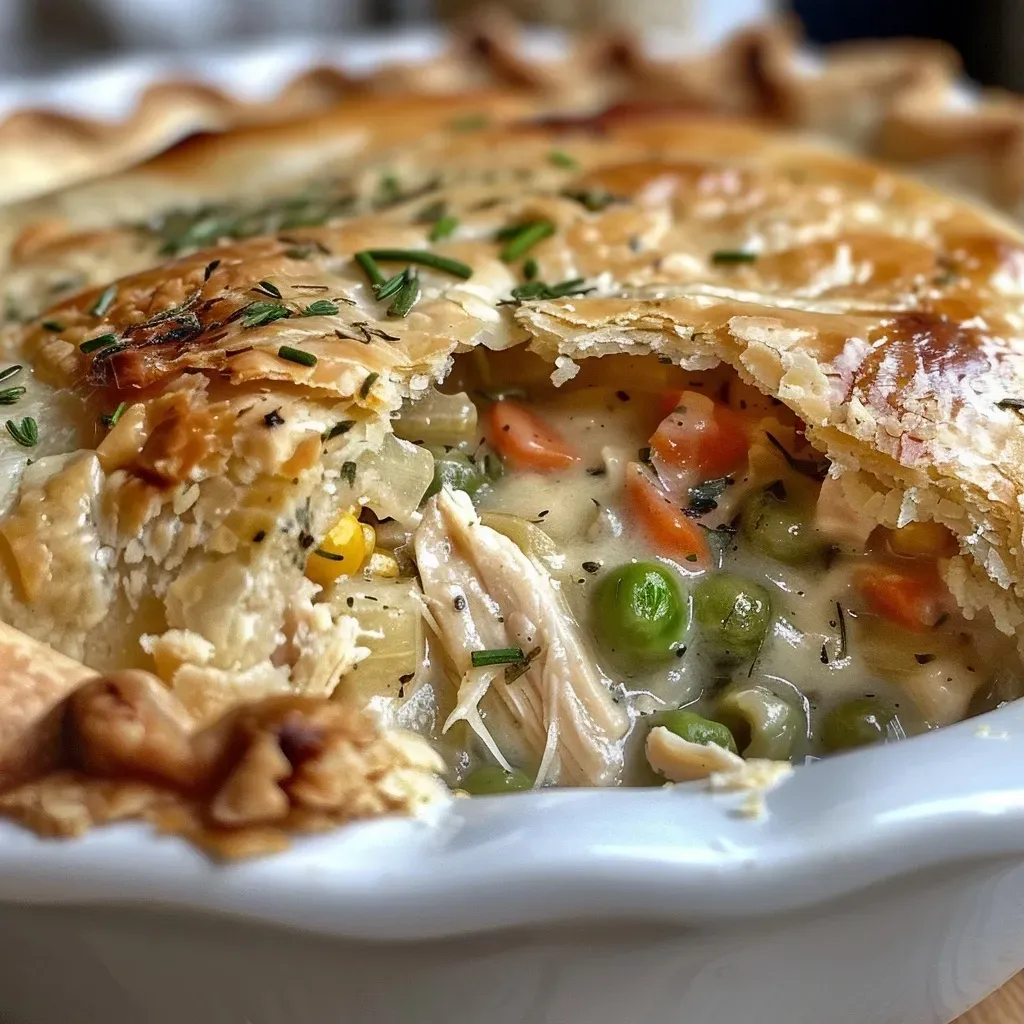
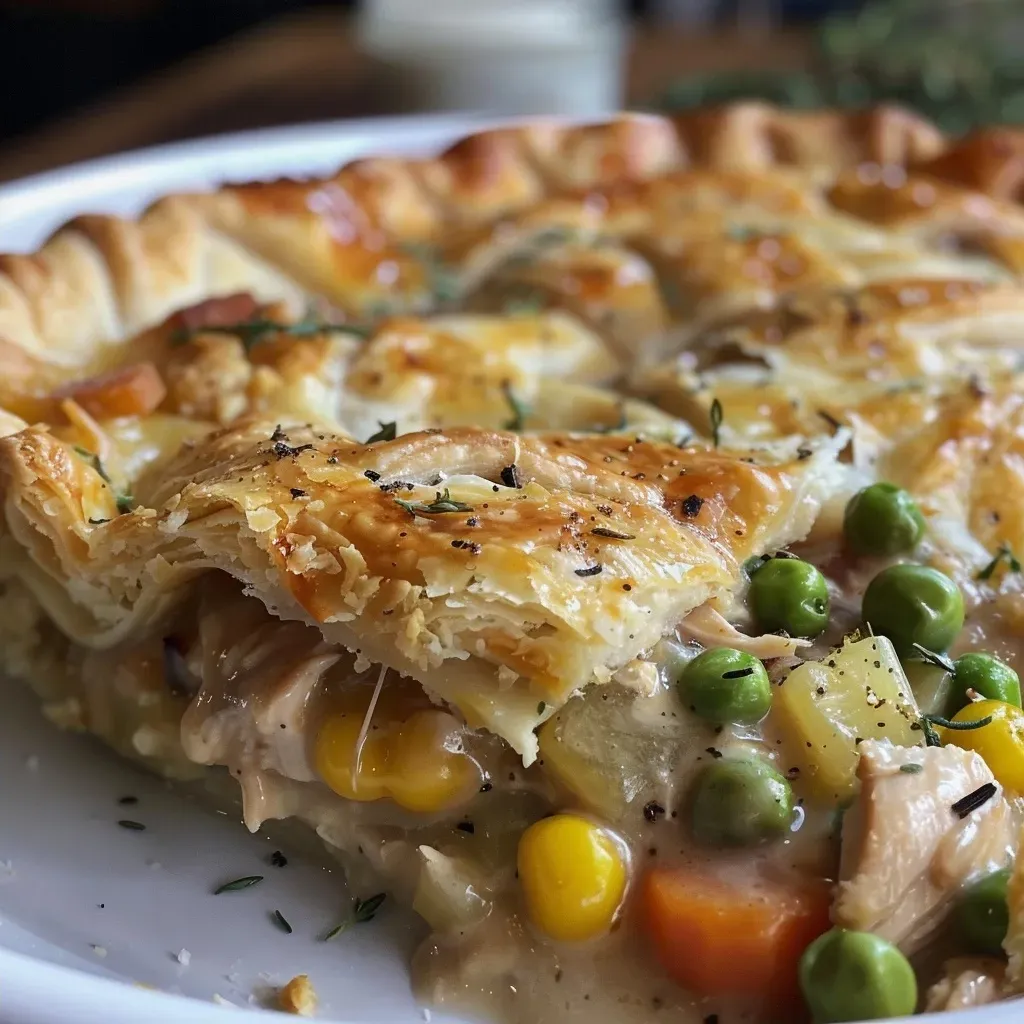
Juicy leftover chicken pot pie displayed with a golden stuffing crust.

Follow these simple steps to create your chicken pot pie:

  1. Preheat the oven to 375°F.
  2. Press one pie crust into a 9-inch pie dish and prebake for 7–8 minutes.
  3. In a large skillet, melt the butter over medium heat. Add the onion and sauté until soft.
  4. Stir in the frozen vegetables and cook for 3–4 minutes, until tender.
  5. Add the cream of chicken soup and milk, stirring until creamy and heated through.
  6. Season with salt, pepper, and thyme. Stir in the shredded chicken (or turkey).
  7. Pour the filling into the prebaked crust and spread evenly.
  8. Spoon the prepared stuffing on top, gently pressing it into an even layer.
  9. Bake for 30–35 minutes, until the stuffing is golden and the filling is bubbling.
  10. Let rest for 10 minutes before slicing and serving warm.

Pro Tips for the Best Chicken Pot Pie

To ensure your chicken pot pie turns out perfect every time, consider these expert tips:

  • Don’t Overcook the Vegetables: You want them tender but not mushy, as they’ll continue cooking in the oven.
  • Use High-Quality Chicken Broth: A flavorful broth enhances the overall taste of your filling.
  • Let the Pie Rest: Allowing the pie to rest before slicing helps the filling set and makes serving easier.
  • Experiment with Herbs: Fresh thyme, rosemary, or parsley can add a delightful freshness to your filling.
  • Perfect the Crust: Brush the top crust with egg wash for a shiny, golden finish.
  • Adjust Seasoning: Always taste your filling and adjust salt and pepper to your liking before baking.
  • Freeze for Later: This dish freezes beautifully! Assemble it, then wrap tightly and freeze before baking.
  • Use Leftover Gravy: If you have leftover gravy, mix it into the filling for added flavor.

Common Mistakes & Troubleshooting

Even the best cooks can run into issues. Here are some common mistakes to avoid and how to troubleshoot them:

  • Too Watery Filling: If your filling turns out soupy, add a bit of cornstarch mixed with water to thicken it.
  • Burnt Crust: Cover the edges of the crust with foil if they brown too quickly during baking.
  • Underseasoned Filling: Don’t forget to taste your filling and adjust seasoning before baking.
  • Dry Stuffing: If your stuffing is too dry, add a splash of chicken broth or melted butter before topping the filling.
  • Uneven Baking: Make sure your oven is properly preheated and positioned correctly to avoid hot spots.

Variations on Chicken Pot Pie

Feel free to get creative! Here are some variations to try:

  • Buffalo Chicken Pot Pie: Add buffalo sauce to the filling for a spicy kick!
  • Vegetarian Pot Pie: Replace chicken with chickpeas and use vegetable broth for a meatless option.
  • Mushroom & Spinach Pot Pie: Sauté mushrooms and spinach with the onions for added flavor and nutrition.
  • Cheesy Chicken Pot Pie: Stir in some shredded cheese into the filling for an extra creamy texture.

Storage & Make-Ahead Instructions

Planning ahead can save you time and ensure you always have a comforting meal at your fingertips:

  • Refrigerator: Store leftover chicken pot pie in an airtight container for up to 3 days.
  • Freezer: Assemble your pie, wrap tightly in plastic wrap, and freeze for up to 3 months. Bake from frozen, adding an extra 10-15 minutes to the cooking time.
  • Make Ahead: You can prepare the filling a day in advance. Just assemble and bake when ready to serve.

Frequently Asked Questions (FAQ)

Here are some common questions about making chicken pot pie:

  • Can I use raw chicken in this recipe?
    It’s best to use cooked chicken for this recipe, but if you prefer raw, sauté it in the skillet first until cooked through.
  • What can I use instead of cream of chicken soup?
    You can make your own cream sauce using butter, flour, and milk or use cream of mushroom soup as a substitute.
  • Can I make this dish gluten-free?
    Yes! Use gluten-free pie crusts and stuffing for a gluten-free version.
  • How do I know when the pie is done?
    The pot pie is done when the filling is bubbling, and the topping is golden brown.
  • What’s the best way to reheat leftovers?
    Reheat in the oven at 350°F until warmed through or in the microwave for a quick meal.
  • Can I add other vegetables?
    Absolutely! Feel free to include your favorite vegetables, such as bell peppers, zucchini, or green beans.
  • Is this recipe freezer-friendly?
    Yes! It freezes well before or after baking, just be sure to wrap it tightly.
  • How can I make this dish healthier?
    Use low-fat cream soup, whole wheat crust, and add more vegetables to boost nutrition.

Nutrition Tips & Dietary Adaptations

This chicken pot pie can be easily adapted to fit various dietary needs:

  • Low-Calorie: Use less butter, low-fat milk, and skip the bottom crust.
  • High-Protein: Add more chicken or include legumes like lentils for an extra protein boost.
  • Dairy-Free: Substitute milk with almond or coconut milk and use dairy-free stuffing.
  • Low-Carb: Use cauliflower mash as a topping instead of stuffing for a low-carb version.

Equipment Recommendations

Having the right tools can make cooking easier and more enjoyable:

  • 9-Inch Pie Dish: Essential for the perfect pot pie structure.
  • Skillet: A large skillet is ideal for sautéing the filling ingredients.
  • Mixing Bowl: For combining your filling ingredients.
  • Pastry Brush: Use for brushing egg wash on the crust for a beautiful finish.
  • Measuring Cups and Spoons: Accurate measurements ensure consistent results.

Serving Suggestions

Pair your chicken pot pie with these delightful sides:

  • Simple Green Salad: A fresh salad balances the richness of the pot pie.
  • Garlic Bread: Perfect for soaking up any delicious gravy.
  • Steamed Vegetables: Lightly seasoned veggies add color and nutrition to your meal.
  • Mashed Potatoes: For an extra comforting touch, serve with creamy mashed potatoes.

With this comprehensive guide, you’re now equipped to make the best chicken pot pie with a stuffing topping that will impress your family and friends alike. Remember, cooking is all about creativity and experimentation, so feel free to make this recipe your own. Enjoy your culinary adventure and happy cooking!

Leftover Chicken Pot Pie with Stuffing Topping

Prep Time 15 minutes
Cook Time 40 minutes
Total Time 55 minutes
Servings 6 servings
Calories 450
A comforting and easy-to-make dish that transforms leftover chicken and stuffing into a delicious pot pie with a savory topping.

Ingredients

Dairy

  • 1 stick butter
  • 1 small onion, finely diced

Frozen Vegetables

  • 1 bag frozen mixed vegetables

Canned Goods

  • 1 can cream of chicken soup
  • 1 can milk (use the empty soup can)

Seasonings

  • to taste Salt, pepper, and thyme
  • 2 cups cooked, shredded chicken (or turkey)

Pie Crusts

Stuffing

  • 2 cups prepared stuffing (leftover or from a mix)

Instructions 

  • Preheat oven to 375°F (190°C). Press one pie crust into a 9-inch dish and prebake 7-8 minutes.
  • Melt butter in a skillet, sauté onion until soft, then add vegetables and cook 3-4 minutes.
  • Stir in cream of chicken soup and milk, cook until heated. Season with salt, pepper, thyme, then add shredded chicken.
  • Pour filling into crust, top with stuffing, press gently, then bake 30-35 minutes until golden and bubbling.
  • Let rest 10 minutes before slicing and serving warm.

Notes

Using pre-made pie crusts and leftovers makes this dish quick and budget-friendly.
Calories: 450kcal
Cost: $15
Course: Main Course
Cuisine: American
Keyword: chicken, leftovers, Pot Pie

Warm Up with This Comforting Chicken Tortellini Soup

If you’re looking for a cozy, satisfying meal that comes together in no time, you’ve landed in the right place! This Chicken Tortellini Soup is ideal for busy weeknights, combining juicy chicken, fresh vegetables, and creamy tortellini in one pot or slow cooker. It’s everything you need for a nourishing dinner that your whole family will love.

Why You’ll Love This Recipe

  • One-Pot Wonder: This recipe simplifies dinner prep, allowing you to spend less time in the kitchen and more time with your loved ones.
  • Quick & Easy: With minimal prep, you can have a delicious meal ready in about 30 minutes on the stovetop or a few hours in the slow cooker.
  • Customizable: Use whatever vegetables you have on hand or swap out the chicken for your favorite protein—this soup is versatile!
  • Kid-Approved: Packed with flavors and textures that appeal to all ages, from tender chicken to cheesy tortellini, it’s sure to be a hit.
  • Make-Ahead Friendly: This soup stores well, making it perfect for meal prep or leftovers.

Ingredients You’ll Need

Gather the following ingredients for your Chicken Tortellini Soup. Feel free to make substitutions based on what you have available!

  • 1 small white onion: Diced for flavor.
  • 1 cup diced celery: Adds crunch and nutrition.
  • 2 cups diced carrots: Sweetness and color.
  • 1 teaspoon no salt added Italian seasoning: For a flavor boost.
  • 1 teaspoon kosher salt: Adjust to taste.
  • 1 quart chicken broth: Use low-sodium for a healthier option.
  • 1 cup water: Helps adjust the soup’s consistency.
  • 1½ pounds boneless skinless chicken breasts or thighs: Choose based on preference.
  • 1 (9-ounce) package fresh cheese tortellini: The star of the soup!
  • ¼ cup cream: Adds richness and creaminess.

Step-by-Step Instructions

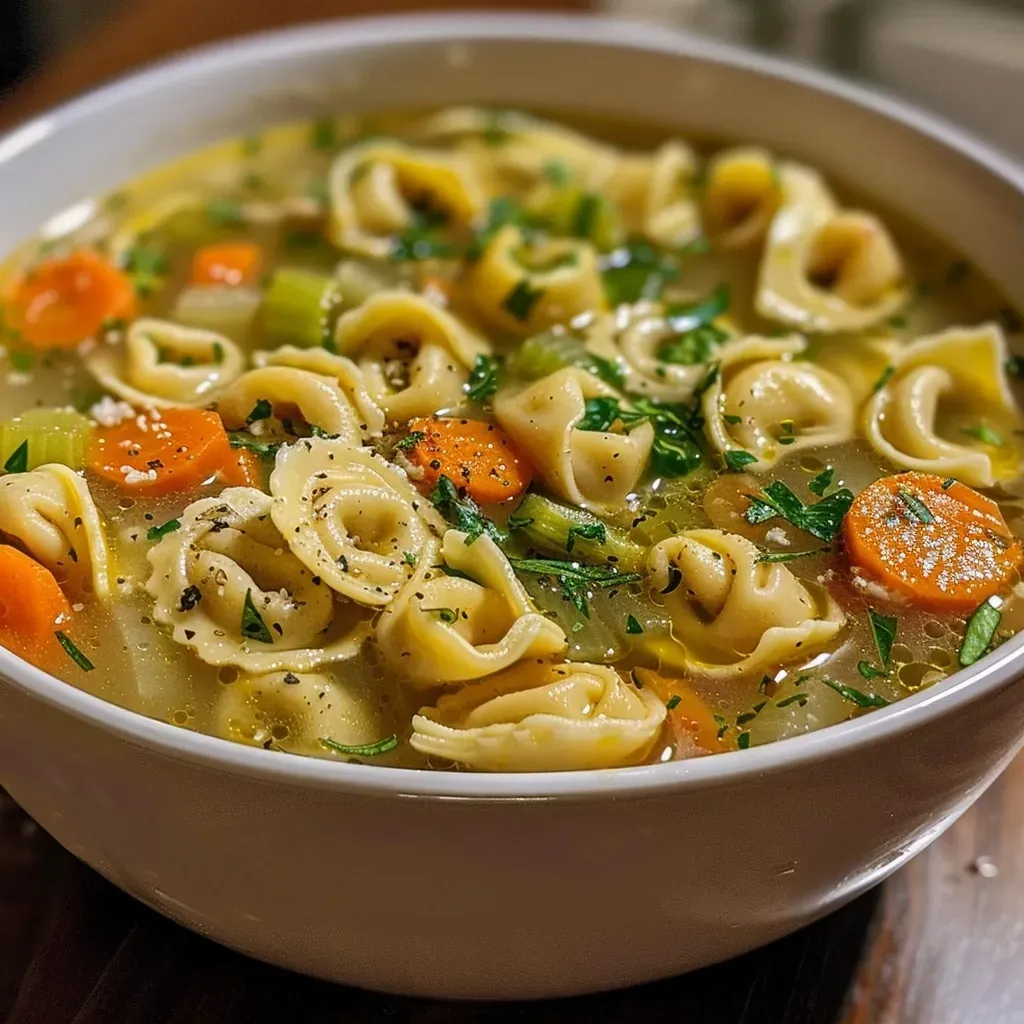
Delicious Easy Chicken Tortellini Soup in a bowl, with glistening tortellini and vegetables.

Stovetop Method

  • Step 1: In a large pot over medium heat, sauté the diced onion, celery, and carrots until soft, about 5-7 minutes.
  • Step 2: Add the chicken breast or thighs to the pot, followed by the chicken broth, water, Italian seasoning, and kosher salt. Bring to a boil.
  • Step 3: Reduce heat and let simmer for 15-20 minutes or until the chicken is fully cooked.
  • Step 4: Remove the chicken, shred it using two forks, and return it to the pot.
  • Step 5: Add the tortellini and cook for 5-7 minutes until they float to the top. Stir in the cream just before serving.

Slow Cooker Method

  • Step 1: Place onion, celery, carrots, chicken, broth, water, Italian seasoning, and salt in the slow cooker. Stir to combine.
  • Step 2: Cover and cook on low for 6-7 hours or high for 3-4 hours.
  • Step 3: About 30 minutes before serving, shred the chicken and return it to the slow cooker. Add the tortellini and cream, then cover and cook until the tortellini is tender.

Expert Tips for Perfect Soup

  • Fresh vs. Frozen Tortellini: If you use frozen tortellini, add them directly to the soup without thawing for best results.
  • Texture Matters: For a creamier soup, let it simmer longer after adding the cream.
  • Veggie Variations: Feel free to toss in spinach, kale, or other vegetables for added nutrition.
  • Flavor Boost: A splash of lemon juice or a sprinkle of Parmesan cheese at the end can elevate the flavors.
  • Storage Tip: Store the soup in an airtight container in the fridge for up to 3 days or freeze for up to 3 months.

Common Mistakes and How to Avoid Them

  • Overcooking Chicken: Keep an eye on the chicken to prevent it from becoming dry. Use a meat thermometer to ensure it reaches 165°F.
  • Too Much Salt: Start with less salt, especially if using store-bought broth, as it can be quite salty.
  • Chewy Tortellini: Avoid overcooking the tortellini; they should float and be tender but not mushy.
  • Leftover Soup Texture: The tortellini can absorb the broth; store them separately to maintain texture.

Delicious Variations to Try

  • Vegetarian Version: Substitute chicken with vegetable broth and add chickpeas for protein.
  • Spicy Kick: Add red pepper flakes or diced jalapeños for heat.
  • Herb-Infused: Experiment with fresh herbs like basil or parsley for a fresh taste.
  • Cheesy Delight: Incorporate shredded mozzarella or Parmesan for a cheesier soup.

Storage and Make-Ahead Instructions

This Chicken Tortellini Soup is perfect for meal prep! Store leftovers in an airtight container in the refrigerator for up to 3 days. If freezing, allow the soup to cool completely before transferring it to freezer-safe containers. It can be frozen for up to 3 months. To reheat, thaw in the fridge overnight and warm on the stovetop or microwave.


Nonstick Grill Pan

★ Recommended Kitchen Tool

Nonstick Grill Pan

Make this recipe even easier with a quality Nonstick Grill Pan — a must-have kitchen staple!


🛒 Check Price on Amazon →

As an Amazon Associate, we earn from qualifying purchases.

Frequently Asked Questions

  • Can I use rotisserie chicken? Absolutely! It’s a great time-saver and adds extra flavor.
  • What vegetables can I add? Feel free to add any veggies you like, such as peas, green beans, or zucchini.
  • Can I make this soup dairy-free? Yes! Omit the cream or use a non-dairy milk alternative.
  • How long does the soup last? In the fridge, it lasts about 3 days. In the freezer, up to 3 months.
  • Can I add pasta instead of tortellini? Yes, but adjust cooking times as pasta may take longer to cook.
  • Is this soup gluten-free? Use gluten-free tortellini and broth to make it gluten-free.
  • Can I use frozen vegetables? Yes, frozen vegetables are a convenient option and will work perfectly in this recipe.
  • What can I serve with this soup? A side salad or crusty bread makes a wonderful pairing!

Nutritional Tips and Dietary Adaptations

This Chicken Tortellini Soup can be tailored to fit various dietary needs:

  • Low-Carb: Substitute tortellini with zucchini noodles or cauliflower rice.
  • High-Protein: Add more chicken or include beans for extra protein.
  • Lower-Fat: Use less cream or substitute with Greek yogurt.
  • Whole Grain: Choose whole-grain tortellini for added fiber.

Equipment Recommendations

To make this soup, you’ll need:

  • Large Pot or Dutch Oven: Ideal for stovetop cooking.
  • Slow Cooker: Perfect for set-and-forget convenience.
  • Meat Thermometer: Ensures your chicken is cooked safely.
  • Cutting Board and Knife: For easy prep of your vegetables.

Serving Suggestions

Serve this comforting soup hot, garnished with fresh herbs or a sprinkle of Parmesan cheese. A side of crusty bread or a simple green salad pairs beautifully to complete the meal.

Now that you have all the tools and tips, you’re ready to create a delicious, warming bowl of Chicken Tortellini Soup. Enjoy your cooking, and happy eating! Remember, cooking is all about experimentation—so don’t be afraid to make it your own!

Easy Chicken Tortellini Soup (One-Pot or Slow Cooker)

Prep Time 10 minutes
Cook Time 30 minutes
Total Time 40 minutes
Servings 4 servings
Calories 450
This comforting chicken tortellini soup is quick to prepare and perfect for a cozy meal, combining tender chicken, fresh vegetables, and cheesy tortellini in a flavorful broth.

Ingredients

Vegetables

  • 1 small white onion (small diced)
  • 1 cup diced celery
  • 2 cup diced carrot

Seasonings

  • 1 teaspoon no salt added Italian seasoning
  • 1 teaspoon kosher salt

Broth and Water

  • 1 quart chicken broth
  • 1 cup water

Main Protein

  • 1.5 pounds boneless skinless chicken breasts (or thighs)
  • 1 9-ounce package fresh cheese tortellini
  • ¼ cup cream

Instructions 

  • Sauté diced onion, celery, and carrots in a large pot until tender.
  • Add chicken broth, water, Italian seasoning, and salt; bring to a boil.
  • Add chicken breasts and cook until fully cooked, then shred or dice.
  • Stir in tortellini and cook until tender, about 5 minutes.
  • Stir in cream and adjust seasoning as needed before serving.

Notes

For a richer flavor, use homemade broth or add fresh herbs.
Calories: 450kcal
Cost: $15
Course: Soup
Cuisine: American
Keyword: chicken, Tortellini

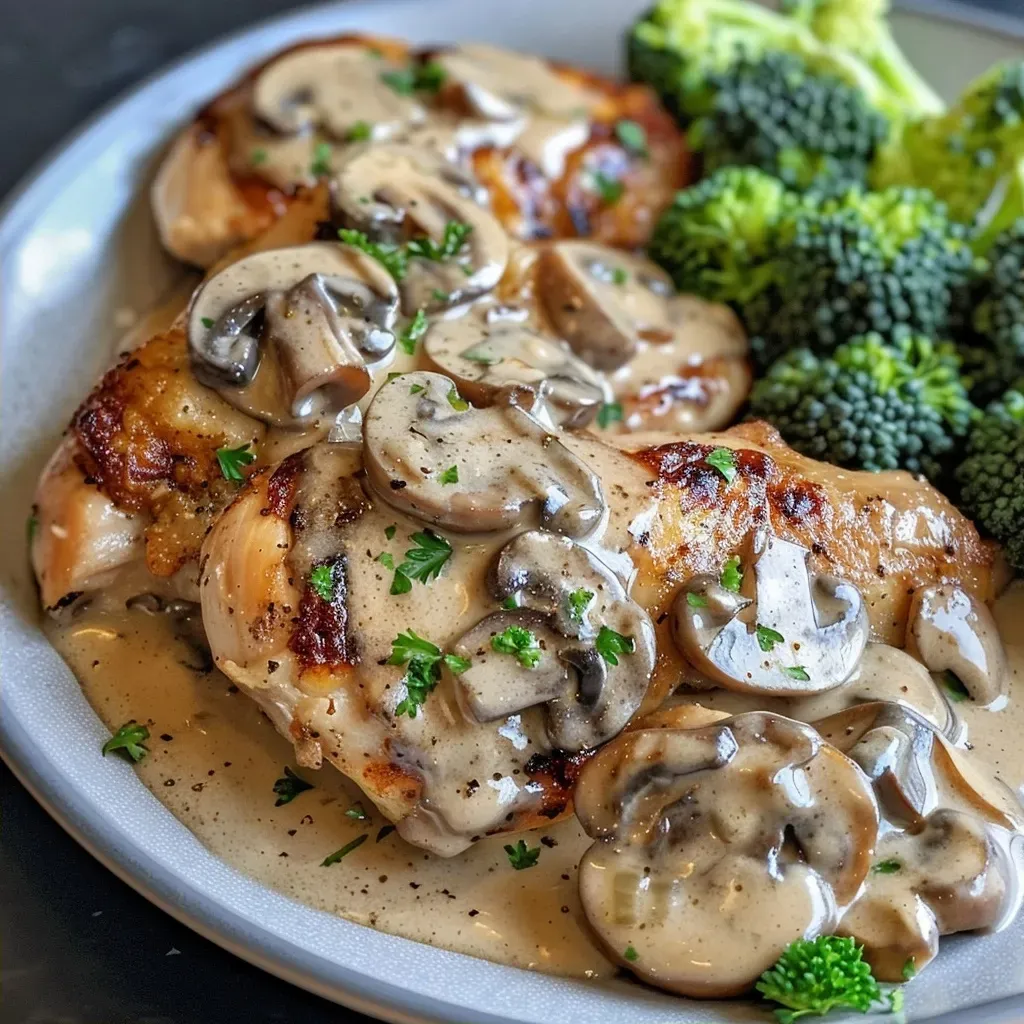
Welcome to your new go-to recipe for busy weeknights! This creamy mushroom chicken dish is not only quick and easy to prepare but also packed with flavor that will delight your family and friends. With simple, everyday ingredients, you can transform humble chicken breasts into a deliciously satisfying meal that feels gourmet. Let’s dive into why this recipe is perfect for you and how to make it shine in your kitchen.

Why You’ll Love This Recipe

  • Time-Saving: Ready in just 30 minutes, making it ideal for those hectic evenings.
  • One-Pan Wonder: Minimal cleanup with everything cooked in one pan – a lifesaver for busy cooks!
  • Customizable: Easily adapt this recipe with different vegetables or proteins to suit your family’s tastes.
  • Healthy and Wholesome: Packed with lean protein and nutrients, especially when served with steamed broccoli.
  • Kid-Friendly: Creamy and flavorful, this dish appeals to picky eaters, making dinner stress-free.

Ingredients Breakdown

Here’s what you need to make this creamy mushroom chicken:

  • Spray Olive Oil: A healthier option for frying. You can use regular olive oil if preferred.
  • Chicken Breasts: Use skinless, boneless chicken breasts (200g/7oz each) for a lean protein source. Chicken thighs can add extra juiciness.
  • Onion: Half an onion, finely chopped, adds depth to the flavor profile.
  • Garlic: One fat garlic clove, crushed, enhances the savory taste.
  • Mushrooms: 100g/3½oz of sliced mixed or chestnut mushrooms provide a rich, earthy flavor.
  • Chicken Stock: 250ml/9fl oz, made from half a stock cube, is essential for the sauce.
  • Salt and Pepper: To taste, ensuring the seasoning brings out the flavors.
  • Half-Fat Crème Fraîche: 100ml/3½fl oz creates a creamy texture without full-fat calories.
  • Fresh Parsley: For garnish, adding a pop of color and freshness.
  • Broccoli: 300g/10½oz, steamed, serves as a nutritious side dish.

Feel free to switch out ingredients based on what you have available. For example, if you don’t have crème fraîche, you can substitute it with Greek yogurt or sour cream for a similar creamy effect.


Digital Meat Thermometer

★ Recommended Kitchen Tool

Digital Meat Thermometer

Make this recipe even easier with a quality Digital Meat Thermometer — a must-have kitchen staple!


🛒 View on Amazon →

As an Amazon Associate, we earn from qualifying purchases.

How to Make Creamy Mushroom Chicken: Step-by-Step

Let’s get started with the cooking process!

  • Step 1: Heat the spray oil in a non-stick frying pan over medium heat. Add the chicken breasts and fry for about 10 minutes, or until well browned on both sides. Remove from the pan and set aside.
  • Step 2: In the same pan, add a little more oil if needed, and fry the chopped onion for 2-3 minutes until translucent. Stir in the crushed garlic and cook for another 1-2 minutes.
  • Step 3: Add the sliced mushrooms to the pan and cook until golden-brown. If they start to stick, stir in a little chicken stock to deglaze.
  • Step 4: Return the chicken to the pan, pour in the remaining chicken stock, and bring to a boil. Cover with a tight-fitting lid, reduce the heat, and simmer for 12-15 minutes, or until the chicken is cooked through. Season with salt and pepper.
  • Step 5: While the chicken is cooking, steam the broccoli in boiling salted water until tender.
  • Step 6: Stir the crème fraîche and chopped parsley into the sauce, mixing well, and serve immediately with the steamed broccoli.

Pro Tips for the Perfect Creamy Mushroom Chicken

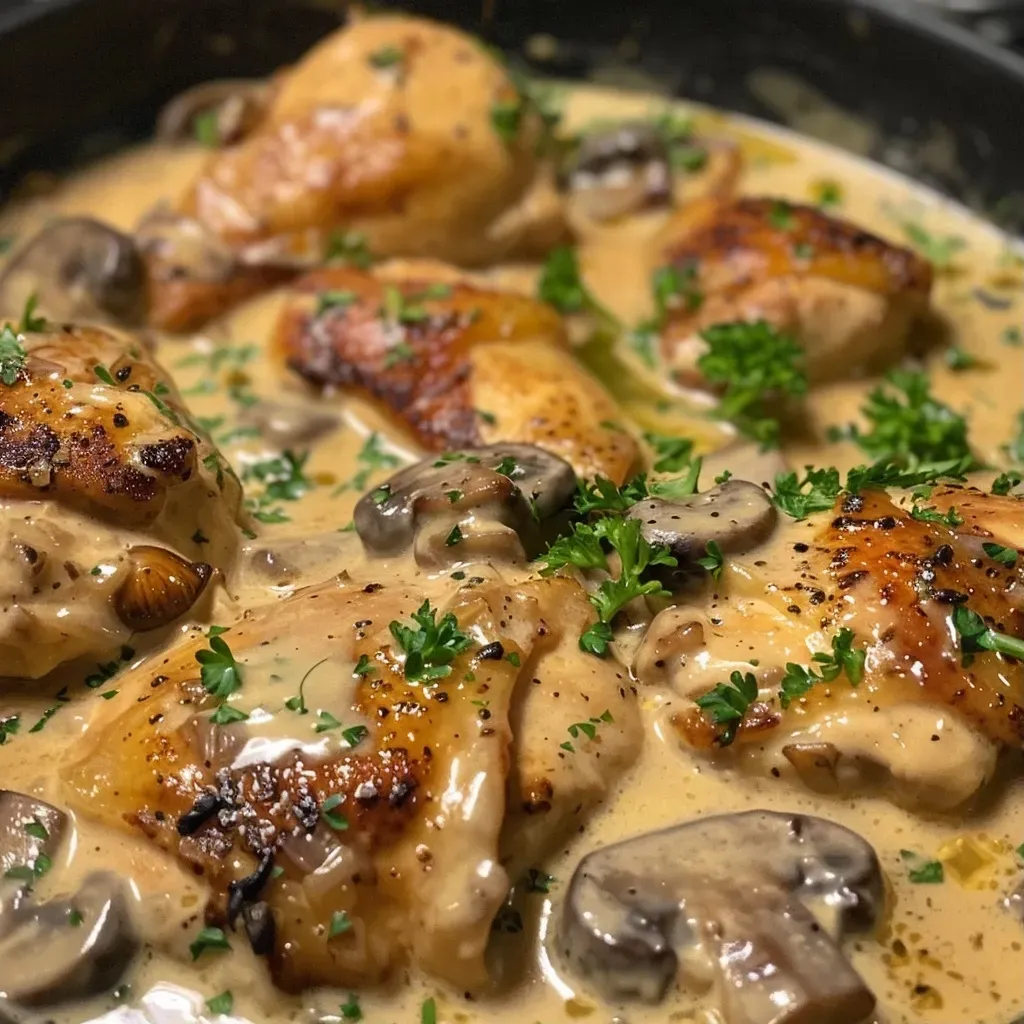
Juicy chicken breasts in a creamy mushroom sauce, garnished with parsley.
  • Even Cooking: Make sure to use chicken breasts of similar size to ensure even cooking.
  • Flavor Boost: Add a splash of white wine after cooking the mushrooms for an extra depth of flavor.
  • Texture Matters: For a silkier sauce, whisk the crème fraîche in before adding it to the pan.
  • Fresh Herbs: Experiment with different herbs, like thyme or rosemary, for a unique twist.
  • Don’t Rush: Allow the chicken to simmer gently to absorb the flavors fully.
  • Use Leftovers: This dish reheats beautifully, making it great for meal prep.
  • Alternative Cooking Method: For a quick air-fried option, cook the chicken in an air fryer for about 12 minutes at 375°F (190°C).
  • Pair Wisely: Serve over rice or pasta for a heartier meal.

Common Mistakes and Troubleshooting

Every cook faces challenges. Here are some common mistakes and how to avoid them:

  • Overcooking Chicken: Ensure your chicken is cooked to 165°F (75°C) but avoid overcooking, which can dry it out.
  • Too Thin Sauce: If the sauce is too thin, let it simmer uncovered for a few extra minutes to thicken.
  • Burnt Garlic: Garlic can burn quickly; add it after the onions are translucent to avoid bitterness.
  • Mushrooms Too Soggy: Ensure your mushrooms are dry before cooking to prevent excess moisture.

Variations to Try

  • Herb Chicken: Add fresh herbs like thyme or oregano for a fragrant touch.
  • Spicy Kick: Incorporate red pepper flakes or a dash of hot sauce for heat.
  • Vegetarian Option: Substitute chicken with firm tofu or seitan for a plant-based delight.
  • Cheesy Delight: Stir in grated Parmesan cheese for a richer flavor profile.

Storage and Make-Ahead Instructions

This creamy mushroom chicken is perfect for meal prep! Here’s how to store and reheat:

  • Refrigeration: Store leftovers in an airtight container in the fridge for up to 3 days.
  • Freezing: Freeze portions for up to 2 months. Thaw in the refrigerator before reheating.
  • Reheating: Gently reheat in the microwave or on the stove over low heat, adding a splash of chicken stock to revive the sauce.

Comprehensive FAQ

  • Can I use frozen chicken? Yes, just ensure it’s fully thawed before cooking for even results.
  • What mushrooms are best for this recipe? Cremini or button mushrooms work wonderfully, but feel free to mix them up!
  • Can I use heavy cream instead of crème fraîche? Absolutely! Just be mindful of the richness.
  • How can I make this dish dairy-free? Substitute crème fraîche with coconut cream or a dairy-free alternative.
  • What sides pair well with creamy mushroom chicken? Steamed vegetables, rice, or a fresh salad complement the dish perfectly.
  • Is this recipe suitable for meal prep? Yes, it stores well and can be reheated for quick lunches!
  • Can I double the recipe? Definitely! Just ensure your pan is large enough to accommodate all the ingredients.
  • How do I know when the chicken is done? Use a meat thermometer to check for an internal temperature of 165°F (75°C).

Nutrition Tips and Dietary Adaptations

This recipe is not only delicious but also offers health benefits:

  • Low-Calorie Option: Use skinless chicken breasts and half-fat crème fraîche to keep calories in check.
  • Increased Fiber: Serve with whole grain rice or add lentils for a fiber boost.
  • Low-Carb Version: Skip the starchy sides and load up on veggies for a keto-friendly meal.

Essential Equipment Recommendations

To make your cooking experience smoother, here’s what I recommend:

  • Non-Stick Frying Pan: Essential for easy cooking and cleanup.
  • Meat Thermometer: For perfect chicken every time.
  • Steamer Basket: To steam your vegetables quickly and healthily.

Serving Suggestions

To elevate your meal, consider these serving ideas:

  • Garnish: Top with fresh parsley or chives for a pop of color.
  • Accompaniments: Serve with crusty bread to soak up the creamy sauce.
  • Wine Pairing: A light white wine, such as Sauvignon Blanc, pairs beautifully with this dish.

With this creamy mushroom chicken recipe, you’re well on your way to mastering a versatile dish that will impress at the dinner table. Whether it’s a casual family night or a special occasion, this meal combines ease and elegance. Enjoy the cooking process and the delicious results!

Creamy mushroom chicken

Prep Time 10 minutes
Cook Time 25 minutes
Total Time 35 minutes
Servings 2 servings
Calories 450
A delicious and creamy chicken dish with mushrooms and broccoli, perfect for a quick and satisfying meal.

Ingredients

oil

  • 2 tbsp spray olive oil
  • 2 pieces chicken breasts, skinless and trimmed (200g/7oz each)
  • 0.5 piece onion, finely chopped
  • 1 clove garlic, crushed
  • 100 g mushrooms, sliced (mixed or chestnut)
  • 250 ml chicken stock (made with half a stock cube)
  • to taste salt and pepper
  • 100 ml half-fat crème fraîche
  • 1 tbsp freshly chopped parsley (for garnish)
  • 300 g broccoli, steamed (to serve)

Instructions 

  • Heat oil in a pan, cook chicken for 10 minutes until browned. Set aside.
  • In the same pan, cook onion for 2-3 minutes, add garlic and mushrooms, cook until golden.
  • Return chicken to pan, add stock, bring to boil, cover and simmer for 12-15 minutes.
  • Meanwhile, steam broccoli until tender.
  • Stir crème fraîche and parsley into sauce, serve with broccoli.

Notes

For extra flavor, add a splash of white wine during cooking.
Calories: 450kcal
Cost: $15
Course: Main Course
Cuisine: International
Keyword: chicken, creamy, mushrooms

Welcome to your new favorite weeknight dinner solution! This creamy chicken casserole is the epitome of comfort food, designed for those hectic nights when you want something delicious without spending hours in the kitchen. Packed with flavor and made with wholesome ingredients, this dish is sure to become a family favorite. Whether you’re a seasoned cook or just starting out, you’ll find that this recipe simplifies meal prep while delivering satisfying results.

Why You’ll Love This Recipe

  • Quick and Easy: With just a few simple steps, you can have a hearty meal on the table in under an hour.
  • Kid-Friendly: The creamy texture and cheesy goodness make it a hit with even the pickiest eaters.
  • Versatile Ingredients: You can easily substitute ingredients based on what you have on hand.
  • Make-Ahead Friendly: Prepare it in advance and store it in the fridge for easy reheating later.
  • Comforting and Delicious: The blend of tender chicken, creamy sauce, and crispy topping creates a dish that feels like a warm hug.

Ingredient Breakdown

Let’s take a closer look at the ingredients you’ll need for this creamy chicken casserole, along with possible substitutions to suit your taste or dietary needs:

  • 12 ounces egg noodles: Feel free to swap for whole wheat or gluten-free pasta.
  • 1/4 cup butter: This can be replaced with olive oil or a dairy-free alternative for a healthier option.
  • 1/2 medium white onion (diced): Yellow or red onions work well if you prefer a different flavor profile.
  • 3 teaspoons minced garlic: Fresh garlic is best, but garlic powder can be used in a pinch.
  • 1/4 cup all-purpose flour: For a gluten-free version, use a gluten-free flour blend.
  • 2 cups chicken broth: Homemade or store-bought, low-sodium broth is ideal.
  • 2 cups milk: Any milk (dairy or plant-based) will work.
  • 1/4 teaspoon salt and black pepper: Adjust to taste.
  • 2 cups frozen peas: You can substitute with corn or green beans if preferred.
  • 1 pound shredded cooked chicken: Rotisserie chicken is a great time-saver, or you can use leftover chicken.
  • 2 cups shredded cheddar cheese: Swap for mozzarella or a non-dairy cheese for a different flavor.
  • 1 cup crushed Ritz crackers: Any buttery cracker will do, or use breadcrumbs for a different texture.
  • 1/4 cup grated parmesan cheese: Optional, but adds a nice depth of flavor.
  • 2-3 teaspoons olive oil: This helps to crisp up the topping.

How to Make Creamy Chicken Casserole

Now that you have all your ingredients ready, let’s walk through the simple steps to create this delicious casserole:


Air Fryer XL

★ Recommended Kitchen Tool

Air Fryer XL

Make this recipe even easier with a quality Air Fryer XL — a must-have kitchen staple!


🛒 Check Price on Amazon →

As an Amazon Associate, we earn from qualifying purchases.
  1. Preheat your oven to 400°F (200°C). Lightly grease a 9×13-inch baking dish.
  2. Cook the egg noodles according to package directions. Drain and transfer them to the prepared baking dish.
  3. In a medium saucepan, melt the butter over medium heat. Add the diced onion and sauté for 5–7 minutes until softened.
  4. Stir in the minced garlic and flour, cooking for 1 minute to create a roux.
  5. Gradually whisk in the chicken broth and milk, seasoning with salt and pepper. Bring to a simmer, stirring constantly until the mixture thickens (about 3–5 minutes).
  6. Once thickened, stir in the peas, cheddar cheese, and shredded chicken until the cheese melts completely. Pour the sauce over the cooked noodles in the baking dish.
  7. In a small bowl, mix the crushed Ritz crackers, parmesan cheese, and olive oil. Sprinkle the mixture evenly over the casserole.
  8. Bake uncovered for 15–20 minutes, or until the topping is lightly browned. Serve hot and enjoy!

Expert Pro Tips

Side view of a golden-brown creamy chicken casserole with melted cheese and peas.
  • Season Generously: Don’t skimp on seasoning your chicken and sauce. This is crucial for enhancing the overall flavor of the casserole.
  • Sear Properly: If you’re using raw chicken, sear it first for the best flavor before shredding it into the dish.
  • Don’t Rush the Roux: Allow the roux to cook slightly before adding liquids to develop a deeper flavor.
  • Customize Your Vegetables: Feel free to add your favorite veggies like broccoli or bell peppers for added nutrition.
  • Check Consistency: If the sauce is too thick, add a splash more milk or broth to reach your desired consistency.
  • Use Leftovers: This is a great recipe to repurpose leftover chicken or turkey!
  • Make it Cheesy: For an extra cheesy flavor, consider adding more cheese to the top or mixing different cheese varieties.
  • Watch the Baking Time: Keep an eye on the casserole in the oven; every oven is different, and you don’t want it to overbake!

Common Mistakes and Troubleshooting

Even the best cooks can face challenges. Here are some common mistakes and how to avoid them:

  • Overcooking the Noodles: Cook them just until al dente, as they will continue to cook in the oven.
  • Lumpy Sauce: Whisk continuously when adding liquids to avoid lumps forming in your sauce.
  • Dry Casserole: Ensure enough sauce is present to keep the dish moist; if too dry, add more broth or milk.
  • Burnt Topping: If the cracker topping is browning too quickly, cover the casserole with foil until the end of baking.

Variations to Explore

This casserole is incredibly versatile! Here are some delicious variations to try:

  • Buffalo Chicken Casserole: Add buffalo sauce and blue cheese for a spicy twist.
  • Vegetarian Option: Replace chicken with chickpeas or tofu and add more vegetables.
  • Mexican Chicken Casserole: Incorporate black beans, corn, and taco seasoning for a flavorful flair.
  • Herbed Mushroom Casserole: Add sautéed mushrooms and fresh herbs like thyme or rosemary for an earthy taste.

Storage and Make-Ahead Instructions

This casserole is perfect for meal prep! Here’s how to store and reheat:

  • Refrigerate: Store leftovers in an airtight container in the fridge for up to 4 days.
  • Freezing: This casserole freezes well! Store in a freezer-safe container for up to 3 months.
  • Reheating: For best results, reheat in the oven at 350°F (175°C) until warmed through. You can also use the microwave, but the texture may vary.

Frequently Asked Questions (FAQs)

  • Can I use raw chicken in this recipe? Yes, just ensure it’s cooked through before serving.
  • Can I make this casserole gluten-free? Absolutely! Use gluten-free pasta and flour.
  • What can I serve with this casserole? A simple side salad or steamed veggies pairs perfectly!
  • Can I prepare this ahead of time? Yes, you can assemble it and store it in the fridge until ready to bake.
  • How do I know when it’s done? The casserole is done when it’s bubbly and the topping is golden brown.
  • Can I substitute the cheese? Yes! Feel free to use your favorite cheese or a dairy-free alternative.
  • How can I make it creamier? Add more cheese or a splash of cream to the sauce.
  • Is it possible to make this in a slow cooker? Yes, combine all ingredients in a slow cooker and cook on low for 4-6 hours.

Nutrition Tips and Dietary Adaptations

This creamy chicken casserole can be adapted to fit a variety of dietary needs:

  • Dairy-Free: Use plant-based butter and milk substitutes.
  • Lower Carb: Substitute pasta with zucchini noodles or cauliflower rice.
  • Protein-Rich: Add beans or legumes for an extra protein boost.

Essential Equipment

  • 9×13-inch baking dish: Perfect size for this casserole.
  • Medium saucepan: For preparing the creamy sauce.
  • Wooden spoon or spatula: Great for mixing ingredients.
  • Measuring cups and spoons: Ensure accurate measurements for best results.

Serving Suggestions

Pair this flavorful casserole with:

  • Fresh Salad: A crisp green salad adds freshness to the meal.
  • Garlic Bread: Serve alongside garlic bread for a comforting touch.
  • Steamed Vegetables: Broccoli or green beans are excellent for adding color and nutrition.

In conclusion, the ultimate creamy chicken casserole is not only a family favorite but also a versatile dish that you can customize to your liking. With the right ingredients and a bit of creativity, you can make weeknight dinners enjoyable and stress-free. So, roll up your sleeves and get ready to impress your loved ones with this delicious, comforting meal. Happy cooking!

Creamy Chicken Casserole

Prep Time 15 minutes
Cook Time 20 minutes
Total Time 35 minutes
Servings 6 servings
Calories 650
A comforting and cheesy baked chicken casserole with peas and a crispy cracker topping, perfect for family dinners.

Ingredients

Pasta

  • 12 ounces egg noodles
  • 1/4 cup butter
  • 1/2 medium white onion (diced)
  • 3 teaspoons minced garlic
  • 1/4 cup all-purpose flour
  • 2 cups chicken broth
  • 2 cups milk
  • 1/4 teaspoon salt
  • 1/4 teaspoon black pepper
  • 2 cups frozen peas
  • 1 pound shredded cooked chicken
  • 2 cups shredded cheddar cheese
  • 1 cup crushed Ritz crackers
  • 1/4 cup grated parmesan cheese
  • 2-3 teaspoons olive oil

Instructions 

  • Cook noodles, then set aside.
  • Make sauce: sauté onion and garlic in butter, add flour, then whisk in broth and milk until thickened.
  • Stir in peas, chicken, and cheese into sauce, then combine with cooked noodles.
  • Pour mixture into baking dish, top with cracker mixture, and bake at 400°F (200°C) for 15–20 minutes.

Notes

For extra flavor, add herbs like thyme or parsley.
Calories: 650kcal
Cost: $15
Course: Main Course
Cuisine: American
Keyword: casserole, Cheese, chicken

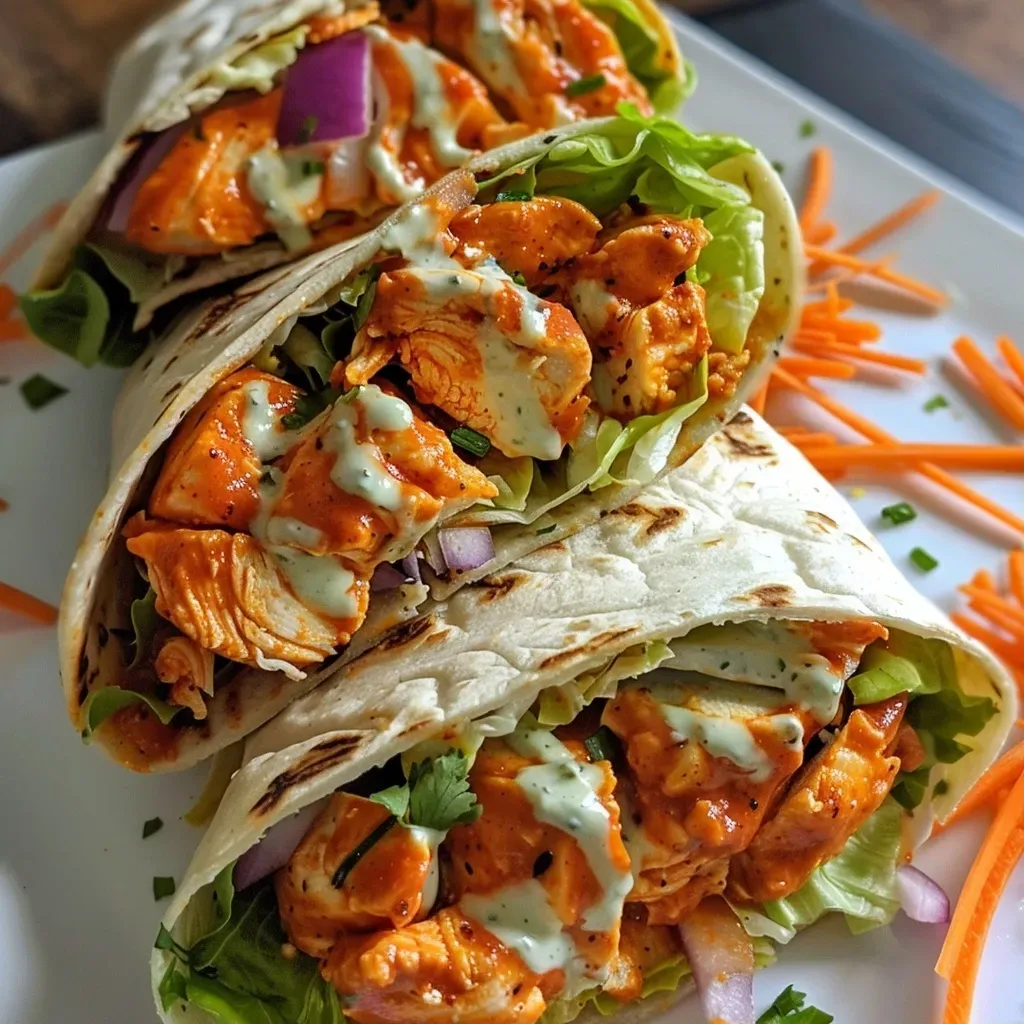
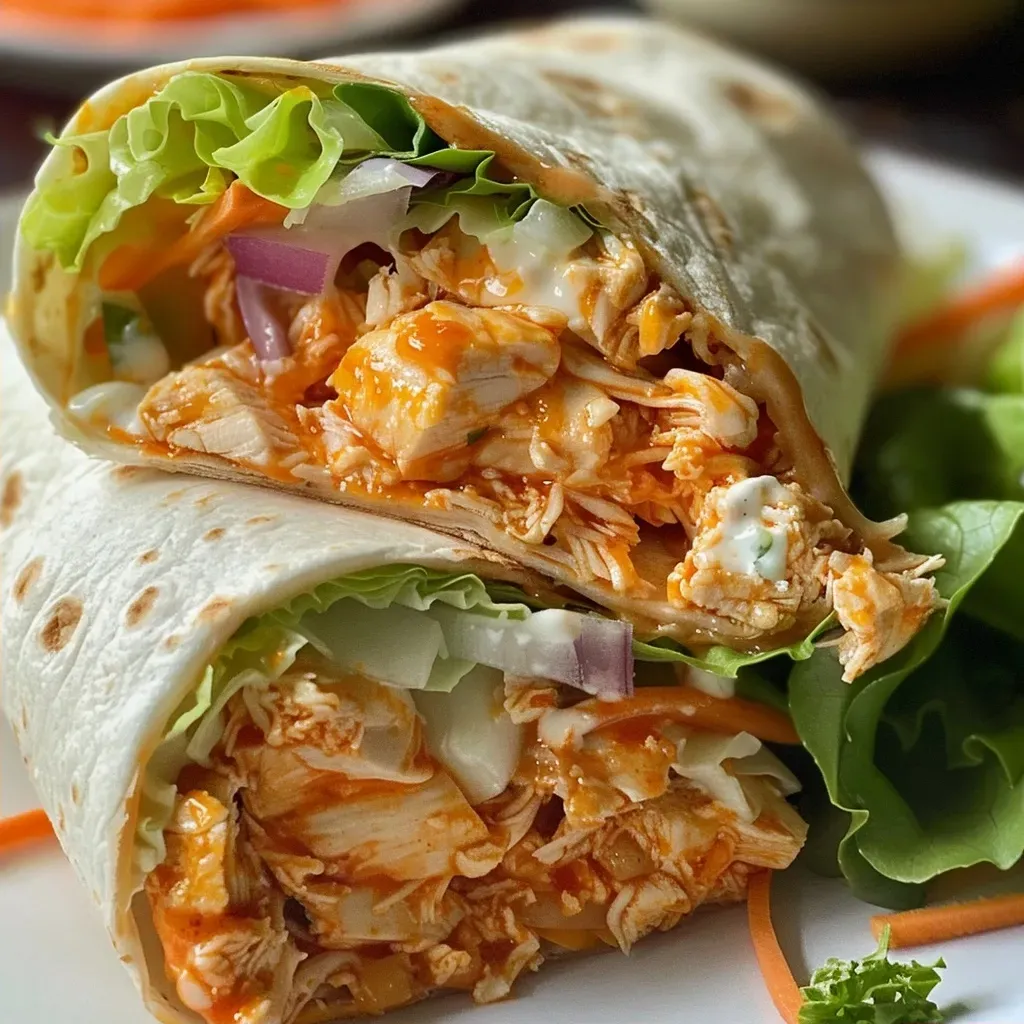
Welcome to your new favorite weeknight meal! These Buffalo Chicken Wraps are not only a breeze to prepare but also bursting with flavor, making them the perfect solution for busy nights. Whether you’re a seasoned cook or just starting out, you’ll find that this recipe is both straightforward and satisfying. In under 30 minutes, you can whip up a delicious dinner that’s sure to please even the pickiest eaters in your family.

Let’s dive into why you’ll love this recipe!

Why You’ll Love This Recipe

  • Quick Preparation: With just 10 minutes of prep time and 15 minutes to cook, these wraps are ideal for busy evenings.
  • Kid-Friendly: The combination of tender chicken, fresh veggies, and creamy ranch dressing appeals to children and adults alike.
  • Customizable: You can easily swap ingredients to cater to your family’s preferences, making it a versatile choice for any dinner table.
  • Perfect for Leftovers: These wraps keep well and can be enjoyed for lunch the next day, saving you time and effort.
  • Healthy and Flavorful: Packed with protein and fresh vegetables, these wraps provide a nutritious meal without sacrificing taste.

Ingredient Breakdown

Here’s what you’ll need to make these mouthwatering wraps:


Nonstick Grill Pan

★ Recommended Kitchen Tool

Nonstick Grill Pan

Make this recipe even easier with a quality Nonstick Grill Pan — a must-have kitchen staple!


🛒 See Deals on Amazon →

As an Amazon Associate, we earn from qualifying purchases.
  • 1 pound boneless skinless chicken breasts: A lean protein that cooks quickly and is easy to shred.
  • 1 tablespoon olive oil: Adds flavor and helps prevent sticking when cooking the chicken.
  • ½ cup Frank’s Buffalo Wings Sauce: The star of the show! Feel free to use your favorite brand or even make your own if you’re feeling adventurous.
  • ½ teaspoon smoked paprika: Adds a hint of smokiness to the chicken, enhancing the overall flavor.
  • ½ teaspoon garlic powder: A must-have for that extra depth of flavor.
  • Pinch of salt: Enhances the taste of the chicken.
  • 4 large flour tortillas: The perfect vessel for all your delicious fillings. You can also opt for whole wheat or low-carb options if you prefer.
  • ½ cup ranch dressing: Creamy and tangy, it perfectly complements the spiciness of the buffalo sauce.
  • 2 cups romaine or iceberg lettuce, chopped: Adds crunch and freshness to your wrap.
  • ½ cup shredded carrots: Provides a touch of sweetness and color.
  • ½ of a medium red onion, cut into half moons: For a bit of zing that balances the richness of the chicken.
  • ½ cup shredded cheddar cheese: Melts beautifully and adds a creamy texture to the wraps.

How to Make Buffalo Chicken Wraps

Ready to make these tasty wraps? Follow these simple steps:

  1. Cut the chicken breast into long, thin strips.
  2. In a small bowl, mix together olive oil, hot sauce, paprika, garlic powder, and salt. Add the chicken strips and let them marinate for at least 10 minutes, or up to 24 hours for more flavor.
  3. Heat a large non-stick skillet over medium-high heat and add the marinated chicken strips. Cook for about 4-5 minutes, until fully cooked and no longer pink.
  4. While the chicken cooks, lay the tortillas on a plate. Top with chopped lettuce, ranch dressing, shredded carrots, onions, and cheese.
  5. Place a few chicken strips down the center of each tortilla. Roll up tightly like a burrito. Serve with extra hot sauce or dressing on the side, if desired. Enjoy!

Pro Tips for Perfect Buffalo Chicken Wraps

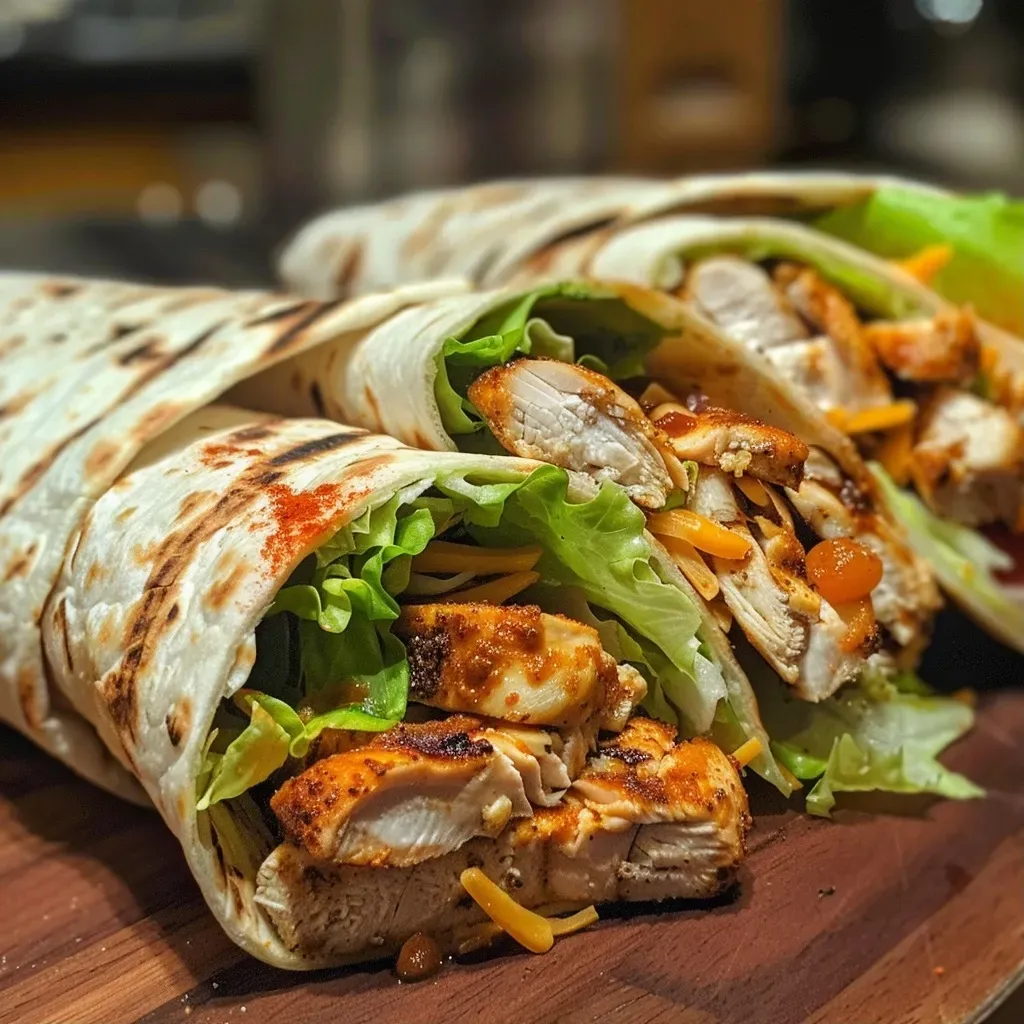
Side angle of a juicy Buffalo Chicken Wrap, showcasing lettuce and cheese.
  • Marinating Time: The longer you marinate the chicken, the more flavorful it will be. Consider marinating overnight for the best results.
  • Heat Control: Make sure your skillet is hot enough before adding the chicken to get that nice sear.
  • Cheese Choices: Experiment with different types of cheese, like blue cheese or pepper jack, for a twist on flavor.
  • Vegetable Variations: Feel free to add other veggies like bell peppers, cucumbers, or avocado for added texture and taste.
  • Wrap Techniques: To prevent fillings from spilling out, fold the sides of the tortilla in before rolling it up tightly.
  • Serving Ideas: Pair these wraps with a side of sweet potato fries or a fresh garden salad for a complete meal.
  • Leftover Chicken: If you have leftover chicken from a previous meal, feel free to use that to save even more time!
  • Spice Level: Adjust the amount of buffalo sauce to your desired spice level. Add more for a spicier kick or use a milder sauce for kids.
  • Freezing Tip: These wraps can be frozen before cooking. Just wrap tightly in foil and freeze. When ready to eat, thaw and cook!

Common Mistakes and Troubleshooting

  • Overcooking the Chicken: Keep an eye on the chicken while it cooks to avoid dryness. It should be juicy and tender.
  • Too Much Sauce: If your wraps become soggy, be mindful of how much sauce you’re adding. Less can be more!
  • Wrong Tortilla Size: Make sure to use large tortillas to adequately hold all the delicious fillings.
  • Not Enough Seasoning: Don’t skimp on the spices! They elevate the flavor and make the dish come alive.

Variations on Buffalo Chicken Wraps

You can switch things up with these tasty variations:

  • Buffalo Cauliflower Wraps: Substitute chicken with roasted cauliflower for a vegetarian option.
  • BBQ Chicken Wraps: Use BBQ sauce instead of buffalo sauce for a different flavor profile.
  • Greek Style Wraps: Add feta cheese, olives, and tzatziki sauce for a Mediterranean twist.
  • Spicy Ranch Chicken Wraps: Mix ranch dressing with hot sauce for an extra kick.

Storage and Make-Ahead Instructions

These wraps are perfect for meal prep! Here’s how to store and prepare in advance:

  • Refrigeration: Store any leftover wraps in an airtight container in the fridge for up to 3 days.
  • Freezing: You can freeze the cooked wraps for up to 2 months. Thaw in the fridge before reheating.
  • Make-Ahead: Prepare the chicken and veggies a day in advance. Assemble the wraps just before serving.

Comprehensive FAQ

  • Can I use chicken thighs instead of breasts? Absolutely! Chicken thighs are juicier and will work just as well.
  • How do I make these wraps gluten-free? Use gluten-free tortillas and ensure your sauces are gluten-free as well.
  • Can I bake these wraps instead of frying? Yes, wrap them in foil and bake at 350°F for about 15-20 minutes, until heated through.
  • What can I serve with these wraps? They pair well with fries, a side salad, or even chips and salsa.
  • How spicy are these wraps? The spice level can be adjusted based on the amount of buffalo sauce you choose to use.
  • Can I add more vegetables? Definitely! Feel free to add any veggies you love.
  • Is this recipe suitable for meal prep? Yes! They hold up well in the fridge and can be reheated.
  • How long do leftovers last? Leftover wraps can be stored in the fridge for up to 3 days.

Nutrition Tips and Dietary Adaptations

For a healthier version of these wraps, consider the following:

  • Low-Calorie Options: Use low-fat ranch dressing and whole wheat tortillas.
  • Vegetarian Alternatives: Substitute chicken with chickpeas or tofu for a plant-based option.
  • Lower Sodium: Use low-sodium versions of buffalo sauce and ranch dressing.

Equipment Recommendations

To make your cooking experience easier, here are a few must-have kitchen tools:

  • Non-Stick Skillet: Essential for cooking the chicken without it sticking.
  • Mixing Bowls: For marinating the chicken and mixing ingredients.
  • Knife and Cutting Board: For prepping the chicken and veggies.
  • Tongs: Handy for flipping the chicken while cooking.

Serving Suggestions

These wraps are delicious on their own but can be even better with some sides. Here are a few ideas:

  • Sweet Potato Fries: Their sweetness is a great complement to the spicy buffalo flavor.
  • Garden Salad: A fresh salad balances out the richness of the wraps.
  • Fruit Salad: A light, refreshing fruit salad can be a delightful contrast to the wraps.

In conclusion, these Buffalo Chicken Wraps are an excellent choice for any weeknight dinner. With their quick preparation, customizable ingredients, and delicious flavors, you’ll find yourself making them again and again. So gather your ingredients, roll up your sleeves, and get ready for a meal that not only satisfies but also brings joy to your dining table!

Buffalo Chicken Wraps

Prep Time 15 minutes
Cook Time 10 minutes
Total Time 25 minutes
Servings 4 wraps
Calories 450
Enjoy these flavorful buffalo chicken wraps, packed with spicy, crunchy, and fresh ingredients for a satisfying meal.

Ingredients

Protein

  • 1 pound boneless skinless chicken breasts
  • 1 tablespoon olive oil
  • ½ cup franks buffalo wings sauce
  • ½ teaspoon smoked paprika (or regular)
  • ½ teaspoon garlic powder
  • pinch salt

Carbohydrates

  • 4 large flour tortillas
  • ½ cup Ranch dressing

Vegetables

  • 2 cups romaine lettuce (or Iceberg lettuce, chopped)
  • ½ cup carrot (shredded)
  • ½ medium red onion (cut into half moons)

Cheese

  • ½ cup shredded cheddar cheese

Instructions 

  • Slice chicken into strips and marinate with oil, hot sauce, paprika, garlic powder, and salt for 10+ minutes.
  • Cook chicken in a skillet over medium-high heat for 4-5 minutes until cooked through.
  • Lay tortillas on a plate, top with lettuce, dressing, carrots, onions, and cheese.
  • Add chicken strips to each tortilla, roll up tightly, and serve with extra sauce if desired.

Notes

For extra flavor, serve with additional hot sauce or dressing on the side.
Calories: 450kcal
Cost: $15
Course: Main Course
Cuisine: American
Keyword: Buffalo Chicken

Are you looking for a delicious and easy dinner that can be whipped up in just 30 minutes? Look no further! These grilled chicken wraps are not only quick to prepare, but they are also packed with flavor and healthy ingredients that your family will love. Whether you’re a busy parent or simply someone who wants a satisfying meal without the hassle, this recipe is your go-to solution. Let’s dive into why you’ll love this recipe and how to make it successfully!

Why You’ll Love This Recipe

  • Quick Preparation: With just 30 minutes from start to finish, these wraps are perfect for those hectic weeknights.
  • Versatile Ingredients: You can easily swap out ingredients to suit your family’s tastes or dietary needs.
  • Kid-Friendly: The combination of chicken, cheese, and ranch dressing ensures that even picky eaters will enjoy these wraps.
  • Healthy Option: Packed with protein and fresh veggies, these wraps are a nutritious choice for dinner.
  • Meal Prep Friendly: Make a batch ahead of time and store them for a quick lunch or dinner option throughout the week.

Ingredients Breakdown

Here’s what you’ll need to make these delightful grilled chicken wraps, along with some easy substitutions:

  • Chicken Breasts: 2 boneless and skinless, sliced into cutlets (about 650g). You can substitute with turkey breasts or even tofu for a vegetarian option.
  • Smoked Paprika: 1 teaspoon for a smoky flavor. If you don’t have it, regular paprika or cayenne pepper can work too.
  • Chili Powder: ¼ teaspoon adds a bit of heat, but feel free to adjust according to your spice tolerance.
  • Garlic Granules: ½ teaspoon for that lovely garlic taste. Fresh minced garlic works well too!
  • Salt and Pepper: For seasoning to taste.
  • Olive Oil: 1 tablespoon if frying, which helps in achieving that golden-brown crust. You can use avocado oil or coconut oil as alternatives.
  • Flour Tortilla Wraps: 4 large. Whole grain or gluten-free tortillas are also great options.
  • Iceberg Lettuce: 4 large leaves provide a refreshing crunch. You could also use spinach or romaine lettuce.
  • Cheese: 1 cup of shredded cheddar or mozzarella. Dairy-free cheese is a fantastic substitution.
  • Ranch Dressing: ½ cup for drizzling. Alternatively, you can use Greek yogurt or a homemade avocado dressing.

How to Make Grilled Chicken Wraps

Creating these grilled chicken wraps is simple and straightforward. Follow these steps:


Nonstick Grill Pan

★ Recommended Kitchen Tool

Nonstick Grill Pan

Make this recipe even easier with a quality Nonstick Grill Pan — a must-have kitchen staple!


🛒 Shop This Tool →

As an Amazon Associate, we earn from qualifying purchases.
  1. Season the chicken cutlets with smoked paprika, chili powder, garlic granules, salt, and pepper.
  2. Heat the oil in a pan, grill pan, or preheat your outdoor grill.
  3. Place the seasoned chicken cutlets on the grill or pan, cooking on both sides until the chicken reaches an internal temperature of at least 165°F (75°C).
  4. Remove the chicken from the grill and allow it to rest on a plate for 5 minutes to retain juiciness.
  5. Cut the chicken into strips and assemble the wrap. On a tortilla, layer lettuce leaves, followed by chicken, shredded cheese, and a drizzle of ranch dressing.
  6. Seal the tortilla and grill on both sides for 1-2 minutes until golden brown. Slice in half and serve!

Pro Tips for Perfect Grilled Chicken Wraps

Side view of a delicious grilled chicken wrap with vibrant ingredients.
  • Marinate for Flavor: If you have extra time, marinate the chicken for an hour in your favorite spices and olive oil for enhanced flavor.
  • Use a Meat Thermometer: Ensuring your chicken is cooked to the right temperature will prevent dryness.
  • Experiment with Wraps: Try using different wraps such as spinach, tomato basil, or whole wheat for variety.
  • Grill Vegetables: Add some grilled veggies like bell peppers or zucchini for extra nutrition and flavor.
  • Make it Spicy: For a kick, add sliced jalapeños or a spicy sauce to your wrap.
  • Keep it Fresh: Add fresh herbs like cilantro or parsley for a burst of freshness.
  • Wrap it Tight: Ensure you wrap tightly to keep all the fillings secure.
  • Serve with Sides: Pair with a salad or sweet potato fries for a complete meal.

Common Mistakes to Avoid

  • Overcooking the Chicken: Keep an eye on the cooking time; overcooked chicken can become dry and tough.
  • Skipping the Resting Step: Allowing the chicken to rest keeps it juicy. Don’t skip this!
  • Using Cold Tortillas: Warm your tortillas slightly before wrapping to make them more pliable.
  • Forgetting to Season: Don’t skip seasoning the chicken; it’s key to delicious flavor.

Variations of Grilled Chicken Wraps

If you want to mix things up, here are four delicious variations you can try:

  • BBQ Chicken Wrap: Replace ranch dressing with BBQ sauce and add pickles for a tangy kick.
  • Mediterranean Wrap: Add feta cheese, olives, and a dollop of tzatziki sauce for a Mediterranean twist.
  • Buffalo Chicken Wrap: Toss the chicken with buffalo sauce before assembling, and top with blue cheese dressing.
  • Veggie Delight Wrap: Substitute chicken with grilled veggies and hummus for a hearty vegetarian option.

Storage and Make-Ahead Instructions

To make life easier, you can prepare these grilled chicken wraps ahead of time:

  • Refrigerating: Assemble the wraps without grilling and wrap them in foil or plastic wrap. They can be stored in the fridge for up to 3 days.
  • Freezing: For longer storage, freeze the ungrilled wraps. When ready to eat, thaw and grill them directly from frozen, adding a few extra minutes to the cooking time.
  • Reheating: To reheat leftovers, simply place the wrap in a hot skillet for a few minutes on each side until warmed through.

Frequently Asked Questions

  • Can I use chicken thighs instead of breasts? Yes, chicken thighs are juicier and work great in wraps!
  • What can I use instead of ranch dressing? Greek yogurt, hummus, or a vinaigrette are excellent alternatives.
  • Can I grill these wraps in an air fryer? Absolutely! Just set your air fryer to 375°F and grill for about 5-7 minutes per side.
  • How do I know when the chicken is done? Use a meat thermometer to check for an internal temperature of 165°F.
  • Can I make these wraps vegan? Yes, substitute chicken with grilled tofu or tempeh and use plant-based cheese and dressing.
  • What sides go well with grilled chicken wraps? Sweet potato fries, a fresh salad, or coleslaw complement these wraps nicely.
  • How long can I store grilled chicken wraps? Refrigerated wraps are best consumed within 3 days for optimal freshness.
  • Can I add other vegetables? Absolutely! Feel free to add bell peppers, cucumbers, or any favorite veggies.

Nutrition Tips and Dietary Adaptations

These grilled chicken wraps are not only delicious but can also be tailored to fit various dietary needs:

  • Low-Carb Option: Use lettuce leaves instead of tortillas for a low-carb wrap.
  • Dairy-Free: Choose dairy-free cheese and swap ranch dressing for avocado or hummus.
  • Gluten-Free: Simply use gluten-free tortillas to accommodate gluten sensitivities.
  • Increased Fiber: Opt for whole grain or spinach tortillas for added fiber.

Recommended Equipment

To make the cooking process smooth and efficient, here’s a list of tools you might need:

  • Grill Pan: Ideal for indoor grilling when the weather doesn’t cooperate.
  • Meat Thermometer: Essential for ensuring perfectly cooked chicken.
  • Sharp Knife: For slicing chicken and wrapping efficiently.
  • Cutting Board: A must-have for food prep and assembly.

Serving Suggestions

To complete your meal, consider serving your grilled chicken wraps with:

  • Fresh Fruit: A side of mixed berries or a fruit salad pairs beautifully with the savory wraps.
  • Chips and Dip: Serve with tortilla chips and guacamole for a fun, crunchy side.
  • Vegetable Sticks: Carrot and cucumber sticks with ranch or hummus are a great healthy addition.

In conclusion, these quick and flavorful grilled chicken wraps are a fantastic way to enjoy a satisfying meal without spending hours in the kitchen. With endless variations and make-ahead options, you can adapt this recipe to fit your family’s preferences and busy lifestyle. So grab your ingredients and get ready to whip up a delicious dinner that will have everyone asking for seconds!

Grilled Chicken Wrap

Prep Time 10 minutes
Cook Time 15 minutes
Total Time 25 minutes
Servings 4 servings
Calories 550
A delicious and easy grilled chicken wrap perfect for a quick lunch or dinner. Packed with flavor and fresh ingredients.

Ingredients

Protein

  • 650 g chicken breasts (boneless and skinless, sliced into cutlets)
  • 1 teaspoon smoked paprika
  • 0.25 teaspoon chili powder
  • 0.5 teaspoon garlic granules
  • 0.5 teaspoon salt
  • 0.125 teaspoon ground black pepper
  • 1 tablespoon olive oil (if frying)
  • 4 large flour tortilla wraps
  • 4 leaves iceberg lettuce (large leaves)
  • 1 cup cheddar or mozzarella cheese (shredded)
  • 0.5 cup ranch dressing

Instructions 

  • Season chicken with paprika, chili powder, garlic, salt, and pepper.
  • Cook chicken in a pan or grill until internal temperature reaches 165°F (75°C).
  • Rest chicken for 5 minutes, then chop into strips.
  • Assemble wraps with lettuce, chicken, cheese, and ranch dressing, then grill for 1-2 minutes on each side.

Notes

For extra flavor, add your favorite herbs or spices.
Calories: 550kcal
Cost: $12
Course: Main Course
Cuisine: American
Keyword: chicken, Wrap

Welcome to Your New Favorite Dinner: Easy Chicken Enchilada Casserole

Are you looking for a quick and cozy dinner solution that your family will absolutely love? Look no further! This Easy Chicken Enchilada Casserole combines delicious shredded chicken, hearty black beans, and gooey cheese, all enveloped in rich enchilada sauce. Perfect for busy weeknights, this dish is not only satisfying but also highly adaptable to suit your family’s tastes. Let’s dive into why this recipe is a must-try!

Why You’ll Love This Recipe

This chicken enchilada casserole offers a delightful blend of flavors and textures, making it a standout choice for any dinner table. Here are just a few reasons why you’ll adore it:

  • Quick and Easy: With minimal prep time, you can have this casserole ready to bake in just 30 minutes. Perfect for those hectic evenings!
  • Family-Friendly Flavor: The combination of shredded chicken, cheese, and enchilada sauce is universally loved, appealing to both picky eaters and adventurous palates.
  • Meal Prep Friendly: This casserole can be made ahead of time, frozen, or stored in the fridge, making it an ideal option for busy days.
  • Versatile Ingredients: Customize the recipe with your favorite vegetables, beans, or spices to create a unique version that suits your family’s preferences.
  • One-Pan Wonder: Everything cooks together in one baking dish, making for easy cleanup while you enjoy quality time with your family.

Ingredient Breakdown

Here’s what you’ll need to create this mouthwatering casserole, along with some handy substitutions:


Nonstick Grill Pan

★ Recommended Kitchen Tool

Nonstick Grill Pan

Make this recipe even easier with a quality Nonstick Grill Pan — a must-have kitchen staple!


🛒 View on Amazon →

As an Amazon Associate, we earn from qualifying purchases.
  • 4 cups shredded cooked chicken: Use rotisserie chicken for convenience or cook your own. You can also substitute with shredded beef or turkey for a different flavor.
  • 1/4 cup taco seasoning: Homemade or store-bought, this adds a zesty kick. Feel free to adjust the amount based on your spice preference.
  • 1/2 cup chicken stock: This helps to keep the mixture moist. Vegetable broth can be used as a vegetarian alternative.
  • 1 (15-ounce) can black beans: Rinsed and drained, these add protein and fiber. You can swap them with pinto beans or even corn for a different texture.
  • 3 1/2 cups (24 ounces) red enchilada sauce: Canned is convenient, but homemade is always a hit! You can also use green enchilada sauce for a twist.
  • 24 (6-inch) corn tortillas: These are the base of your casserole. Flour tortillas can be used if you prefer.
  • 16 ounces Monterey Jack cheese, shredded: This melty cheese is perfect, but feel free to mix in cheddar or pepper jack for added flavor.
  • Optional toppings: Sour cream, red onions, sliced jalapeños, and fresh cilantro add a fresh finish to your dish.

Step-by-Step Directions

Side view of a hearty chicken enchilada casserole, showcasing layers of tortillas and chicken.

Follow these simple steps to create your delicious chicken enchilada casserole:

  • Preheat the oven to 350°F.
  • Lightly grease the bottom and sides of a 9×13-inch baking dish with cooking spray or vegetable oil.
  • In a medium mixing bowl, combine the shredded chicken with taco seasoning and chicken stock until evenly coated.
  • Add the drained black beans to the chicken mixture and toss together.
  • Pour 2 1/2 cups of the enchilada sauce into a pie dish or wide bowl. Dip 8 corn tortillas into the sauce, ensuring each is coated.
  • Line the bottom of the baking dish with the dipped tortillas, overlapping them slightly.
  • Sprinkle 3/4 cup of shredded cheese over the tortillas.
  • Spoon half of the chicken mixture over the cheese, then top with another 3/4 cup of cheese.
  • Repeat the dipping and layering process with another 8 tortillas and the remaining chicken mixture.
  • Top with 8 more sauce-coated tortillas, pour the remaining enchilada sauce over the top, and sprinkle with the last of the cheese.
  • Cover the baking dish with aluminum foil and bake for 25 minutes.
  • Remove the foil and bake until the cheese is melted and starting to brown for an additional 10 to 12 minutes.
  • Allow the casserole to cool for 10 to 15 minutes, then cut into squares and serve garnished with optional toppings.

Pro Tips for the Perfect Casserole

To ensure your chicken enchilada casserole turns out perfectly, consider the following expert tips:

  • Use high-quality tortillas: Fresh corn tortillas provide the best texture and flavor. If using flour, choose low-carb options for a healthier twist.
  • Taste as you go: Adjust seasoning based on your palate. You can always add more spice, but it’s hard to take it away!
  • Layering is key: Make sure to layer evenly for consistent flavor in every bite. It helps to use a spatula to spread out the chicken mixture.
  • Experiment with cheeses: Mixing different types of cheese can elevate the flavor. Try adding a bit of feta or goat cheese for a unique twist.
  • Let it rest: Allowing the casserole to cool slightly before serving helps the layers set, making it easier to cut and serve.
  • Garnish boldly: Don’t skip the toppings! Fresh ingredients like cilantro, jalapeños, or avocado elevate the dish.
  • Stay organized: Prepare your ingredients ahead of time for a smoother cooking process. Measure everything out before starting.
  • Use leftovers creatively: Any leftover casserole can be transformed into burritos or quesadillas for lunch the next day!

Common Mistakes and Troubleshooting

Even the best of us make mistakes in the kitchen. Here are some common pitfalls and how to avoid them:

  • Too soggy: Ensure you’re not over-soaking the tortillas in sauce. Just a quick dip is enough. Layering is essential to keep it from getting too wet.
  • Dry chicken: If your chicken is dry, ensure it’s adequately coated with the taco seasoning and chicken stock to keep it moist.
  • Uneven cooking: Make sure your oven is preheated fully before placing the casserole inside for even cooking.
  • Burnt cheese: If you notice the cheese browning too quickly, cover the casserole with foil until the last few minutes of baking.

Variations to Spice Things Up

Feeling adventurous? Here are some fun variations to customize your chicken enchilada casserole:

  • Vegetarian Delight: Swap out the chicken for sautéed bell peppers, zucchini, and mushrooms for a hearty vegetarian option.
  • Spicy Kick: Add diced jalapeños or a splash of hot sauce to the chicken mixture for an extra kick of heat.
  • Cheesy Spinach: Incorporate fresh or frozen spinach into the chicken mixture for added nutrition and flavor.
  • Breakfast Casserole: Use scrambled eggs and breakfast sausage instead of chicken for a delicious brunch variant.

Storage and Make-Ahead Instructions

This casserole is perfect for meal prep! Here’s how to store and reheat:

  • Refrigeration: Store leftovers in an airtight container in the fridge for up to 4 days.
  • Freezing: Assemble the casserole without baking, cover tightly, and freeze for up to 3 months. Thaw in the fridge overnight before baking.
  • Reheating: To reheat, cover with foil and bake at 350°F until heated through, about 20-30 minutes.

Frequently Asked Questions

Here are some common questions about this recipe:

  • Can I use frozen chicken? Yes! Just make sure to cook it thoroughly before shredding.
  • What can I use instead of corn tortillas? Flour tortillas work, but keep in mind the flavor and texture will change slightly.
  • Is this recipe gluten-free? If you use gluten-free tortillas and check your enchilada sauce for gluten-free ingredients, it can be gluten-free.
  • How can I make this spicier? Add chopped jalapeños or a dash of cayenne pepper to the chicken mixture.
  • Can I add vegetables? Absolutely! Feel free to mix in some corn, bell peppers, or spinach.
  • How long does it take to cook from frozen? From frozen, it will take about 1 hour to bake at 350°F.
  • Can I make this in advance? Yes! Assemble it the night before and bake it the next day.
  • What should I serve with it? Serve with a side salad, guacamole, or Mexican rice for a complete meal.

Nutritional Tips and Dietary Adaptations

This casserole can be tailored to fit various dietary needs:

  • Low-Carb Option: Use cauliflower rice instead of tortillas for a low-carb alternative.
  • Dairy-Free Version: Substitute cheese with a dairy-free alternative and use coconut milk in the sauce for creaminess.
  • High-Protein Twist: Add black beans or extra chicken to boost protein content.

Equipment Recommendations

To make your cooking experience easier, here are some essential tools you’ll need:

  • 9×13-inch baking dish: The perfect size for this casserole.
  • Mixing bowls: For combining ingredients and prepping.
  • Spatula: Great for layering and serving the casserole.
  • Measuring cups and spoons: Precise measurements lead to the best results!

Serving Suggestions

To complete your meal, consider these serving suggestions:

  • Fresh Toppings: Garnish your casserole with sour cream, fresh cilantro, diced tomatoes, or avocado slices.
  • Side Dishes: Pair with a crisp green salad or a side of Mexican rice to round out your dinner.
  • Beverage Pairings: Enjoy with a refreshing margarita or a simple glass of iced tea.

Conclusion

This Easy Chicken Enchilada Casserole is more than just a dinner option; it’s a comforting meal that brings the family together. With its versatile ingredients and straightforward preparation, you’ll find it to be a go-to recipe in your household. So gather your loved ones, and enjoy a cozy dinner that feels special without the fuss. Happy cooking!

Easy Chicken Enchilada Casserole

Prep Time 15 minutes
Cook Time 35 minutes
Total Time 50 minutes
Servings 6 servings
Calories 650
A flavorful and easy-to-make casserole combining shredded chicken, cheese, and enchilada sauce, perfect for a quick family dinner.

Ingredients

Main

  • 4 cups shredded cooked chicken
  • 1/4 cup taco seasoning (homemade or store-bought)
  • 1/2 cup chicken stock
  • 1 can (15-ounce) black beans (drained)
  • 3.5 cups red enchilada sauce (canned or homemade)
  • 24 corn tortillas corn tortillas
  • 16 ounces Monterey Jack cheese (shredded)
  • Optional toppings (Sour cream, red onions, cilantro, jalapeños)

Instructions 

  • Preheat oven to 350°F (175°C). Grease a 9x13-inch dish.
  • Mix chicken with taco seasoning and chicken stock; add black beans.
  • Dip tortillas in enchilada sauce; layer 8 in dish, sprinkle with cheese, then add chicken mixture and more cheese. Repeat with remaining tortillas and chicken.
  • Pour remaining sauce over top, sprinkle with cheese, cover with foil, and bake 25 minutes. Remove foil and bake 10-12 minutes until bubbly and browned.
  • Let cool 10-15 minutes, then serve with optional toppings.

Notes

For a spicier version, add sliced jalapeños or hot sauce.
Calories: 650kcal
Cost: $15
Course: Main Course
Cuisine: Mexican
Keyword: chicken