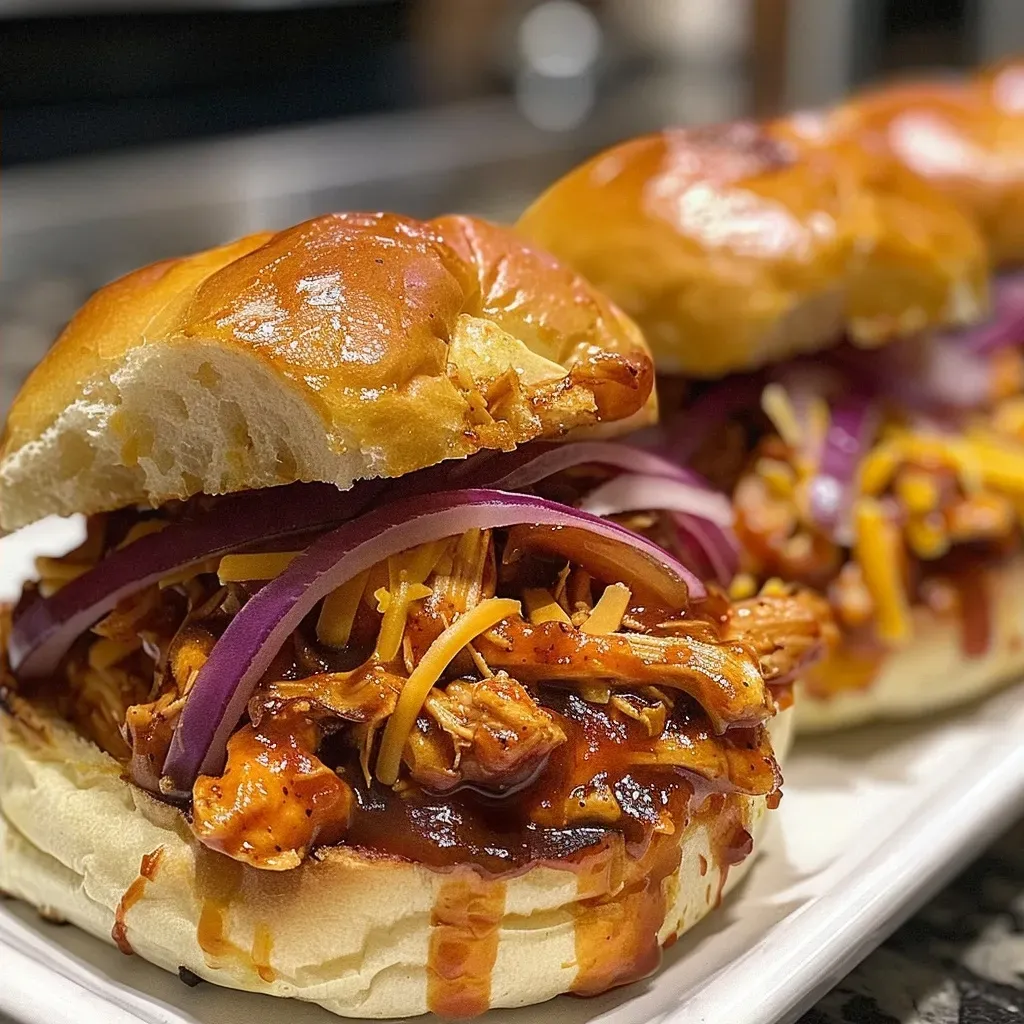
When you need a delicious and easy solution for dinner or a party, look no further than BBQ Chicken Sliders! These sliders are packed with flavor, incredibly simple to prepare, and sure to please both kids and adults alike. In less than 30 minutes, you can turn a few everyday ingredients into a crowd-pleaser. Let’s dive into why this recipe is not only a staple in my kitchen but also a must-try for yours!
Why You’ll Love This Recipe
This BBQ Chicken Sliders recipe is more than just a meal; it’s a culinary experience! Here are five reasons why you’ll adore it:
- Quick Preparation: With only 10 minutes of prep time, these sliders are perfect for busy weeknights or last-minute gatherings.
- Kid-Friendly: The sweet and tangy BBQ sauce appeals to picky eaters, making it a hit for family dinners.
- Versatile Ingredients: You can easily swap in your favorite BBQ sauce or cheese to customize the flavors to your liking.
- Leftover Friendly: These sliders taste just as good the next day, making them an excellent choice for meal prep.
- Party Perfect: Make a large batch for your next gathering, and watch them disappear in no time!
Ingredients for BBQ Chicken Sliders
To create these delicious sliders, you’ll need the following ingredients:

★ Recommended Kitchen Tool
Nonstick Grill Pan
Make this recipe even easier with a quality Nonstick Grill Pan — a must-have kitchen staple!
- 12 Hawaiian rolls: These soft, slightly sweet rolls are perfect for holding the BBQ chicken and toppings.
- 2 cups shredded cooked chicken: Use rotisserie chicken for convenience or cook your own for a fresh option.
- 1/2 cup BBQ sauce: Choose your favorite brand for a flavor that suits your taste.
- 1/2 small red onion, thinly sliced: Adds a crisp texture and a bit of sharpness to balance the sweetness of the rolls.
- 1 cup shredded cheese: Cheddar, Monterey jack, or pepper jack cheese works beautifully in this recipe.
- 2 tablespoons melted butter: This gives the tops of the rolls a gorgeous golden finish.
How to Make BBQ Chicken Sliders
Follow these simple steps to assemble your BBQ Chicken Sliders:
- Preheat your oven to 350°F and line a baking sheet with parchment paper.
- Slice the attached Hawaiian rolls in half and place the bottom halves on the baking sheet.
- In a bowl, mix the shredded chicken with the BBQ sauce until well combined.
- Spread the BBQ chicken evenly over the bottom halves of the rolls.
- Add sliced red onion and sprinkle the shredded cheese on top.
- Place the top buns on the sliders.
- Brush the tops of the rolls with melted butter.
- Cover the sliders with foil and bake for 12 minutes.
- Remove the foil and bake for an additional 5 minutes until the cheese is melted and the buns are toasted.
- Cut into individual sliders and serve warm.
Pro Tips for Perfect BBQ Chicken Sliders
Here are some expert insights to elevate your slider-making game:
- Use Rotisserie Chicken: For the quickest prep, grab a rotisserie chicken from the store. It’s flavorful and saves time!
- BBQ Sauce Variations: Experiment with different BBQ sauces like spicy, honey, or even homemade for unique flavors.
- Cheese Options: Mix cheeses for a richer flavor, or try a slice of pepper jack for a kick.
- Don’t Overbake: Keep an eye on the sliders in the oven to ensure they don’t dry out; the cheese should be gooey and the buns lightly toasted.
- Fresh Toppings: Consider adding toppings like pickles, jalapeños, or coleslaw for extra crunch and flavor.
- Make Ahead: You can assemble the sliders in advance and store them in the fridge, baking them just before serving.
- Freezing Sliders: These sliders freeze well! Assemble them, then wrap tightly and freeze. Bake from frozen, adding a few extra minutes to the cooking time.
- Perfect for Meal Prep: These sliders are great for lunchboxes—just pack them in an airtight container!
Common Mistakes and Troubleshooting
Here are some common pitfalls to avoid while preparing BBQ Chicken Sliders:
- Dry Chicken: Ensure your chicken is well-coated in BBQ sauce. If using cooked chicken, avoid overcooking it in the oven.
- Sticky Rolls: If the rolls are sticking to the baking sheet, try using parchment paper or a non-stick spray.
- Overcooked Cheese: Watch the cheese closely to prevent it from becoming rubbery.
- Too Much Sauce: Balance is key! If the filling is too saucy, it can make the rolls soggy.
Delicious Variations to Try
Want to shake things up? Here are some fun variations:
- Buffalo Chicken Sliders: Substitute BBQ sauce with buffalo sauce for a spicy kick.
- Veggie Sliders: Replace shredded chicken with sautéed mushrooms, zucchini, and bell peppers for a vegetarian option.
- Hawaiian BBQ Sliders: Add pineapple slices for a tropical twist.
- BBQ Bacon Sliders: Top the sliders with crispy bacon for added crunch and flavor.
Storage and Make-Ahead Instructions
These sliders are not only made for immediate enjoyment but can also be prepped ahead:
- Refrigerate: Store leftover sliders in an airtight container for up to 3 days.
- Freeze: Assemble the sliders, wrap tightly, and freeze for up to 2 months. Bake directly from frozen, adding extra time.
Frequently Asked Questions
Here are some common questions about BBQ Chicken Sliders:
- Can I use frozen chicken? Absolutely! Just ensure it’s fully cooked and shredded before mixing with BBQ sauce.
- What’s the best way to reheat the sliders? Reheat in the oven at 350°F for about 10 minutes, covered with foil to prevent drying out.
- Can I use different types of rolls? Yes! Feel free to use any soft rolls, such as slider buns or brioche.
- Is this recipe gluten-free? Use gluten-free rolls and BBQ sauce to make it suitable for a gluten-free diet.
- How can I make these sliders spicier? Add diced jalapeños or use a spicy BBQ sauce to kick up the heat.
- Can I add other toppings? Definitely! Consider lettuce, tomatoes, or avocado for extra freshness.
- How long do these sliders take to prepare? It takes about 10 minutes to prepare and 17 minutes to bake.
- What sides pair well with BBQ Chicken Sliders? Serve with coleslaw, potato salad, or corn on the cob for a complete meal.
Nutrition Tips and Dietary Adaptations
To make these sliders fit various dietary needs, consider the following:
- Low-Calorie Option: Use low-calorie BBQ sauce and reduced-fat cheese.
- Protein Boost: Add black beans or chickpeas to the chicken mixture for added protein and fiber.
- Low-Carb Version: Serve the BBQ chicken on lettuce wraps instead of rolls for a keto-friendly meal.
Equipment Recommendations
Here’s what you’ll need to make these BBQ Chicken Sliders:
- Baking Sheet: A standard baking sheet lined with parchment paper is perfect for baking.
- Mixing Bowl: Use a large bowl for mixing the shredded chicken and BBQ sauce.
- Sharp Knife: A good knife is essential for slicing the rolls and toppings.
Serving Suggestions
To make your sliders even more enjoyable, consider these serving ideas:
- Top with Fresh Herbs: Garnish with cilantro or parsley for a fresh touch.
- Offer Dipping Sauces: Serve with extra BBQ sauce or ranch dressing for dipping.
- Pair with Drinks: These sliders go perfectly with iced tea, lemonade, or a refreshing beer.
Conclusion
BBQ Chicken Sliders are the ultimate solution for busy nights and entertaining friends. With their easy preparation, delicious flavors, and endless customization options, you’ll find yourself making these again and again. Trust me, once you serve these sliders, your family and friends will be asking for seconds and thirds! So roll up your sleeves, grab your ingredients, and get ready to impress!
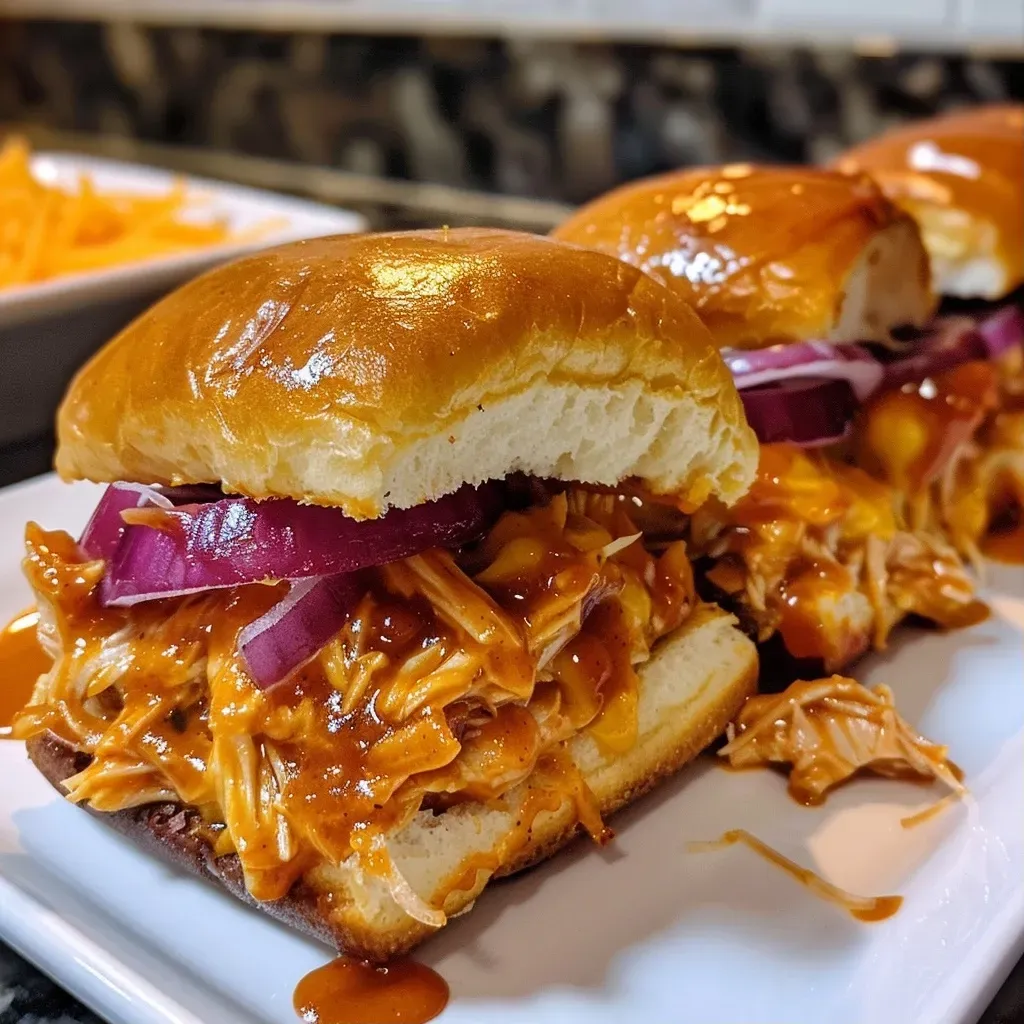
BBQ Chicken Sliders – Easy and Delicious Party Recipe
Ingredients
Bread
- 12 pieces Hawaiian rolls
- 2 cups shredded cooked chicken
- 1/2 cup BBQ sauce
- 1/2 small red onion, thinly sliced
- 1 cup shredded cheddar, Monterey jack or pepper jack cheese
- 2 tablespoons melted butter
Instructions
- Preheat oven to 350°F (175°C). Slice rolls and place bottom halves on a baking sheet.
- Mix shredded chicken with BBQ sauce and spread over rolls.
- Add sliced red onion and sprinkle cheese on top. Cover with top buns.
- Brush melted butter over the tops, cover with foil, and bake for 12 minutes.
- Remove foil and bake 5 more minutes until cheese melts and buns toast. Serve warm.